TripPin 第 3 部分 - 導覽數據表
此多部分教學課程涵蓋如何建立Power Query的新數據源延伸模組。 本教學課程旨在循序完成,每個課程都是以先前課程中建立的連接器為基礎,以累加方式將新功能新增至您的連接器。
在本課程中,您將會:
- 建立一組固定查詢的導覽數據表
- 在 Power BI Desktop 中測試瀏覽數據表
本課程會將導覽表格新增至上一課所建立的 TripPin 連接器。 當您的連接器使用 函 OData.Feed 式 (第 1 部分)時,您會收到「免費」導覽表,衍生自 OData 服務的$metadata檔。 當您移至函 Web.Contents 式 (第 2 部分)時,會遺失內建導覽表格。 在這一課,您會採用您在Power BI Desktop中建立的一組固定查詢,並新增Power Query的適當元數據,以快顯數據源函式的 [導覽器 ] 對話框。
在連接器中定義固定查詢
REST API 的簡單連接器可以視為一組固定的查詢,每個查詢都會傳回數據表。 這些數據表可透過連接器的導覽數據表進行探索。 基本上,導覽器中的每個項目都會與特定的URL和一組轉換相關聯。
首先,將您在Power BI Desktop 中撰寫的查詢(在上一課中)複製到連接器檔案。 在 Visual Studio Code 中開啟 TripPin 專案,然後將航空公司和機場查詢貼到 TripPin.pq 檔案中。 然後,您可以將這些查詢轉換成採用單一文字參數的函式:
GetAirlinesTable = (url as text) as table =>
    let
        source = TripPin.Feed(url & "Airlines"),
        value = source[value],
        toTable = Table.FromList(value, Splitter.SplitByNothing(), null, null, ExtraValues.Error),
        expand = Table.ExpandRecordColumn(toTable, "Column1", {"AirlineCode", "Name"}, {"AirlineCode", "Name"})
    in
        expand;

GetAirportsTable = (url as text) as table =>
    let
        source = TripPin.Feed(url & "Airports"),
        value = source[value],
        #"Converted to Table" = Table.FromList(value, Splitter.SplitByNothing(), null, null, ExtraValues.Error),
        #"Expanded Column1" = Table.ExpandRecordColumn(#"Converted to Table", "Column1", {"Name", "IcaoCode", "IataCode", "Location"}, {"Name", "IcaoCode", "IataCode", "Location"}),
        #"Expanded Location" = Table.ExpandRecordColumn(#"Expanded Column1", "Location", {"Address", "Loc", "City"}, {"Address", "Loc", "City"}),
        #"Expanded City" = Table.ExpandRecordColumn(#"Expanded Location", "City", {"Name", "CountryRegion", "Region"}, {"Name.1", "CountryRegion", "Region"}),
        #"Renamed Columns" = Table.RenameColumns(#"Expanded City",{{"Name.1", "City"}}),
        #"Expanded Loc" = Table.ExpandRecordColumn(#"Renamed Columns", "Loc", {"coordinates"}, {"coordinates"}),
        #"Added Custom" = Table.AddColumn(#"Expanded Loc", "Latitude", each [coordinates]{1}),
        #"Added Custom1" = Table.AddColumn(#"Added Custom", "Longitude", each [coordinates]{0}),
        #"Removed Columns" = Table.RemoveColumns(#"Added Custom1",{"coordinates"}),
        #"Changed Type" = Table.TransformColumnTypes(#"Removed Columns",{{"Name", type text}, {"IcaoCode", type text}, {"IataCode", type text}, {"Address", type text}, {"City", type text}, {"CountryRegion", type text}, {"Region", type text}, {"Latitude", type number}, {"Longitude", type number}})
    in
        #"Changed Type";
接下來,您將匯入您所撰寫的模擬導覽數據表查詢,以建立連結至這些數據集查詢的固定數據表。 撥話它 TripPinNavTable:
TripPinNavTable = (url as text) as table =>
    let
        source = #table({"Name", "Data"}, {
            { "Airlines", GetAirlinesTable(url) },
            { "Airports", GetAirportsTable(url) }
        })
    in
        source;
最後,您會宣告新的共用函式 , TripPin.Contents做為主要數據源函式。 您也會從 TripPin.Feed 中移除Publish值,使其不再顯示在 [取得數據] 對話框中。
[DataSource.Kind="TripPin"]
shared TripPin.Feed = Value.ReplaceType(TripPinImpl, type function (url as Uri.Type) as any);

[DataSource.Kind="TripPin", Publish="TripPin.Publish"]
shared TripPin.Contents =  Value.ReplaceType(TripPinNavTable, type function (url as Uri.Type) as any);
注意
您的延伸模組可以將多個函式標示為 shared,且不將它們與 DataSource.Kind產生關聯。 不過,當您將函式與特定DataSource.Kind產生關聯時,每個函式都必須具有相同名稱和類型的必要參數集。 這是因為數據源函式參數會結合以建立用於查閱快取認證的「密鑰」。
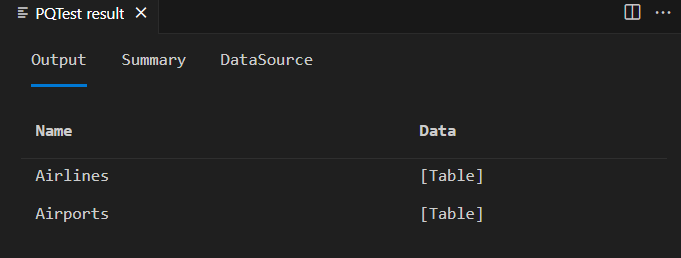
完成所有變更並測試函式之後,請使用 TripPin.query.pq 檔案來建置您的 TripPin.Contents 連接器。 您可以繼續使用先前建立的認證,也可以設定新的認證,然後評估目前的Power Query 檔案。
TripPin.Contents("https://services.odata.org/v4/TripPinService/")
建立導覽數據表
使用方便 的 Table.ToNavigationTable 函式,將您的靜態數據表格式化為 Power Query 辨識為導覽數據表的專案。 由於此函式不是 Power Query 標準連結庫的一部分,因此您必須將其原始程式碼複製到 .pq 檔案中。
在此協助程式函式就緒后,請更新您的 TripPinNavTable 函式以新增瀏覽數據表欄位。
TripPinNavTable = (url as text) as table =>
    let
        source = #table({"Name", "Data", "ItemKind", "ItemName", "IsLeaf"}, {
            { "Airlines", GetAirlinesTable(url), "Table", "Table", true },
            { "Airports", GetAirportsTable(url), "Table", "Table", true }
        }),
        navTable = Table.ToNavigationTable(source, {"Name"}, "Name", "Data", "ItemKind", "ItemName", "IsLeaf")
    in
        navTable;
再次執行測試查詢,在再次建置連接器之後,提供您與上次類似的結果,並新增了幾個數據行。
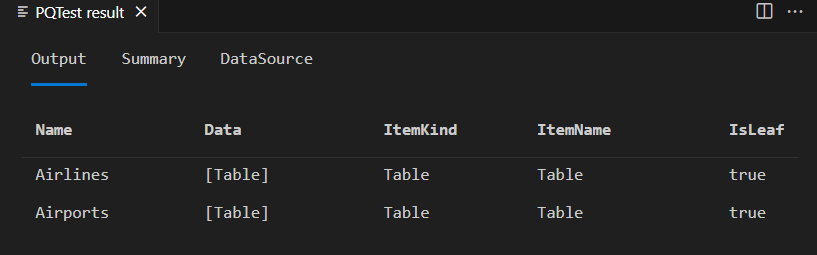
注意
您看不到 [導覽器 ] 視窗出現在 Visual Studio Code 的 PQTest 結果視窗中。 [ M 查詢輸出 ] 視窗一律會顯示基礎表。
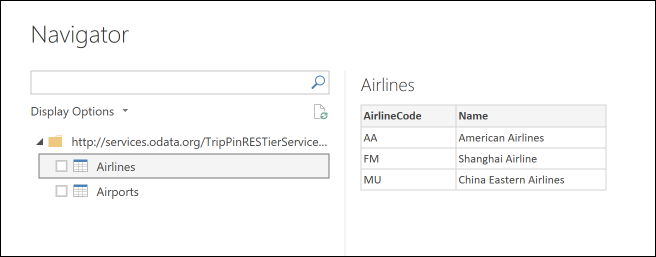
如果您將延伸模組複製到 Power BI Desktop 自定義連接器,並從 [取得資料] 對話方塊叫用新的函式,您的導覽器隨即出現。
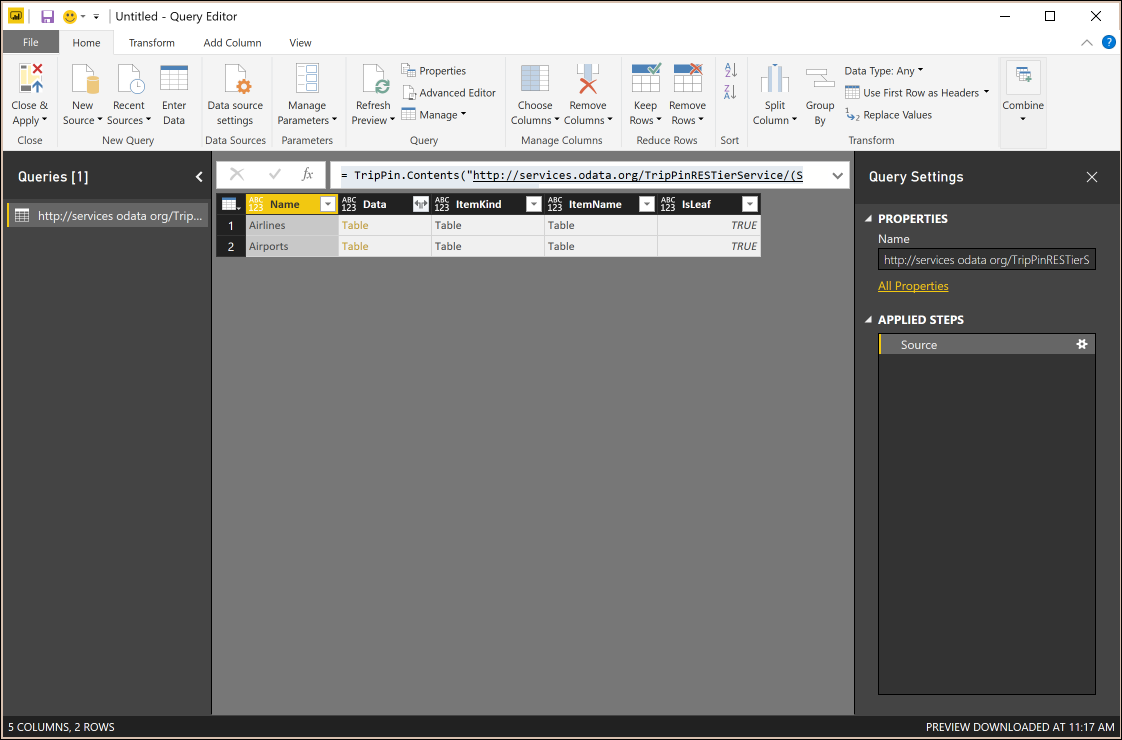
如果您以滑鼠右鍵按兩下瀏覽樹狀結構的根目錄,然後選取 [編輯],您會看到與 Visual Studio 中相同的數據表。
結論
在本教學課程中,您已將瀏覽資料表新增至延伸模組。 導覽數據表是一項重要功能,可讓連接器更容易使用。 在此範例中,您的瀏覽數據表只有單一層級,但 Power Query UI 支援顯示具有多個維度的導覽數據表(即使它們不完全)。
下一步
意見反應
即將登場:在 2024 年,我們將逐步淘汰 GitHub 問題作為內容的意見反應機制,並將它取代為新的意見反應系統。 如需詳細資訊,請參閱:https://aka.ms/ContentUserFeedback。
提交並檢視相關的意見反應