Note
Access to this page requires authorization. You can try signing in or changing directories.
Access to this page requires authorization. You can try changing directories.
Learn how to enable authentication for your web app running on Azure App Service and limit access to users in your organization.
In this tutorial, you learn how to:
- Configure authentication for the web app.
- Limit access to the web app to users in your organization by using Microsoft Entra as the identity provider.
Automatic authentication provided by App Service
App Service provides built-in authentication and authorization support, so you can sign in users with no code in your web app. Using the optional App Service authentication/authorization module simplifies authentication and authorization for your app. When you're ready for custom authentication and authorization, you build on this architecture.
App service authentication provides:
- Easily turn on and configure through the Azure portal and app settings.
- No SDKs, specific languages, or changes to application code are required.
- Several identity providers are supported:
- Microsoft Entra
- Microsoft Account
- X
When the authentication/authorization module is enabled, every incoming HTTP request passes through it before being handled by your app code. To learn more, see Authentication and authorization in Azure App Service.
1. Prerequisites
If you don't have an Azure account, create a free account before you begin.
2. Create and publish a web app on App Service
For this tutorial, you need a web app deployed to App Service. You can use an existing web app, or you can follow one of the quickstarts to create and publish a new web app to App Service:
Whether you use an existing web app or create a new one, take note of the following:
- Web app name.
- Resource group that the web app is deployed to.
You need these names throughout this tutorial.
3. Configure authentication and authorization
Now that you have a web app running on App Service, enable authentication and authorization. You use Microsoft Entra as the identity provider. For more information, see Configure Microsoft Entra authentication for your App Service application.
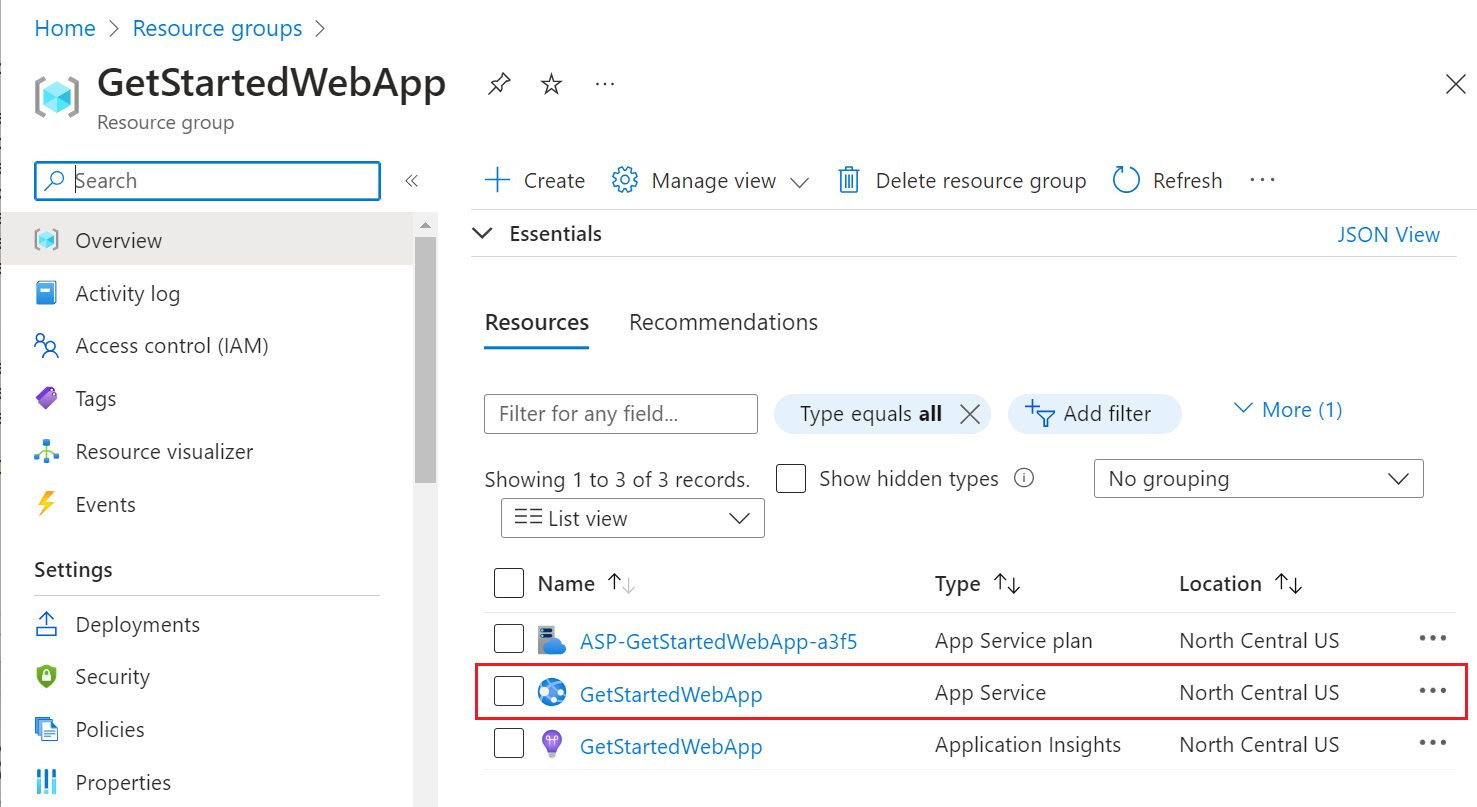
In the Azure portal menu, select Resource groups, or search for and select Resource groups from any page.
In Resource groups, find and select your resource group. In Overview, select your app's management page.
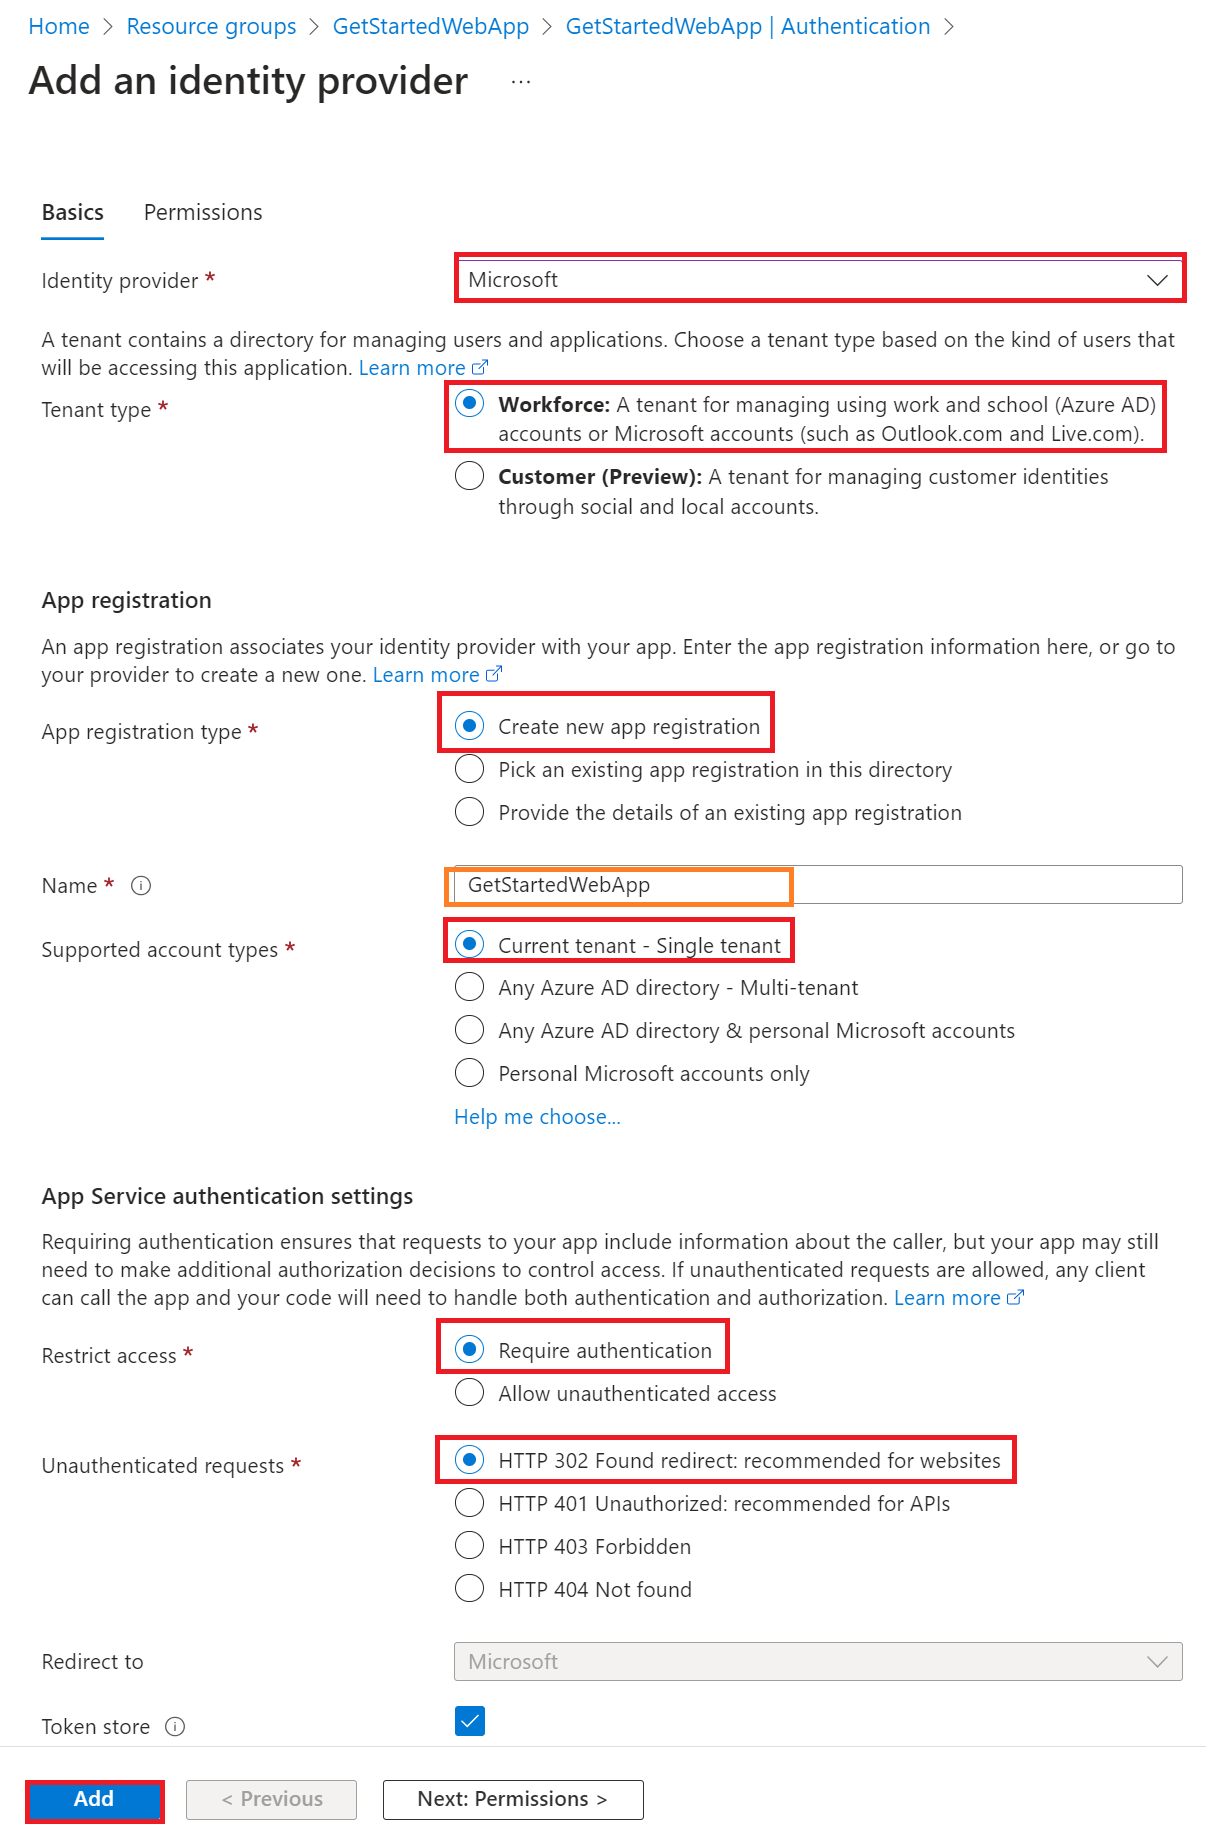
On your app's left menu, select Authentication, and then select Add identity provider.
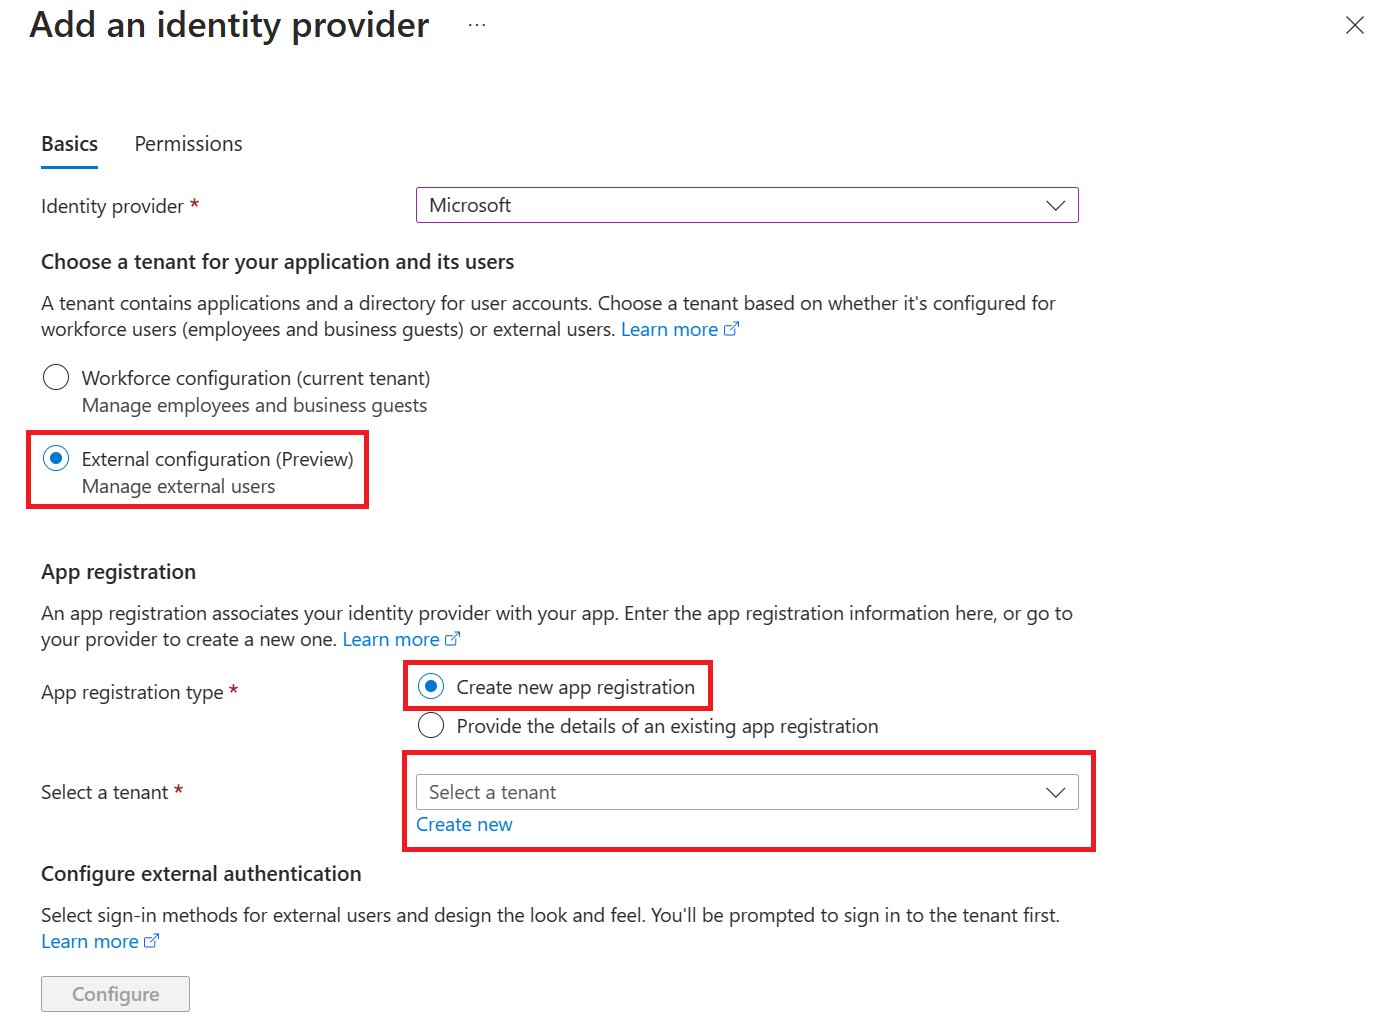
In the Add an identity provider page, select Microsoft as the Identity provider to sign in Microsoft and Microsoft Entra identities.
For Tenant type, select Workforce configuration (current tenant) for employees and business guests.
For App registration > App registration type, select Create new app registration to create a new app registration in Microsoft Entra.
Enter a display Name for your application. Users of your application might see the display name when they use the app, for example during sign-in.
For Client secret expiration, select Recommended: 180 days.
For App registration > Supported account types, select Current tenant-single tenant so only users in your organization can sign in to the web app.
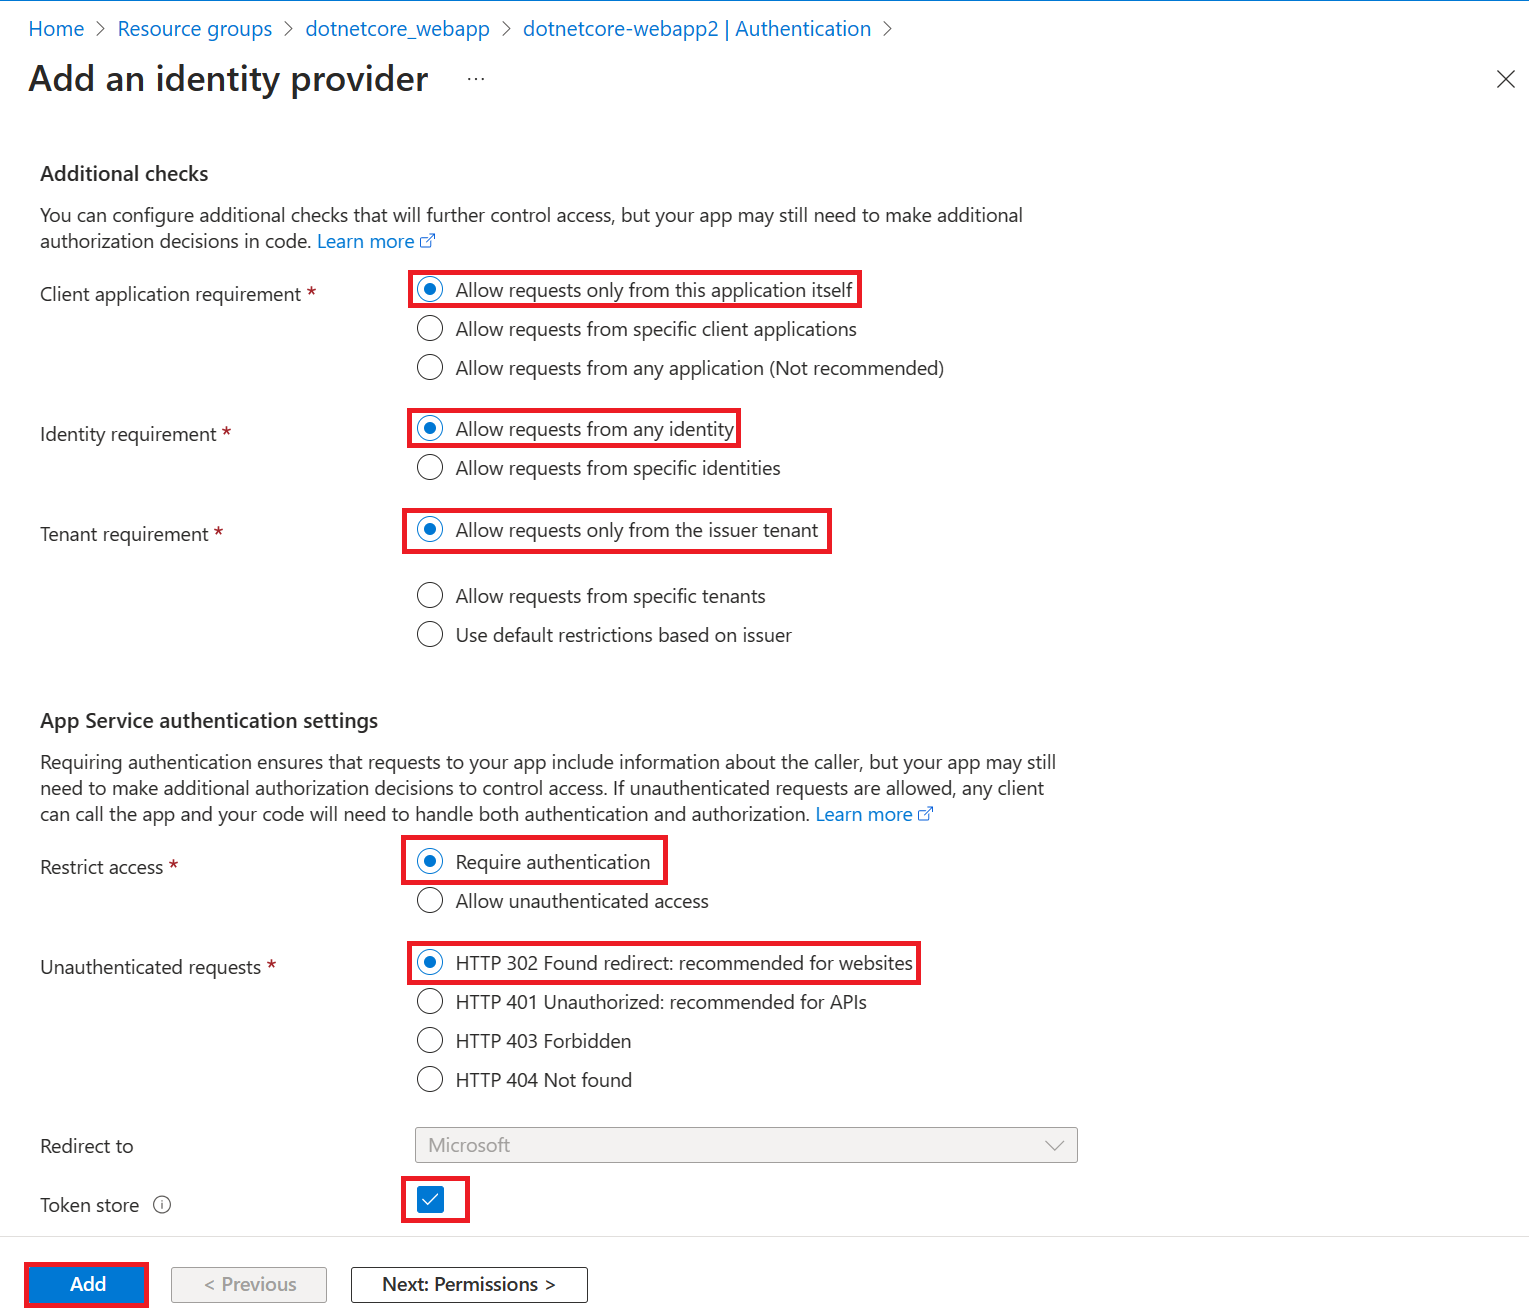
In the Additional checks section, select:
- Allow requests only from this application itself for Client application requirement
- Allow requests from any identity for Identity requirement
- Allow requests only from the issuer tenant for Tenant requirement
In the App Service authentication settings section, set:
- Require authentication for Authentication
- HTTP 302 Found redirect: recommended for websites for Unauthenticated requests
- Token store box
At the bottom of the Add an identity provider page, select Add to enable authentication for your web app.
You now have an app that's secured by the App Service authentication and authorization.
Note
To allow accounts from other tenants, change the 'Issuer URL' to 'https://login.microsoftonline.com/common/v2.0' by editing your 'Identity Provider' from the 'Authentication' blade.
4. Verify limited access to the web app
When you enabled the App Service authentication/authorization module in the previous section, an app registration was created in your workforce or external tenant. The app registration has the display name you created in a previous step.
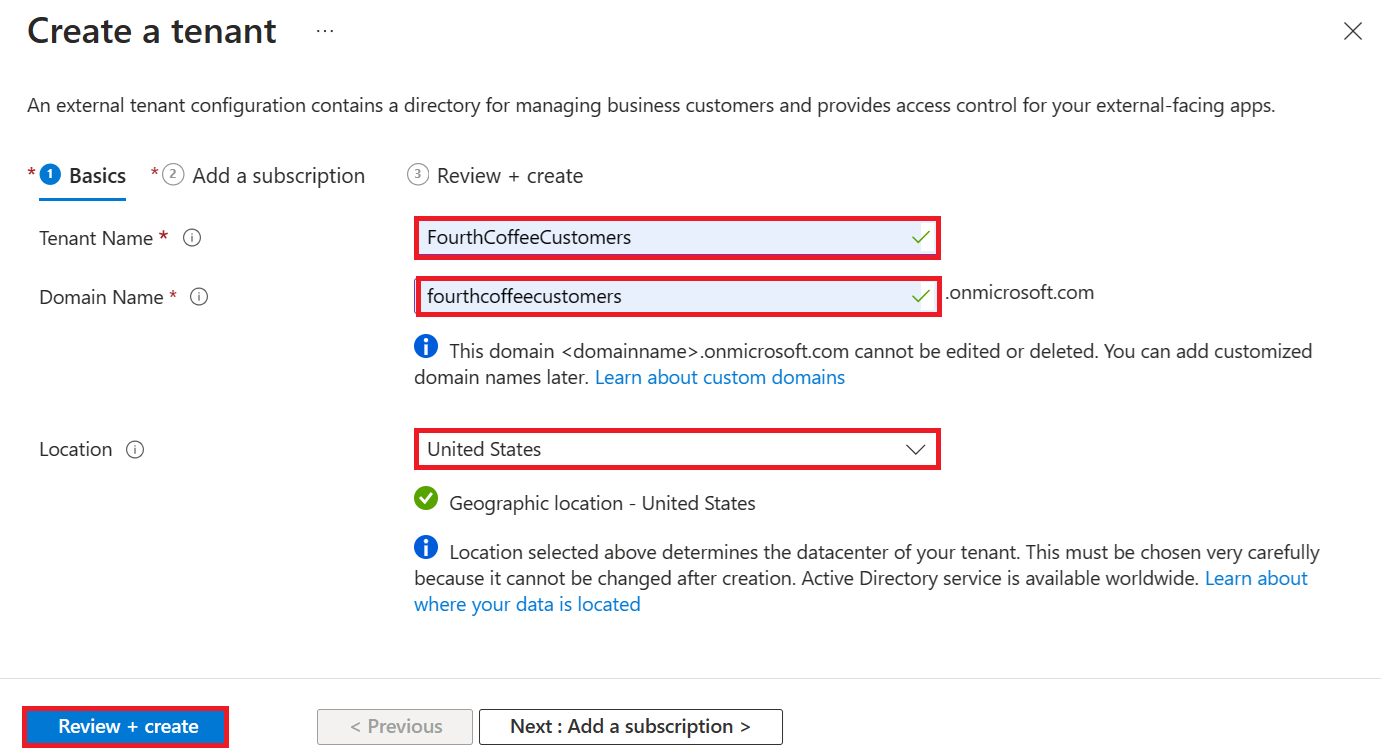
To check the settings, sign in to the Microsoft Entra admin center as at least an Application Developer. If you chose external configuration, use the Settings icon in the top menu to switch to the external tenant with your web app from the Directories + subscriptions menu. When you are in the correct tenant:
Browse to Identity > Applications > App registrations and select Applications > App registrations from the menu.
Select the app registration that was created.
In the overview, verify that Supported account types is set to My organization only.
To verify that access to your app is limited to users in your organization, go to your web app Overview and select the Default domain link.
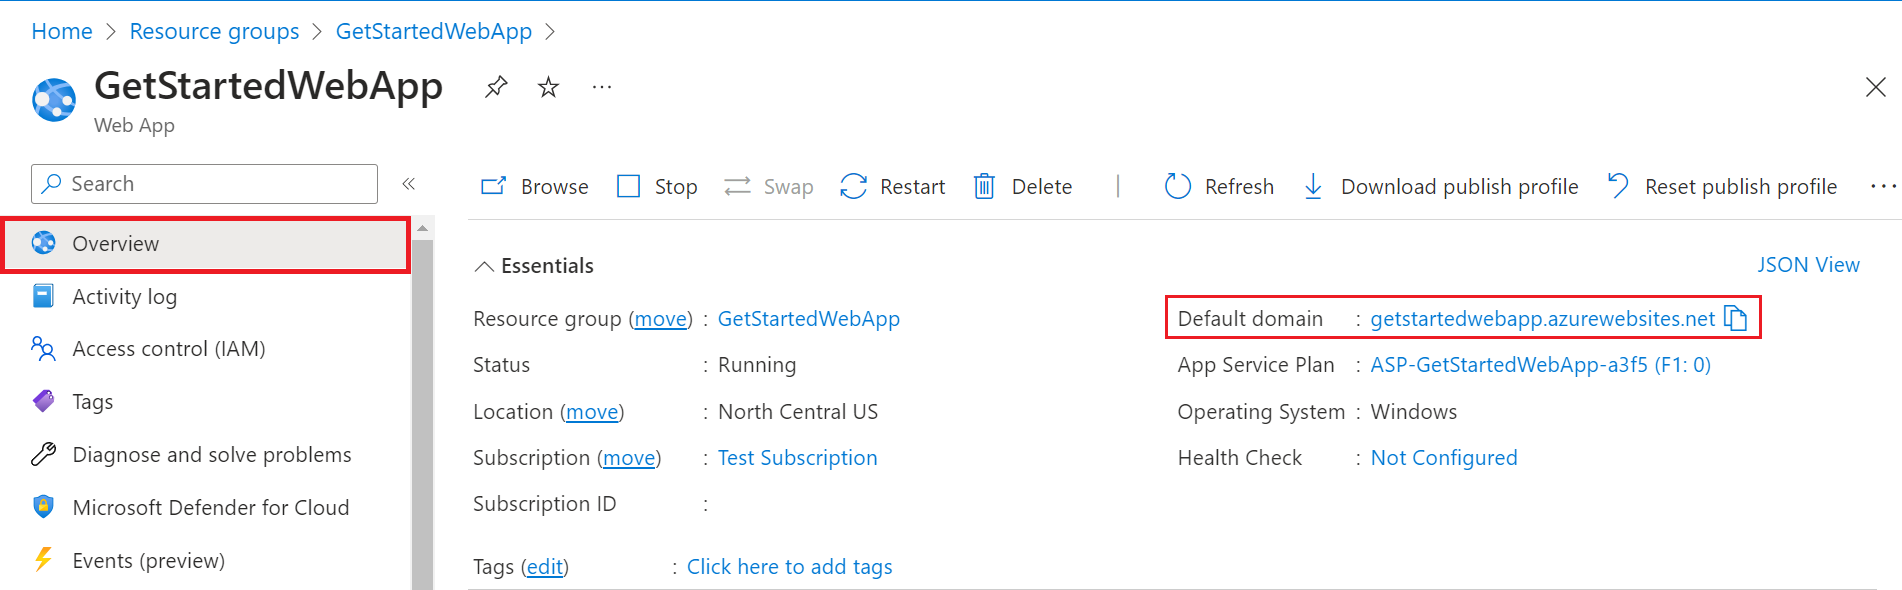
You should be directed to a secured sign-in page, verifying that unauthenticated users aren't allowed access to the site.
Sign in as a user in your organization to gain access to the site. You can also start up a new browser and try to sign in by using a personal account to verify that users outside the organization don't have access.
5. Clean up resources
If you completed all the steps in this multipart tutorial, you created an App Service, App Service hosting plan, and a storage account in a resource group. You also created an app registration in Microsoft Entra ID. If you chose external configuration, you may have created a new external tenant. When no longer needed, delete these resources and app registration so that you don't continue to accrue charges.
In this tutorial, you learn how to:
- Delete the Azure resources created while following the tutorial.
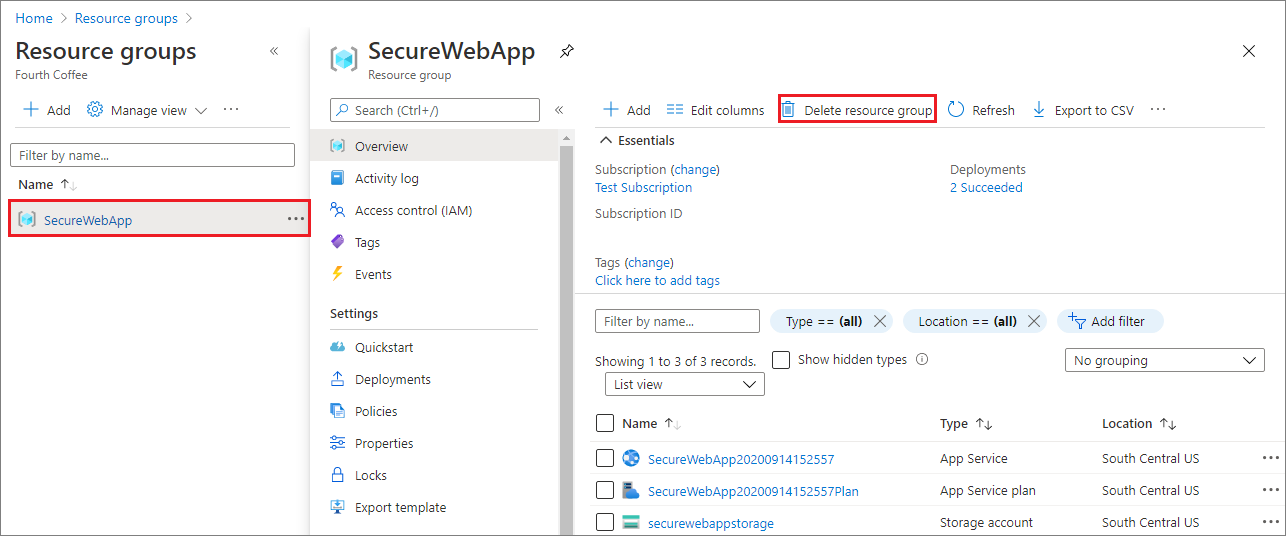
Delete the resource group
In the Azure portal, select Resource groups from the portal menu and select the resource group that contains your App Service and App Service plan.
Select Delete resource group to delete the resource group and all the resources.
This command might take several minutes to run.
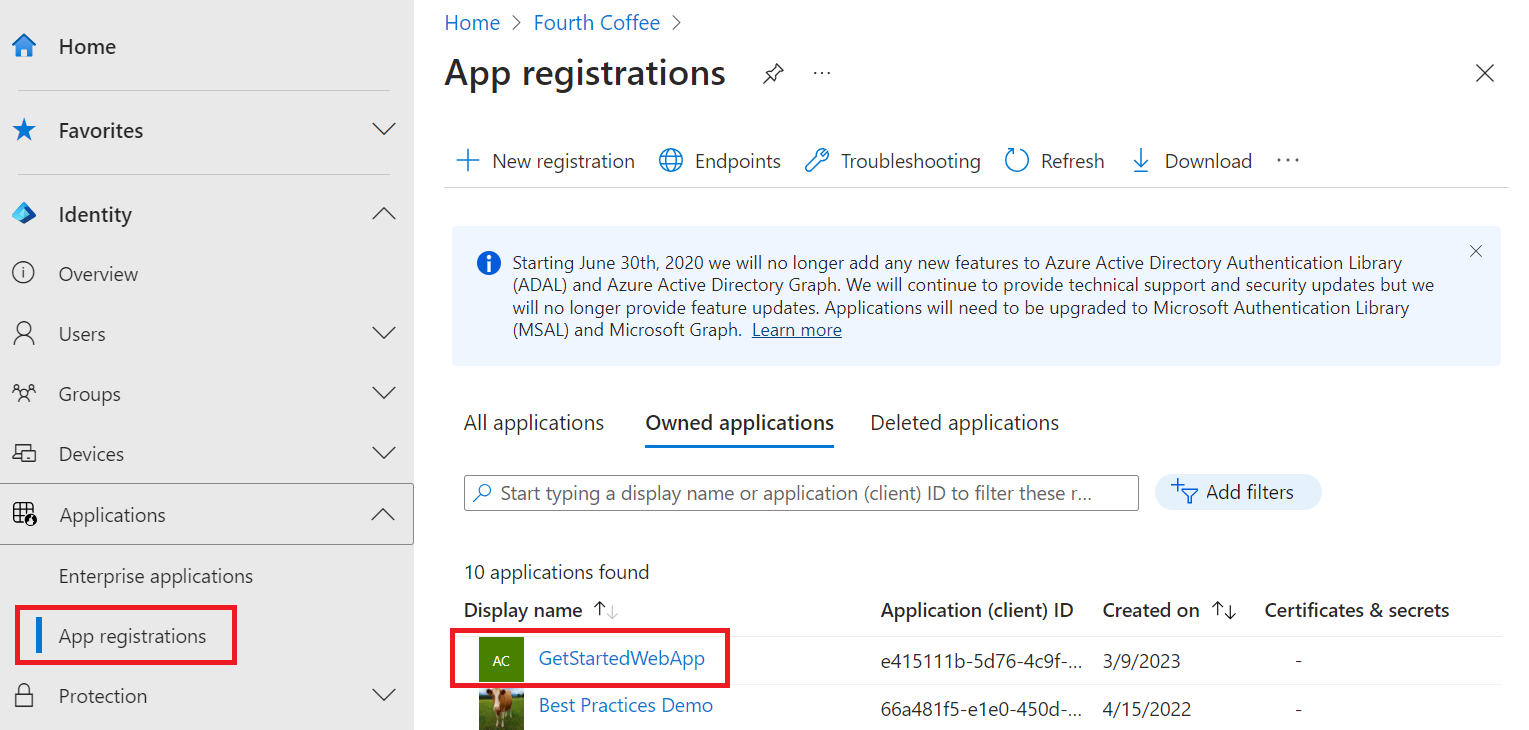
Delete the app registration
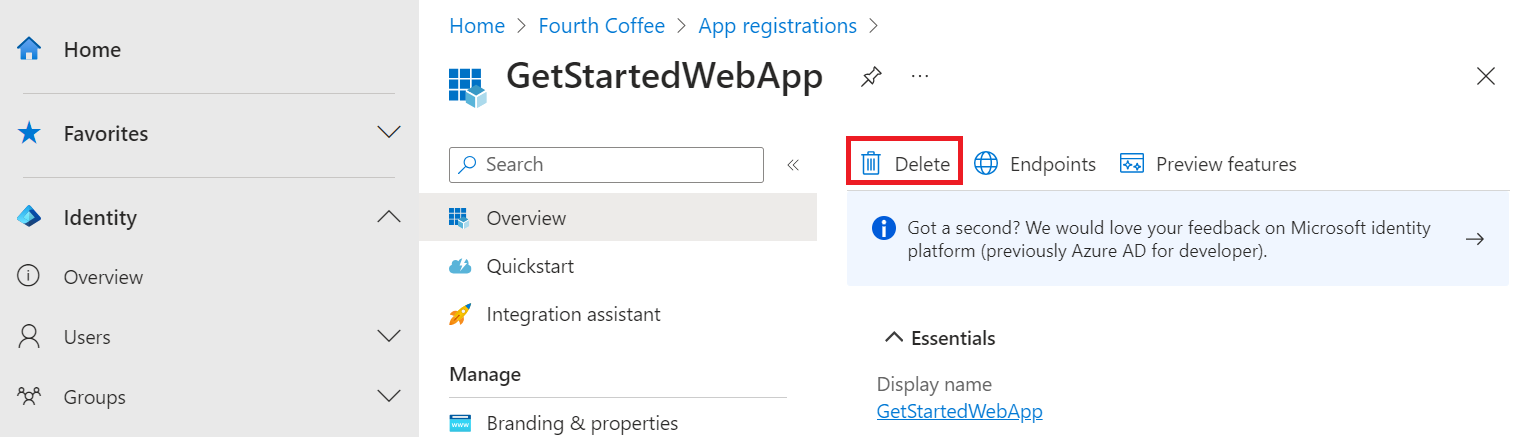
In the Microsoft Entra admin center, select Applications > App registrations. Then select the application you created.
In the app registration overview, select Delete.
Delete the external tenant
If you created a new external tenant, you can delete it. In to the Microsoft Entra admin center, browse to Identity > Overview > Manage tenants.
Select the tenant you want to delete, and then select Delete.
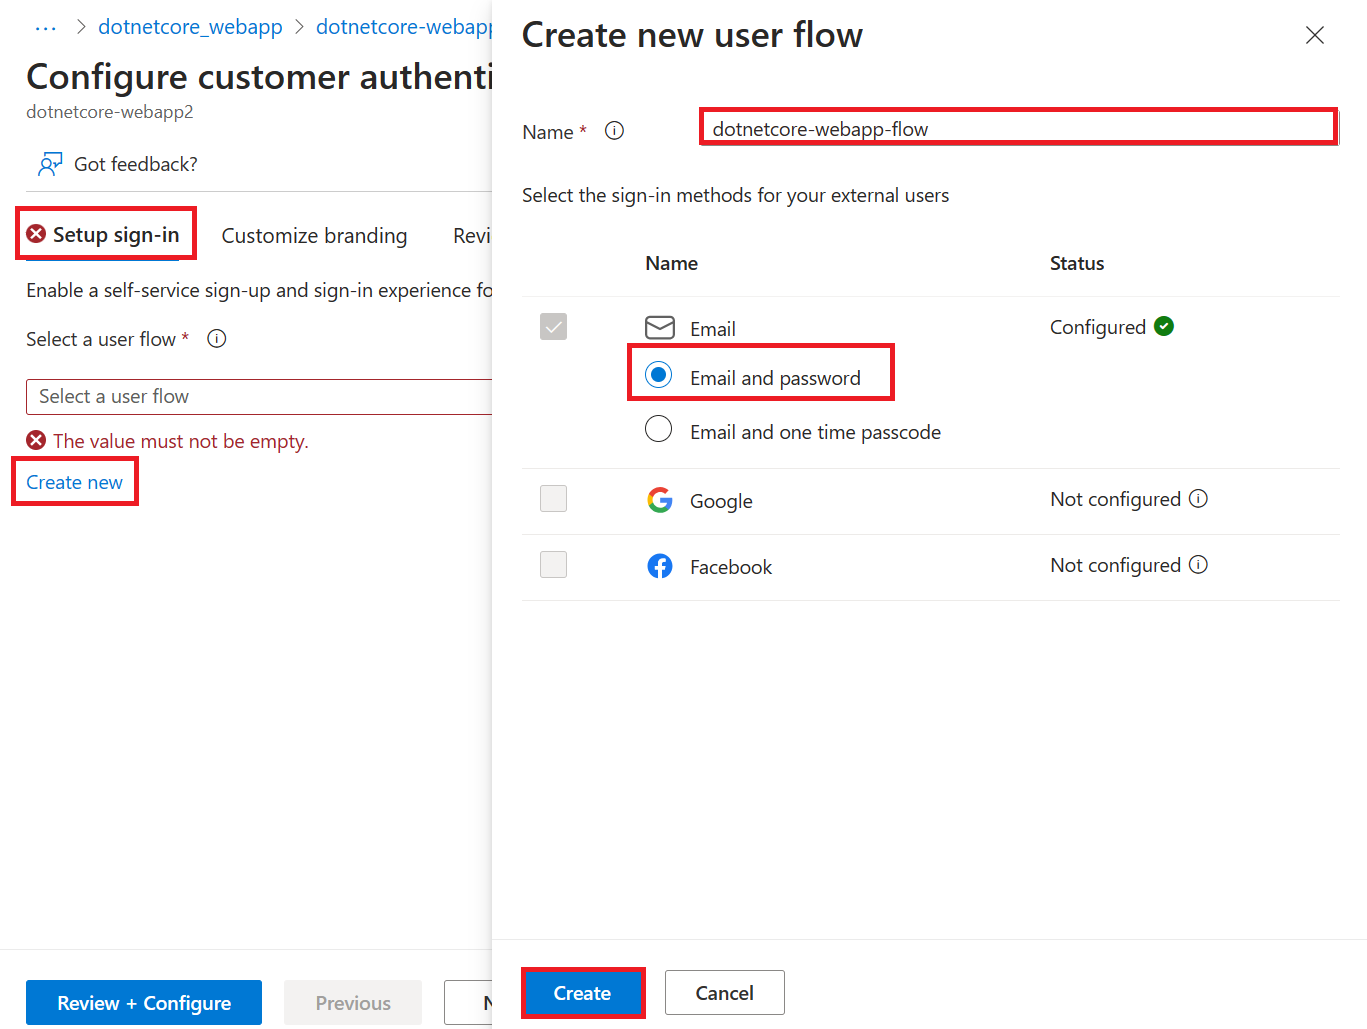
You might need to complete required actions before you can delete the tenant. For example, you might need to delete all user flows and app registrations in the tenant.
If you're ready to delete the tenant, select Delete.
Next steps
In this tutorial, you learned how to:
- Configure authentication for the web app.
- Limit access to the web app to users in your organization.