Note
Access to this page requires authorization. You can try signing in or changing directories.
Access to this page requires authorization. You can try changing directories.
Azure DevOps Services | Azure DevOps Server 2022 - Azure DevOps Server 2019
Backlogs help teams define, prioritize, and organize work hierarchically while assigning tasks to iterations and forecasting progress. Each backlog is a shared team resource where changes to items, priorities, and parent-child links are instantly visible to all team members.
This article shows you how to configure your backlog view options—including backlog levels, view settings, column options, and filtering—to align with your team's workflow and project requirements.
Prerequisites
| Category | Requirements |
|---|---|
| Project access | Project member. |
| Permissions | Member of the Contributors group. |
| Access levels | - To reorder a backlog or use the Forecast tool: At least Basic access. Users with Stakeholder access can't reorder backlog items or use the Forecast tool. For more information, see Stakeholder access quick reference. |
| Configured backlogs | Both product and portfolio backlogs set up for your team. |
Tip
You can't sort your backlog directly by clicking on a column header. To view a sorted list, select Create query from your backlog. Save and open the query, then modify it to a flat list query if needed to apply sorting to the results. For more information about queries, see Use the query editor to list and manage queries.
Backlog configuration options
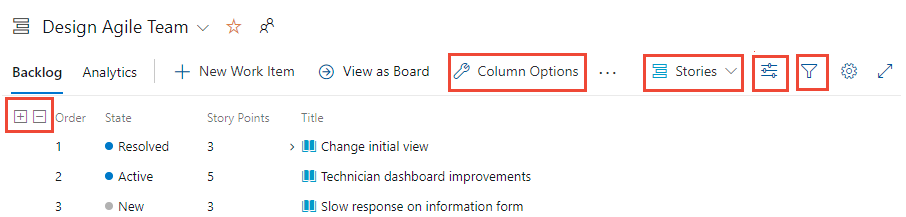
Customize your backlog view with these configuration tools:
- Expand/collapse one level: Show or hide hierarchical work item relationships
- Column options: Select which fields display as columns
- Backlog level selector: Switch between product and portfolio backlogs
- View options: Control visibility of parents, forecasting, filters, and planning panes
- Filter toolbar: Find specific work items by keywords, tags, or field values
Each backlog level (Stories, Features, Epics) maintains separate configuration settings that persist across sessions.
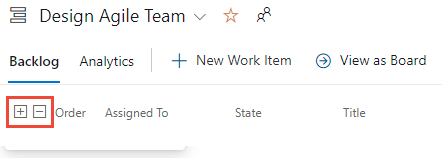
Expand and collapse the hierarchy
Backlog levels default to a collapsed view showing only items for that level. Use the ![]() and
and ![]() icons to show or hide one level of the hierarchy. These settings don't persist when you navigate to other pages.
icons to show or hide one level of the hierarchy. These settings don't persist when you navigate to other pages.
Use backlog levels
Your team administrator configures available backlog levels, which might include custom work item types. Each backlog automatically applies your team's Area paths and Iteration paths filters.
Note
Before configuring these tools, review Create your backlog to ensure your setup supports your team's requirements.
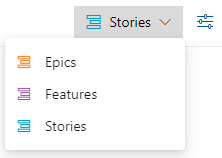
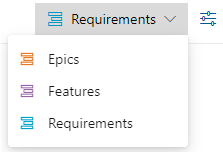
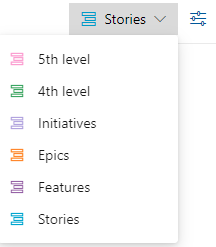
Use the backlog level selector (next to the ![]() View options icon) to switch between Product Backlog and Portfolio backlog levels. Available options vary by process model and customizations, as shown in the following table.
View options icon) to switch between Product Backlog and Portfolio backlog levels. Available options vary by process model and customizations, as shown in the following table.
Agile process
Scrum process
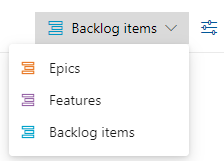
Basic process

CMMI process
Customized process
For more information, see Select backlog navigation levels for your team.
Use the view options menu
The ![]() View options menu controls the following options.
View options menu controls the following options.
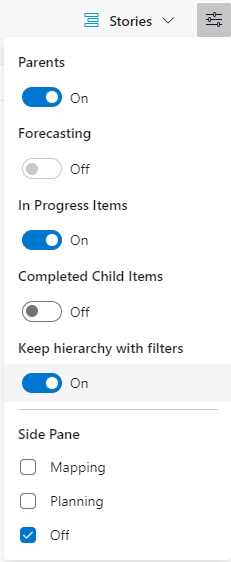
- Parents: Show hierarchical parent-child relationships. Useful for adding children, reparenting, or viewing rollup columns.
- Forecasting: Show forecast tool and lines. Available only for first-level backlogs with assigned Story points, Effort, or Size.
- In progress items: Show items in In progress workflow states. When off, hides items in Active, Committed, or Resolved states. See workflow states and state categories.
- Completed child items: Show completed child items. Turn on when reviewing rollup columns.
- Keep hierarchy with filters: Maintain hierarchy when filtering.
- Mapping: Show Mapping pane for drag-and-drop linking to parents. Not available at the highest backlog level.
- Planning: Show Planning pane for drag-and-drop assignment to Iteration paths.
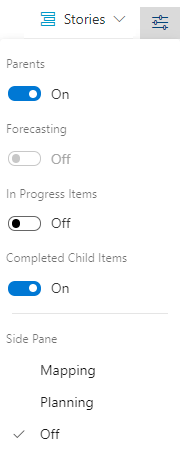
- Parents: Show hierarchical parent-child relationships. Useful for adding children, reparenting, or viewing rollup columns.
- Forecasting: Show forecast tool and lines. Available only for first-level backlogs with assigned Story points, Effort, or Size.
- In progress items: Show items in In progress workflow states. When off, hides items in Active, Committed, or Resolved states. See workflow states and state categories.
- Completed child items: Show completed child items. Turn on when reviewing rollup columns.
- Mapping: Show Mapping pane for drag-and-drop linking to parents. Not available at the highest backlog level.
- Planning: Show Planning pane for drag-and-drop assignment to Iteration paths.
Use the filter toolbar
Filter work items by keywords, tags, assignments, or fields configured in Column options. Select the ![]() Filter icon to activate filtering.
Filter icon to activate filtering.
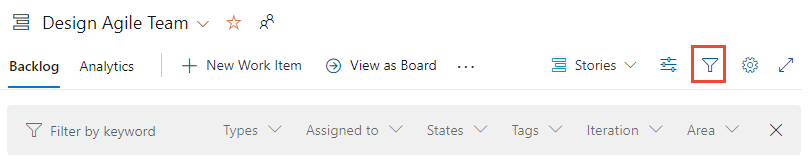
When active, filtering displays a flat list and temporarily suspends the hierarchical view, even if Parents is enabled. The filter toolbar stays visible until you close it.
For more information, see Filter backlogs, boards, and plans.
Filter your backlog and maintain the hierarchy
Filter your backlog while preserving hierarchy by enabling Parents and Keep hierarchy with filters in the View options menu.
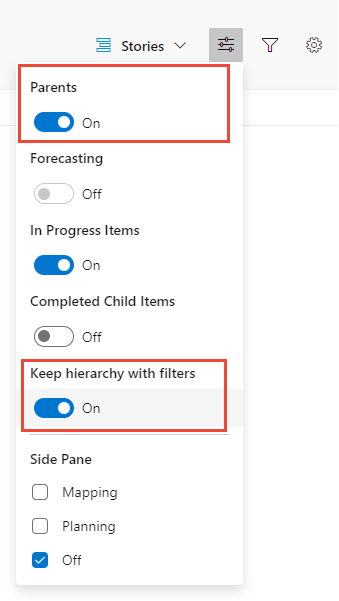
Use these options to filter by team members, work item types, paths, or keywords while maintaining the hierarchy. Matching items appear in bold text.
Add work items quickly
Quickly capture work items and refine details later. Use backlog queries to triage and enhance items after adding them.
Choose the backlog level where you want to add new work items.
From the View options menu, turn Off Parents and Forecasting to simplify the view.
(Optional) Configure more settings:
- In progress items: Show or hide items currently in progress.
- Column display: Minimize columns or select specific fields, streamlining your view.
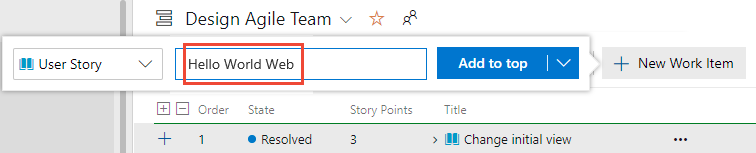
Add new work items:
- Select the
 New work item icon.
 - Enter a title for the work item.
- Select Add to Top or Add to Bottom:
- Recommendation: Add items to the bottom if your team prioritizes backlog items regularly.
- Select Enter to add the work item.
Work items are automatically assigned the default Area path and Iteration path configured for the team.
Note
If you have Stakeholder access, you can only add work items to the bottom of the backlog. For more information, see Stakeholder access quick reference.
- Select the
For more detailed instructions, see the following articles:
Prioritize your product backlog
Prioritize your backlog to ensure the most important work items are addressed first:
Choose the backlog level you want to prioritize (Stories, Features, Epics).
From the View options menu, turn Off the Parents option to simplify the view.
Reorder work items:
- Drag and drop: Select and drag work items up or down to adjust priority.
- Keyboard shortcuts: Hold Alt and use arrow keys to move items.
Note
Priority changes affect all team members and update automatically when they refresh their backlogs. A background process updates the Stack rank (Agile, Basic, and CMMI processes) or Backlog priority (Scrum process) fields. These fields track relative ranking and are assigned separately for each backlog level. By default, these fields don't appear on work item forms.
Some backlogs might restrict reordering due to portfolio management or nested items. For more information, see:
- Backlogs, portfolios, and Agile project management: Work with multi-team ownership of backlog items
- Fix reordering and nesting issues
Prioritize a portfolio backlog
Portfolio backlog prioritization works like product backlog prioritization, except you prioritize child items within each portfolio item. Each backlog level (Stories, Features, Epics) supports separate priority ordering.
Prioritize portfolio items:
- Select the portfolio backlog level you want to prioritize.
- Turn Off the Parents view option.
- Drag work items up or down within the backlog.
Prioritize child items:
- Expand each portfolio item.
- Drag each child item up or down within the expanded item.
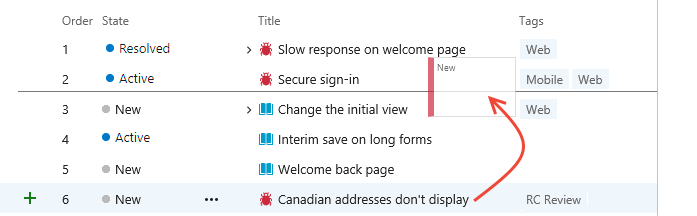
Link work items to a parent (mapping)
Quickly link work items to parent portfolio items by dragging them within your backlog view.
Tip
Before mapping, add and prioritize the portfolio backlog items you want to link to. The Mapping pane lists portfolio items in priority order.
Choose the backlog level where you want to link work items (for example, Stories to Features).
Select
 View options.
Select Mapping to open the Mapping pane. The pane lists next-level portfolio items for the current team.
(Optional) To map items to parents owned by a different team, select the team from the team selector in the Mapping pane.
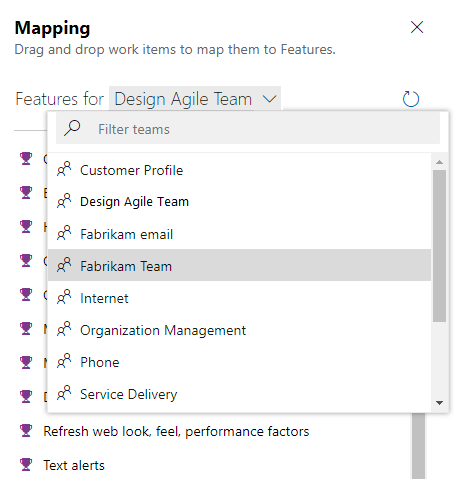
Drag work items from the backlog and drop them onto the desired portfolio item in the Mapping pane.
The system automatically creates a parent-child link and the backlog item's text turns bold briefly.
To select multiple work items:
- Sequential selection: Hold Shift to select a range of items.
- Non-sequential selection: Hold Ctrl to select individual items.
- Drag the selected items to create links.
(Optional) Within an expanded hierarchical view, drag a work item to a different parent to reparent it.
Tip
To view unparented work items, add the Parent field as a column. The parent item's Title appears for linked work items.
For more information, see Organize your backlog and map child work items to parents.
Add child items to a portfolio backlog item
- Select the portfolio backlog level (Features, for example) where you want to add items.
- Select
 Add User Story, Bug for the feature you want to add the child item to. Labels might differ based on your process and customizations.
 - In the work item form, enter a Title and any required fields. Save the work item.
For more information, see Define features and epics, add child items.
View or find unparented work
Select the backlog level you want to inspect for unparented items.
Open View options and select Parents.
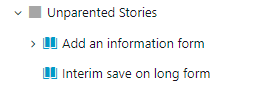
Scroll to the bottom and expand Unparented Stories, Unparented Features, or similar entries. Unparented work items are listed under these entries.
Assign work to a sprint or iteration
Use the Planning pane to assign work items to an Iteration path or sprint.
Ensure all Iteration paths you want to show in the Planning pane are selected for your team.
Choose the backlog level that contains the work items you want to assign.
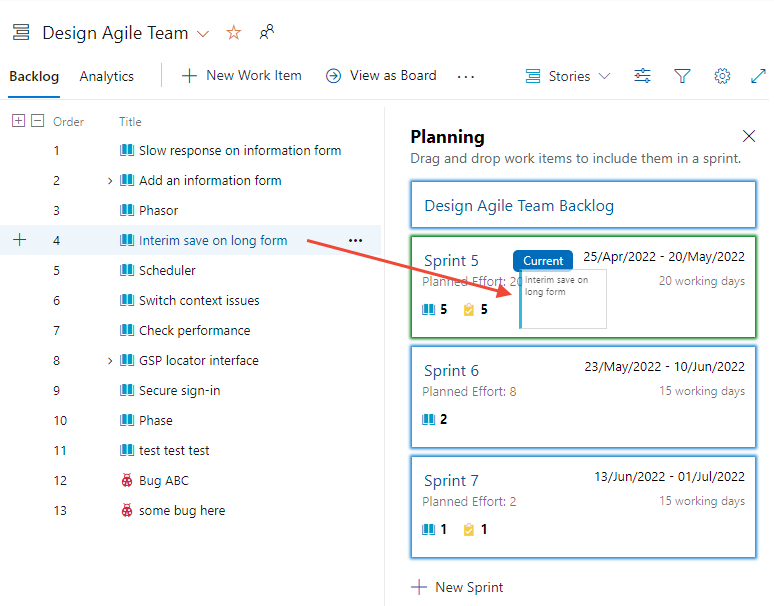
Open View options, turn Off Completed child items and choose Planning.
Drag work items from the backlog to the desired sprint in the Planning pane. The system creates assignments in the background. The backlog item turns bold briefly as the system saves changes.
To select multiple items: hold Shift for sequential items or Ctrl for individual items, then drag the selected items.
Forecast a backlog
The Forecast tool is only available for the product backlog. To forecast your backlog:
Ensure future Iteration paths are selected for your team.
Choose the backlog level for your team.
(Optional) Add the Story points, Effort, or Size field as a column based on your process.
Open View options and turn Off Parents, In progress items, and Completed child items. Turn On Forecast.
Enter a velocity estimate in the Forecasting based on velocity box.
Review the forecast lines that appear, similar to the ones shown in the following image.
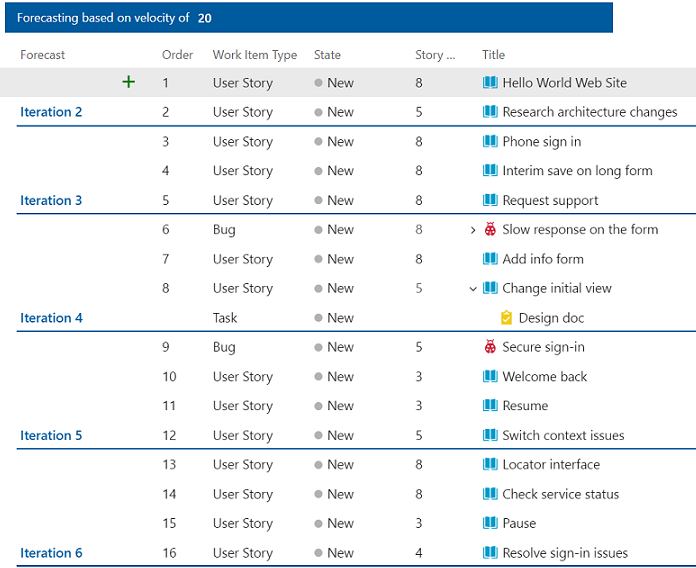
The forecast tool doesn't reference iteration assignments made to product backlog items.
Tip
You can drag items to reprioritize them with forecast lines shown. You can also use the Planning pane with the Forecast tool turned on.
For more information, see Forecast your product backlog.