Note
Access to this page requires authorization. You can try signing in or changing directories.
Access to this page requires authorization. You can try changing directories.
In this quickstart, you write Java code using the azure-messaging-servicebus package to send messages to an Azure Service Bus topic and then receive messages from subscriptions to that topic.
Note
This quick start provides step-by-step instructions for a simple scenario of sending a batch of messages to a Service Bus topic and receiving those messages from a subscription of the topic. You can find pre-built Java samples for Azure Service Bus in the Azure SDK for Java repository on GitHub.
Tip
If you're working with Azure Service Bus resources in a Spring application, we recommend that you consider Spring Cloud Azure as an alternative. Spring Cloud Azure is an open-source project that provides seamless Spring integration with Azure services. To learn more about Spring Cloud Azure, and to see an example using Service Bus, see Spring Cloud Stream with Azure Service Bus.
Prerequisites
- An Azure subscription. To complete this tutorial, you need an Azure account. You can activate your Visual Studio or MSDN subscriber benefits or sign-up for a free account.
- Install Azure SDK for Java. If you're using Eclipse, you can install the Azure Toolkit for Eclipse that includes the Azure SDK for Java. You can then add the Microsoft Azure Libraries for Java to your project. If you're using IntelliJ, see Install the Azure Toolkit for IntelliJ.
Create a namespace in the Azure portal
To begin using Service Bus messaging entities in Azure, create a namespace with a name that is unique across Azure. A namespace provides a scoping container for Service Bus resources, such as queues and topics, in your application.
To create a namespace:
Sign in to the Azure portal.
Select the flyout menu from the top left and navigate to the All services page.
On the left navigation bar, select Integration.
Scroll down to Messaging services > Service Bus and select Create.

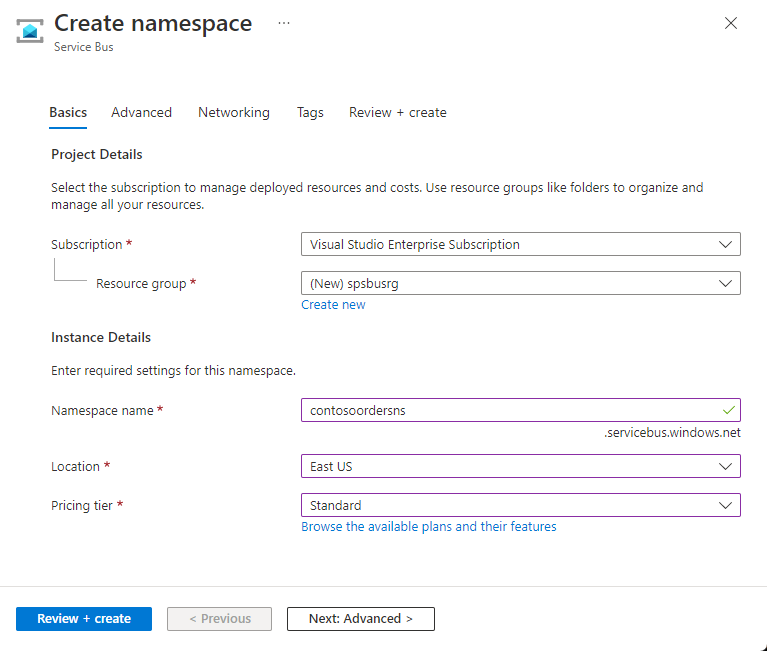
In the Basics tab of the Create namespace page, follow these steps:
For Subscription, choose an Azure subscription in which to create the namespace.
For Resource group, choose an existing resource group, or create a new one.
Enter a Namespace name that meets the following naming conventions:
- The name must be unique across Azure. The system immediately checks to see if the name is available.
- The name length is at least 6 and at most 50 characters.
- The name can contain only letters, numbers, hyphens
-. - The name must start with a letter and end with a letter or number.
- The name doesn't end with
-sbor-mgmt.
For Location, choose the region to host your namespace.
For Pricing tier, select the pricing tier (Basic, Standard, or Premium) for the namespace. For this quickstart, select Standard.
If you select Premium tier, you can enable geo-replication for the namespace. The geo-replication feature ensures that the metadata and data of a namespace are continuously replicated from a primary region to one or more secondary regions.
Important
If you want to use topics and subscriptions, choose either Standard or Premium. Topics and subscriptions aren't supported in the Basic pricing tier.
If you selected the Premium pricing tier, specify the number of messaging units. The premium tier provides resource isolation at the CPU and memory level so that each workload runs in isolation. This resource container is called a messaging unit. A premium namespace has at least one messaging unit. You can select 1, 2, 4, 8 or 16 messaging units for each Service Bus Premium namespace. For more information, see Service Bus premium messaging tier.
Select Review + create at the bottom of the page.
On the Review + create page, review settings, and select Create.
After the deployment of the resource is successful, select Go to resource on the deployment page.
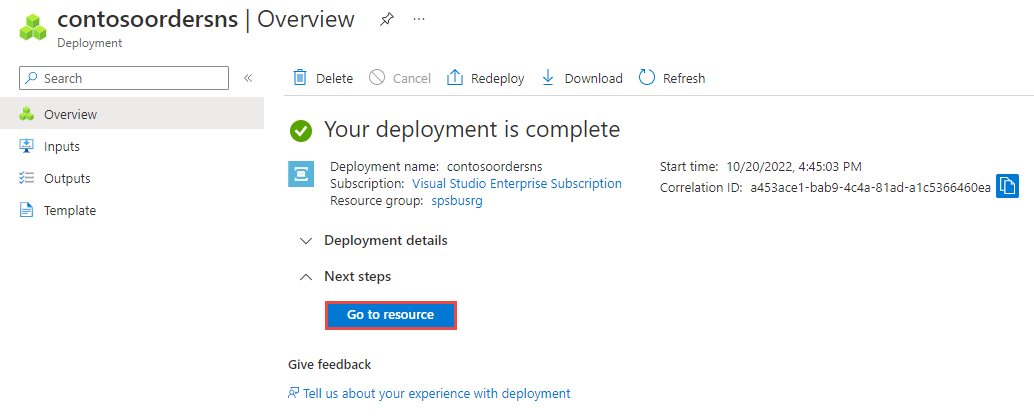
You see the home page for your service bus namespace.


Create a topic using the Azure portal
On the Service Bus Namespace page, expand Entities on the navigational menu to the left, and select Topics on the left menu.
Select + Topic on the toolbar.
Enter a name for the topic. Leave the other options with their default values.
Select Create.

Create a subscription to the topic
Select the topic that you created in the previous section.
On the Service Bus Topic page, select + Subscription on the toolbar.
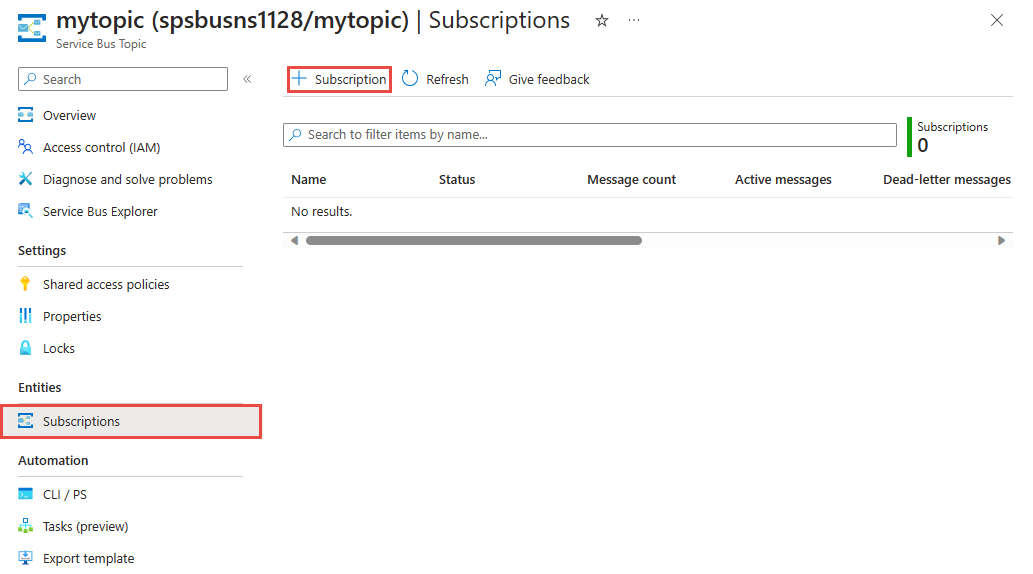
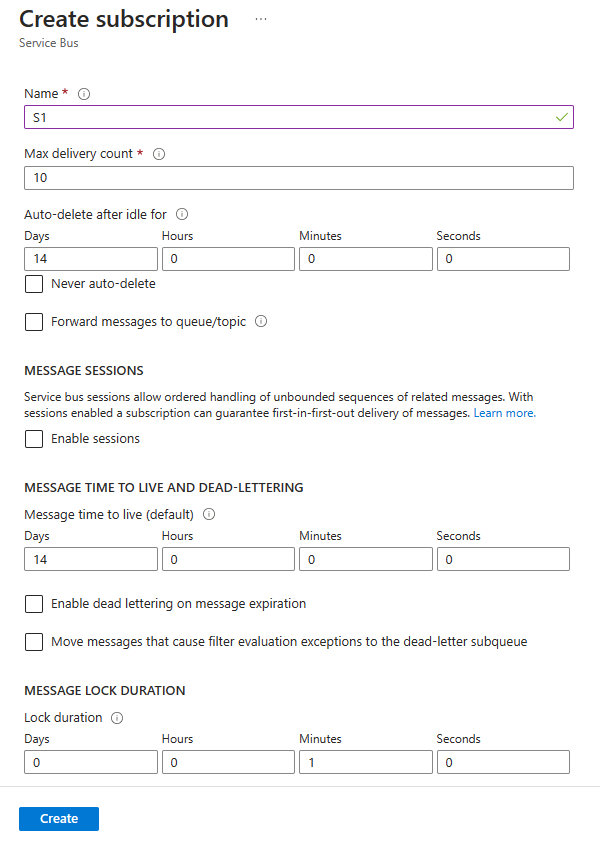
On the Create subscription page, follow these steps:
Enter S1 for name of the subscription.
Then, select Create to create the subscription.
Authenticate the app to Azure
This article shows you two ways of connecting to Azure Service Bus: passwordless and connection string.
The first option shows you how to use your security principal in Microsoft Entra ID and role-based access control (RBAC) to connect to a Service Bus namespace. You don't need to worry about having a hard-coded connection string in your code, in a configuration file, or in a secure storage like Azure Key Vault.
The second option shows you how to use a connection string to connect to a Service Bus namespace. If you're new to Azure, you might find the connection string option easier to follow. We recommend using the passwordless option in real-world applications and production environments. For more information, see Service Bus authentication and authorization. To read more about passwordless authentication, see Authenticate .NET apps.
Assign roles to your Microsoft Entra user
When you develop locally, make sure that the user account that connects to Azure Service Bus has the correct permissions. You need the Azure Service Bus Data Owner role in order to send and receive messages. To assign yourself this role, you need the User Access Administrator role, or another role that includes the Microsoft.Authorization/roleAssignments/write action.
You can assign Azure RBAC roles to a user using the Azure portal, Azure CLI, or Azure PowerShell. To learn more the available scopes for role assignments, see Understand scope for Azure RBAC.
The following example assigns the Azure Service Bus Data Owner role to your user account, which provides full access to Azure Service Bus resources. In a real scenario, follow the principle of least privilege to give users only the minimum permissions needed for a more secure production environment.
Azure built-in roles for Azure Service Bus
For Azure Service Bus, the management of namespaces and all related resources through the Azure portal and the Azure resource management API is already protected using the Azure RBAC model. Azure provides the following Azure built-in roles for authorizing access to a Service Bus namespace:
- Azure Service Bus Data Owner: Enables data access to Service Bus namespace and its entities, including queues, topics, subscriptions, and filters. A member of this role can send and receive messages from queues or topics/subscriptions.
- Azure Service Bus Data Sender: Use this role to give the
sendaccess to Service Bus namespace and its entities. - Azure Service Bus Data Receiver: Use this role to give the
receiveaccess to Service Bus namespace and its entities.
If you want to create a custom role, see Rights required for Service Bus operations.
Add Microsoft Entra user to Azure Service Bus Owner role
Add your Microsoft Entra user name to the Azure Service Bus Data Owner role at the Service Bus namespace level. This configuration allows an app that runs in the context of your user account to send messages to a queue or a topic. It can receive messages from a queue or a topic's subscription.
Important
In most cases, it takes a minute or two for the role assignment to propagate in Azure. In rare cases, it might take up to eight minutes. If you receive authentication errors when you first run your code, wait a few moments and try again.
If you don't have the Service Bus Namespace page open in the Azure portal, locate your Service Bus namespace using the main search bar or left navigation.
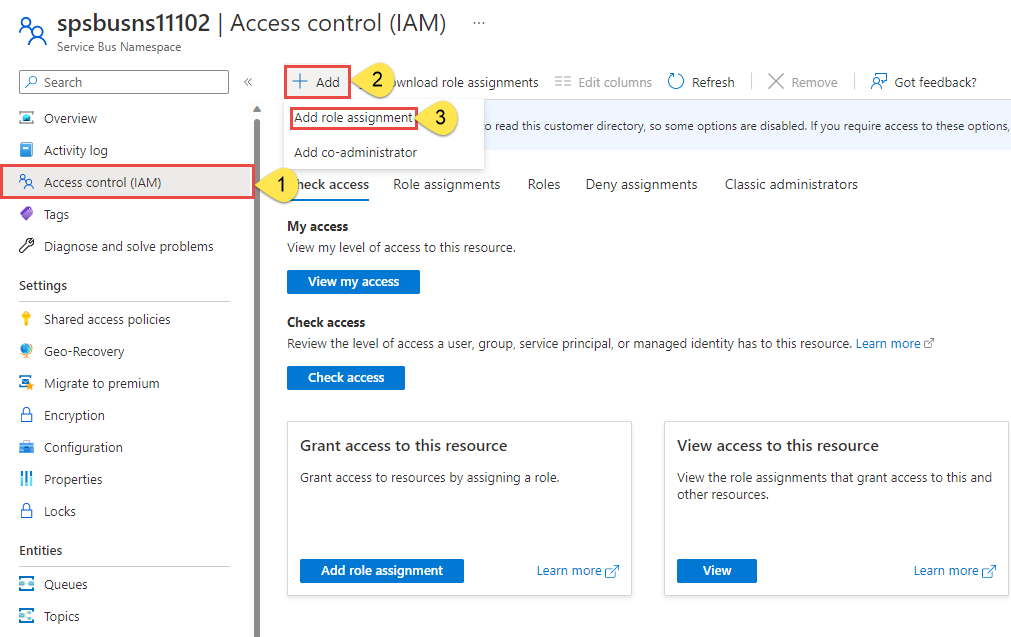
On the Overview page, select Access control (IAM) from the left-hand menu.
On the Access control (IAM) page, select the Role assignments tab.
Select + Add from the top menu and then Add role assignment.
Use the search box to filter the results to the desired role. For this example, search for
Azure Service Bus Data Ownerand select the matching result. Then choose Next.Under Assign access to, select User, group, or service principal, and then choose + Select members.
In the dialog, search for your Microsoft Entra username (usually your user@domain email address) and then choose Select at the bottom of the dialog.
Select Review + assign to go to the final page, and then Review + assign again to complete the process.

Send messages to a topic
In this section, you create a Java console project, and add code to send messages to the topic you created.
Create a Java console project
Create a Java project using Eclipse or a tool of your choice.
Configure your application to use Service Bus
Add references to Azure Core and Azure Service Bus libraries.
If you're using Eclipse and created a Java console application, convert your Java project to a Maven: right-click the project in the Package Explorer window, select Configure -> Convert to Maven project. Then, add dependencies to these two libraries as shown in the following example.
Update the pom.xml file to add dependencies to Azure Service Bus and Azure Identity packages.
    <dependencies>
        <dependency>
            <groupId>com.azure</groupId>
            <artifactId>azure-messaging-servicebus</artifactId>
            <version>7.13.3</version>
        </dependency>
        <dependency>
            <groupId>com.azure</groupId>
            <artifactId>azure-identity</artifactId>
            <version>1.8.0</version>
            <scope>compile</scope>
        </dependency>
    </dependencies>
Add code to send messages to the topic
Add the following
importstatements at the topic of the Java file.import com.azure.messaging.servicebus.*; import com.azure.identity.*; import java.util.concurrent.TimeUnit; import java.util.Arrays; import java.util.List;In the class, define variables to hold connection string (not needed for passwordless scenario), topic name, and subscription name.
static String topicName = "<TOPIC NAME>";
static String subName = "<SUBSCRIPTION NAME>";
Important
Replace
<TOPIC NAME>with the name of the topic, and<SUBSCRIPTION NAME>with the name of the topic's subscription.Add a method named
sendMessagein the class to send one message to the topic.Important
Replace
NAMESPACENAMEwith the name of your Service Bus namespace.static void sendMessage() { // create a token using the default Azure credential DefaultAzureCredential credential = new DefaultAzureCredentialBuilder() .build(); ServiceBusSenderClient senderClient = new ServiceBusClientBuilder() .fullyQualifiedNamespace("NAMESPACENAME.servicebus.windows.net") .credential(credential) .sender() .topicName(topicName) .buildClient(); // send one message to the topic senderClient.sendMessage(new ServiceBusMessage("Hello, World!")); System.out.println("Sent a single message to the topic: " + topicName); }Add a method named
createMessagesin the class to create a list of messages. Typically, you get these messages from different parts of your application. Here, we create a list of sample messages.static List<ServiceBusMessage> createMessages() { // create a list of messages and return it to the caller ServiceBusMessage[] messages = { new ServiceBusMessage("First message"), new ServiceBusMessage("Second message"), new ServiceBusMessage("Third message") }; return Arrays.asList(messages); }Add a method named
sendMessageBatchmethod to send messages to the topic you created. This method creates aServiceBusSenderClientfor the topic, invokes thecreateMessagesmethod to get the list of messages, prepares one or more batches, and sends the batches to the topic.Important
Replace
NAMESPACENAMEwith the name of your Service Bus namespace.static void sendMessageBatch() { // create a token using the default Azure credential DefaultAzureCredential credential = new DefaultAzureCredentialBuilder() .build(); ServiceBusSenderClient senderClient = new ServiceBusClientBuilder() .fullyQualifiedNamespace("NAMESPACENAME.servicebus.windows.net") .credential(credential) .sender() .topicName(topicName) .buildClient(); // Creates an ServiceBusMessageBatch where the ServiceBus. ServiceBusMessageBatch messageBatch = senderClient.createMessageBatch(); // create a list of messages List<ServiceBusMessage> listOfMessages = createMessages(); // We try to add as many messages as a batch can fit based on the maximum size and send to Service Bus when // the batch can hold no more messages. Create a new batch for next set of messages and repeat until all // messages are sent. for (ServiceBusMessage message : listOfMessages) { if (messageBatch.tryAddMessage(message)) { continue; } // The batch is full, so we create a new batch and send the batch. senderClient.sendMessages(messageBatch); System.out.println("Sent a batch of messages to the topic: " + topicName); // create a new batch messageBatch = senderClient.createMessageBatch(); // Add that message that we couldn't before. if (!messageBatch.tryAddMessage(message)) { System.err.printf("Message is too large for an empty batch. Skipping. Max size: %s.", messageBatch.getMaxSizeInBytes()); } } if (messageBatch.getCount() > 0) { senderClient.sendMessages(messageBatch); System.out.println("Sent a batch of messages to the topic: " + topicName); } //close the client senderClient.close(); }
Receive messages from a subscription
In this section, you add code to retrieve messages from a subscription to the topic.
Add a method named
receiveMessagesto receive messages from the subscription. This method creates aServiceBusProcessorClientfor the subscription by specifying a handler for processing messages and another one for handling errors. Then, it starts the processor, waits for few seconds, prints the messages that are received, and then stops and closes the processor.Important
- Replace
NAMESPACENAMEwith the name of your Service Bus namespace. - Replace
ServiceBusTopicTestinServiceBusTopicTest::processMessagein the code with the name of your class.
// handles received messages static void receiveMessages() throws InterruptedException { DefaultAzureCredential credential = new DefaultAzureCredentialBuilder() .build(); // Create an instance of the processor through the ServiceBusClientBuilder ServiceBusProcessorClient processorClient = new ServiceBusClientBuilder() .fullyQualifiedNamespace("NAMESPACENAME.servicebus.windows.net") .credential(credential) .processor() .topicName(topicName) .subscriptionName(subName) .processMessage(context -> processMessage(context)) .processError(context -> processError(context)) .buildProcessorClient(); System.out.println("Starting the processor"); processorClient.start(); TimeUnit.SECONDS.sleep(10); System.out.println("Stopping and closing the processor"); processorClient.close(); }- Replace
Add the
processMessagemethod to process a message received from the Service Bus subscription.private static void processMessage(ServiceBusReceivedMessageContext context) { ServiceBusReceivedMessage message = context.getMessage(); System.out.printf("Processing message. Session: %s, Sequence #: %s. Contents: %s%n", message.getMessageId(), message.getSequenceNumber(), message.getBody()); }Add the
processErrormethod to handle error messages.private static void processError(ServiceBusErrorContext context) { System.out.printf("Error when receiving messages from namespace: '%s'. Entity: '%s'%n", context.getFullyQualifiedNamespace(), context.getEntityPath()); if (!(context.getException() instanceof ServiceBusException)) { System.out.printf("Non-ServiceBusException occurred: %s%n", context.getException()); return; } ServiceBusException exception = (ServiceBusException) context.getException(); ServiceBusFailureReason reason = exception.getReason(); if (reason == ServiceBusFailureReason.MESSAGING_ENTITY_DISABLED || reason == ServiceBusFailureReason.MESSAGING_ENTITY_NOT_FOUND || reason == ServiceBusFailureReason.UNAUTHORIZED) { System.out.printf("An unrecoverable error occurred. Stopping processing with reason %s: %s%n", reason, exception.getMessage()); } else if (reason == ServiceBusFailureReason.MESSAGE_LOCK_LOST) { System.out.printf("Message lock lost for message: %s%n", context.getException()); } else if (reason == ServiceBusFailureReason.SERVICE_BUSY) { try { // Choosing an arbitrary amount of time to wait until trying again. TimeUnit.SECONDS.sleep(1); } catch (InterruptedException e) { System.err.println("Unable to sleep for period of time"); } } else { System.out.printf("Error source %s, reason %s, message: %s%n", context.getErrorSource(), reason, context.getException()); } }Update the
mainmethod to invokesendMessage,sendMessageBatch, andreceiveMessagesmethods and to throwInterruptedException.public static void main(String[] args) throws InterruptedException { sendMessage(); sendMessageBatch(); receiveMessages(); }
Run the app
Run the program to see the output similar to the following output:
If you're using Eclipse, right-click the project, select Export, expand Java, select Runnable JAR file, and follow the steps to create a runnable JAR file.
If you're signed into the machine using a user account that's different from the user account added to the Azure Service Bus Data Owner role, follow these steps. Otherwise, skip this step and move on to run the Jar file in the next step.
Install Azure CLI on your machine.
Run the following CLI command to sign in to Azure. Use the same user account that you added to the Azure Service Bus Data Owner role.
az login
Run the Jar file using the following command.
java -jar <JAR FILE NAME>You see the following output in the console window.
Sent a single message to the topic: mytopic
Sent a batch of messages to the topic: mytopic
Starting the processor
Processing message. Session: e0102f5fbaf646988a2f4b65f7d32385, Sequence #: 1. Contents: Hello, World!
Processing message. Session: 3e991e232ca248f2bc332caa8034bed9, Sequence #: 2. Contents: First message
Processing message. Session: 56d3a9ea7df446f8a2944ee72cca4ea0, Sequence #: 3. Contents: Second message
Processing message. Session: 7bd3bd3e966a40ebbc9b29b082da14bb, Sequence #: 4. Contents: Third message
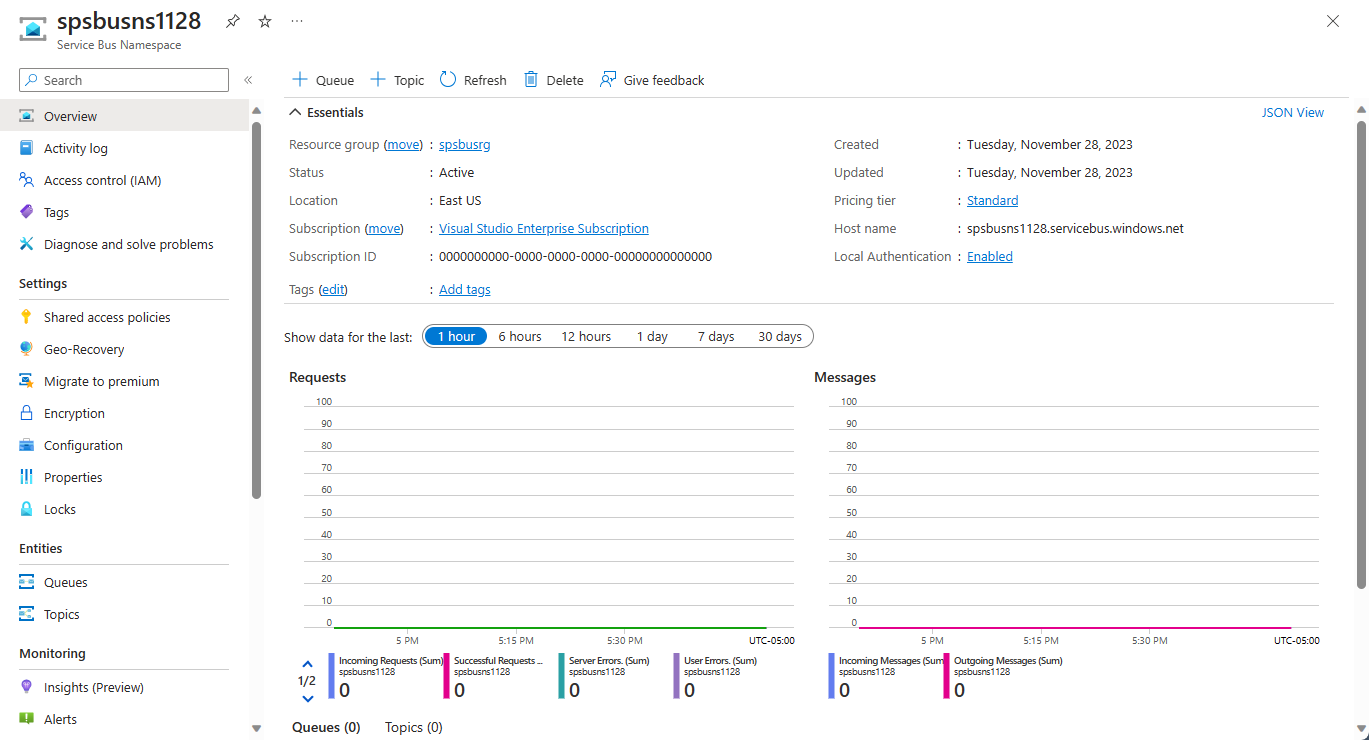
On the Overview page for the Service Bus namespace in the Azure portal, you can see incoming and outgoing message count. Wait for a minute or so and then refresh the page to see the latest values.

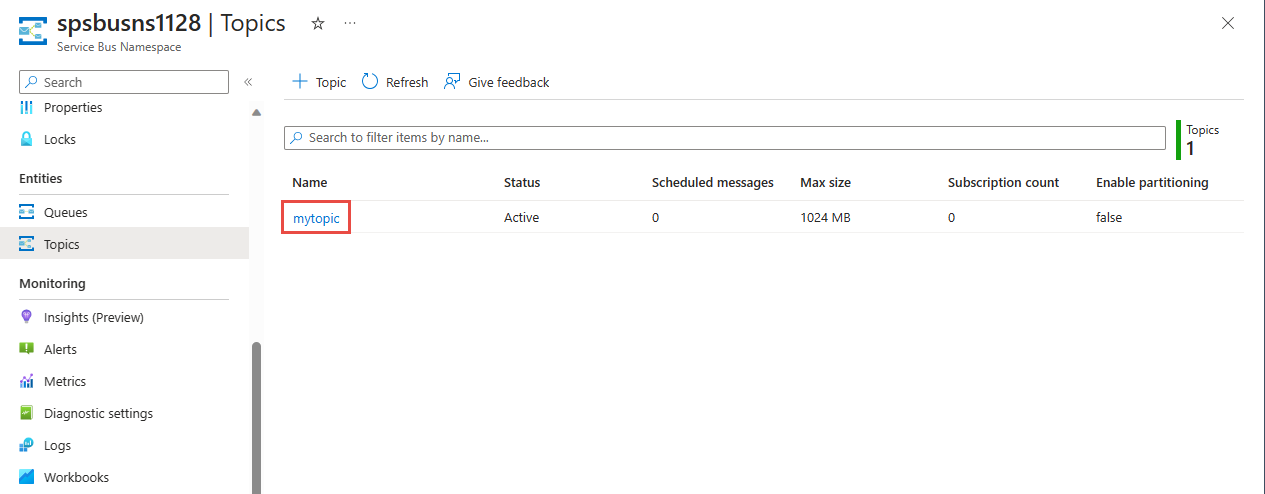
Switch to the Topics tab in the middle-bottom pane, and select the topic to see the Service Bus Topic page for your topic. On this page, you should see four incoming and four outgoing messages in the Messages chart.

If you comment out the receiveMessages call in the main method and run the app again, on the Service Bus Topic page, you see 8 incoming messages (4 new) but four outgoing messages.

On this page, if you select a subscription, you get to the Service Bus Subscription page. You can see the active message count, dead-letter message count, and more on this page. In this example, there are four active messages that the receiver hasn't received yet.

Next steps
See the following documentation and samples: