Note
Access to this page requires authorization. You can try signing in or changing directories.
Access to this page requires authorization. You can try changing directories.
Note
- Brand agents is currently in beta.
- Currently, Brand agents is available for Shopify and WooCommerce sites.
- Currently, Brand agents is available for websites and not for mobile apps.
- Refer to the Brand agents terms for detailed usage guidelines.
- By accepting the Brand agents terms, you consent to having your catalog published to Microsoft Merchant Center (MMC). This enables your products to be discovered through Bing and Copilot.
This guide walks you through installing Brand agents on your WooCommerce store. There are multiple ways to get started depending on whether you're setting up a new project or already have an existing Clarity project connected to your WordPress site.
Set up Brand agents
Step 1: Install the Clarity WordPress plugin
Sign in to your WordPress admin panel and go to Plugins -> Add New. Search for Microsoft Clarity and select Install Now -> Activate.
For a detailed step-by-step guide, refer to the Clarity WordPress plugin installation guide.
After installing the plugin:
- If you don't have a project, continue to create one.
- If you have an existing project, continue to set up Brand agents for an existing project.
New project
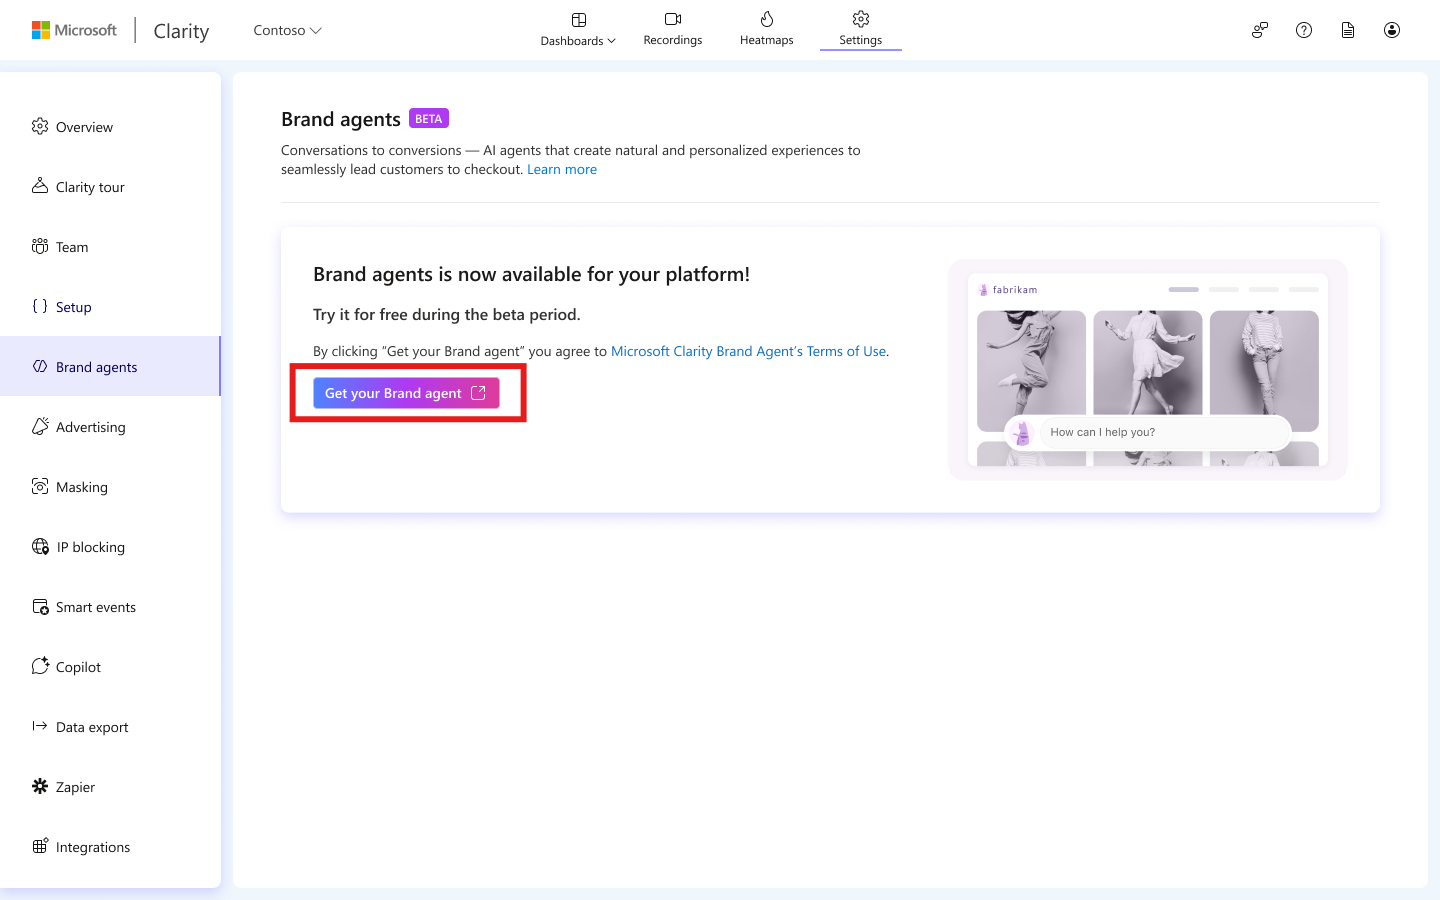
If you're setting up Clarity and Brand agents for the first time, create a new project. After you create your project, a popup prompts you to set up Brand agents. Select Get your Brand agent to begin.
Continue to Step 2: Approve WooCommerce permissions.
Existing project
If you already have a Clarity project, follow the steps based on whether your WooCommerce store is linked to Clarity.
If WooCommerce is not linked
If your WordPress site isn't connected to Clarity yet, link it by going to Settings -> Clarity. In your WordPress admin panel, sign in with your Microsoft account, and select your existing Clarity project.
If WooCommerce is already linked
If your WordPress site is already connected to Clarity, go to Settings -> Brand agents in the Clarity dashboard.
If your Clarity plugin needs an update, a prompt appears. Select Update Clarity plugin to install the latest version.
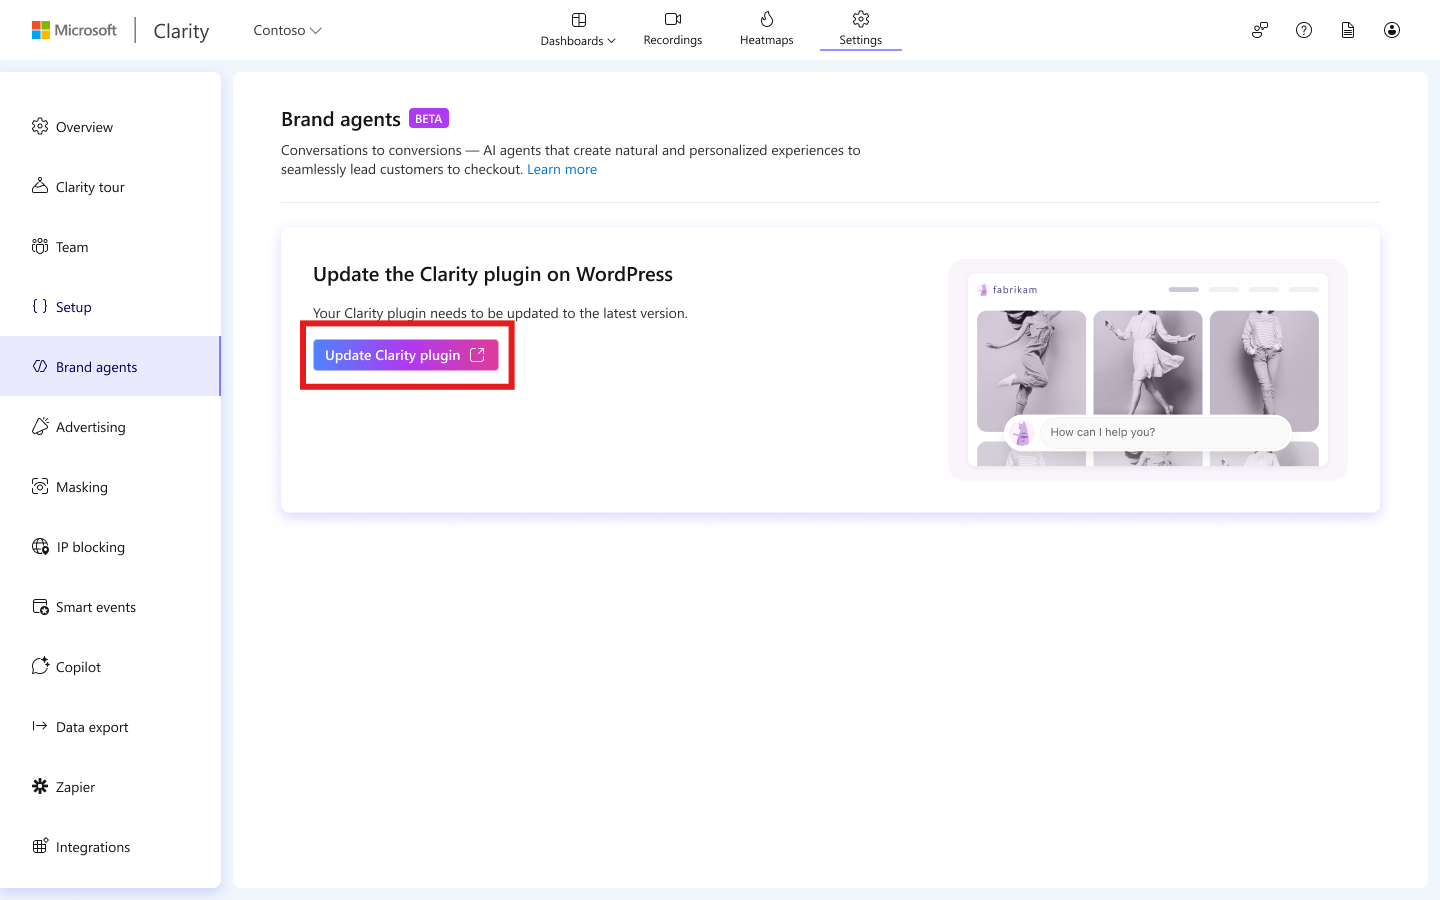
If your plugin is up to date, select Get your Brand agent to proceed.
Step 2: Approve WooCommerce permissions
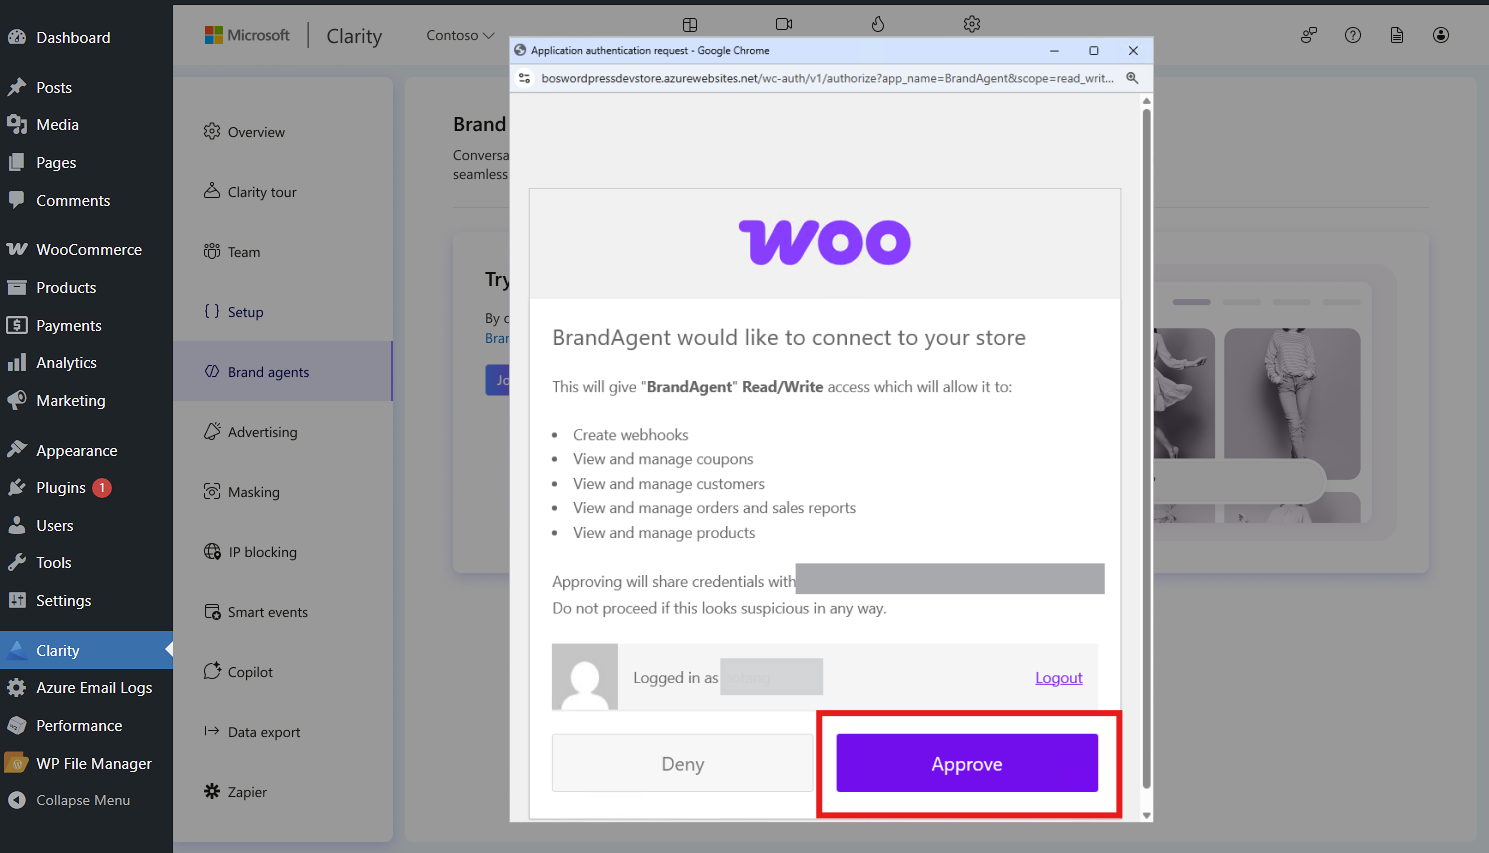
After selecting Get your Brand agent, a WooCommerce authorization window opens. Review the permissions and select Approve to grant access.
Step 3: Customize greeting messages and appearance
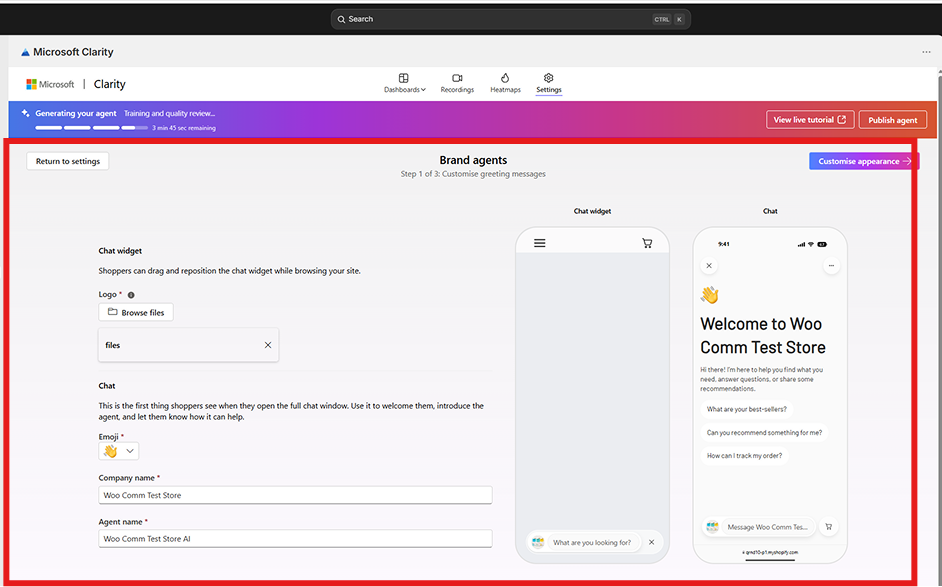
After approval, the configuration page opens. Customize your agent's chat widget, including:
- Logo: Upload your brand logo.
- Chat greeting: Set the emoji, company name, and agent name.
A live preview of the chat widget appears on the right side of the page.
Next, customize the visual appearance of your Brand agent, including colors, positioning, and styling to match your store's branding.
Step 4: View live demo
Preview your agent on your store before publishing. Select View live demo to interact with the agent using guided prompts and test how it responds to customer questions.
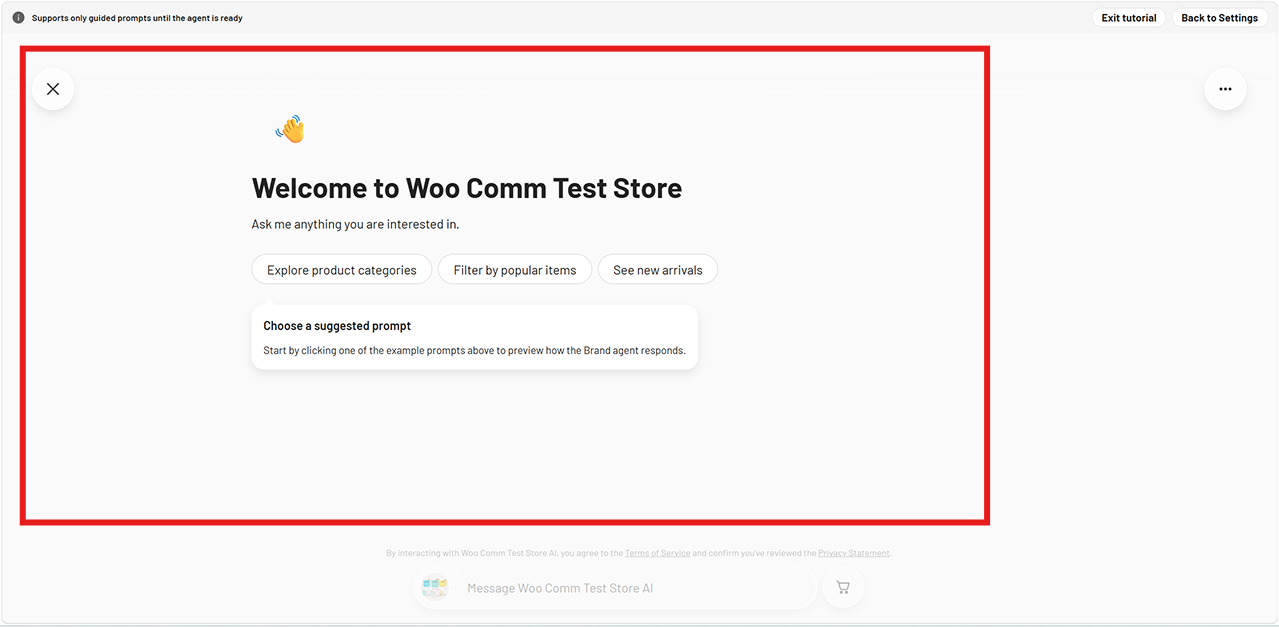
After reviewing the preview, exit the demo.
Step 5: Review and publish
Review your brand identity and agent configuration. Select Publish agent, set the traffic percentage for your Brand agent, and then select Publish agent to confirm.
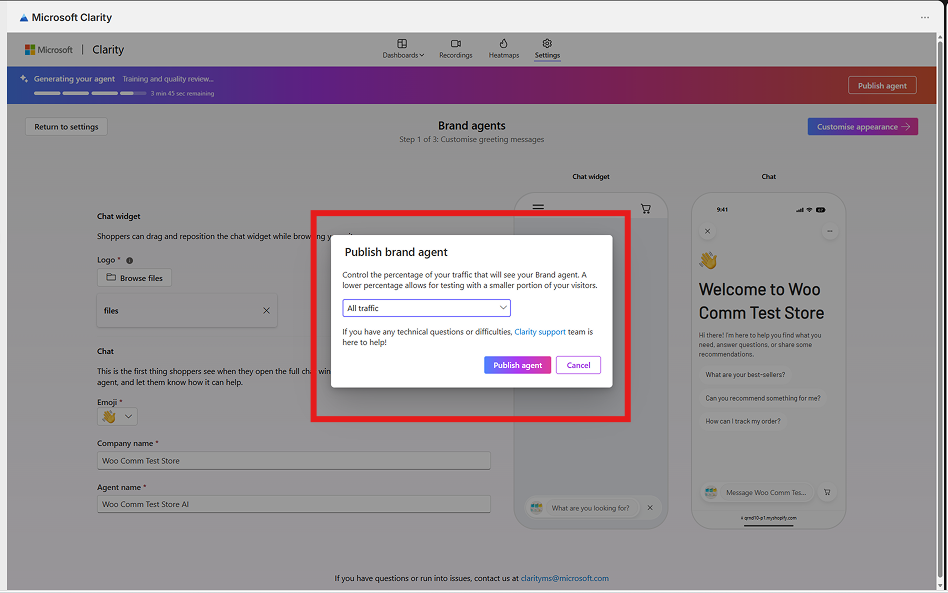
After publishing, a confirmation appears indicating that your Brand agent is being generated and is available shortly.
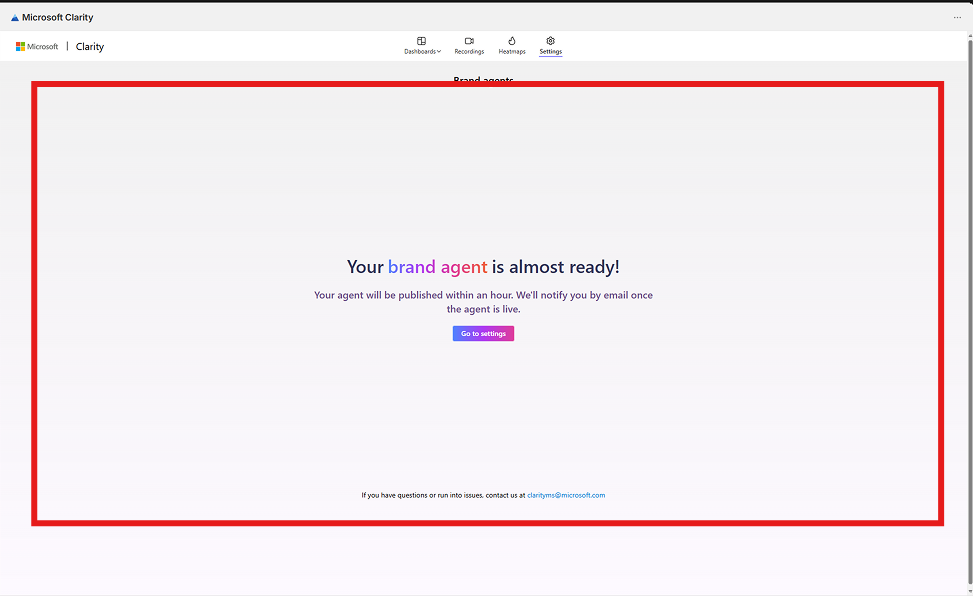
Step 6: Brand agents settings
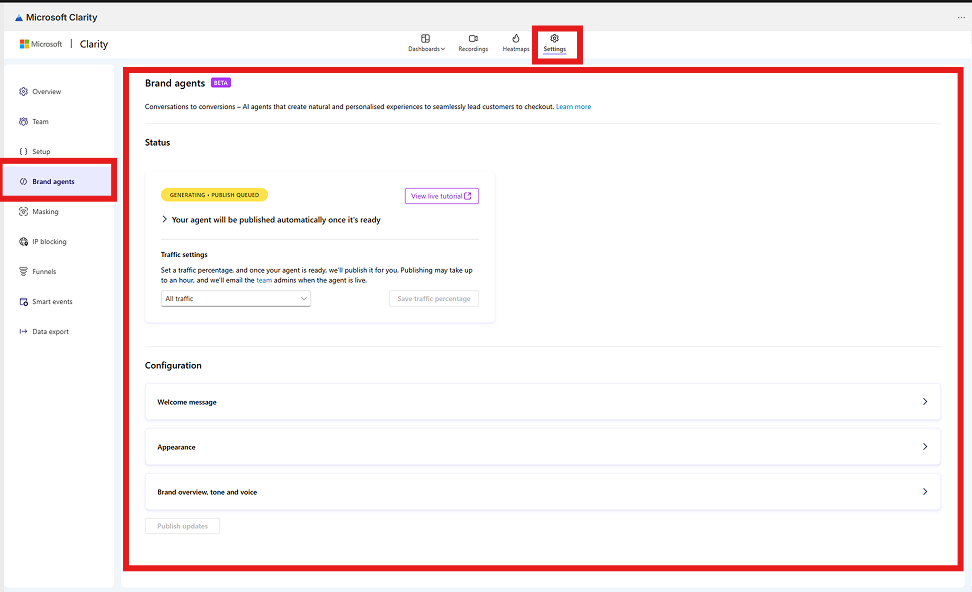
To view the status and configurations, go to Settings -> Brand agents in the Clarity dashboard. The settings page includes:
- Status: Current state of your agent (Generating, Active).
- Rollout type: Choose between All traffic (expose to all visitors) or Rollout (test with a percentage of visitors).
- Configuration: View and update your agent's Greeting, Appearance, Identity, and Reference materials configured in earlier steps.
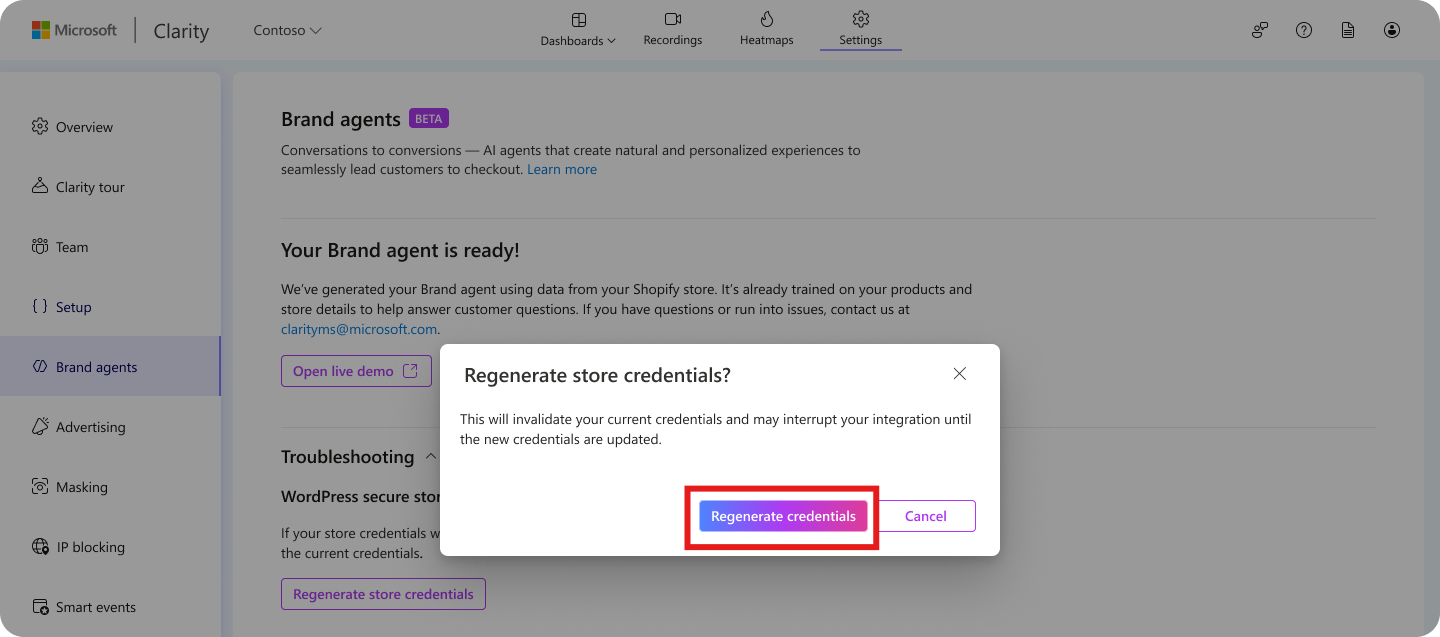
- Troubleshooting: Options to regenerate store credentials if needed.
Note
If your store credentials were compromised or shared publicly, you can generate a new set under the Troubleshooting section by selecting Regenerate store credentials. This invalidates the current credentials.
FAQ
For more answers, refer to FAQ.