Note
Access to this page requires authorization. You can try signing in or changing directories.
Access to this page requires authorization. You can try changing directories.
A canvas is a record page for one table, such as account or contact, made of sections and components. This article shows you how to customize one of Microsoft's canvases or build your own in CRM Canvas Designer, and then publish it to the people who need it.
To change access to a published canvas, switch canvases, roll back a version, or delete a canvas, see Manage canvases in CRM Canvas Designer.
In this preview, you configure a canvas manually: you choose the components, arrange them in sections, and set what each one shows.
Important
- This is a preview feature.
- Preview features aren’t meant for production use and might have restricted functionality. These features are subject to supplemental terms of use, and are available before an official release so that customers can get early access and provide feedback.
Prerequisites
- You have the App Profile Manager Administrator security role. Learn more in Security roles.
- Copilot credits are set up for your environment. Turning on and customizing canvases doesn't use credits. Insights do: they're calculated in the background to appear on canvases, and that calculation uses credits. For more information, see Copilot credits.
Open the canvas designer
Open the canvas designer setup from the Sales Hub app or Copilot Service Admin Center app.
Depending on your app, use the following navigation path to open the designer:
Sales Hub:
- From the lower-left corner of the Sales Hub app, select App Settings.
- Select Dynamics 365 AI hub > Canvas Studio.
Copilot Service Admin Center:
- Select Agent Hub from the Home page.
- From the Canvas studio card, select Open canvas studio.
In the Canvases card, select Manage canvases. Before you finish the guided setup, this button is Set up canvases. For more information, see Turn on canvases for the first time.
In the canvases list, customize a predefined canvas or create a new one.
Customize a default canvas
You can't edit a default canvas directly. Select the canvas, and then select Clone to edit to create a copy that you can edit.
Create a new canvas
- In the canvases list, select New canvas. The canvas designer opens with the Settings dialog.
- In Name, enter a name for the canvas.
- In Record type, select the table that the canvas is for, such as account.
- In Unique name, keep the name that's filled in from the canvas name, or enter your own.
To change these details later, select Settings in the canvas designer.
The designer opens with the component list on the left and the canvas on the right, shown with a sample record.
Arrange sections
A section is a titled group of components with one, two, or three columns.
- Add, rename, reorder, or remove sections from the component list.
- On a tablet, a section shows at most two columns, and on a phone, one.
Add and arrange components
A component is a building block that you add whole. A single field never goes on the canvas by itself: add it to a fields component or to the header.
- In the component list, add a component, or drag components to reorder them.
- Select a component to see its properties. Every component has Title, Section, Width, and Height, plus Duplicate and Remove.
- Set the common settings for the component. Find the rest under More options.
The following configurations are common components available on the canvas for each selected table.
| Component | What you configure |
|---|---|
| Header | Fields under the name, photo or initials, tags, and key numbers |
| Fields | Fields from this record or one linked record, including custom fields, in one to four columns |
| Business involvement | Related records, such as opportunities, cases, leads, and campaigns, with their columns, row count, and sort |
| What's important now | A title, how many cards show before See more, and the card layout. |
| Who is {full name}? | Name of the customer, with information such as title, company, and contact details along with personal notes. |
| What happened before | Past activities and interactions related to the record including Activity types, a time range, and how many items show. |
You change what a component shows, not how it looks. Fonts, colors, spacing, and field formatting come from each component's design.
Manage duplicate detection of account and contact canvases
Account and contact canvases don't have their own duplicate setting. When duplicate detection for insights is turned on, the insights on these canvases include the customer's duplicate records. Learn more in Configure duplicate detection.
Save a draft
To keep working without publishing, select the Save button. People don't see draft changes, and saving a draft doesn't create a version.
Changes that you save after publishing stay in your draft until you publish again.
Publish the canvas and choose who sees it
Before publishing, select Review to ensure all changes to the canvas are complete with no problems. You can't publish the canvas if there are any problems detected during the review.
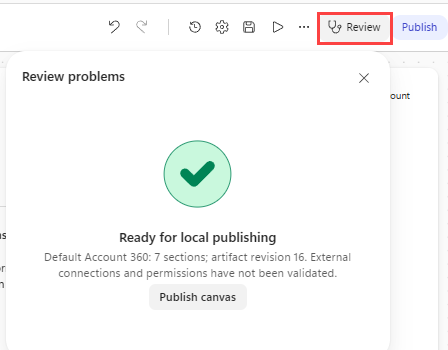
Select Publish, and then confirm.
Note
If the canvas was already published and you're editing it, select Update.
Publishing doesn't ask who sees the canvas. The first time you publish a canvas, its status is Disabled, so nobody sees it yet.
To choose who sees the canvas, go to the canvases list, select the canvas, and then select Configure. Choose the apps and the users or security roles, and then save. The status changes to Enabled. Learn more in Roll out a canvas to a pilot group.
Each publish creates a new numbered version, which you can find in Revision history. Only assigned users can see the corresponding published canvas. To change who sees a published canvas later, use Configure in the canvases list.
To restore a published version, learn more in Roll back to an earlier version.
Turn on canvases for the first time
The first time you open Canvas studio, a guided setup turns on canvases in one pass. You choose the canvases, the apps, and the users together, so the canvases go straight to Enabled. You don't need to edit or publish anything first.
On Canvases, select the canvases to turn on, such as Account and Contact. To see what one looks like, select Preview.
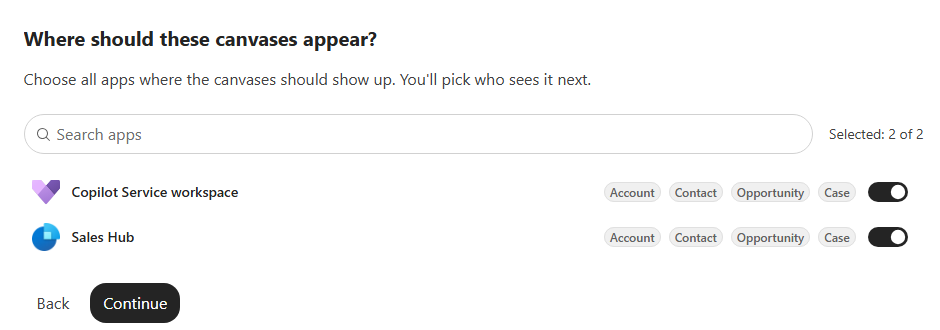
On Apps, select the apps where the canvases appear, such as Sales Hub or Copilot Service workspace.
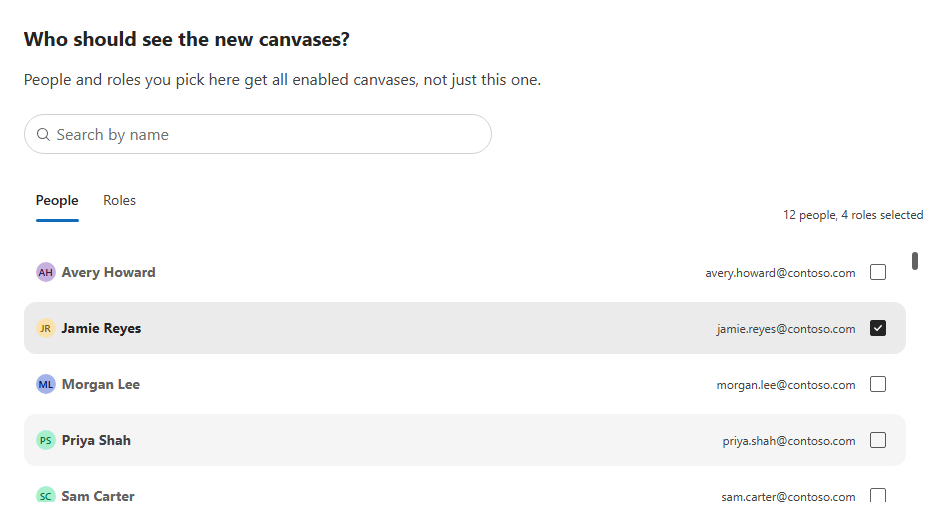
On Users, select the People tab or the Roles tab, and then select who sees the canvases.
Review the canvases, apps, and people, and then select Enable.