Note
Access to this page requires authorization. You can try signing in or changing directories.
Access to this page requires authorization. You can try changing directories.
While you set up Dynamics 365 Field Service for your organization, you might have to customize the forms that back-office workers such as dispatchers and service managers use to view important information and document their work. IT administrators might customize Field Service forms to ensure that form layouts match your business processes, and that users can capture information that is unique to your business or industry.
Customizing forms correctly is important for maximizing performance. Form customizations can affect the time that it takes to load forms and save changes. Correct form customization can improve usability. Therefore, users can more easily view and update information.
This article explains how to customize the work order form. However, the steps can be used to customize any Field Service web form.
Note
To learn how to customize the work order form for the mobile app, go to Edit the booking and work order form.
Step 1. Understand the default work order form
Before you customize the work order form, make sure that you understand the default work order form that is included with Field Service. An understanding of the existing fields and recommended process flow helps you determine what changes to make to the form. For better performance, usability, and upgradability, we recommend that you use the default fields and processes.
Go to Field Service > Work Orders, and either select an existing record or create a new one.
View and familiarize yourself with the default fields, and determine which ones can be used for your business.

Standard work order process
The default work order form is optimized for the following standard work order process.
- A work order is created manually, from a converted case, via an Internet of Things (IoT) alert, from an agreement schedule, or via an integration. By default, newly created work orders have a system status of Unscheduled.
- Work order details are entered. These details include the account, work order type, location, products, services, service tasks, and any other information that is important.
- The work order is scheduled to one or more resources ("frontline workers"). The system status is automatically changed to Scheduled.
- A frontline worker views the scheduled work order on their mobile app and travels to the customer location to perform the required work. The system status is changed to In Progress. The frontline worker updates information such as the time when they arrived on-site, the service tasks that they completed, and the services and products to bill.
- The frontline worker completes the work order. The system status is changed to Completed.
- The back-office manager or dispatcher reviews the completed work order and verifies that the work was completed and the necessary data was captured. If everything is finished, the system status is changed to Posted.
Learn more in Work order lifecycle and system statuses.
Critical fields
The following fields are critical to the Field Service work order process and are required. If your organization doesn't plan to use these fields, you might want to consider using a different entity/table or creating a new one.
- Work Order Number
- System Status
- Service Account
- Billing Account
- Price List
- Work Order Type
- Work Location
- Address
- Latitude
- Longitude
The following subgrids are also critical to the Field Service work order process and are highly recommended:
- Bookable Resource Booking ("Bookings")
- Service Tasks
- Products
- Services
Learn more in Work order architecture and Create a work order.
Step 2. Make a list of needed and unneeded fields
Make a list of default work order fields that are relevant to your business process. Make another list of unneeded fields. Be sure to add the critical fields to the list of needed fields, because they are required.
Step 3. Create new fields as needed
If the default work order form is missing fields that you need, create new fields.
To learn about best practices, go to Create and edit Field Service columns.
Important
Use caution when you edit default fields. Never delete default fields.
Step 4. Start to customize the work order form
Although we recommend that you use the existing (default) work order form that is included with Field Service, there are scenarios where you might want to create a new custom work order form.
The following tabbed sections explain the pros and cons of each approach. They also include instructions for getting started with each approach.
The existing work order form is a better choice for scenarios where your organization doesn't want to make many changes to the layout or fields. It's also a better choice for organizations that generally want to use the default work order process.
Pros
- It's recommended. The existing form is recommended by Microsoft.
- It receives updates. The existing form receives updates for performance and new features.
- It provides better supportability. When you use the existing form, it's easier for support teams to diagnose and fix issues.
Cons
- It's less customizable. By agreeing to use the existing form, you agree to make fewer changes to it.
- You must test upgrades. The existing form receives updates as often as twice per year. Test new updates in a sandbox environment, and ensure that they don't disrupt your users. Learn more in Merge form customizations.
Start to customize the existing work order form
Sign in to Power Apps.
Select Tables.
Search for and select Work Order.
Under Data experiences, select Forms.
Find the main Work Order form.


Step 5. Hide form tabs, sections, and fields
The next step is to hide unwanted tabs, sections, and fields. We recommend that you hide items instead of removing them. This approach helps reduce the likelihood of errors. In addition, you can more easily add the items back later if they are needed. Hide items before you rearrange or add fields.
Note
Don't hide critical fields. If your organization doesn't plan to use these fields, you might want to consider creating a new entity table.
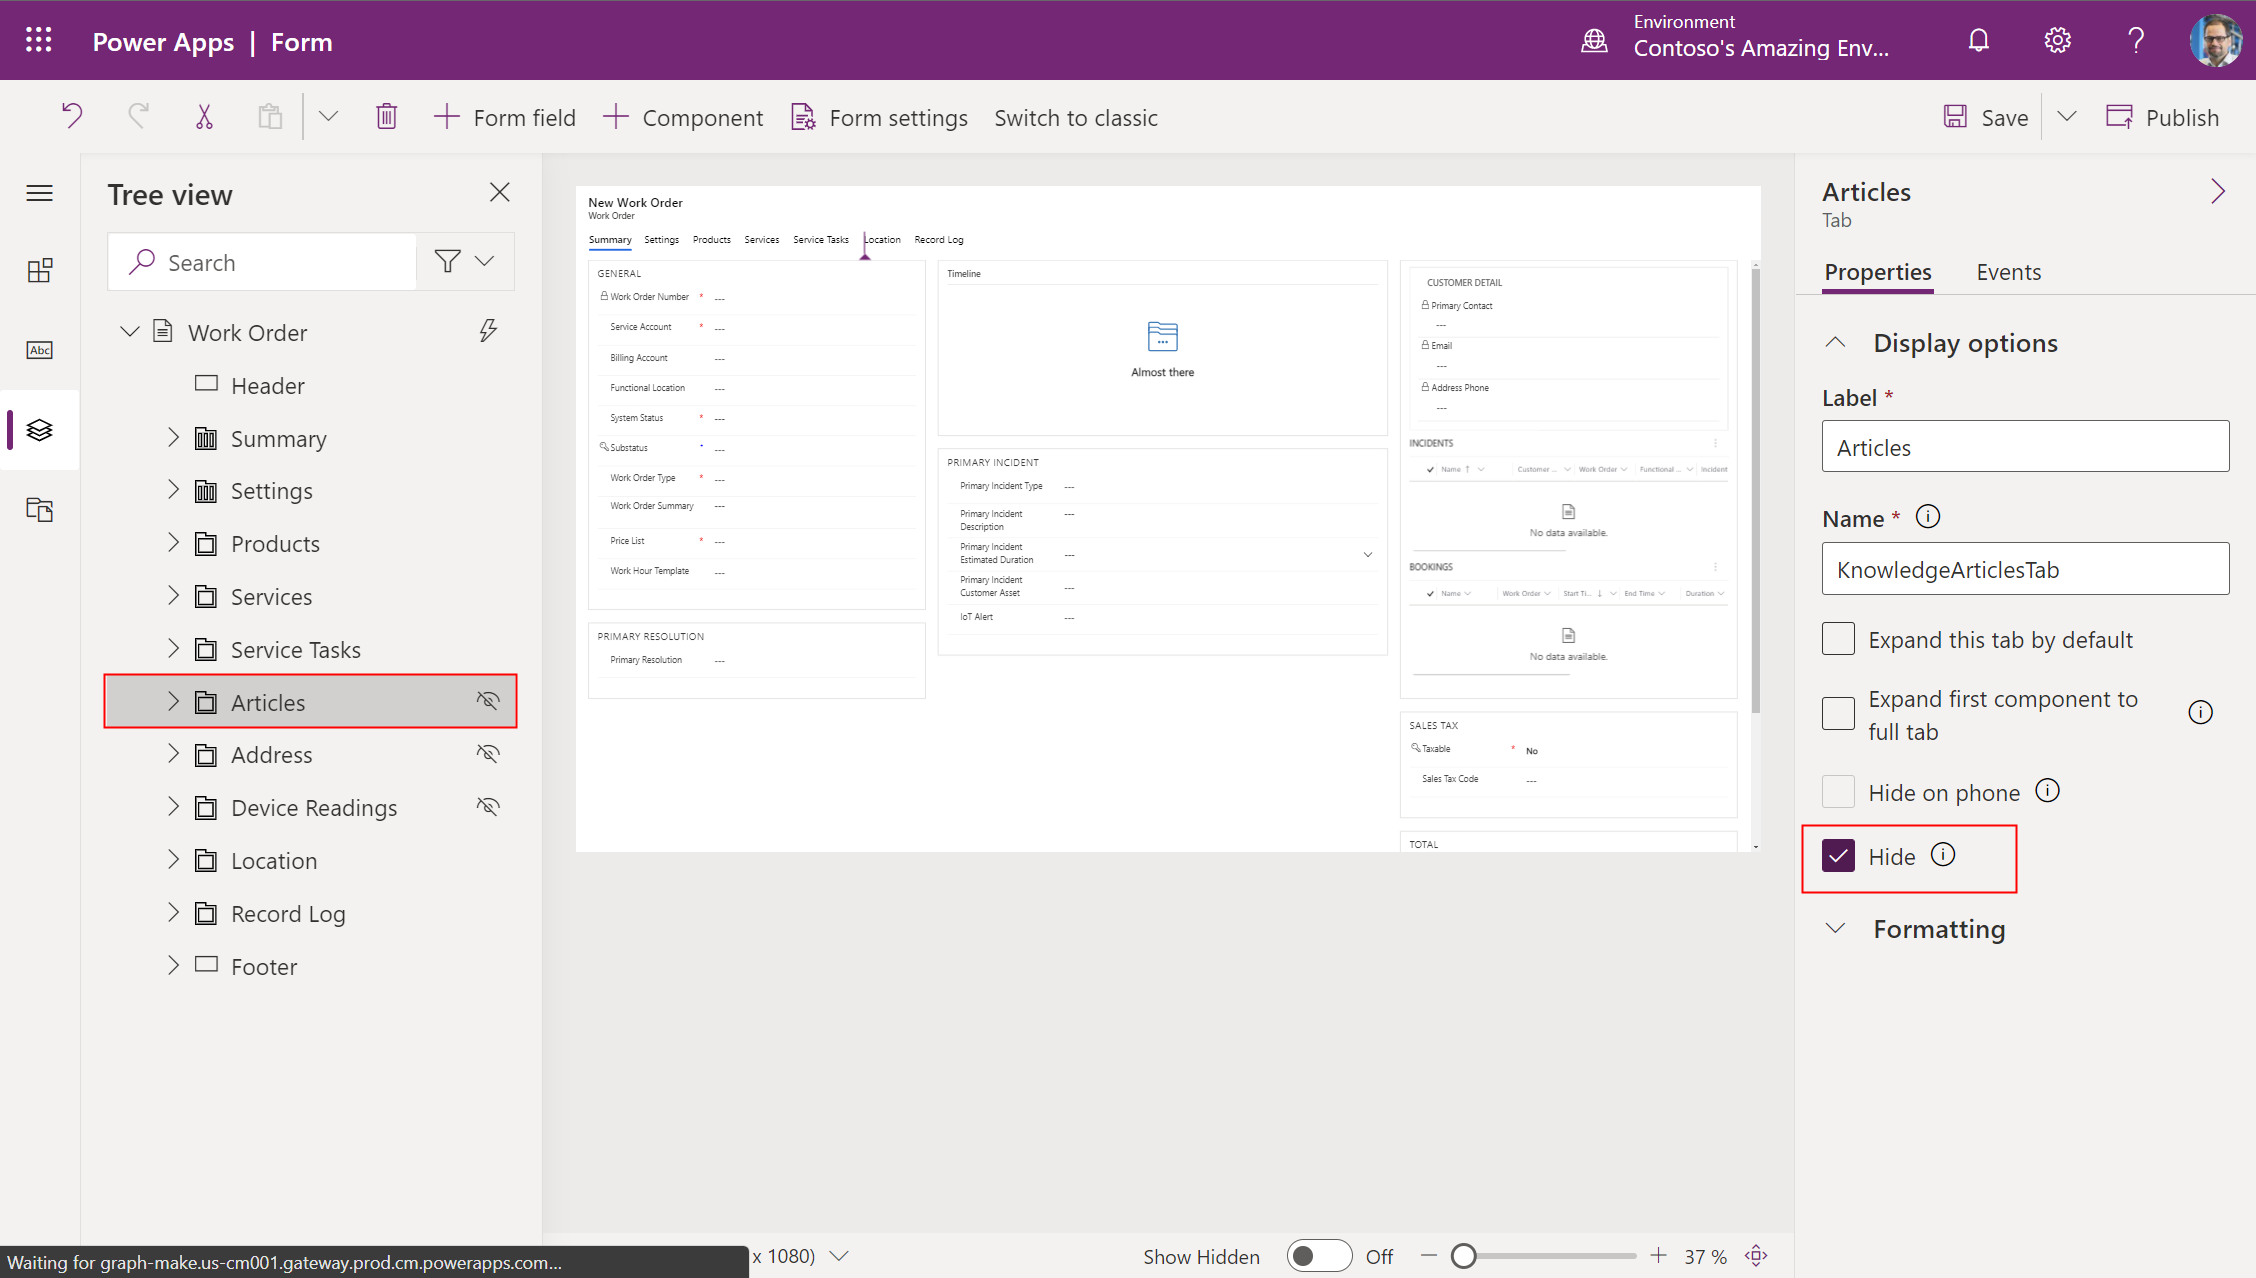
Hide unwanted tabs
Tabs run horizontally across the top of the form. Hide tabs that you don't need. You can't hide the summary tab.
Hide unwanted sections
Sections are areas on tabs. Hide sections that you don't need. If a section that you need has only one field, move that field to another section, and then hide the unneeded section.
Hide unwanted fields
Hide fields that you don't need, unless they are critical fields.
Remove price-related fields if applicable
There is an easy and supported way to remove all price-related fields (such as Price List and Total Amount) from the work order, work order product, and work order service forms.
- Sign in to the Field Service app.
- Select the Settings area.
- Under General, select Field Service Settings.
- On the Work Order / Booking tab, set the Calculate Price field to No. Learn more in Work Order / Booking settings.
Remove tax-related fields if applicable
There is an easy and supported way to remove all tax-related fields (such as Taxable) from the work order, work order product, and work order service forms.
- In Field Service, select the Settings area.
- Under General, select Field Service Settings.
- On the Work Order / Booking tab, set the Calculate Tax field to No. Learn more in Work Order / Booking settings.
Step 6. Add your custom fields to the form
If you created custom fields (columns) earlier, add them to the form. For the best outcome, follow these guidelines:
- (Required) Add new custom fields to a new form section.
- (Highly recommended but not required) Add new custom fields to a new form tab.
- Don't add new custom fields to the first form tab unless you must. (By default, the first tab is the summary tab.) Custom fields on the first tab cause form load times to be slower. In particular, avoid adding subgrids and lookup fields to the first form tab, because they can cause load times to be significantly slower.
Add your custom fields to a new form tab (recommended)
In this example, you have a new custom field that is named Source. It's a choice-type field that is used to select whether the work order originated from a phone call, email, IoT alert, or agreement, for example. You want to add this custom field to the work order form.
In Power Apps, open the work order form editor.
Select Component on the toolbar, and then, in the Components pane on the left, select 1-column tab, 2-column tab, or 3-column tab.
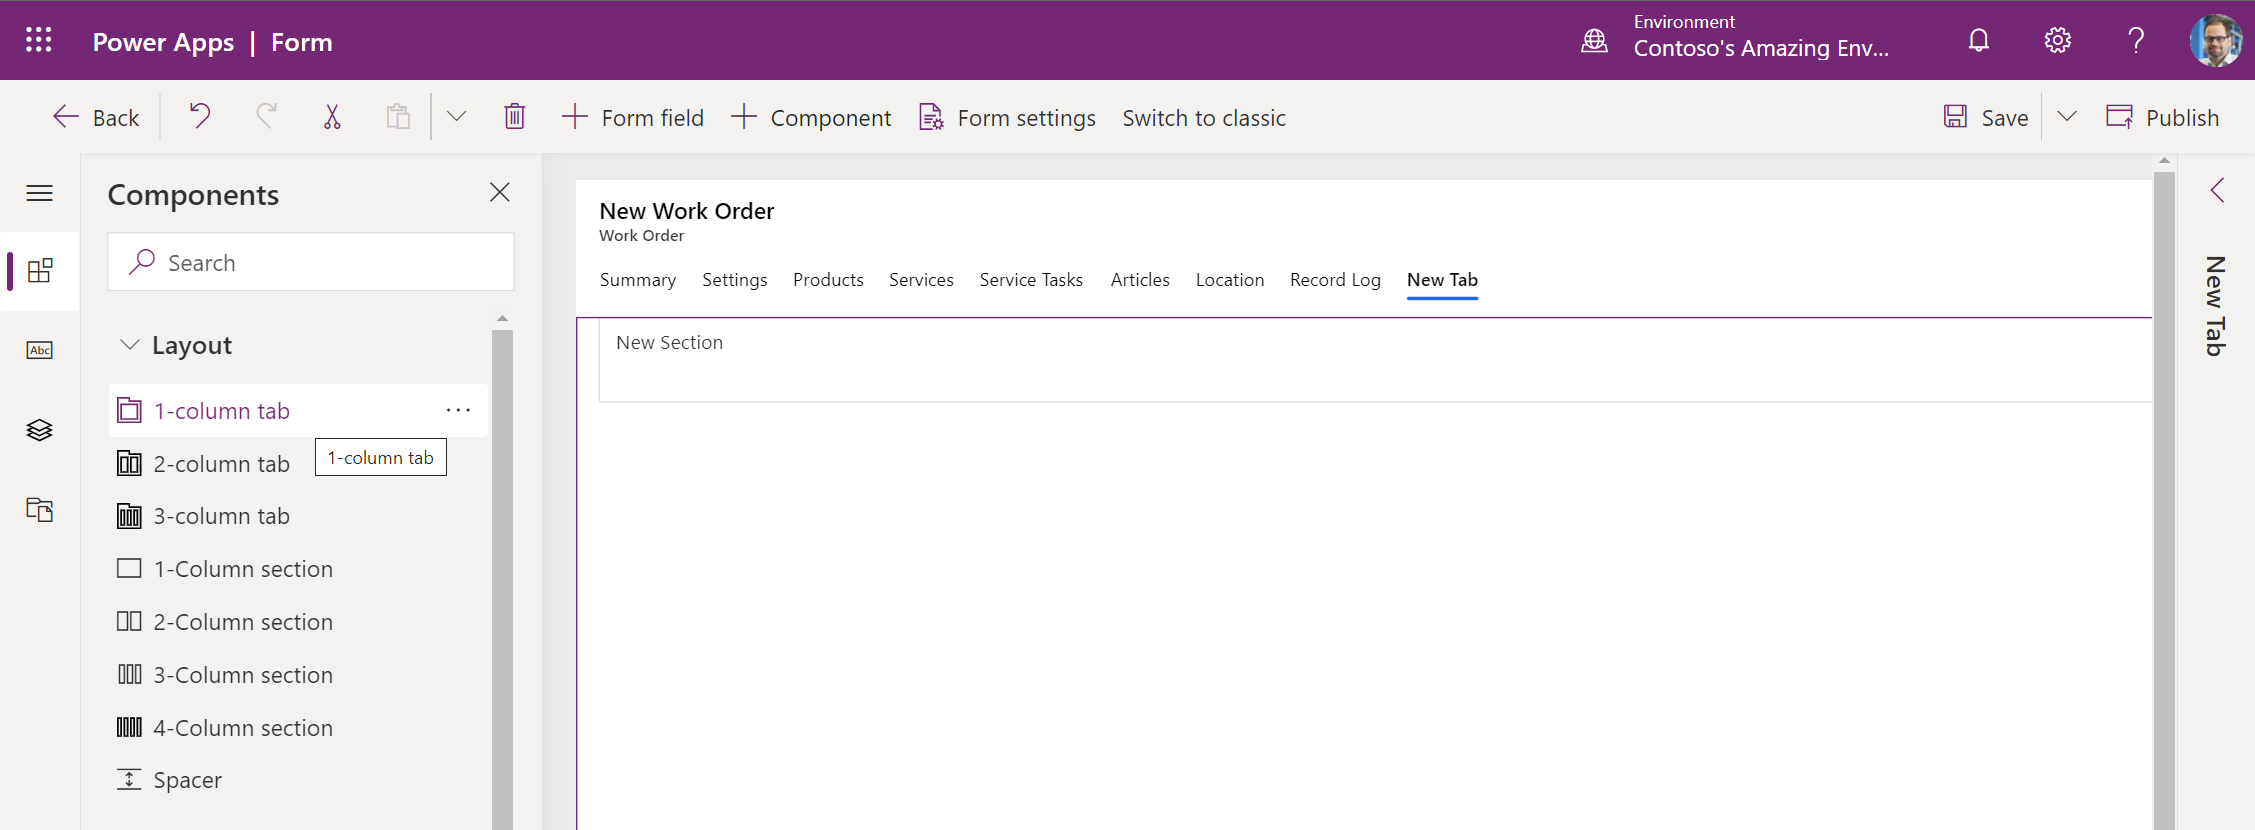
Rename the tab based on your business process.
When a new form tab is created, new sections are automatically created on it.
Add your custom fields to the new sections on the new tab. You can add new tabs and new sections as needed.
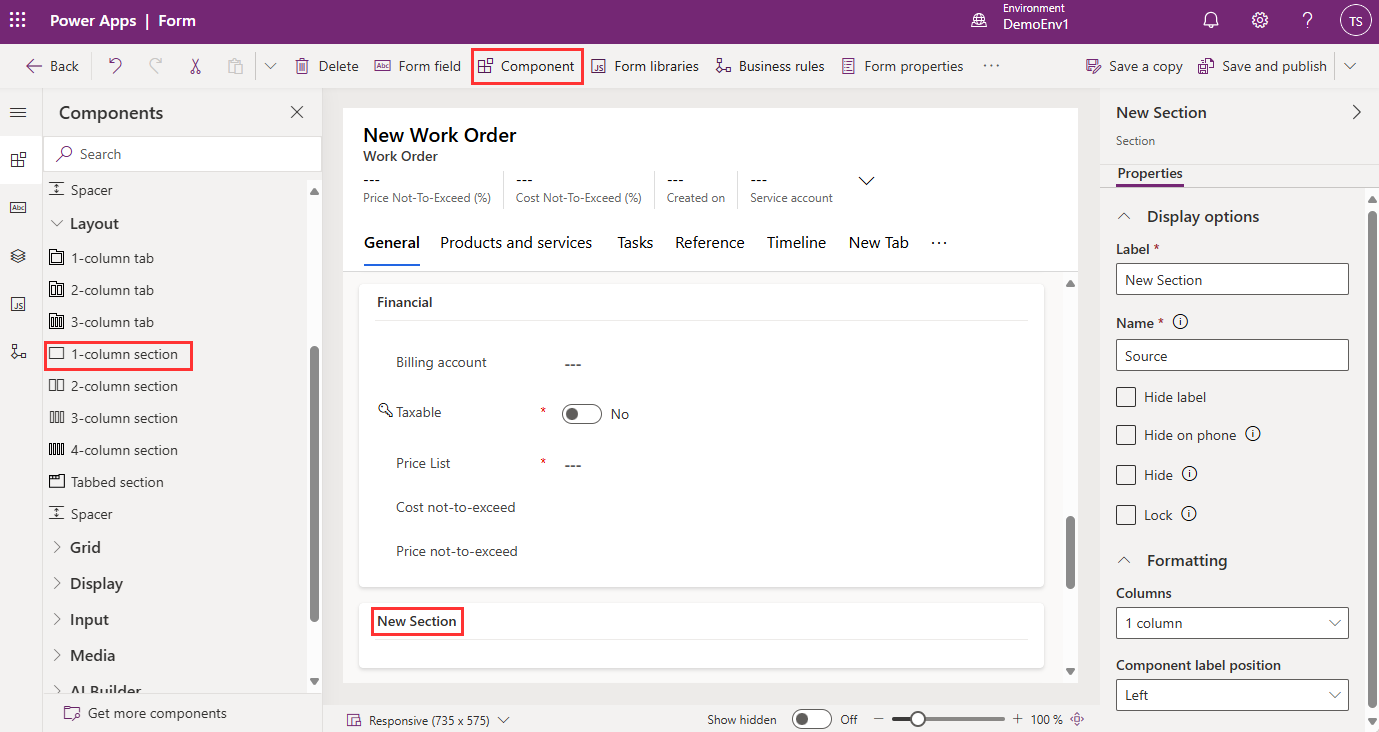
Add your custom fields to a new section (required)
In scenarios where you need custom fields on an existing tab, create a new section on the tab, and then add your custom fields to the new section.
Important
Don't add new custom fields to existing sections. You must create new sections. In addition, avoid adding new sections and custom fields to the first form tab (by default, the summary tab). Custom fields on the first tab cause form load times to be slower.
For example, you created a new section on the General tab of the work order form, and you want to add custom fields it.
To learn more about how to edit forms, go to Create, edit, or configure forms using the form designer.
Step 7. Test your forms with tools
To determine how factors such as browsers, network performance, and data queries affect app and form performance, run performance insights.
For help understanding the root cause of slow form load times, use the monitoring tool. Learn more in Use Monitor to troubleshoot model-driven app form behavior.
Form scripts
The work order form includes form script libraries. Don't edit or remove any out-of-box form libraries.
When the form is loaded, changed, and saved, many organizations run code scripts to perform validations and run processes. Form scripts can greatly affect aspects of form performance, such as load times. To learn more about best practices, including running solution checker to test scripts for issues, go to Write scripts to implement complex business logic.