Note
Access to this page requires authorization. You can try signing in or changing directories.
Access to this page requires authorization. You can try changing directories.
Important
This topic is pre-release documentation and is subject to change.
This article provides information on how to work with notes in a Teams meeting.
Overview
The following prerequisites must be met before you can work with notes in a linked record:
- The record must be linked to the meeting.
- The Dynamics 365 app must be added to the meeting.
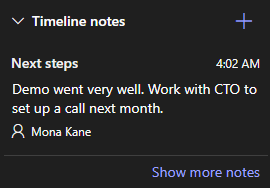
The latest note is displayed under the Notes section in the side panel. To view all notes, select Show more notes.
If you add, edit, or delete notes in the side panel, your changes are synced with the record in Dynamics 365.
Add a note
- In the Notes section, select
 .
. - In the Add note form, enter a title and description of the note.
- To attach a file, select Attach file.
- Select Save.
Edit a note
- In the Notes section, hover over the note, and then select
 .
. - In the Edit note form, update the title and description of the note as needed.
- Select Save.
Delete a note
- In the Notes section, hover over the note, and then select
 .
. - In the confirmation message, select Delete.
Related information
Enable Microsoft Teams meeting integration
Customize record details in the side panel
Integrate Dynamics 365 and Microsoft Teams meetings
Create a Teams meeting
Add the Dynamics 365 app to a Teams meeting
Work with the Dynamics 365 app
Join a Teams meeting
Work with tasks during a meeting
Work with activities during a meeting