Note
Access to this page requires authorization. You can try signing in or changing directories.
Access to this page requires authorization. You can try changing directories.
Note
Microsoft Sustainability Manager has been rebranded as Dynamics 365 Sustainability. This change reflects a new product name only. Product functionality, capabilities, licensing, and service offerings remain unchanged. Some screenshots and UI labels in this article may show the previous name while visuals are being updated.
Important
Some or all of this functionality is available as part of a preview release. The content and the functionality are subject to change. Preview features aren't intended for production use and might have restricted functionality. These features are subject to supplemental terms of use, and are available before an official release so that customers can get early access and provide feedback.
Note
This feature is included in Microsoft Dynamics 365 Sustainability Premium.
To improve data accuracy and oversight, route responses from data owners through a multilevel approval workflow. Create an approval policy and link it to your data collection requests. Adding an approval policy validates submissions and ensures accountability.
Configure and manage multilevel approvals
Sign in to Microsoft Dynamics 365 Sustainability as admin or data manager and follow these steps to configure and manage the approval process:
Step 1: Create an approval policy
In the left navigation pane, under Approvals, select Policies.
Select New to create a new approval policy.
Enter a name for the policy, and then select Save.
Select New Approval Policy Approver in the Approvers grid. For each approver, provide a name, select the team or individual assigned to that approval level, and specify their position in the approval sequence.
Note
For example, if the approval policy requires two levels, add two approvers and assign them sequence numbers 1 and 2.
Important
Approver teams or individuals can read/write approval record details. Enable approvers by assigning the Sustainability data approver role, as described in Assign security roles.
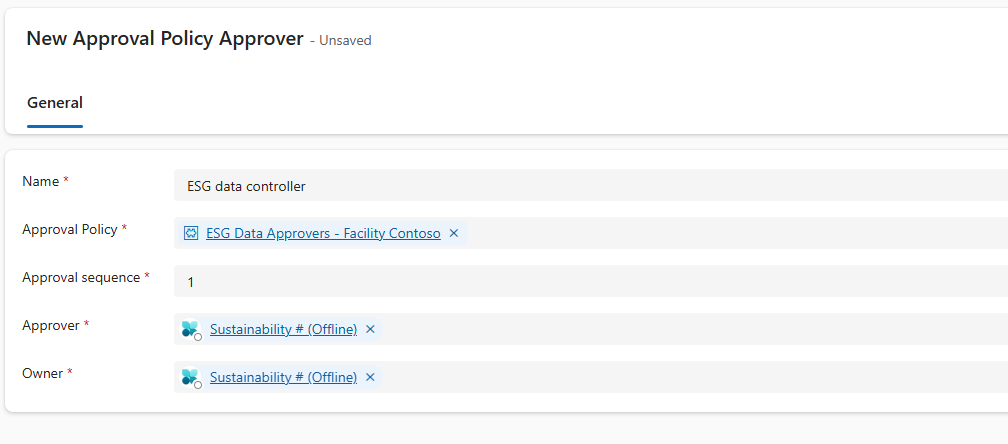
After you add all the approvers, select Save & Close.
Step 2: Assign approval policy to a data collection request
When creating a data request, select the appropriate approval policy in the Approval policy to use for responses field. If you select an approval policy, the system automatically routes responses through the designated approval workflow.
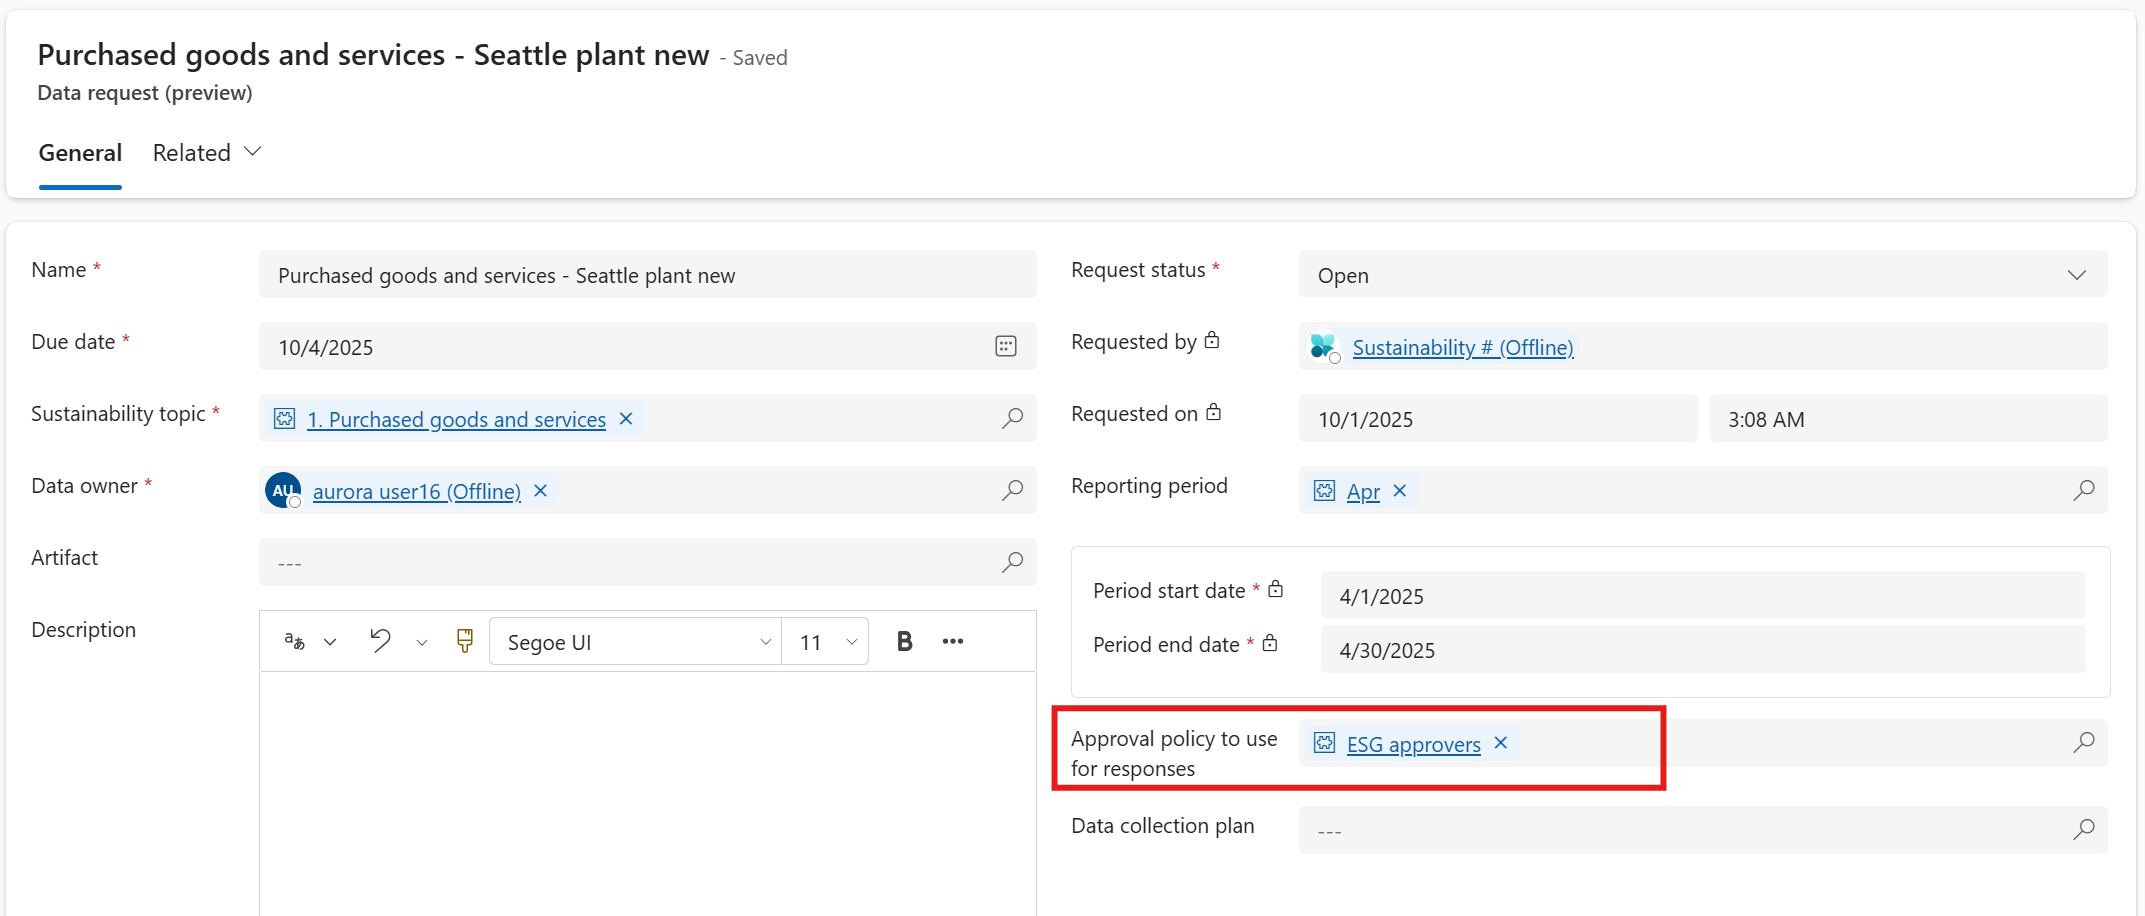
Step 3: Manage approvals
From the left navigation under the Approvals section, go to the Approvals tab. As an approver, you can start by filtering the records assigned to you by using the Approver column.
Select the approval artifact to view the submitted record. Select the artifact to review the data and verify any attached documents in the Documents section.
After the review is complete, return to the previous page and select the name of the record you reviewed.
Update the Approval status to either Approved or Rejected, and add your comments in the Approval message field. Select Save & close.
For multilevel approvals, the current approver’s record is marked Active, and subsequent approvers’ records are marked Pending.
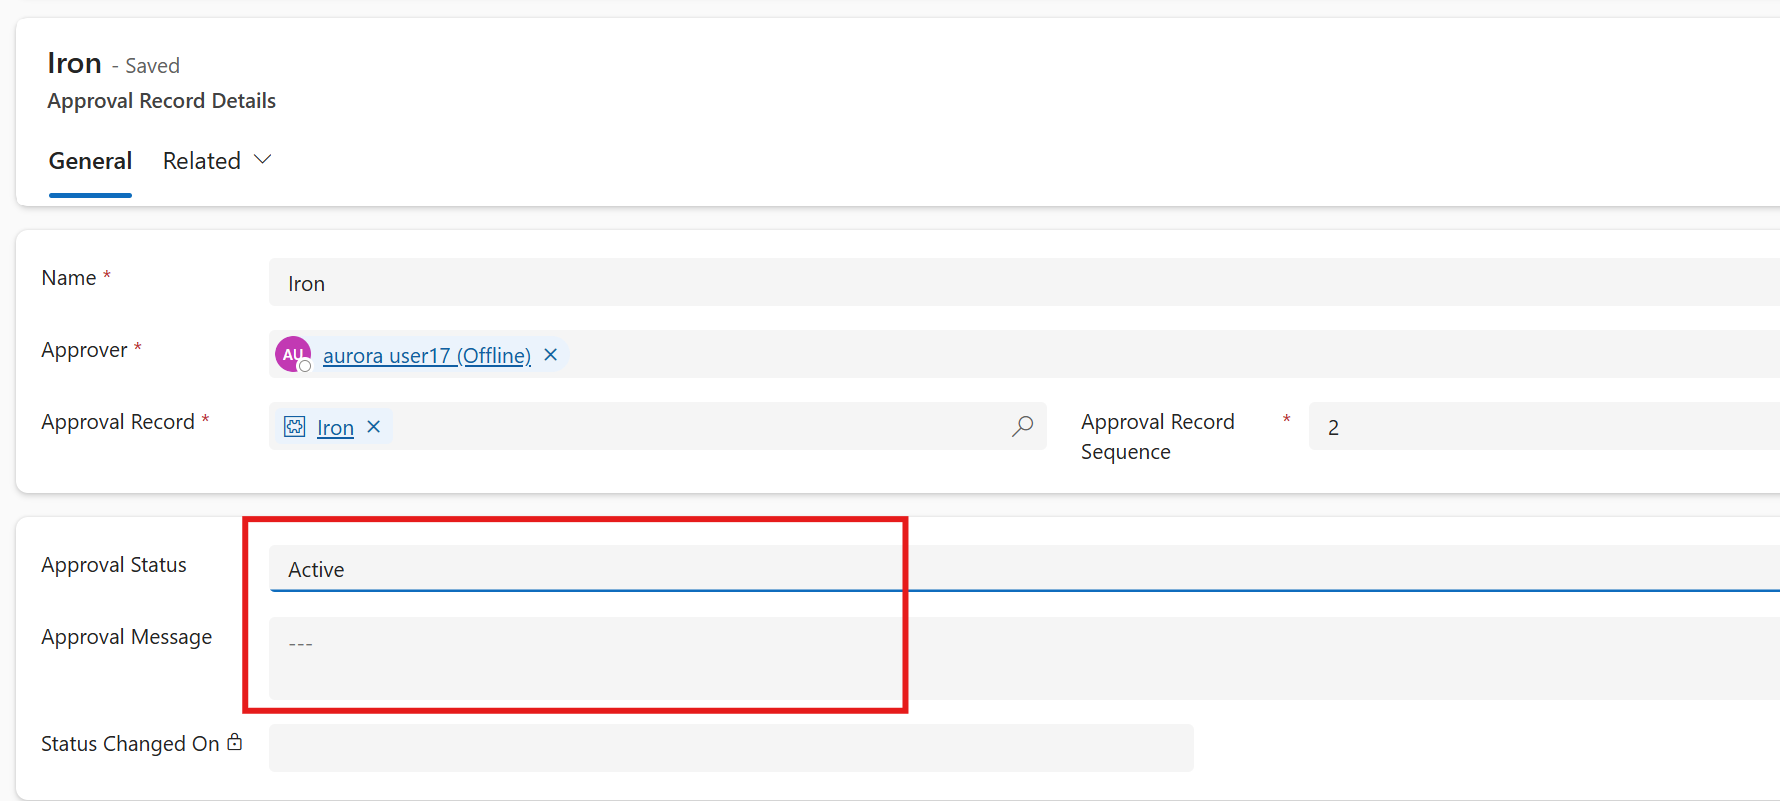
Note
If an approver rejects a record, all subsequent records in the approval sequence stay in Pending state but can't be approved. Approvals must follow the specified sequence and records can only be approved in the defined order.