Note
Access to this page requires authorization. You can try signing in or changing directories.
Access to this page requires authorization. You can try changing directories.
Remote networks are remote locations, such as a branch office, or networks that require internet connectivity. Setting up remote networks connects your users in remote locations to Global Secure Access. Once a remote network is configured, you can assign a traffic forwarding profile to manage your corporate network traffic. Global Secure Access provides remote network connectivity so you can apply network security policies to your outbound traffic.
There are multiple ways to connect remote networks to Global Secure Access. In a nutshell, you're creating an Internet Protocol Security (IPSec) tunnel between a core router, known as the customer premises equipment (CPE), at your remote network and the nearest Global Secure Access endpoint. All internet-bound traffic is routed through the core router of the remote network for security policy evaluation in the cloud. Installation of a client isn't required on individual devices.
This article explains how to create a remote network for Global Secure Access.
Prerequisites
To configure remote networks, you must have:
- A Global Secure Access Administrator role in Microsoft Entra ID.
- The product requires licensing. For details, see the licensing section of What is Global Secure Access. If needed, you can purchase licenses or get trial licenses.
- Customer premises equipment (CPE) must support the following protocols:
- Internet Protocol Security (IPSec)
- GCMEAES128, GCMAES 192, or GCMAES256 algorithms for Internet Key Exchange (IKE) phase 2 negotiation
- Internet Key Exchange Version 2 (IKEv2)
- Border Gateway Protocol (BGP)
- Review the valid configurations for setting up remote networks.
- Remote network connectivity solution uses RouteBased VPN configuration with any-to-any (wildcard or 0.0.0.0/0) traffic selectors. Make sure that your CPE has the correct traffic selector set.
- Remote network connectivity solution uses Responder modes. Your CPE must initiate the connection.
Known limitations
For detailed information about known issues and limitations, see Known limitations for Global Secure Access.
High-level steps
You can create a remote network in the Microsoft Entra admin center or through the Microsoft Graph API.
At a high level, there are five steps for creating a remote network and configuring an active IPsec tunnel:
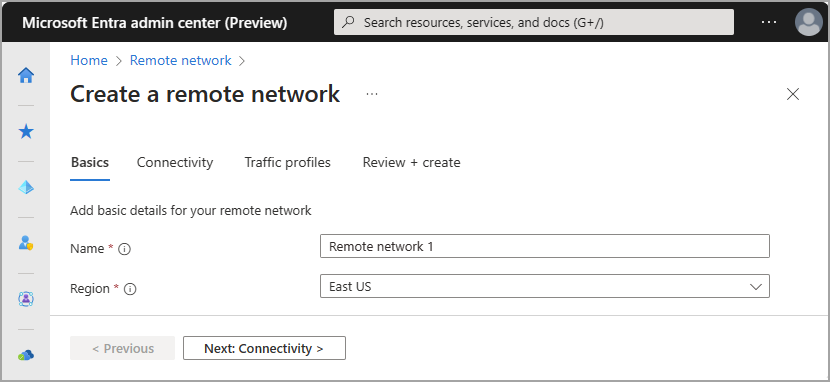
Basics: Enter the basic details like the Name and Region of your remote network. Region specifies where you want your other end of IPsec tunnel. The other end of the tunnel is your router or CPE.
Connectivity: Add a device link (or IPsec tunnel) to the remote network. In this step, you enter your router's details in the Microsoft Entra admin center, which tells Microsoft where to expect IKE negotiations to come from.
Traffic forwarding profile: Associate a traffic forwarding profile with the remote network, which specifies what traffic to acquire over the IPsec tunnel. We use dynamic routing through BGP.
View CPE connectivity configuration: Retrieve the IPsec tunnel details of Microsoft's end of the tunnel. On the Connectivity step, you provided your router's details to Microsoft. In this step, you retrieve Microsoft's side of the connectivity configuration.
Set up your CPE: Take Microsoft's connectivity configuration from the previous step and enter it in the management console of your router or CPE. This step isn't in the Microsoft Entra admin center.
Remote networks are configured on three tabs. You must complete each tab in order. After completing the tab either select the next tab from the top of the page, or select the Next button at the bottom of the page.
Basics
The first step is to provide the name and location of your remote network. Completing this tab is required.
- Sign in to the Microsoft Entra admin center as a Global Secure Access Administrator.
- Browse to Global Secure Access > Connect > Remote networks.
- Select the Create remote network button and provide the details.
- Name
- Region
Connectivity
The Connectivity tab is where you add the device links for the remote network. You can add device links after creating the remote network. You need to provide the device type, public IP address of your CPE, border gateway protocol (BGP) address, and autonomous system number (ASN) for each device link.
The details required to complete the Connectivity tab can be complex. For more information, see How to manage remote network device links.
Traffic forwarding profiles
You can assign the remote network to a traffic forwarding profile when you create the remote network. You can also assign the remote network at a later time. For more information, see Traffic forwarding profiles.
- Either select the Next button or select the Traffic profiles tab.
- Select the appropriate traffic forwarding profile.
- Select the Review + Create button.
The final tab in the process is to review all of the settings that you provided. Review the details provided here and select the Create remote network button.
View CPE connectivity configuration
All your remote networks appear on the Remote network page. Select the View configuration link in the Connectivity details column to view your configuration details.
These details contain the connectivity information from Microsoft's side of the bidirectional communication channel that you use to set up your CPE.
This process is covered in detail in the How to configure your customer premises equipment.
Set up your CPE
This step is performed in management console your CPE, not in Microsoft Entra admin center. Until you complete this step, your IPsec isn't set up. IPsec is a bidirectional communication. IKE negotiations happen between two parties before the tunnel is successfully set up. So, don't miss this step.
Verify your remote network configurations
There are a few things to consider and verify when creating remote networks. You might need to double-check some settings.
Verify IKE crypto profile: The crypto profile (IKE phase 1 and phase 2 algorithms) set for a device link should match what is set on the CPE. If you chose the default IKE policy, ensure that your CPE is set up with the crypto profile specified in the Remote network configurations reference article.
Verify pre-shared key: Compare the pre-shared key (PSK) you specified when creating the device link in Microsoft Global Secure Access with the PSK you specified on your CPE. This detail is added on the Security tab during the Add a link process. For more information, see How to manage remote network device links..
Verify local and peer BGP IP addresses: The public IP and BGP address you use to configure the CPE must match what you use when you create a device link in Microsoft Global Secure Access.
- Refer to the valid BGP addresses list for reserved values that can't be used.
- The local and peer BGP addresses are reversed between the CPE and what is entered in Global Secure Access.
- CPE: Local BGP IP address = IP1, Peer BGP IP address = IP2
- Global Secure Access: Local BGP IP address = IP2, Peer BGP IP address = IP1
- Choose an IP address for Global Secure Access that doesn't overlap with your on-premises network.
Verify ASN: Global Secure Access uses BGP to advertise routes between two autonomous systems: your network and Microsoft's. These autonomous systems should have different Autonomous System Numbers (ASNs).
- Refer to the valid ASN values list for reserved values that can't be used.
- When creating a remote network in the Microsoft Entra admin center, use your network's ASN.
- When configuring your CPE, use Microsoft's ASN. Go to Global Secure Access > Devices > Remote Networks. Select Links and confirm the value in the Link ASN column.
Verify your public IP address: In a test environment or lab setup, the public IP address of your CPE might change unexpectedly. This change can cause the IKE negotiation to fail even though everything remains the same.
- If you encounter this scenario, complete the following steps:
- Update the public IP address in the crypto profile of your CPE.
- Go to the Global Secure Access > Devices > Remote Networks.
- Select the appropriate remote network, delete the old tunnel, and recreate a new tunnel with the updated public IP address.
- If you encounter this scenario, complete the following steps:
Verify Microsoft's public IP address: When you delete a device link and/or create a new one, you might get another public IP endpoint of that link in View configuration for that remote network. This change can cause the IKE negotiation to fail. If you encounter this scenario, update the public IP address in the crypto profile of your CPE.
Verify BGP connectivity setting on your CPE: Suppose you create a device link for a remote network. Microsoft provides you with the public IP address, say PIP1, and BGP address, say BGP1, of its gateway. This connectivity information is available under
localConfigurationsin the jSON blob you see when you select View Configuration for that remote network. On your CPE, make sure that you have a static route destined to BGP1 sent over the tunnel interface created with PIP1. The route is necessary so that CPE can learn the BGP routes we publish over the IPsec tunnel you created with Microsoft.Verify firewall rules: Allow User Datagram Protocol (UDP) port 500 and 4500 and Transmission Control Protocol (TCP) port 179 for IPsec tunnel and BGP connectivity in your firewall.
Port forwarding: In some situations, the Internet Service Provider (ISP) router is also a network address translation (NAT) device. A NAT converts the private IP addresses of home devices to a public internet-routable device.
- Generally, a NAT device changes both the IP address and the port. This port changing is the root of the problem.
- For IPsec tunnels to work, Global Secure Access uses port 500. This port is where IKE negotiation happens.
- If the ISP router changes this port to something else, Global Secure Access can't identify this traffic and negotiation fails.
- As a result, phase 1 of IKE negotiation fails and the tunnel isn't established.
- To remediate this failure, complete the port forwarding on your device, which tells the ISP router to not change the port and forward it as-is.
Next steps
The next step for getting started with Microsoft Entra Internet Access is to target the Microsoft traffic profile with Conditional Access policy.
For more information about remote networks, see the following articles: