Note
Access to this page requires authorization. You can try signing in or changing directories.
Access to this page requires authorization. You can try changing directories.
In this article, we'll create an app that can take photos of a mixed-reality session and upload them to a folder on OneDrive. We'll use the View in MR control in this example, but the View shape in MR and Measuring camera controls would work as well.
We'll cover the following tasks:
- Adding a 3D object control to view and manipulate a sample 3D object
- Connecting the 3D object control to a View in MR control to view the 3D object in the real world
- Adding a gallery control to view photos taken with the View in MR control
- Uploading the photos to OneDrive with a Microsoft Power Automate flow
- Uploading photos captured in mixed-reality to Dataverse
Prerequisites
- Create a blank canvas app.
- Create a folder called MRPhotos on OneDrive. You'll use this folder to store your uploaded photos.
Tip
The mixed-reality (MR) controls work best in well-lit environments with flat-textured surfaces. Tracking is better on LIDAR-enabled devices.
Add a button to take a photo of a 3D object in mixed reality
This example has three parts. First, we'll add a button that lets users take a photo of a 3D object in a mixed reality experience.
Insert a 3D object control
With your app open for editing in Power Apps Studio:
Open the Insert tab and expand Media.
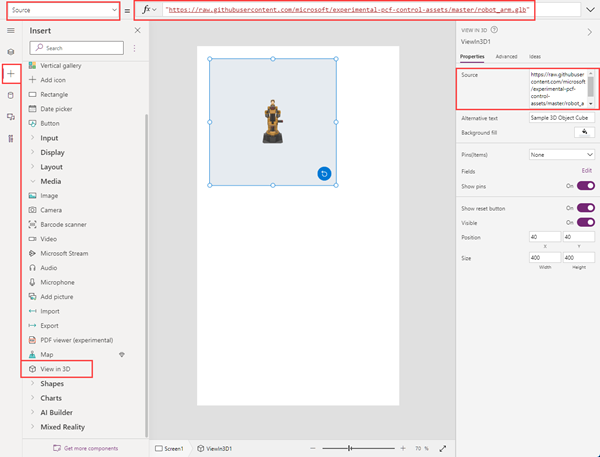
Select 3D object to place a 3D object on the app screen. Drag the control to the screen to position it more precisely.
The control comes with a transparent cube shape. If you like, change the control's Source property to load a different 3D model. In this example, we'll use the URL https://raw.githubusercontent.com/microsoft/experimental-pcf-control-assets/master/robot_arm.glb.
Insert and connect a View in MR control
Open the Insert tab and expand Mixed Reality.
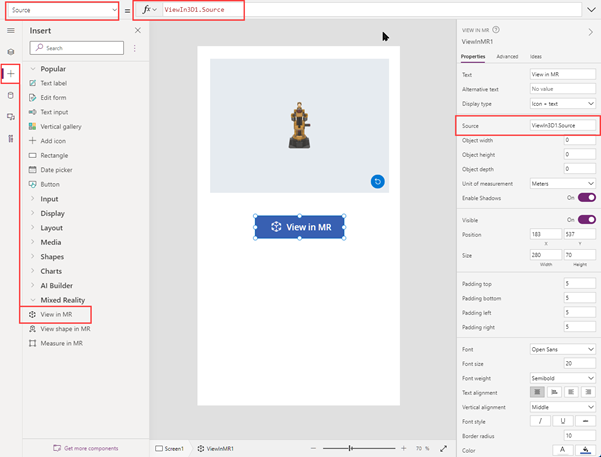
Select View in MR to place the control on the app screen, or drag the control to the screen to position it more precisely.
Change the control's Source property to 3DObject1.Source. (3DObject1 is the name of the 3D object control we added earlier.) This expression directs the View in MR control to overlay the 3D model on the device camera feed.
Select View in MR to view the 3D object in mixed reality. Select the camera icon to take a photo of the MR view.
Insert a gallery control to view photos taken in the app
Next, we'll add a gallery so users can view the photos they've taken.
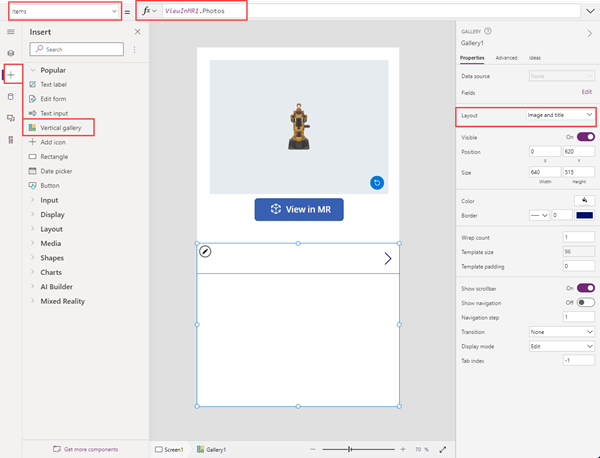
Edit your app again. Open the Insert tab and place a Vertical gallery control on the screen.
Change the control's Items property to ViewInMR1.Photos. (ViewInMR1 is the name of the View in MR control we added earlier.)
Optionally, change the gallery's Layout property to Image and title.
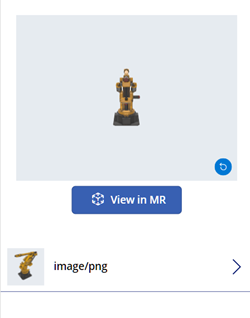
Preview the app and select View in MR to generate a sample photo. The gallery populates with a sample picture.
Note
If users exit the MR view to see the gallery, then enter the MR view again and take more photos, the new photos will replace the ones they took earlier.
Add a larger overlay to the thumbnail images in the gallery
To make the photos in the gallery easier to see, you can add a full-size overlay that appears when the user selects a thumbnail image.
Edit your app again. Open the Insert tab and expand Media.
Select Image to place an image control on the screen. Move and size it according to how you want the larger photo to appear when a thumbnail image is selected.
Change the image control's properties as follows: | Property | Value | | - | - | | OnSelect | UpdateContext({vVisibleImageZoom:false}) | | Image | Gallery1.Selected.Image2 (assuming the gallery control is Gallery1 and the first thumbnail image is Image2) | Visible | vVisibleImageZoom
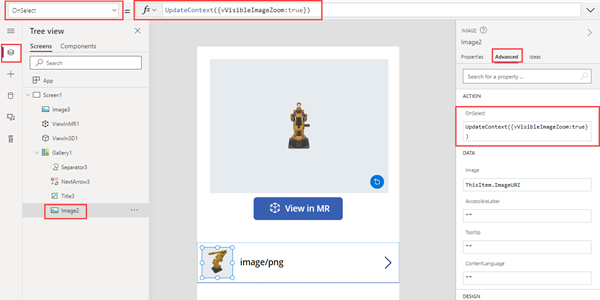
Select the first thumbnail image in the gallery control. Change its OnSelect property to UpdateContext({vVisibleImageZoom:true}).
Select View in MR, and then select the camera icon to take a photo. Select the back arrow at the top of the screen to exit the MR view.
Select the thumbnail in the gallery to show a larger version of the photo. Select the image to hide it.
Upload photos to OneDrive with a Power Automate flow
Last, we'll create a workflow using the Power Automate pane. The workflow uploads photos from the app to a folder named MRPhotos on OneDrive.
Create a flow in Power Automate
Edit your app. On the app authoring menu, select Power Automate > Create new flow.
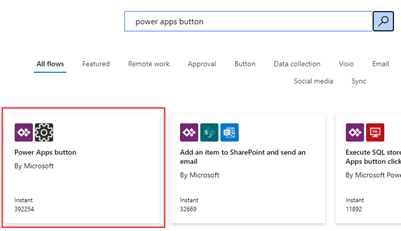
Search for and select the Power Apps button template.
In the Create your flow window, select Edit in advanced mode.
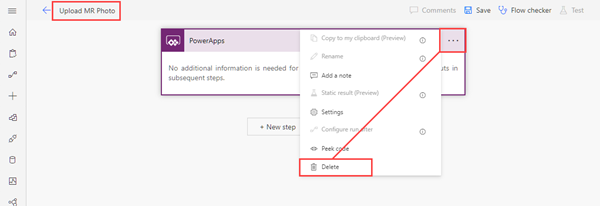
Select Power Apps button at the top of the window and enter a new name for your flow. In this example, we'll name the flow Upload MR Photo.

Select Power Apps button at the top of the window and enter a new name for your flow. In this example, we'll name the flow Upload MR Photo.
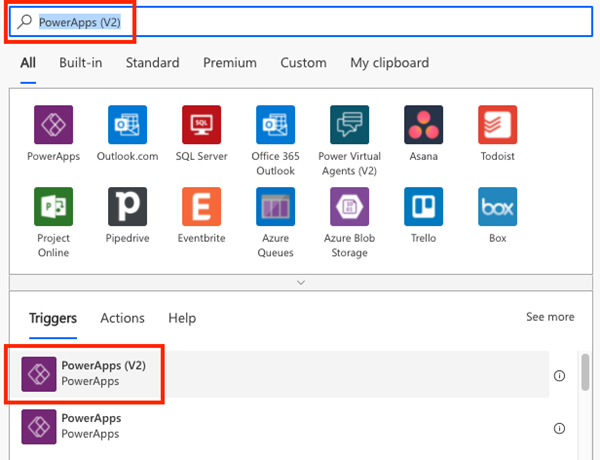
Search for PowerApps (V2) and select the PowerApps (V2) trigger.
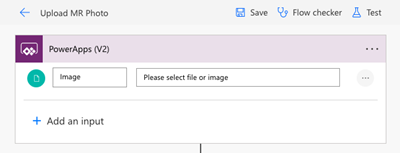
Select Add an input, and then select File.
Change the label File Content to Image.
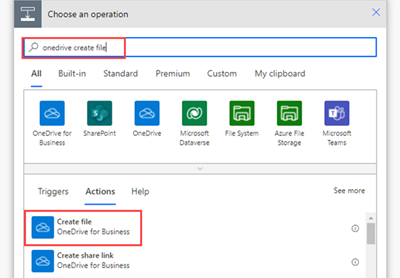
Select New step. Search for OneDrive Create file and select the Create file action.
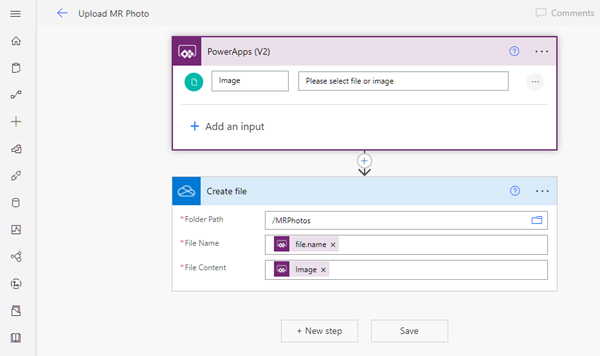
In Folder Path, select the folder icon and navigate to the MRPhotos folder you created earlier.
In File Name, enter @{triggerBody()?['file']?['name']} (Your text changes to "file.name.")
In File Content, enter @{triggerBody()['file']['contentBytes']} (Your text changes to "Image.")
Save your flow.
The complete flow should look like this:
Connect the workflow to a button in your app
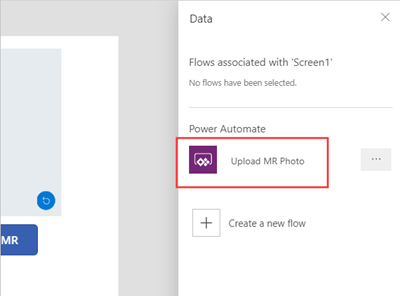
Return to your app in Power Apps Studio. Your flow is now listed under Available flows.
Open the Insert tab and select Button. Place the button control on the screen and resize it as needed.
Change the button control's Text property to Upload photos.
In the formula bar at the top of the Power Apps window, select the OnSelect property. Select Action > Power Automate > Upload MR Photo.

The button control's OnSelect property changes to UploadMRPhoto.Run(.
To upload the last photo taken, paste the following code after the opening parenthesis: {file:{name:GUID() & ".png", contentBytes:Last(ViewInMR1.Photos).ImageURI}})

If you placed the button control inside the gallery, paste the following code instead: {file: {name:GUID() & ".png", contentBytes:ThisItem.ImageURI}})

To make the button upload all the photos taken, delete UploadMRPhoto.Run( and paste the following code: ForAll(ViewInMR1.Photos, UploadMRPhoto.Run({file:{name:GUID() & ".png", contentBytes:ImageURI}}))

Preview the app and select View in MR, and then select Upload photos. Check the MRPhotos folder on OneDrive and confirm that the sample photo has been uploaded.
Add offline capability to your app
You can use your app even when you have limited or no network connectivity using the SaveData and LoadData functions.
Upload photos captured in mixed-reality to Dataverse
You can add photos to Dataverse tables through an Image data type column. Image columns in Dataverse have two required fields - Full and Value - which can be set to the ImageURI output of the MR controls.
For example, if you wanted to upload the first photo captured by the Markup in MR control to a Dataverse column called Image:
Image: {Full: First(MarkupInMR.Photos).ImageURI, Value: First(MarkupInMR.Photos).ImageURI}