Copilot의 모양과 느낌 사용자 지정
중요
Power Virtual Agents 기능 및 특징은 생성 AI에 대한 막대한 투자와 Microsoft Copilot 전반의 향상된 통합에 따라 이제 Microsoft Copilot Studio의 일부가 되었습니다.
문서 및 교육 콘텐츠를 업데이트하는 동안 일부 문서와 스크린샷에서는 Power Virtual Agents을 참조할 수 있습니다.
Copilot의 모양과 느낌은 캔버스에 의해 정의됩니다. Copilot을 사용자 지정하려면 캔버스를 사용자 지정해야 합니다. 사용자 지정의 복잡성에 따라 두 가지 방법으로 캔버스를 사용자 지정할 수 있습니다.
Copilot을 배포하는 웹 사이트에 대한 HTML 코드에서 JavaScript 스타일을 사용하여 기본 캔버스를 사용자 지정합니다.
이 접근 방식은 코드 개발에 투자하지 않고 소규모 사용자 지정을 수행하려는 경우에 유용합니다.Bot Framework 웹 채팅 캔버스를 기반으로 한 사용자 지정 캔버스를 사용합니다.
이 접근 방식에는 광범위한 개발자 지식이 필요합니다. 완전히 맞춤화된 경험을 원하는 조직에 유용합니다.
중요
Microsoft Copilot Studio와 함께 사용하기 위해서만 이 문서에 포함된 샘플 코드를 설치하고 사용할 수 있습니다. 샘플 코드는 "있는 그대로" 라이선스가 부여되며 서비스 수준 약정 또는 지원 서비스에서 제외됩니다. 이 문서의 사용으로 발생하는 위험은 귀하의 책임입니다.
Microsoft는 어떠한 명시적 보증, 보장 또는 조건을 제공하지 않으며 상품성, 특정 목적에의 적합성 및 비침해를 비롯한 모든 묵시적 보증을 제외합니다.
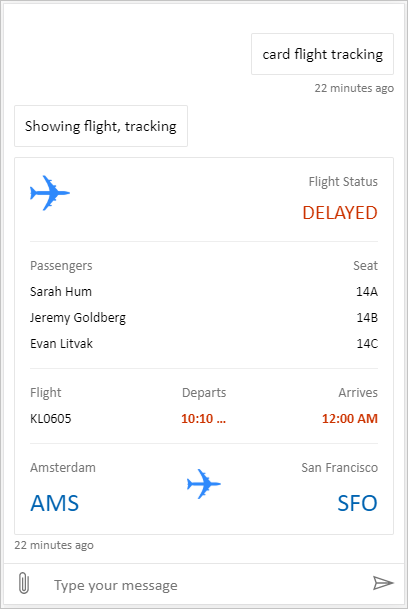
Copilot을 만들고 게시한 후 고객은 Copilot의 웹 채팅 캔버스를 사용하여 이와 상호 작용할 수 있습니다.
또한 사용자 정의된 캔버스를 Copilot 구성과 결합하여 대화를 자동으로 시작할 수 있습니다.
마지막으로 포털에서 직접 Copilot의 이름과 아이콘을 변경할 수 있습니다(Microsoft Teams에서 공유된 경우).
Copilot 이름 및 아이콘 변경
중요
Copilot이 Customer Service용 옴니채널에 연결된 경우 해당 이름은 Azure Portal 등록의 표시 이름 속성에 의해 정의됩니다.
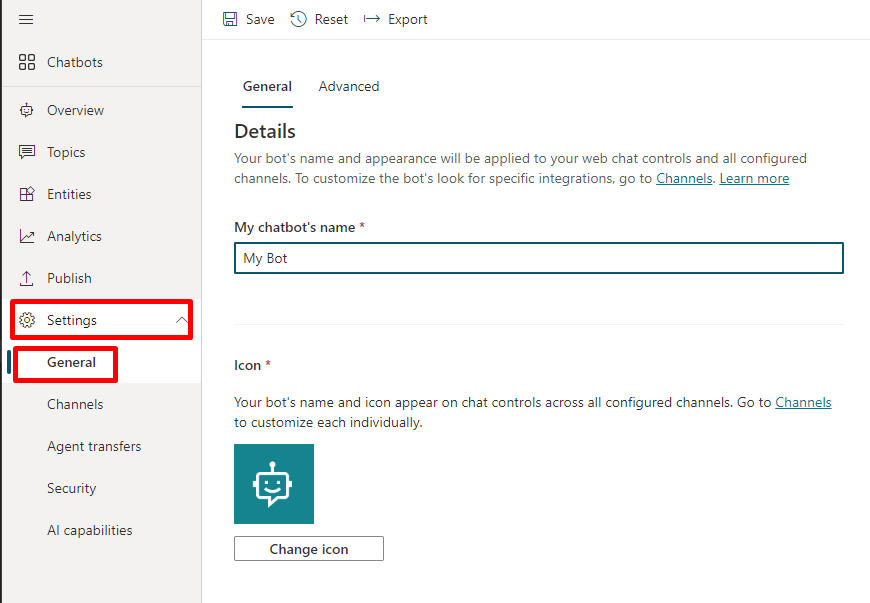
Copilot의 이름과 아이콘을 변경할 수 있습니다. 이는 Copilot을 게시하는 모든 채널의 아이콘에 영향을 줍니다.
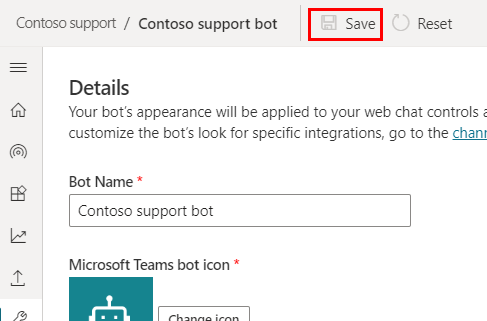
탐색 메뉴에서 설정 아래의 세부 정보를 선택합니다.
Copilot의 이름 및 아이콘을 변경합니다. Microsoft Teams 아이콘 형식의 권장 사항 검토
저장을 선택하여 변경 내용을 커밋합니다.
중요
Copilot의 아이콘을 업데이트한 후 새 아이콘이 모든 곳에 나타나는 데 최대 24시간이 걸릴 수 있습니다.
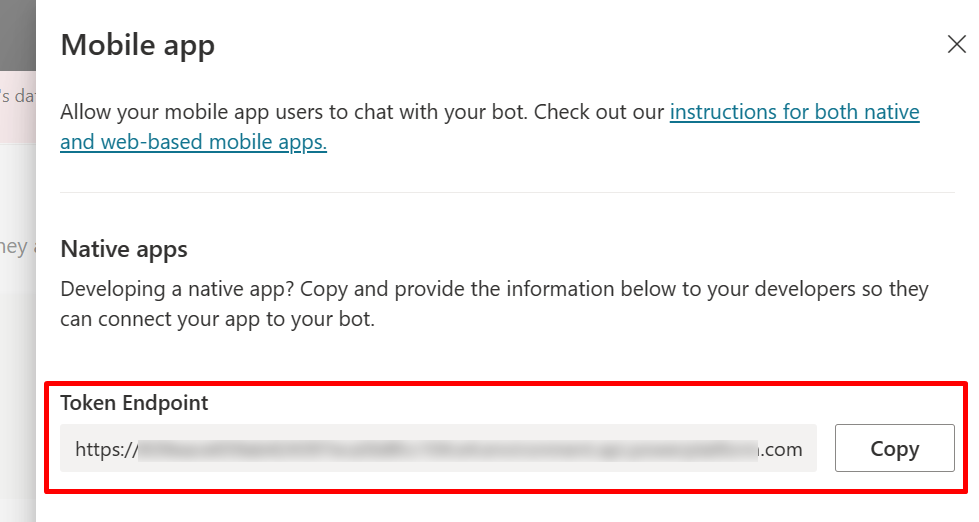
토큰 엔드포인트 검색
캔버스가 기본 캔버스인지 또는 사용자 지정 캔버스인지에 관계없이 캔버스를 사용자 지정하려면 Copilot 세부 정보를 검색해야 합니다.
탐색 메뉴에서 설정 아래의 채널을 선택합니다.
모바일 앱을 선택합니다.
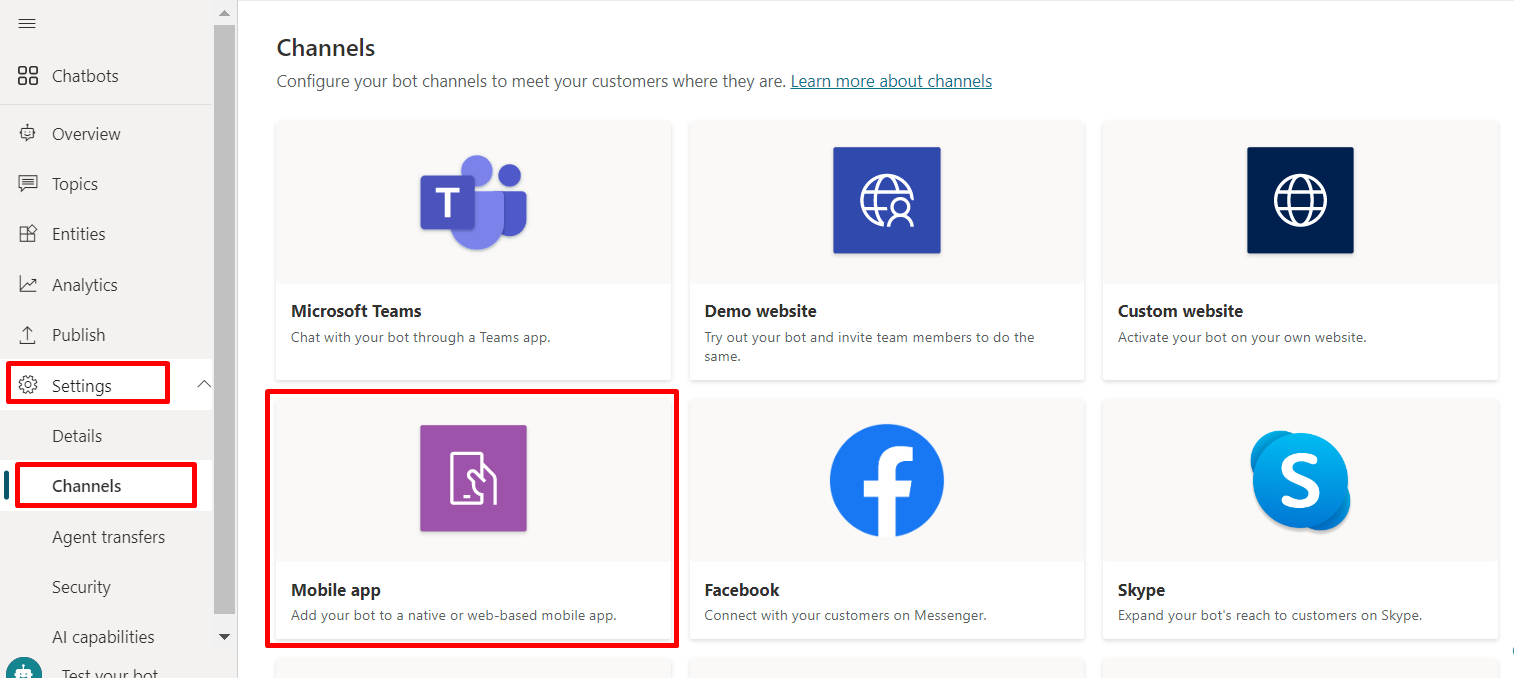
토큰 엔드포인트 옆에 있는 복사를 선택합니다.
기본 캔버스 사용자 지정(단순)
몇 가지 단순한 CSS 및 JavaScript 스타일 지정 옵션으로 채팅 캔버스의 모습을 구성할 수 있습니다.
먼저 Copilot 캔버스를 배포할 위치를 구성해야 합니다.
아래 HTML 코드를 복사하여 붙여 넣고 index.html로 저장하십시오.
아래 코드를 복사하여 w3schools.com HTML 체험 편집기에 붙여 넣을 수도 있습니다. 여전히 토큰 엔드포인트를 추가해야 합니다.<!doctype html> <html lang="en"> <head> <title>Contoso Sample Web Chat</title> <!-- This styling is for the Web Chat demonstration purposes. It is recommended that style is moved to a separate file for organization in larger projects. Please visit https://github.com/microsoft/BotFramework-WebChat for details about Web Chat. --> <style> html, body { height: 100%; } body { margin: 0; } h1 { color: whitesmoke; font-family: Segoe UI; font-size: 16px; line-height: 20px; margin: 0; padding: 0 20px; } #banner { align-items: center; background-color: black; display: flex; height: 50px; } #webchat { height: calc(100% - 50px); overflow: hidden; position: fixed; top: 50px; width: 100%; } </style> </head> <body> <div> <div id="banner"> <h1>Contoso copilot name</h1> </div> <div id="webchat" role="main"></div> </div> <!-- In this sample, the latest version of Web Chat is being used. In production environment, the version number should be pinned and version bump should be done frequently. Please visit https://github.com/microsoft/BotFramework-WebChat/tree/main/CHANGELOG.md for changelog. --> <script crossorigin="anonymous" src="https://cdn.botframework.com/botframework-webchat/latest/webchat.js"></script> <script> (async function () { // Specifies style options to customize the Web Chat canvas. // Please visit https://microsoft.github.io/BotFramework-WebChat for customization samples. const styleOptions = { // Hide upload button. hideUploadButton: true }; // Specifies the token endpoint URL. // To get this value, visit Copilot Studio > Settings > Channels > Mobile app page. const tokenEndpointURL = new URL('<COPILOT TOKEN ENDPOINT>'); // Specifies the language the copilot and Web Chat should display in: // - (Recommended) To match the page language, set it to document.documentElement.lang // - To use current user language, set it to navigator.language with a fallback language // - To use another language, set it to supported Unicode locale // Setting page language is highly recommended. // When page language is set, browsers will use native font for the respective language. const locale = document.documentElement.lang || 'en'; // Uses language specified in <html> element and fallback to English (United States). // const locale = navigator.language || 'ja-JP'; // Uses user preferred language and fallback to Japanese. // const locale = 'zh-HAnt'; // Always use Chinese (Traditional). const apiVersion = tokenEndpointURL.searchParams.get('api-version'); const [directLineURL, token] = await Promise.all([ fetch(new URL(`/powervirtualagents/regionalchannelsettings?api-version=${apiVersion}`, tokenEndpointURL)) .then(response => { if (!response.ok) { throw new Error('Failed to retrieve regional channel settings.'); } return response.json(); }) .then(({ channelUrlsById: { directline } }) => directline), fetch(tokenEndpointURL) .then(response => { if (!response.ok) { throw new Error('Failed to retrieve Direct Line token.'); } return response.json(); }) .then(({ token }) => token) ]); // The "token" variable is the credentials for accessing the current conversation. // To maintain conversation across page navigation, save and reuse the token. // The token could have access to sensitive information about the user. // It must be treated like user password. const directLine = WebChat.createDirectLine({ domain: new URL('v3/directline', directLineURL), token }); // Sends "startConversation" event when the connection is established. const subscription = directLine.connectionStatus$.subscribe({ next(value) { if (value === 2) { directLine .postActivity({ localTimezone: Intl.DateTimeFormat().resolvedOptions().timeZone, locale, name: 'startConversation', type: 'event' }) .subscribe(); // Only send the event once, unsubscribe after the event is sent. subscription.unsubscribe(); } } }); WebChat.renderWebChat({ directLine, locale, styleOptions }, document.getElementById('webchat')); })(); </script> </body> </html>자신이 만든 index.html 파일의
const tokenEndpointURL = "<YOUR TOKEN ENDPOINT>";줄에 토큰 엔드포인트를 입력합니다.최신 브라우저(예: Microsoft Edge)를 사용하여 index.html을 열고 사용자 지정 캔버스에서 Copilot을 엽니다.
Copilot을 테스트하여 Copilot으로부터 응답을 받고 있으며 제대로 작동하는지 확인하십시오.
문제가 발생하면 Copilot을 게시했는지, 토큰 엔드포인트가 올바른 위치에 삽입되었는지 확인하십시오.
const tokenEndpointURL = "<YOUR TOKEN ENDPOINT>"줄에서 등호(=) 뒤에 있어야 하며, 큰 따옴표(") 안에 있어야 합니다.
Copilot 아이콘, 배경색 및 이름 사용자 지정
사용자 지정 캔버스가 Copilot과 작동하게 되면 이를 변경할 수 있습니다.
JavaScript styleOptions 옵션을 사용하여 여러 사전 정의된 스타일을 구성할 수 있습니다.
defaultStyleOptions.js 파일 링크에 대한 웹 채팅 사용자 지정과 사용자 지정할 수 있는 항목 및 표시 방법에 대한 자세한 정보를 확인하세요.
Copilot 아이콘 변경
다음 샘플 코드로 index.html 파일을 업데이트합니다.
const styleOptions = {
  accent: '#00809d',
  botAvatarBackgroundColor: '#FFFFFF',
  botAvatarImage: 'https://learn.microsoft.com/azure/bot-service/v4sdk/media/logo_bot.svg',
  botAvatarInitials: 'BT',
  userAvatarImage: 'https://avatars.githubusercontent.com/u/661465'
};
Copilot과 사용자 아바타 이미지를 회사 이미지로 교체하세요.
이미지 URL이 없는 경우 대신 Base64로 인코딩된 이미지 문자열을 사용할 수 있습니다.
배경 색상을 변경합니다.
다음 샘플 코드로 index.html 파일을 업데이트합니다.
const styleOptions = {
  backgroundColor: 'lightgray'
};
원하는 색상으로
backgroundColor를 변경합니다. 표준 CSS 색상 이름, RGB 값 또는 16진수를 사용할 수 있습니다.
Copilot 이름 변경
index.html 파일의
<h1>텍스트를 다음으로 업데이트합니다.<body> <div id="banner"> <h1><img src="contosocopilot-teams.png"> Contoso copilot name</h1> </div>Copilot을 지칭하려는 텍스트로 변경합니다. 머리글 섹션에 맞도록 스타일을 지정해야 할 수도 있지만 이미지를 삽입할 수도 있습니다.
채팅 캔버스 사용자 지정 및 호스팅(고급)
독립형 웹앱으로 호스팅되는 사용자 지정 캔버스와 Copilot Studio Copilot을 연결할 수 있습니다. 이 옵션은 여러 웹 페이지에서 사용자 지정 iFrame를 포함해야 하는 경우에 가장 좋습니다.
노트
사용자 지정 캔버스를 호스팅하려면 소프트웨어 개발이 필요합니다. 여기의 지침은 개발자 도구, 유틸리티 및 IDE에 대해 잘 알고 있는 IT 관리자나 개발자와 같은 숙련된 IT 전문가를 대상으로 합니다.
사용자 지정할 샘플 선택
Copilot Studio로 작업하기 위해 맞춤 빌드된 다음 샘플 중 하나를 사용하는 것이 좋습니다.
전체 번들은 Copilot Studio의 모든 풍부한 콘텐츠를 표시할 수 있는 사용자 지정 캔버스입니다. 예:
위치 및 파일 업로드는 사용자의 위치를 가져와 Copilot Studio Copilot에게 보낼 수 있는 사용자 지정 캔버스입니다. 예:

또는 Bot Framework에서 제공되는 다른 샘플 웹 채팅 캔버스를 사용할 수 있습니다.
styleSetOptions를 사용하여 캔버스 사용자 지정
기본 캔버스 사용자 지정과 마찬가지로 styleSetOptions를 사용하여 사용자 지정 캔버스를 사용자 지정할 수 있습니다. 모든 사용자 지정 가능한 속성은 defaultStyleOptions.js에 나열됩니다. 사용자 지정할 수 있는 내용과 모습에 대한 자세한 내용은 웹 채팅 사용자 지정을 참조하세요.
맞춤형 캔버스 배포
사용자 지정 캔버스를 호스팅하려면 모든 파일을 웹앱에 배포하십시오.
관련 항목
피드백
출시 예정: 2024년 내내 콘텐츠에 대한 피드백 메커니즘으로 GitHub 문제를 단계적으로 폐지하고 이를 새로운 피드백 시스템으로 바꿀 예정입니다. 자세한 내용은 다음을 참조하세요. https://aka.ms/ContentUserFeedback
다음에 대한 사용자 의견 제출 및 보기