Note
Access to this page requires authorization. You can try signing in or changing directories.
Access to this page requires authorization. You can try changing directories.
After deploying the Defender for Servers plan in Microsoft Defender for Cloud, you can check which machines are protected by the plan, and configure plan settings as needed.
Check machine protection
Find machines protected by the plan.
In Defender for Cloud, select Inventory.
In the Resource Type query, you can filter the inventory to narrow down results to resources supported by Defender for Servers. For example:
- Use the Resource type query to find virtual machines, AWS EC2 instances, and GCP Compute instances.
- Use the Environment query to narrow down to Azure, AWS, or GCP resources.
In the virtual machine list, review the Defender for Cloud column:
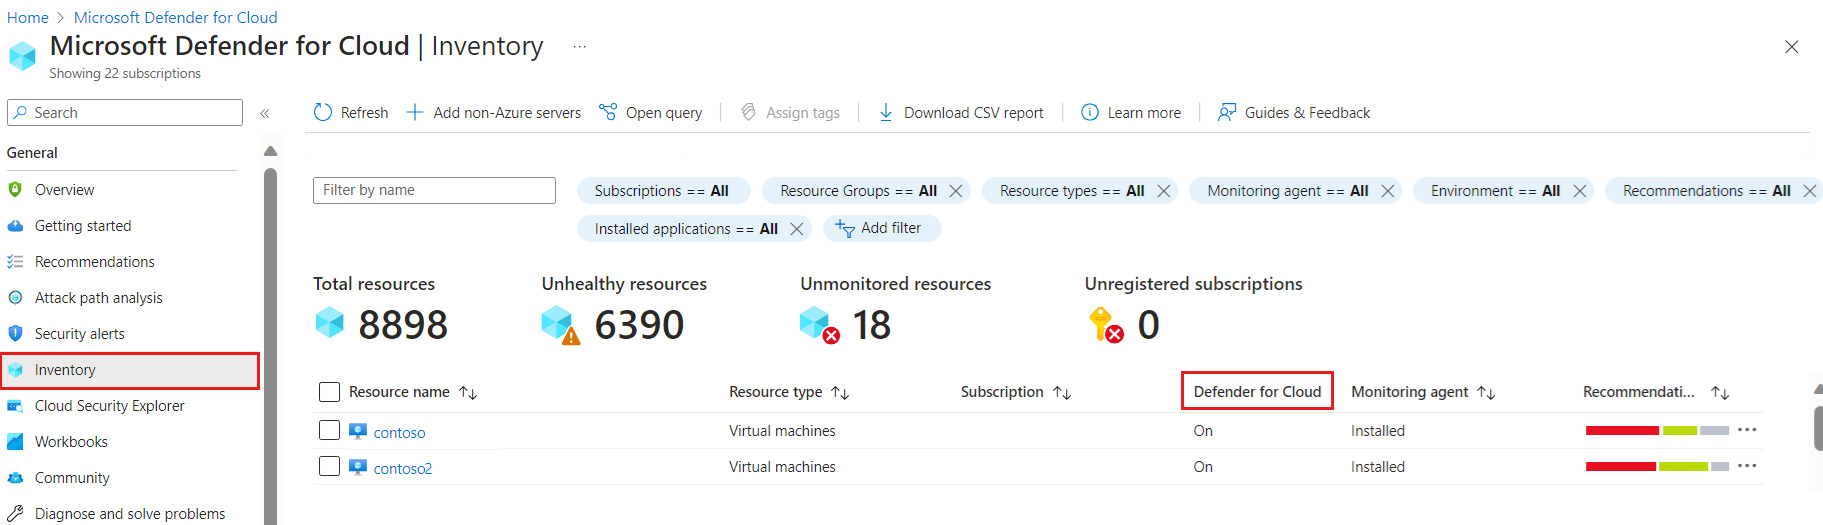
If the column setting is On, then Defender for Cloud is enabled, along with any plans switched on in Defender for Cloud, including Defender for Servers.

You can also check protection coverage for all subscriptions and resources using the Coverage workbook.
Modify plan settings
Some features are turned on by default when you enable Defender for Servers. You can modify plan features manually as follows:
In subscription enabled for Defender for Cloud, select Environment settings.
Locate Defender for Servers and select Settings.
In Settings and monitoring, select the setting you want to modify.
Feature Details Modify plan Vulnerability assessment When you enable Defender for Servers Plan 1 (P1) or Plan 2 (P2), vulnerability scanning is enabled by default. Manually configure vulnerability scanning settings. Endpoint protection. When you enable Defender for Servers Plan 1 (P1) or 2 (P2), Defender for Endpoint is integrated by default. Protection features from Defender for Endpoint are available. Automatic provisioning of the Defender for Endpoint agent on connected machines is enabled. Turn endpoint protection on and off in a plan. Agentless scanning Agentless scanning provides a number of scanning capabilities. It's enabled by default when Defender for Servers Plan 2 (or the Defender Cloud Security Posture Management (CSPM) plan) is turned on. Turn agentless scanning on and off, and exclude machines from agentless scanning. File integrity monitoring When you enable Defender for Servers Plan 2, you can turn on file integrity monitoring. It's not turned on by default Learn about and enable file integrity monitoring