Note
Access to this page requires authorization. You can try signing in or changing directories.
Access to this page requires authorization. You can try changing directories.
Azure Device Registry uses jobs to apply software updates to groups of IoT Hub-connected devices. A software update job targets a group of devices and applies a software update to the compatible members of that group. In contrast, an onboarding update job targets devices that onboard to a namespace. Deploying a software update as a job lets you roll out the same update to many devices at once, so you can keep your IoT Hub-connected devices current without updating each device individually.
This article shows you how to define or validate a target group, use the Azure portal or Bicep to create a standard software update job, run or schedule the job, and monitor the results. Use this article after you import the software update that you want to apply. To learn how jobs, groups, and software updates work together, see Software updates in Azure Device Registry.
Important
Azure Device Registry software updates is currently in preview. The current preview is scoped to IoT Hub-connected devices. This preview is provided without a service-level agreement, and the capability and its portal experience might change before it becomes generally available. For more information, see Supplemental Terms of Use for Microsoft Azure Previews.
Note
During the preview, you can use software updates only with IoT hubs that don't have an existing Device Update for IoT Hub instance. To use software updates, link an IoT hub without a Device Update for IoT Hub instance to your namespace, or delete the existing instance before you link the hub. For more information, see Software updates and Device Update for IoT Hub.
Prerequisites
- IoT Hub-connected devices whose properties identify the devices that you want to update. Use these properties to define the target group.
- A software update imported into the namespace. To learn more, see Import a software update (preview).
- Software updates enabled on the namespace that contains your devices. To learn more, see Get started with Azure Device Registry.
- Azure Resource Manager control-plane permissions, such as the Contributor role, to create, read, update, and delete jobs.
- To run jobs, the namespace's managed identity must have access to the software updates instance that's linked to the namespace. If you enable software updates in the Azure portal, these role assignments are created for you.
Define or validate the target group
A software update job targets a group instead of every device in the namespace. Create a group with a filter that selects only the IoT Hub-connected devices that should receive the update, or reuse an existing group whose membership matches that scope. For example, use device properties such as manufacturer, model, or software revision to target a specific device cohort. Use the Azure portal or Bicep to create the group.
To create a group in the Azure portal:
In the namespace navigation, open Operations > Groups (preview), and then start group creation from the command bar.
On the Basics page, enter a descriptive Name and, optionally, a Description that identifies the intended device cohort.
On the Definition page, under Define filter conditions, enter a query that selects the IoT Hub-connected devices that you want to update.
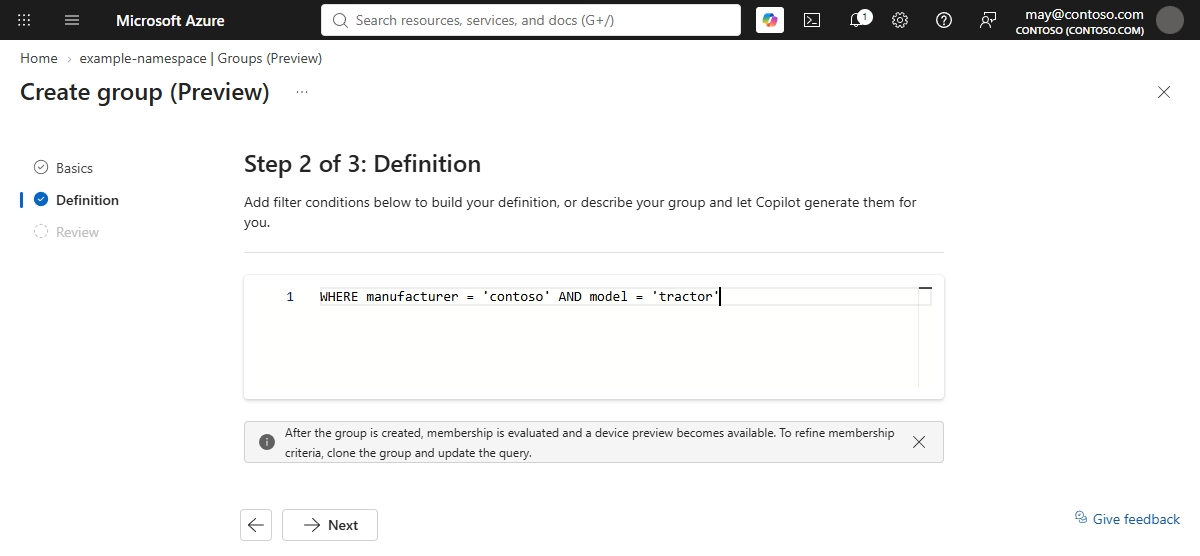
Group filters are immutable after creation. To use different membership criteria, create another group with a different query.
On the Review page, verify the Basics, Definition, and Query filter, and then select Create.
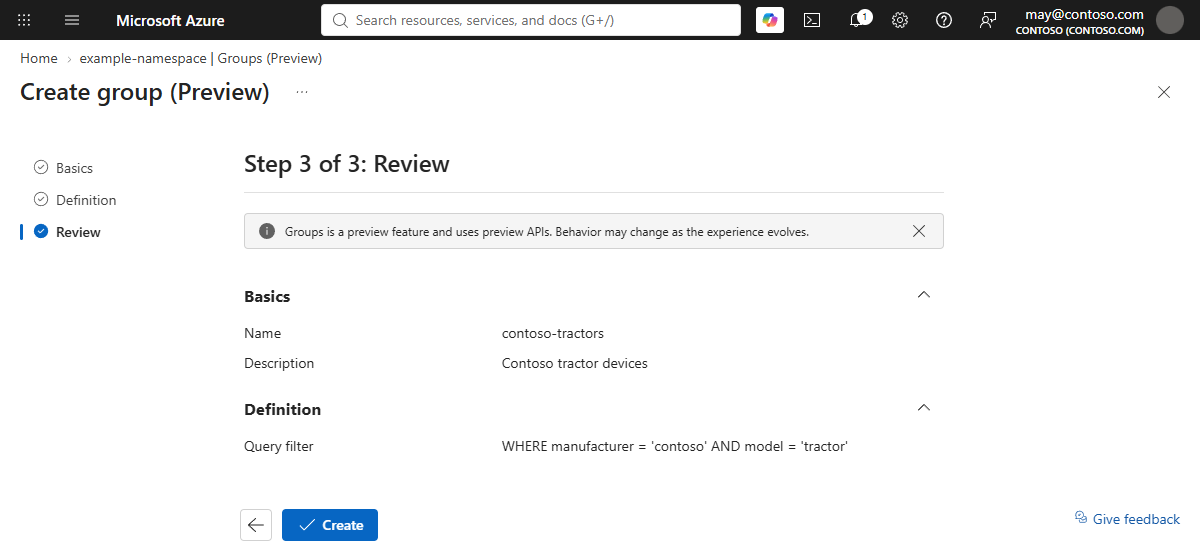
Group membership is calculated and cached when you create or refresh the group. Before you use a group for a software update job:
- Refresh the group's membership if device properties might have changed. In the Azure portal, Refresh is available from the group detail command bar.
- Wait until the group status is Ready.
- On the group detail view, verify the resolved query filter and the member count. The member list previews up to 10 devices, so treat it as a spot check rather than a complete listing, and confirm that the member count matches the devices that you intend to update.
Create a software update job
A software update job targets a group of devices and applies an imported software update to the compatible members of that group. Use the Azure portal or Bicep to create the job.
In the Azure portal, go to your Azure Device Registry and select the namespace that contains the devices you want to update.
In the namespace, select Operations > Jobs. The Jobs screen lists the defined jobs with their status, job type, and target group. From this screen, you can also view the groups and software updates in the namespace.
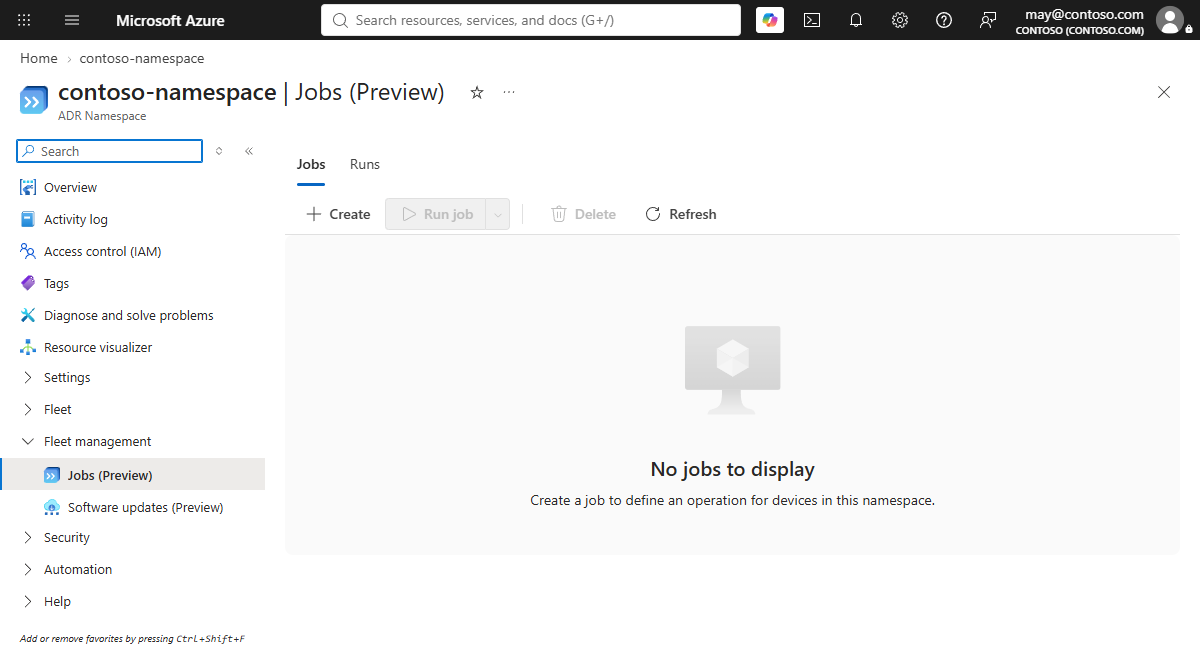
Select Create to create a new job.
On the Basics page, provide a name and description for the job.
For the job type, select Software update.
In preview, the available job types are Software update and Onboarding update. A software update job targets a group of devices, and an onboarding update job targets devices that onboard to a namespace. This article covers the software update job.
Select the group that you want to target. Use the group picker to search for and select a group. The picker shows the approximate number of devices in each group.
For information about how group membership refreshes, see Groups concepts (preview).
Save the group selection. The portal shows a sample of the devices in the group and the device count.
Define the action to run by selecting one of the software updates imported into the namespace. Each software update includes a compatibility check that determines whether it applies to a device. The portal runs a compatibility check for the selected group to determine whether the software update is compatible.
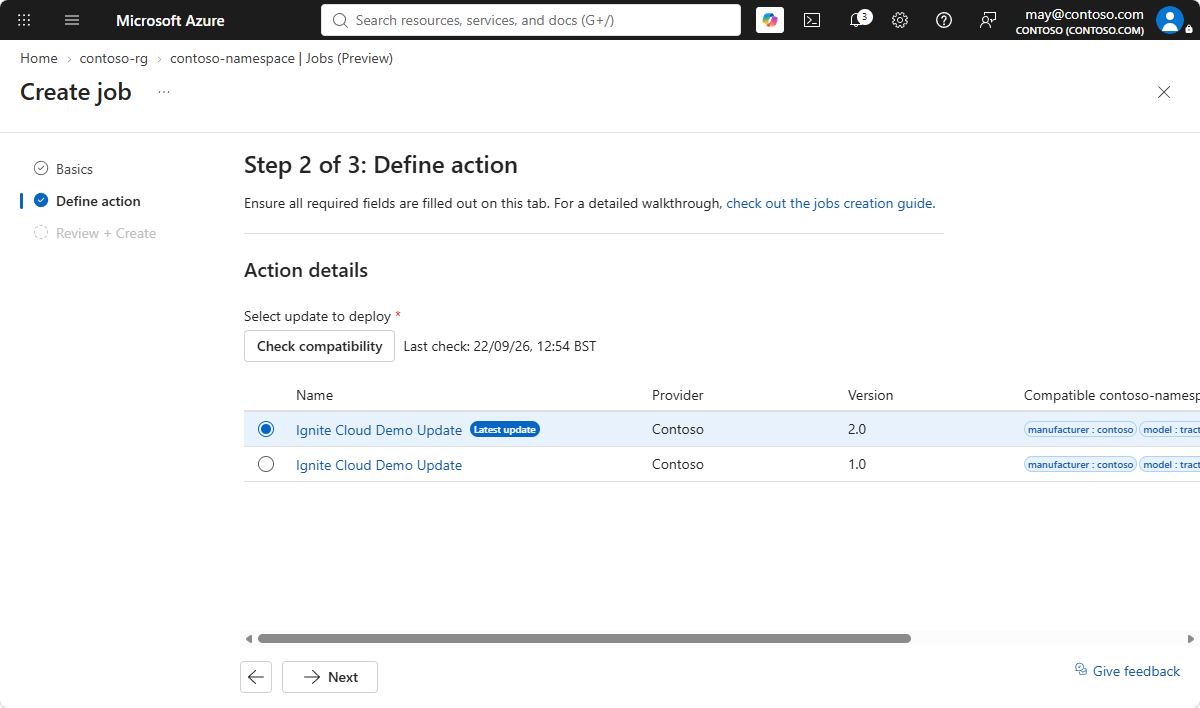
Select Next to view a summary of the job. The summary shows the number of group members and an estimate of the number of compatible members that the job is likely to update successfully.
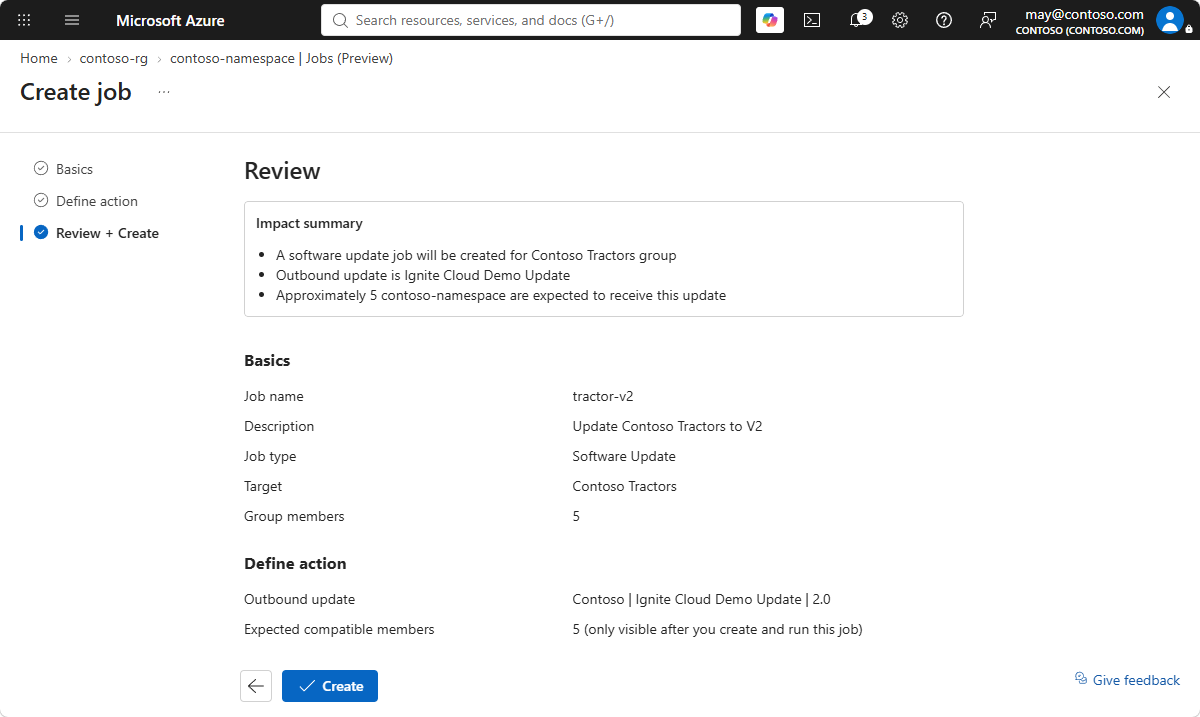
Select Create. The job status shows Creating and then changes to Ready after a moment.
Run or schedule the job
After a job is ready, you can run it immediately or schedule it to run later.
On the Jobs screen, select the job that you want to run.
Select one of the following options:
- Run now: The job runs immediately.
- Schedule for later: Pick a time in the next seven days. The job runs at the time you select.
After you run or schedule the job, the portal moves to the Runs tab.
Monitor the job run
The Runs tab shows the jobs, including running, completed, and scheduled runs.
Select the Runs tab to view the runs and their status.
Select a completed run to view its statistics. The run details show the number of updated devices and details of those devices.
Check a specific device. To confirm whether a specific device was updated, use the search box in the run details to find the device.