Note
Access to this page requires authorization. You can try signing in or changing directories.
Access to this page requires authorization. You can try changing directories.
Use tasks in the Microsoft Defender portal to break incident response work into actionable items, assign ownership, track progress, and document outcomes.
Incident case tasks help security operations teams coordinate investigation, response, remediation, handoff, and review work for incident cases.
Note
Incident cases are in preview and are the recommended experience for managing incidents in the Microsoft Defender portal. The legacy incident experience remains available during this preview.
For an overview of case management, see Case management in the Microsoft Defender portal.
How incident case tasks work
Tasks help analysts organize incident response work into smaller steps. Each task can include details such as status, priority, assigned user, due date, description, and closing notes.
Using tasks is useful for:
- Assigning investigation or response actions to specific analysts
- Tracking work across shifts or teams
- Coordinating handoff between analysts
- Onboarding junior analysts
- Working with managed security service providers
- Documenting investigation outcomes
- Supporting post-incident review and audit requirements
When you close a task, add closing notes to document what was done and what the outcome was.
Prerequisites
Before you begin, make sure you have one of the following Microsoft Defender unified RBAC permissions:
- To view incident case tasks: Read-only or Security data basics (read) in the Security operations group.
- To create and manage incident case tasks: All read and manage permissions or Response (manage) in the Security operations group.
For more information, see Microsoft Defender unified role-based access control (RBAC).
View incident case tasks
To view tasks for an incident case:
Sign in to the Microsoft Defender portal.
Select Cases.
Select Incident.
Select the relevant incident case.
Go to Tasks.
From Tasks, you can view task status, add tasks, edit existing tasks, or delete tasks.
Create an incident case task
To create a task for an incident case:
Sign in to the Microsoft Defender portal.
Select Cases.
Select Incident.
Select the relevant incident case.
Go to Tasks.
Select Add task.
Enter a name for your task.
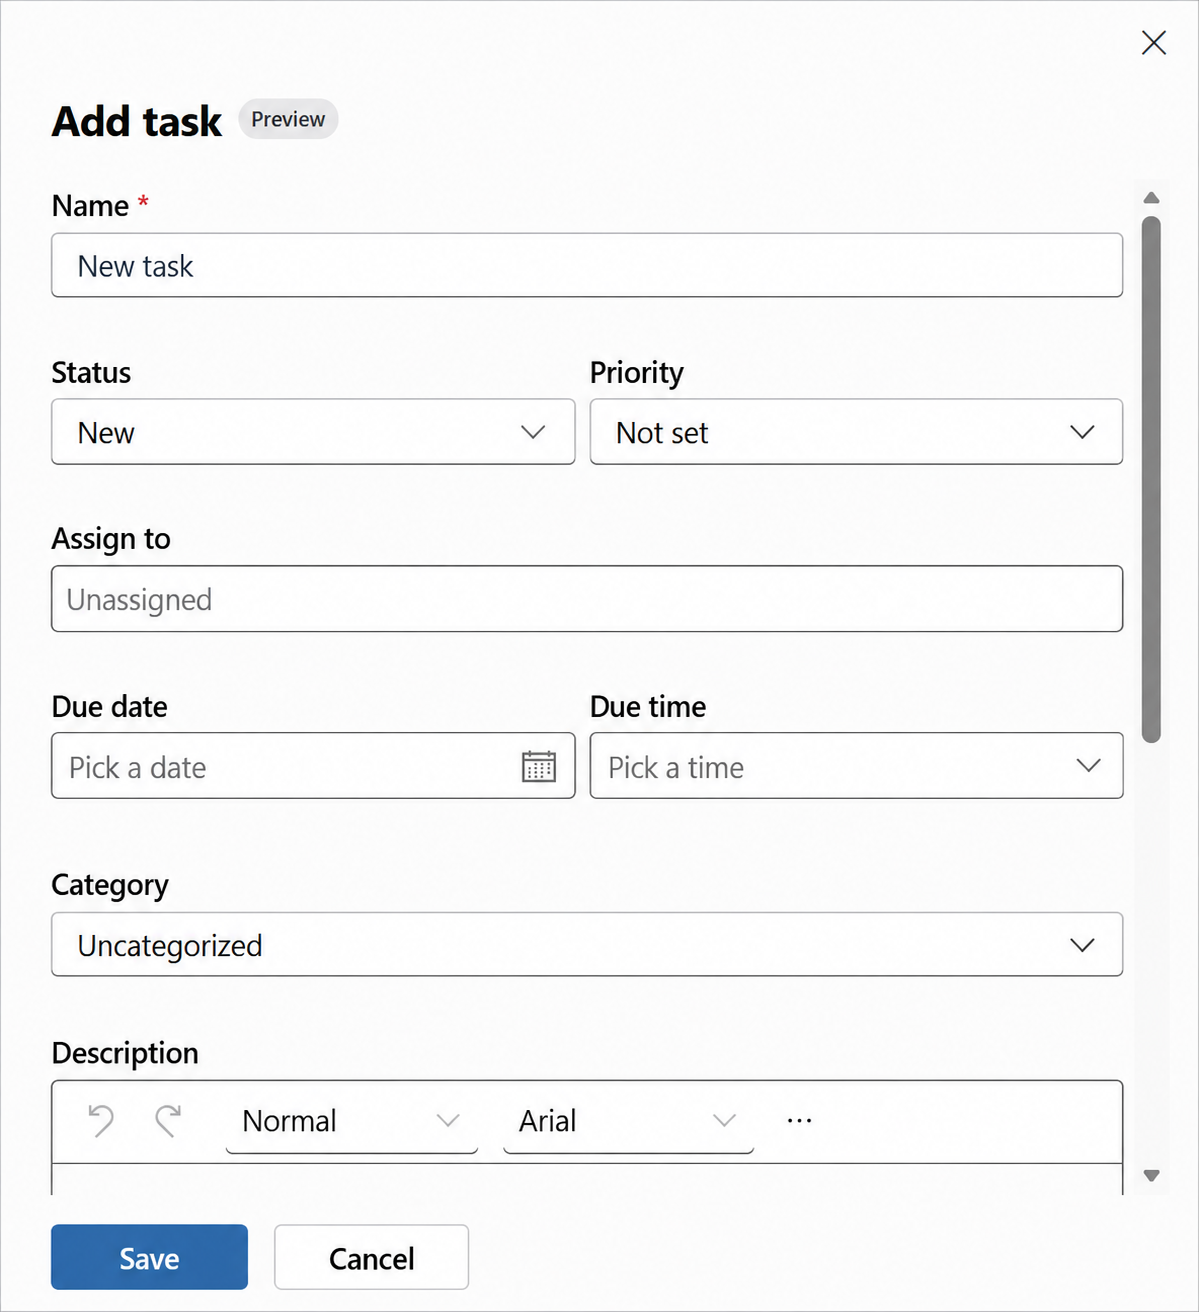
Select a task status.
Select a task priority.
Assign the task to a user, if needed.
Select a due date and due time, if needed.
Add a description for the task.
If you're closing the task, add closing notes to document the outcome.
Select Save.
Update an incident case task
To update an incident case task:
Sign in to the Microsoft Defender portal.
Select Cases.
Select Incident.
Select the relevant incident case.
Go to Tasks.
Select the edit icon for the task you want to update.
Update the task details.
Select Save.
Change task status
To change the status of an incident case task:
Sign in to the Microsoft Defender portal.
Select Cases.
Select Incident.
Select the relevant incident case.
Go to Tasks.
Select the task status.
Select the new status.
The task status is updated in Tasks.
Close an incident case task
To close an incident case task:
Sign in to the Microsoft Defender portal.
Select Cases.
Select Incident.
Select the relevant incident case.
Go to Tasks.
Select the edit icon for the task you want to close.
Change the task status to Closed.
Add closing notes to document the outcome.
Select Save.
Delete an incident case task
Delete a task only when you're sure it isn't needed.
To delete an incident case task:
Sign in to the Microsoft Defender portal.
Select Cases.
Select Incident.
Select the relevant incident case.
Go to Tasks.
Select the delete icon for the task you want to delete.
Select Yes to confirm.