Note
Access to this page requires authorization. You can try signing in or changing directories.
Access to this page requires authorization. You can try changing directories.
The Retail Interest Group by Dynamics 365 Commerce has moved from Yammer to Viva Engage. If you don't have access to the new Viva Engage community, fill out this form (https://aka.ms/JoinD365commerceVivaEngageCommunity) to be added and stay engaged in the latest discussions.
This article describes how to add a checkout module to a page and set the required properties in Microsoft Dynamics 365 Commerce.
A checkout module is a special container that hosts all modules that are required to create an order. It presents a step-by-step flow that a customer uses to enter all the relevant information to make a purchase. It captures the shipping address, shipping method, and billing information. It also provides an order summary and other information that is related to a customer order.
A checkout module renders data based on the cart ID. This cart ID is saved as a browser cookie. A cart ID is required to render information in the checkout module, such as the items in the order, the total amount, and discounts.
The following image shows an example of a Fabrikam checkout module on a checkout page.

Checkout module properties
A checkout module shows an order summary and provides the functionality for placing an order. To gather all the customer information that is required before an order can be placed, additional modules must be added to the checkout module. Therefore, retailers have the flexibility to add custom modules to the checkout flow, or to exclude modules, based on their requirements.
| Property name | Values | Description |
|---|---|---|
| Checkout heading | Heading text and a heading tag (H1, H2, H3, H4, H5, or H6) | A heading for the checkout module. |
| Order summary heading | Heading text | A heading for the order summary section of the module. |
| Cart line items heading | Heading text | A heading for cart line items that are shown in the checkout module. |
| Show shipping charges on line item | True or False | If this property is set to True, the shipping charges that are applicable for line items are shown on cart lines. If the Header charge with no proration feature is turned on in Commerce headquarters, the shipping charge is applied at the header level, not the line level. This feature was added in Commerce version 10.0.13. |
Modules that can be used in the checkout module
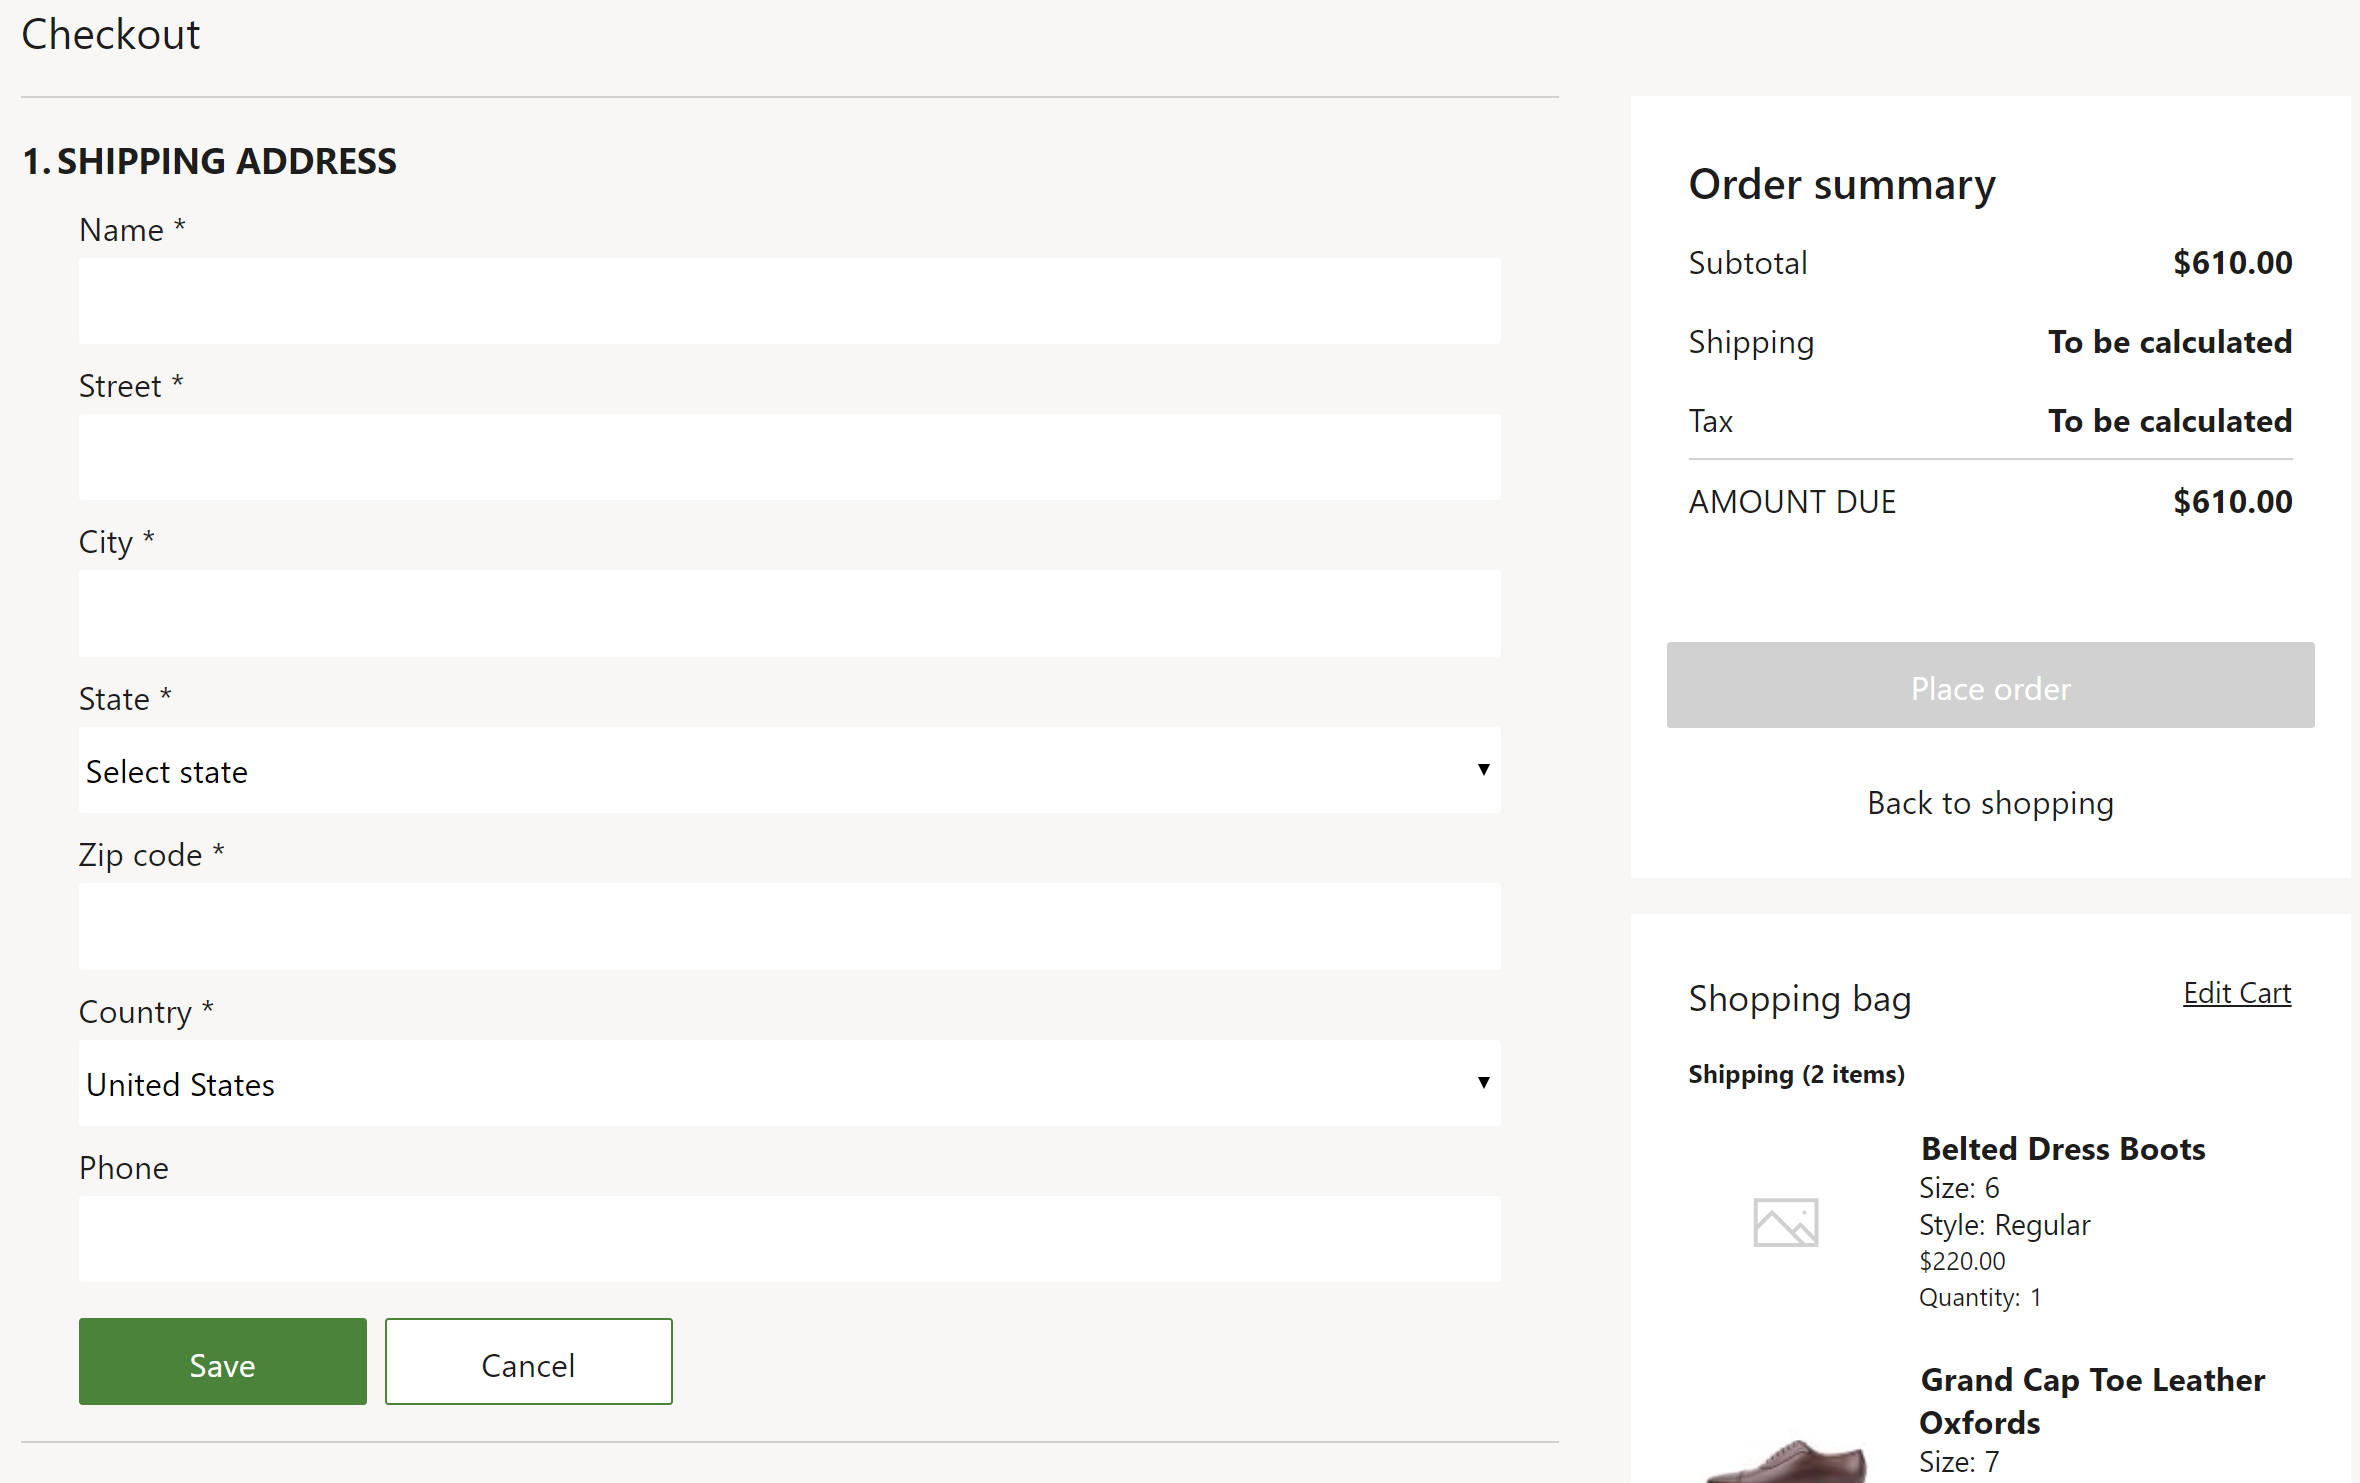
Shipping address – This module lets a customer add or select the shipping address for an order. For more information about this module, see Shipping address module.
The following image shows an example of a shipping address module on a checkout page.

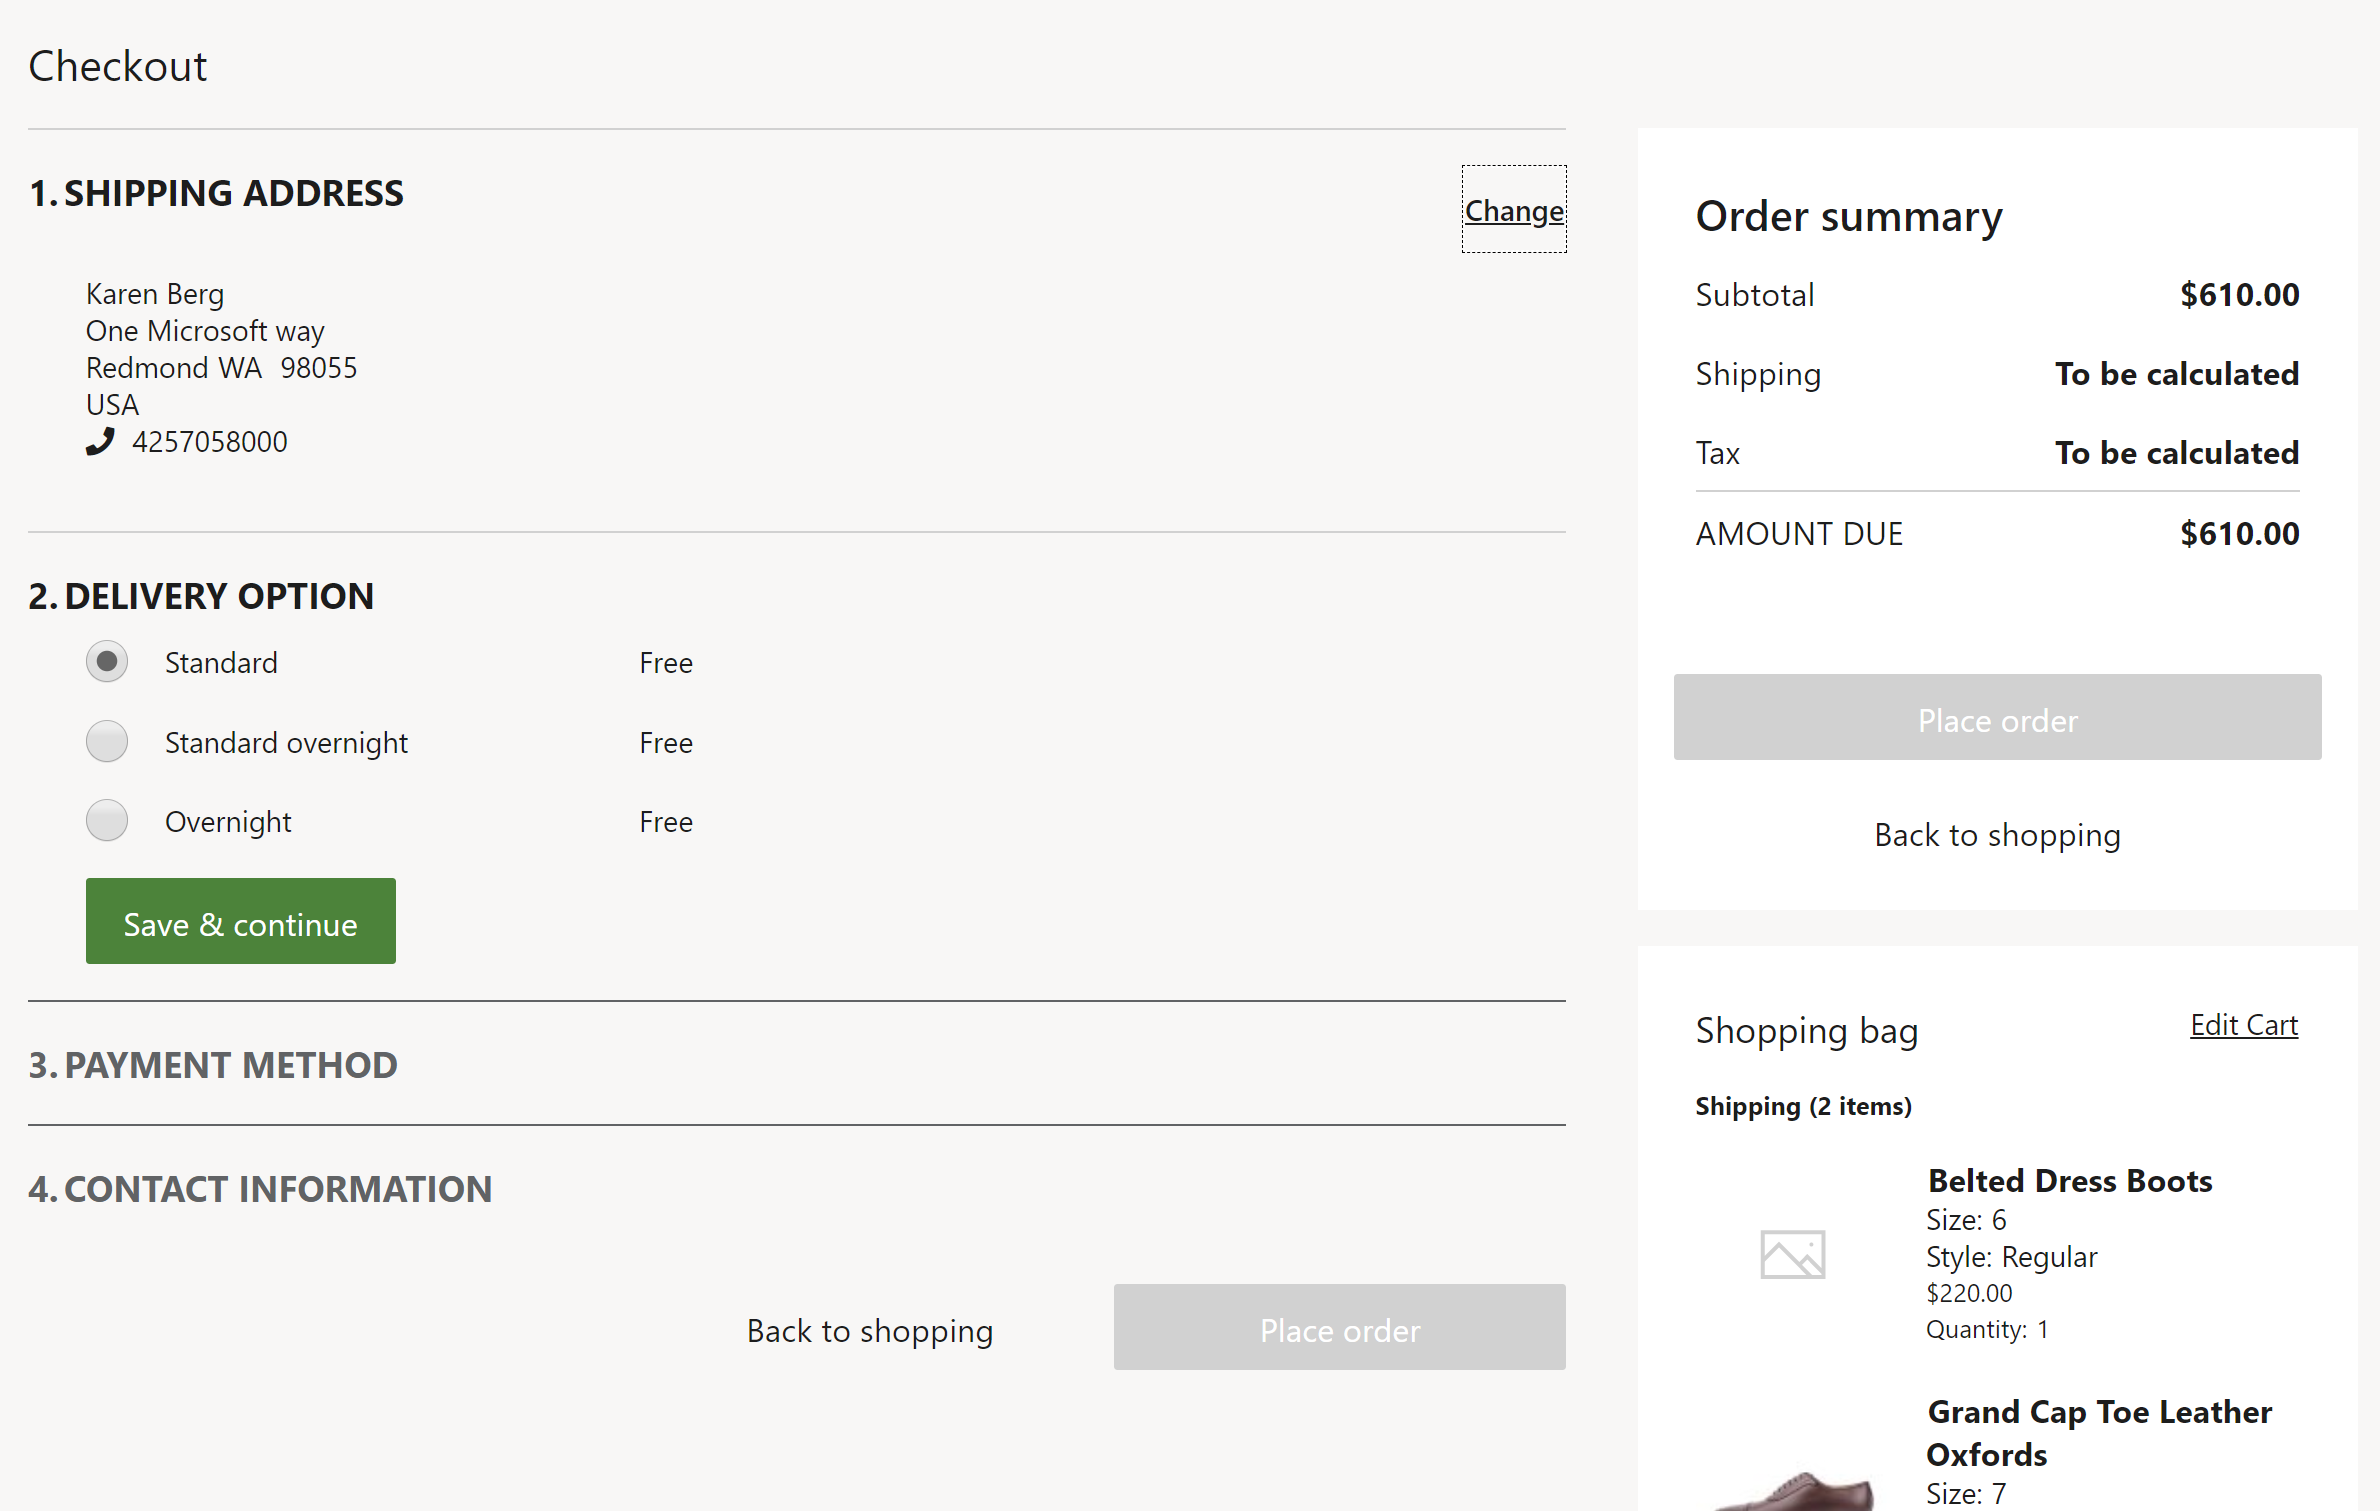
Delivery options – This module lets a customer select a mode of delivery for an order. For more information about this module, see Delivery options module.
The following image shows an example of a delivery options module on a checkout page.

Checkout section container – This module is a container that you can put multiple modules inside to create a section within the checkout flow. For example, you can put all payment-related modules inside this container to make them appear as one section. This module affects only the layout of the flow.
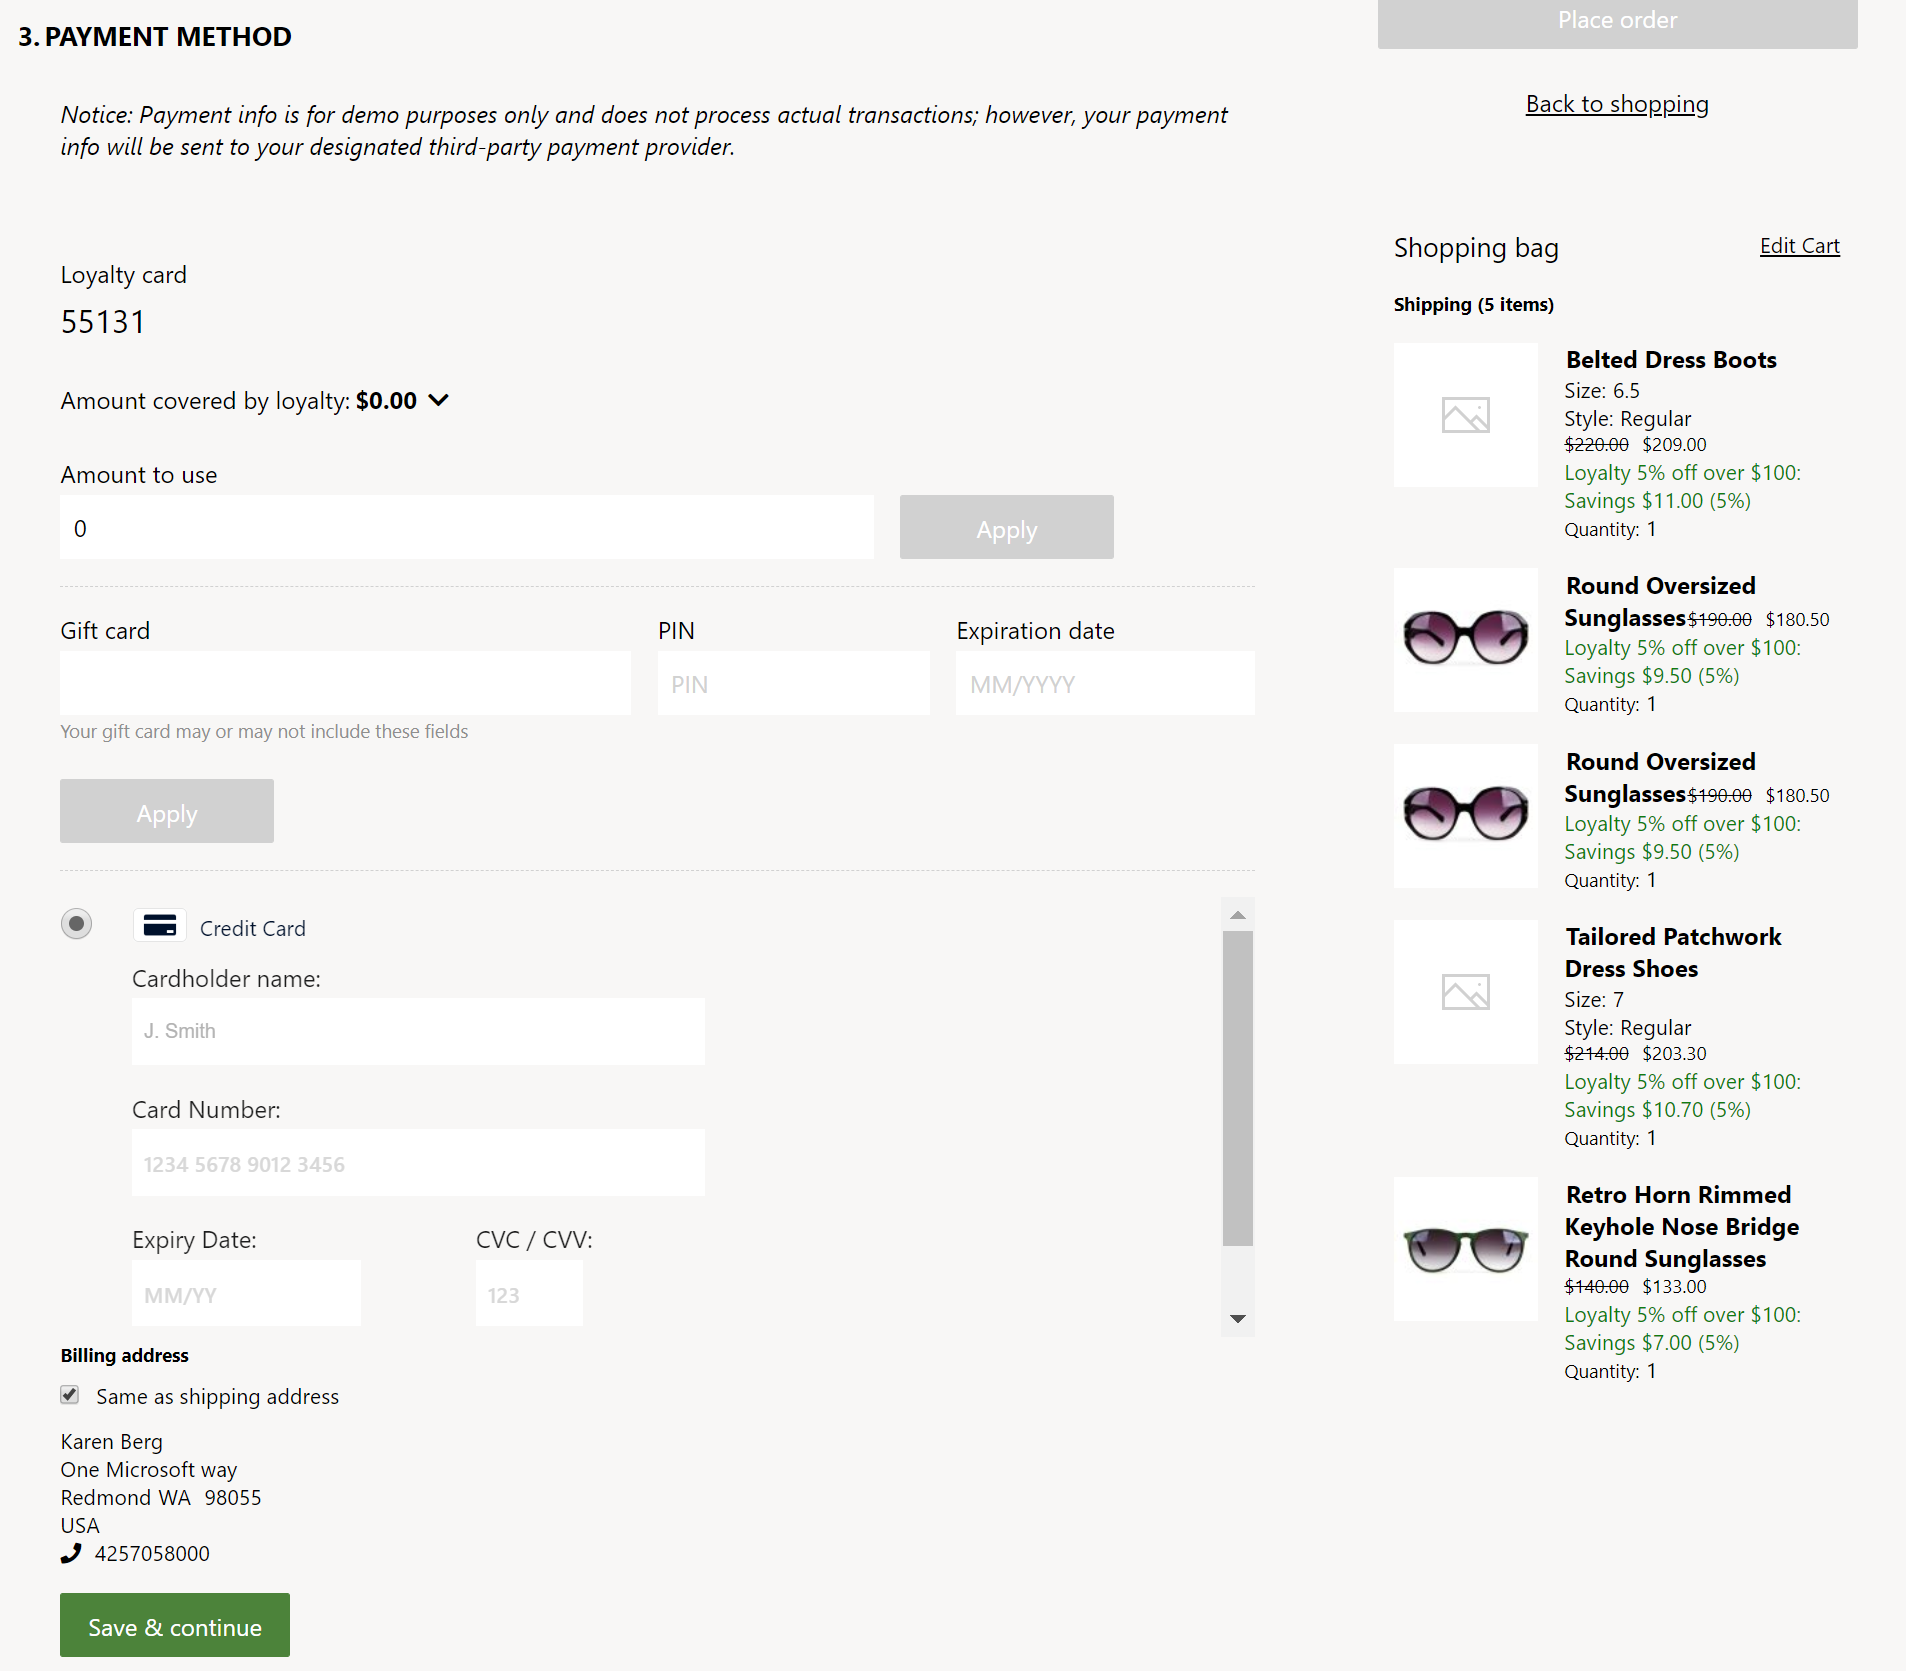
Gift card – This module lets a customer pay for an order by using a gift card. For more information about this module, see Gift card module.
Loyalty points – This module lets a customer pay for an order by using loyalty points. It provides a summary of available points and expiring points, and lets the customer select the number of points to redeem. If the customer isn't signed in or isn't a loyalty member, or if the total amount in the cart is 0 (zero), this module is automatically hidden.
Payment – This module lets a customer pay for an order by using a credit or debit card. Customers can also provide a billing address for the payment option that they select. For more information about this module, see Payment module.
The following image shows an example of gift card, loyalty points, and payment modules on a checkout page.

Contact information – This module lets a customer add or change the contact information (email address) for an order.
| Property name | Values | Description |
|---|---|---|
| Enable customer reference | True or False | If this optional property is set to True, then a customer can provide a reference number during checkout, which gets saved to the order header. This feature is available as of the Commerce version 10.0.40 release. |
| Enable customer requisition | True or False | If this optional property is set to True, then a customer can provide a requisition number during checkout, which gets saved to the order header. Customers view this information on their order history and can filter their orders using this number. This feature is available as of the Commerce version 10.0.40 release. |
| Enable cart note | True or False | If this optional property is set to True, then a customer can provide delivery instructions or any other information during checkout. This information gets saved as a note attachment to the order header. This feature is available as of the Commerce version 10.0.40 release. |
| Default Note Title | Text string | The default title for Notes created and attached to order headers. This property value must be populated if the Enable cart note property is set to True. This feature is available as of the Commerce version 10.0.40 release. |
Text block – This module contains any messaging that is driven by the content management system (CMS). For example, it might contain a message that states, "For issues with your order, contact 1-800-Fabrikam."
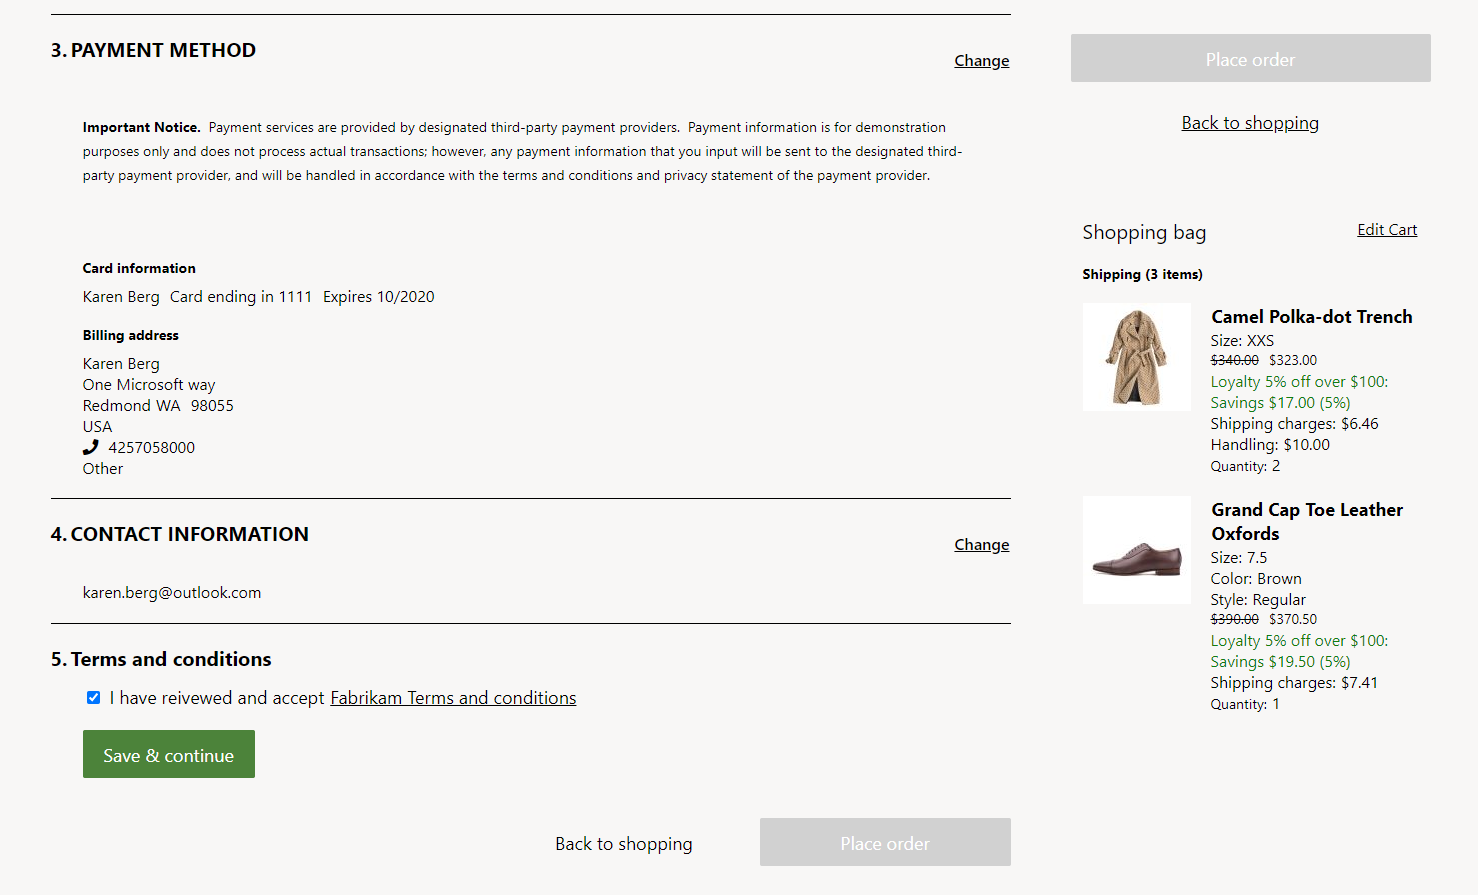
Checkout terms and conditions – This module shows rich text that contains the terms and conditions and a check box for the customer input. The check box is optional and configurable. The input is captured by the module and can be used as a check before order placement is triggered, but it isn't included in the order summary information. This module can be added to the checkout container, checkout section container, or terms and conditions slot, according to business needs. If the module is added to the checkout container or checkout section container slot, it appears as a step in the checkout process. If the module is added to the terms and conditions slot, it appears near the order placement button.
The following image shows an example of terms and conditions on a checkout page.

Note
If you're planning to accept multiple payment methods for online orders in your online channel (for example, loyalty points and credit card payments), the Omni-channel Commerce order payments feature (in headquarters at System administration > Workspace > Feature management), and the call center Enable order completion setting (on the General FastTab of your channel at Retail and Commerce > Channels > Call Centers) must both be enabled. If the Omni-channel Commerce order payments feature is enabled, the Enable order completion setting is enabled by default and hidden.
Commerce Scale Unit interaction
Most of the checkout information, such as the shipping address and shipping method, is stored in the cart and processed as part of the order. The only exception is the credit card information. This information is processed directly by using the Adyen payment connector. The payment is authorized, but it isn't charged until the order is fulfilled.
Add a checkout module to a page and set the required properties
To add a checkout module to a new page and set the required properties, follow these steps.
- Go to Fragments, and select New to create a new fragment.
- In the Select fragment dialog box, select the Checkout module.
- Under Fragment name, enter the name Checkout fragment, and then select OK.
- Select the Checkout module slot.
- In the properties pane on the right, select the pencil symbol, enter heading text in the field, and then select the check mark symbol.
- In the Checkout Information slot, select the ellipsis (...), and then select Add module.
- In the Select modules dialog box, select the Shipping address, Delivery options, Checkout section container, and Contact information modules, and then select OK.
- In the Checkout section container module, select the ellipsis (...), and then select Add module.
- In the Select modules dialog box, select the Gift card, Loyalty, and Payment modules, and then select OK. In this way, you make sure that all the payment methods appear together in a section.
- In the Terms and conditions slot, add a Checkout terms and conditions module if it's required. In the module's properties pane, configure the terms and condition text as appropriate.
- Select Save, and then select Preview to preview the fragment. Some modules that don't have a cart context might not be rendered in the preview.
- Select Finish editing to check in the fragment, and then select Publish to publish it.
- Create a template that uses the new checkout fragment.
- Create a checkout page that uses the new template.
[NOTE] When using single payment authorization as described in Enhanced payments in storefront checkout, in the Checkout information section of the checkout page, confirm that the checkout section container is positioned last. This ensures that all required information is gathered by the checkout page prior to the final payment checkout and order completion actions.