Note
Access to this page requires authorization. You can try signing in or changing directories.
Access to this page requires authorization. You can try changing directories.
Note
The Retail Interest Group by Dynamics 365 Commerce has moved from Yammer to Viva Engage. If you don't have access to the new Viva Engage community, fill out this form (https://aka.ms/JoinD365commerceVivaEngageCommunity) to be added and stay engaged in the latest discussions.
This article covers cart modules and describes how to add them to site pages in Microsoft Dynamics 365 Commerce.
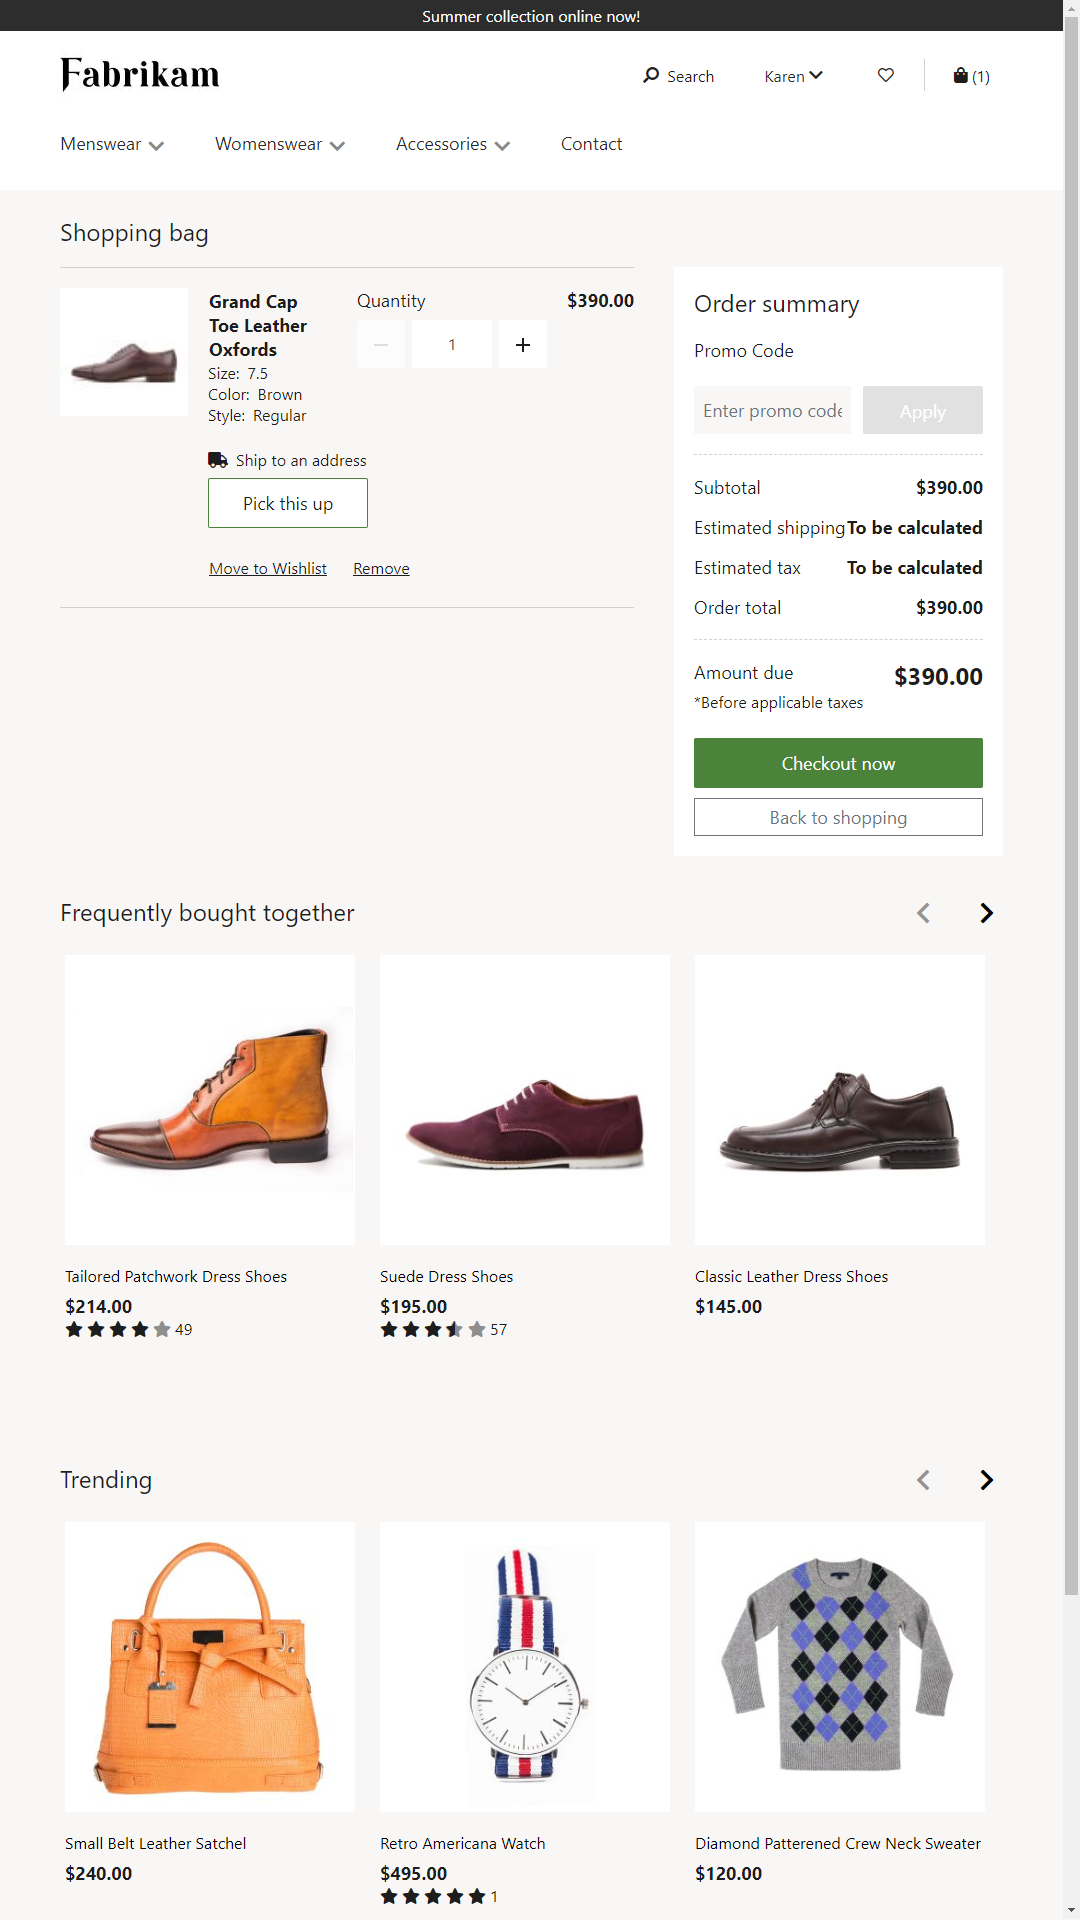
A cart module shows the items added to the cart before the customer proceeds to checkout. The module also shows an order summary and lets the customer apply or remove promotional codes.
The cart module supports signed-in checkout and guest checkout. It also supports a Back to shopping link. You can configure the route for this link at Site Settings > Extensions > Routes.
The cart module renders data based on the cart ID, which is a browser cookie available throughout the site.
The following image shows an example of a cart page on the Fabrikam site.
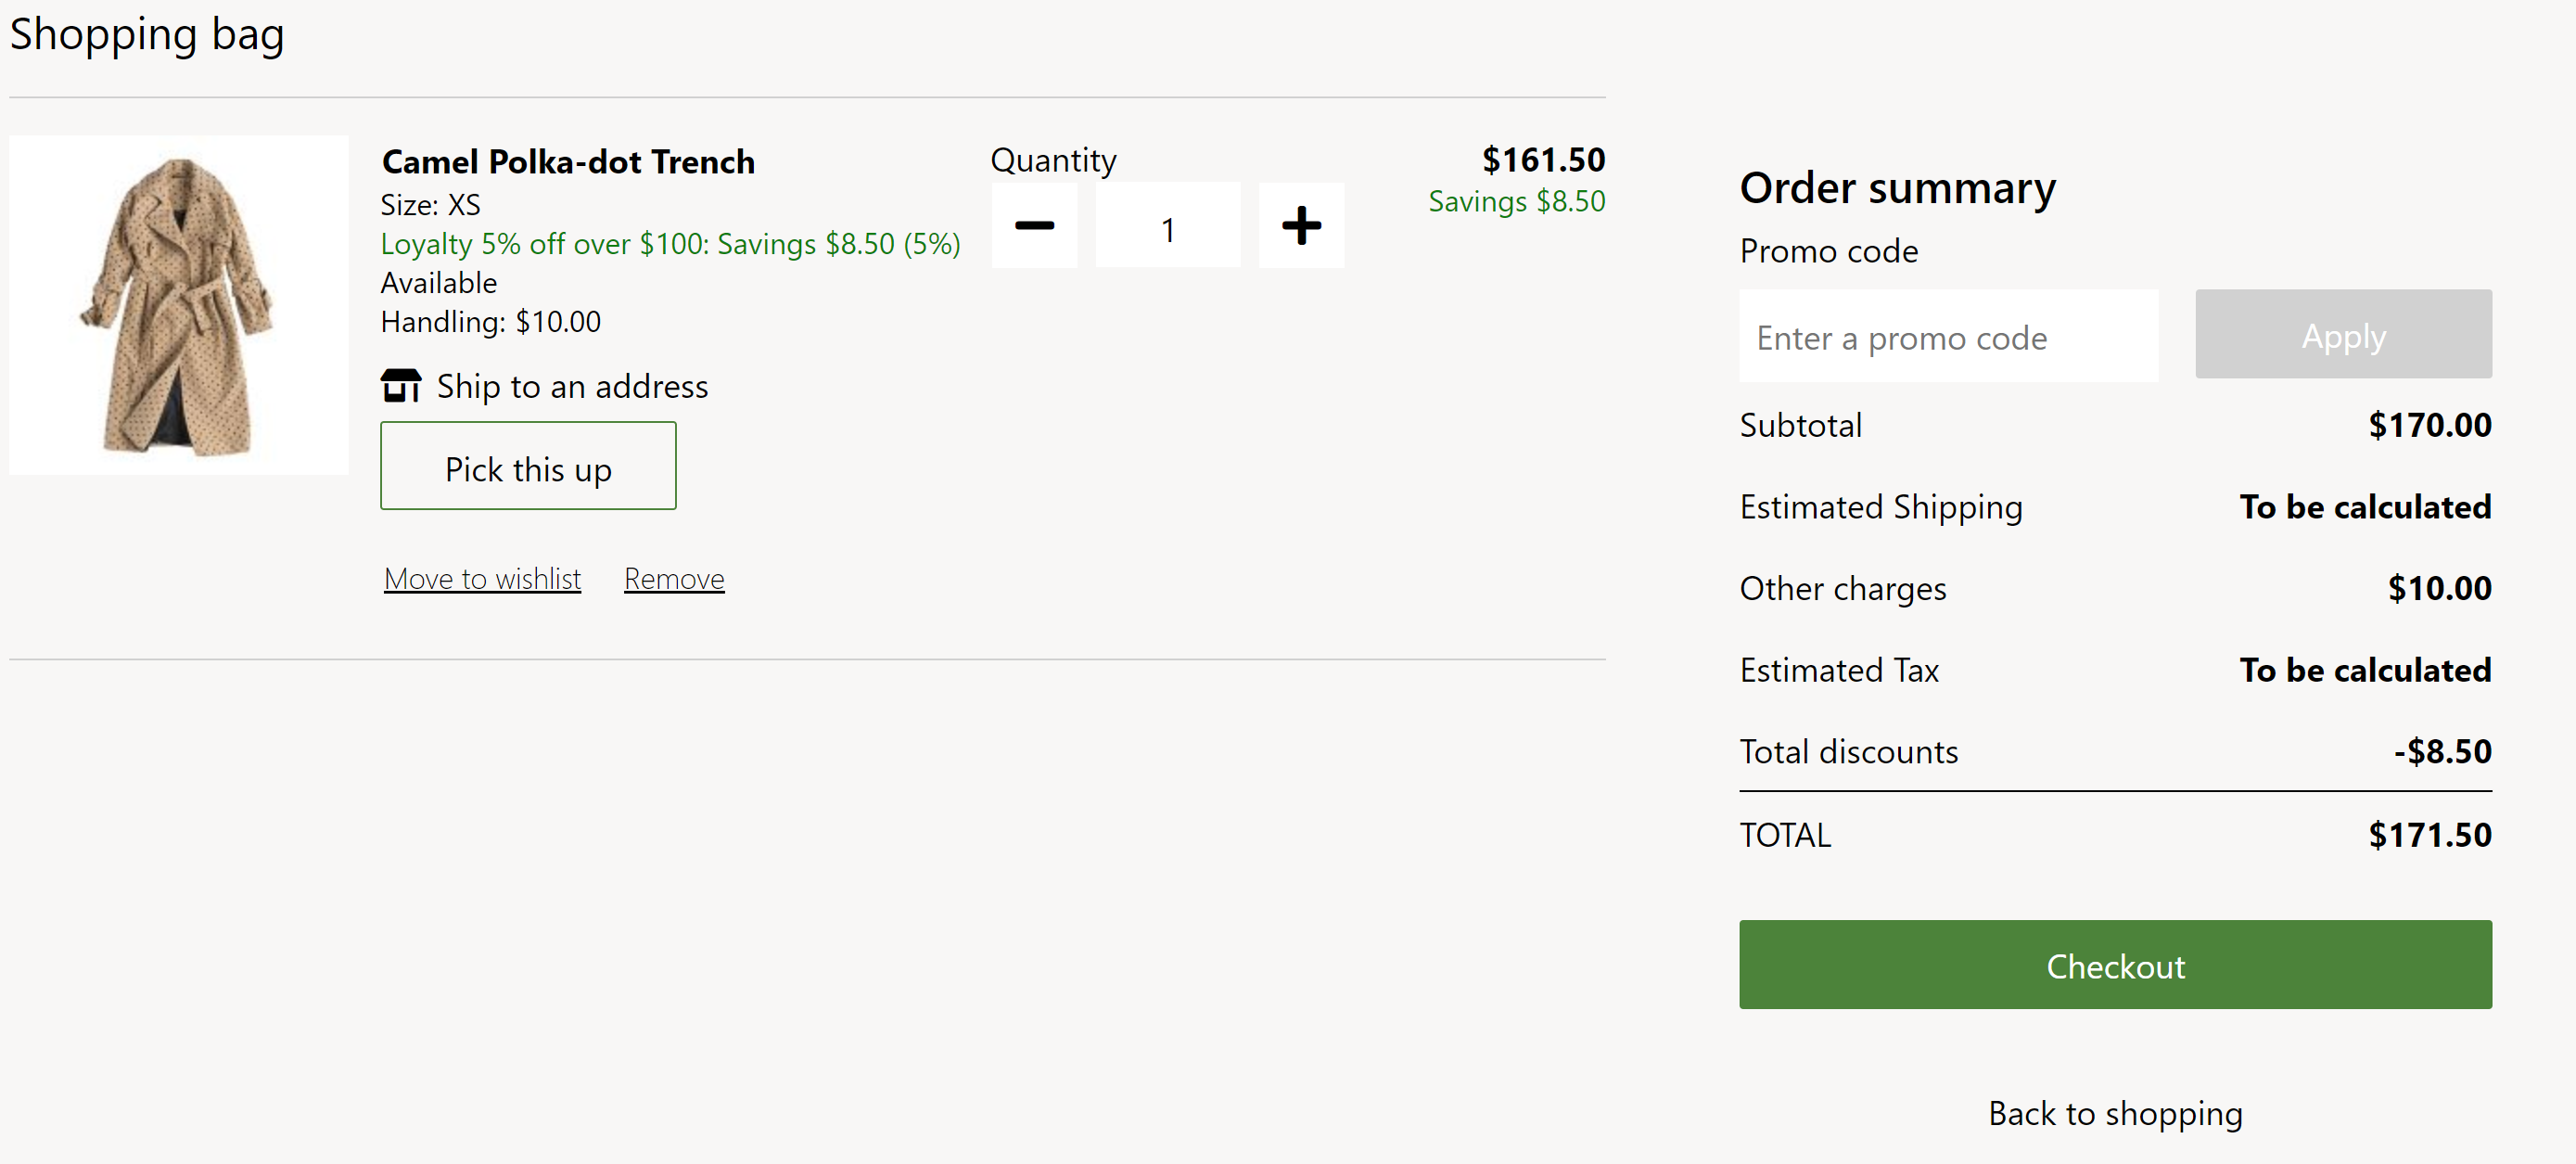
The following image shows an example of a cart page on the Fabrikam site. In this example, there's a handling fee for a line item.
Cart module properties and slots
| Property | Values | Description |
|---|---|---|
| Heading | Heading text and a heading tag (H1, H2, H3, H4, H5, or H6) | A heading for the cart, such as "Shopping bag" or "Items in your cart." |
| Show out of stock errors | True or False | If this property is set to True, the cart page shows stock-related errors. We recommend that you set this property to True if inventory checks are applied on the site. |
| Show shipping charges for line items | True or False | If this property is set to True, cart line items show the shipping charges, if this information is available. This feature isn't supported in the Fabrikam theme, because users select shipping only in the checkout flow. However, this feature can be turned on in other workflows if it's applicable. |
| Show available promotions | True or False | If this property is set to True, the cart shows available promotions, based on items in the cart. This capability is available in the Dynamics 365 Commerce 10.0.16 release. |
Modules that can be used in a cart module
- Text block – This module supports custom messaging in the cart module. The content management system (CMS) generates the messages. Any message can be added, such as "For issues with your order, contact 1-800-Fabrikam."
- Store selector – This module shows a list of nearby stores where an item is available for pickup. It lets users enter a location to find stores that are nearby. For more information on this module, see Store selector module.
Module properties
The following cart module settings can be configured at Site Settings > Extensions:
- Maximum quantity – This property is used to specify the maximum number of each item that can be added to the cart. For example, a retailer might decide that only 10 of each product can be sold in a single transaction.
- Inventory – For information about how to apply inventory settings, see Apply inventory settings.
- Back to shopping – This property is used to specify the route for the Back to shopping link. The route can be configured at the site level, allowing retailers to take the customer back to the home page or any other page on the site.
Important
In the Dynamics 365 Commerce 10.0.14 release and later, items in the cart are aggregated based on the settings defined in the online functionality profile for the online store in Commerce headquarters. For more information about how to create an online functionality profile and set the properties that are required for aggregation, see Create an online functionality profile.
Commerce Scale Unit interaction
The cart module retrieves product information by using Commerce Scale Unit APIs. The cart ID from the browser cookie is used to retrieve all the product information from Commerce Scale Unit.
Add a cart module to a page
To add a cart module to a new page and set the required properties, follow these steps:
- Go to Fragments, and select New to create a new fragment.
- In the Select fragment dialog box, select the Cart module.
- Under Fragment name, enter the name Cart fragment, and then select OK.
- Select the Cart slot.
- In the properties pane on the right, select the pencil symbol, enter heading text in the field, and then select the check mark symbol.
- In the Cart slot, select the ellipsis (...), and then select Add module.
- In the Select modules dialog box, select the Store selector module, and then select OK.
- Select Save, select Finish editing to check in the fragment, and then select Publish to publish it.
- Go to Templates, and select New to create a new template.
- In the New Template dialog box, under Template name, enter a name for the template.
- In the outline tree, select the Body slot, select the ellipsis (...), and then select Add fragment.
- In the Select fragment dialog box, select the Cart fragment fragment, and then select OK.
- Select Save, select Finish editing to check in the template, and then select Publish to publish it.
- Go to Pages, and select New to create a new page.
- In the Choose a template dialog box, select the template that you created, enter a page name, and then select OK.
- Select Save, and then select Preview to preview the page.
- Select Finish editing to check in the page, and then select Publish to publish it.