컬렉션 뷰를 사용하면 임의의 레이아웃을 사용하여 콘텐츠를 표시할 수 있습니다. 또한 사용자 지정 레이아웃을 지원하면서 그리드와 유사한 레이아웃을 쉽게 만들 수 있습니다.
클래스에서 사용할 수 있는 UICollectionView 컬렉션 뷰는 레이아웃을 사용하여 화면에 여러 항목을 표시하는 iOS 6의 새로운 개념입니다. 항목을 만들고 해당 항목과 상호 작용하는 데 데이터를 UICollectionView 제공하는 패턴은 iOS 개발에 일반적으로 사용되는 것과 동일한 위임 및 데이터 원본 패턴을 따릅니다.
그러나 컬렉션 뷰는 자체와 독립적인 UICollectionView 레이아웃 하위 시스템에 작동합니다. 따라서 단순히 다른 레이아웃을 제공하면 컬렉션 뷰의 프레젠테이션을 쉽게 변경할 수 있습니다.
iOS는 추가 작업 없이 그리드와 같은 선 기반 레이아웃을 만들 수 있도록 하는 레이아웃 클래스를 UICollectionViewFlowLayout 제공합니다. 또한 상상할 수 있는 프레젠테이션을 허용하는 사용자 지정 레이아웃을 만들 수도 있습니다.
UICollectionView 기본 사항
클래스는 UICollectionView 세 가지 항목으로 구성됩니다.
- 셀 – 각 항목에 대한 데이터 기반 보기
- 보조 뷰 – 섹션과 연결된 데이터 기반 보기입니다.
- 장식 보기 – 레이아웃에서 만든 데이터 기반이 아닌 뷰
셀
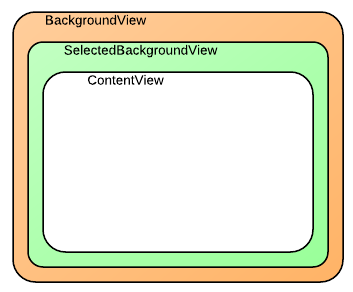
셀은 컬렉션 뷰에서 제공하는 데이터 집합의 단일 항목을 나타내는 개체입니다. 각 셀은 아래 그림과 같이 세 가지 다른 보기로 구성된 클래스의 인스턴스 UICollectionViewCell 입니다.
클래스에는 UICollectionViewCell 이러한 각 보기에 대해 다음과 같은 속성이 있습니다.
ContentView– 이 보기에는 셀이 표시하는 내용이 포함됩니다. 화면의 맨 위 z 순서로 렌더링됩니다.SelectedBackgroundView– 셀은 선택 영역을 기본적으로 지원합니다. 이 보기는 셀이 선택되었음을 시각적으로 나타내는 데 사용됩니다. 셀을 선택할 때 바로 아래에ContentView렌더링됩니다.BackgroundView– 셀은 배경도 표시할 수 있으며, 이 배경은 .에BackgroundView의해 표시됩니다. 이 보기는SelectedBackgroundView.
ContentView 아래와 같이 셀이 BackgroundView 선택될 때 표시되는 반면SelectedBackgroundView, 콘텐츠를 시각적으로 프레임하는 데 사용할 수 있습니다.SelectedBackgroundViewBackgroundView
위의 스크린샷에 있는 셀은 다음 코드와 같이 각각 , 및 속성을 상속 UICollectionViewCell 하고 BackgroundView 설정 ContentViewSelectedBackgroundView 하여 만듭니다.
public class AnimalCell : UICollectionViewCell
{
        UIImageView imageView;

        [Export ("initWithFrame:")]
        public AnimalCell (CGRect frame) : base (frame)
        {
            BackgroundView = new UIView{BackgroundColor = UIColor.Orange};

            SelectedBackgroundView = new UIView{BackgroundColor = UIColor.Green};

            ContentView.Layer.BorderColor = UIColor.LightGray.CGColor;
            ContentView.Layer.BorderWidth = 2.0f;
            ContentView.BackgroundColor = UIColor.White;
            ContentView.Transform = CGAffineTransform.MakeScale (0.8f, 0.8f);

            imageView = new UIImageView (UIImage.FromBundle ("placeholder.png"));
            imageView.Center = ContentView.Center;
            imageView.Transform = CGAffineTransform.MakeScale (0.7f, 0.7f);

            ContentView.AddSubview (imageView);
        }

        public UIImage Image {
            set {
                imageView.Image = value;
            }
        }
}
보조 보기
보조 보기는 각 섹션과 연결된 정보를 표시하는 뷰입니다 UICollectionView. 셀과 마찬가지로 보조 뷰는 데이터 기반입니다. 셀이 데이터 원본의 항목 데이터를 표시하는 경우 추가 보기는 책장의 책 범주 또는 음악 라이브러리의 음악 장르와 같은 섹션 데이터를 제공합니다.
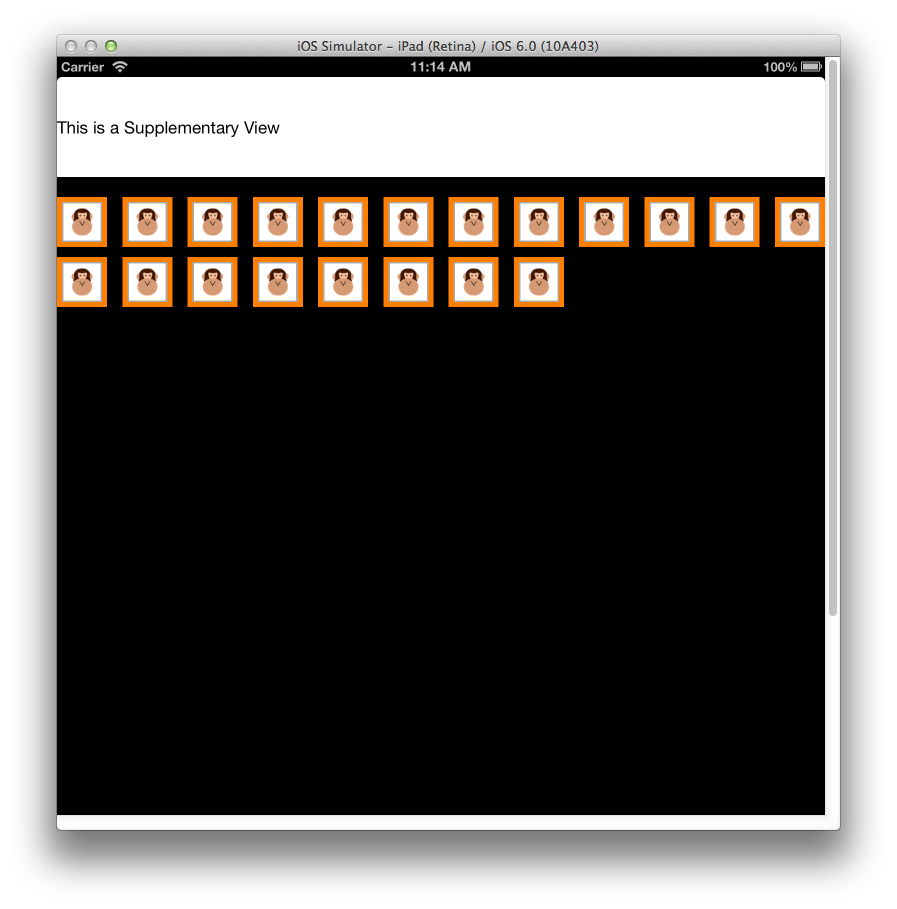
예를 들어 아래 그림과 같이 보조 뷰를 사용하여 특정 섹션에 대한 헤더를 표시할 수 있습니다.
보조 보기를 사용하려면 먼저 메서드에 ViewDidLoad 등록해야 합니다.
CollectionView.RegisterClassForSupplementaryView (typeof(Header), UICollectionElementKindSection.Header, headerId);
그런 다음, 뷰를 사용하여 반환하고, 사용하여 GetViewForSupplementaryElementDequeueReusableSupplementaryView만들고, 상속해야 합니다UICollectionReusableView. 다음 코드 조각은 위의 스크린샷에 표시된 SupplementaryView를 생성합니다.
public override UICollectionReusableView GetViewForSupplementaryElement (UICollectionView collectionView, NSString elementKind, NSIndexPath indexPath)
        {
            var headerView = (Header)collectionView.DequeueReusableSupplementaryView (elementKind, headerId, indexPath);
            headerView.Text = "Supplementary View";
            return headerView;
        }
보조 보기는 머리글 및 바닥글보다 일반적입니다. 컬렉션 보기의 모든 위치에 배치할 수 있으며 모든 보기로 구성될 수 있으므로 모양을 완전히 사용자 지정할 수 있습니다.
장식 보기
장식 보기는 순전히 시각적 보기로, 에 UICollectionView표시될 수 있습니다. 셀 및 보조 뷰와 달리 데이터 기반이 아닙니다. 항상 레이아웃의 하위 클래스 내에서 만들어지고 이후에 콘텐츠의 레이아웃으로 변경할 수 있습니다. 예를 들어 장식 보기를 사용하여 아래와 같이 콘텐츠 UICollectionView와 함께 스크롤되는 배경 보기를 표시할 수 있습니다.
아래 코드 조각은 샘플 CircleLayout 클래스에서 배경을 빨간색으로 변경합니다.
public class MyDecorationView : UICollectionReusableView
 {
   [Export ("initWithFrame:")]
   public MyDecorationView (CGRect frame) : base (frame)
   {
     BackgroundColor = UIColor.Red;
   }
 }
데이터 원본
iOS의 다른 부분(예: UITableView 및) UICollectionView 과 MKMapView마찬가지로 클래스를 통해 UICollectionViewDataSource Xamarin.iOS에 노출되는 데이터 원본에서 해당 데이터를 가져옵니다. 이 클래스는 다음과 같은 콘텐츠 제공을 UICollectionView 담당합니다.
- 셀 – 메서드에서
GetCell반환됩니다. - 보조 뷰 – 메서드에서
GetViewForSupplementaryElement반환됩니다. - 섹션 수 - 메서드에서
NumberOfSections반환됩니다. 구현되지 않은 경우 기본값은 1입니다. - 섹션 당 항목 수 - 메서드에서
GetItemsCount반환됩니다.
UICollectionViewController
편의상 클래스를 UICollectionViewController 사용할 수 있습니다. 이 작업은 다음 섹션에서 설명하는 대리자와 해당 뷰에 대한 UICollectionView 데이터 원본으로 자동으로 구성됩니다.
마찬가지로 UITableView클래스는 UICollectionView 해당 데이터 원본을 호출하여 화면에 있는 항목의 셀만 가져옵니다.
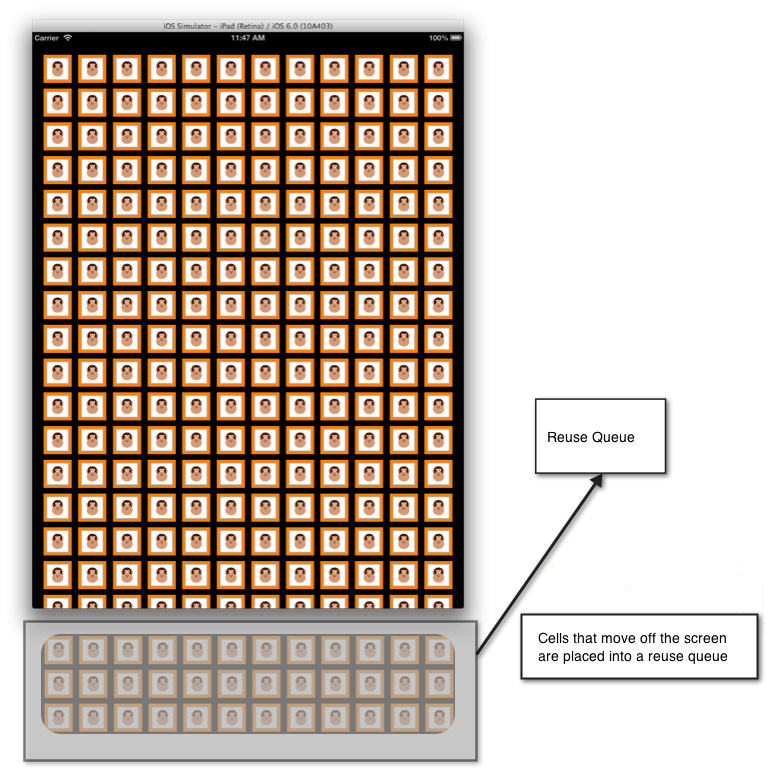
다음 이미지와 같이 화면에서 스크롤하는 셀은 재사용을 위해 큐에 배치됩니다.
셀 재사용이 간소화되었습니다.UICollectionView UITableView 셀이 시스템에 등록되어 있으므로 다시 사용 큐에서 셀을 사용할 수 없는 경우 더 이상 데이터 원본에 직접 셀을 만들 필요가 없습니다. 다시 사용 큐에서 셀 큐를 해제하기 위해 호출할 때 셀을 사용할 수 없는 경우 iOS는 등록된 형식 또는 nib에 따라 셀을 자동으로 만듭니다.
보조 보기에도 동일한 기술을 사용할 수 있습니다.
예를 들어 클래스를 등록하는 다음 코드를 고려합니다.AnimalCell
static NSString animalCellId = new NSString ("AnimalCell");
CollectionView.RegisterClassForCell (typeof(AnimalCell), animalCellId);
항목이 UICollectionView 화면에 UICollectionView 있기 때문에 셀이 필요한 경우 해당 데이터 원본의 GetCell 메서드를 호출합니다. UITableView에서 작동하는 방식과 마찬가지로 이 메서드는 백업 데이터에서 셀을 구성합니다. 이 경우 클래스가 AnimalCell 됩니다.
다음 코드는 인스턴스를 반환하는 구현 GetCell 을 보여 줍니다 AnimalCell .
public override UICollectionViewCell GetCell (UICollectionView collectionView, Foundation.NSIndexPath indexPath)
{
        var animalCell = (AnimalCell)collectionView.DequeueReusableCell (animalCellId, indexPath);

        var animal = animals [indexPath.Row];

        animalCell.Image = animal.Image;

        return animalCell;
}
호출 DequeReusableCell 은 다시 사용 큐에서 셀이 큐에서 제거되거나, 큐에서 셀을 사용할 수 없는 경우 호출 CollectionView.RegisterClassForCell에 등록된 형식에 따라 생성되는 위치입니다.
이 경우 클래스를 등록하면 AnimalCell iOS는 내부적으로 새 AnimalCell 셀을 만들고 큐를 해제하라는 호출이 수행되면 이를 반환합니다. 그 후에는 동물 클래스에 포함된 이미지로 구성되고 표시를 위해 UICollectionView반환됩니다.
대리인
클래스는 UICollectionView 형식 UICollectionViewDelegate UICollectionView의 대리자를 사용하여 . 이렇게 하면 다음을 제어할 수 있습니다.
- 셀 선택 – 셀이 선택되어 있는지 여부를 결정합니다.
- 셀 강조 표시 – 셀이 현재 터치되고 있는지 여부를 확인합니다.
- 셀 메뉴 – 긴 누름 제스처에 대한 응답으로 셀에 대해 표시되는 메뉴입니다.
데이터 원본과 마찬가지로 기본적으로 . UICollectionViewController 에 대한 UICollectionView대리자로 구성됩니다.
셀 HighLighting
셀을 누르면 셀이 강조 표시된 상태로 전환되고 사용자가 셀에서 손가락을 떼기 전까지는 선택되지 않습니다. 이렇게 하면 셀이 실제로 선택되기 전에 셀의 모양을 일시적으로 변경할 수 있습니다. 선택 시 셀이 SelectedBackgroundView 표시됩니다. 아래 그림에서는 선택 영역이 발생하기 직전에 강조 표시된 상태를 보여 줍니다.
강조 표시를 ItemHighlighted 구현하기 위해 해당 메서드 및 ItemUnhighlighted 메서드를 UICollectionViewDelegate 사용할 수 있습니다. 예를 들어 다음 코드는 위의 이미지와 같이 셀이 강조 표시될 때의 ContentView 노란색 배경과 강조 표시되지 않은 경우 흰색 배경을 적용합니다.
public override void ItemHighlighted (UICollectionView collectionView, NSIndexPath indexPath)
{
        var cell = collectionView.CellForItem(indexPath);
        cell.ContentView.BackgroundColor = UIColor.Yellow;
}

public override void ItemUnhighlighted (UICollectionView collectionView, NSIndexPath indexPath)
{
        var cell = collectionView.CellForItem(indexPath);
        cell.ContentView.BackgroundColor = UIColor.White;
}
선택 영역 사용 안 림
선택 영역은 기본적으로 .에서 사용하도록 설정됩니다 UICollectionView. 선택을 사용하지 않도록 설정하려면 아래와 같이 false를 재정 ShouldHighlightItem 의하고 반환합니다.
public override bool ShouldHighlightItem (UICollectionView collectionView, NSIndexPath indexPath)
{
        return false;
}
강조 표시를 사용하지 않도록 설정하면 셀을 선택하는 프로세스도 비활성화됩니다. 또한 선택 영역을 직접 제어하는 메서드도 ShouldSelectItem 있지만, 구현되고 false ShouldSelectItem 를 반환하는 경우에는 ShouldHighlightItem 호출되지 않습니다.
ShouldSelectItem 에서는 구현되지 않은 경우 항목별로 선택을 설정하거나 해제할 수 ShouldHighlightItem 있습니다. 또한 구현된 경우 ShouldHighlightItem 선택하지 않고 강조 표시를 허용하고 true를 반환하고 false를 ShouldSelectItem 반환합니다.
셀 메뉴
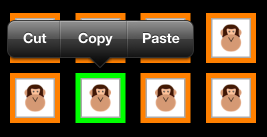
A의 UICollectionView 각 셀은 선택적으로 잘라내기, 복사 및 붙여넣기를 지원하는 메뉴를 표시할 수 있습니다. 셀에 편집 메뉴를 만들려면 다음을 수행합니다.
- 항목에 메뉴가 표시되어야 하는 경우 재정
ShouldShowMenu의하고 true를 반환합니다. - 항목이 수행할 수 있는 모든 작업(잘라내기, 복사 또는 붙여넣기)에 대해 재정
CanPerformAction의하고 true를 반환합니다. - 편집, 붙여넣기 작업의 복사본을 수행하도록 재정
PerformAction의합니다.
다음 스크린샷은 셀을 길게 누를 때의 메뉴를 보여줍니다.
레이아웃
UICollectionView 에서는 모든 요소, 셀, 보조 뷰 및 장식 뷰의 위치를 자체적으로 관리할 UICollectionView 수 있는 레이아웃 시스템을 지원합니다.
애플리케이션은 레이아웃 시스템을 사용하여 이 문서에서 살펴본 그리드와 같은 레이아웃을 지원하고 사용자 지정 레이아웃을 제공할 수 있습니다.
레이아웃 기본 사항
의 UICollectionView 레이아웃은 상속되는 클래스에서 UICollectionViewLayout정의됩니다. 레이아웃 구현은 .의 모든 항목 UICollectionView에 대한 레이아웃 특성을 만드는 역할을 담당합니다. 레이아웃을 만드는 방법에는 두 가지가 있습니다.
- 기본 제공
UICollectionViewFlowLayout. - 에서
UICollectionViewLayout상속하여 사용자 지정 레이아웃을 제공합니다.
선형 레이아웃
클래스는 UICollectionViewFlowLayout 본 것처럼 셀 그리드에서 콘텐츠를 정렬하는 데 적합한 선 기반 레이아웃을 제공합니다.
흐름 레이아웃을 사용하려면 다음을 수행합니다.
- 다음의 인스턴스를 만듭니다
UICollectionViewFlowLayout.
var layout = new UICollectionViewFlowLayout ();
- 인스턴스를 다음의 생성자에 전달합니다
UICollectionView.
simpleCollectionViewController = new SimpleCollectionViewController (layout);
이는 그리드에서 콘텐츠를 레이아웃하는 데 필요한 모든 것입니다. 또한 방향이 변경 UICollectionViewFlowLayout 되면 아래와 같이 핸들이 콘텐츠를 적절하게 다시 정렬합니다.
섹션 Inset
주위에 UIContentView공간을 제공하기 위해 레이아웃에는 형식UIEdgeInsets의 속성이 SectionInset 있습니다. 예를 들어 다음 코드는 다음 코드에 의해 배치된 경우의 UIContentView 각 섹션 주위에 50픽셀 버퍼를 UICollectionViewFlowLayout제공합니다.
var layout = new UICollectionViewFlowLayout ();
layout.SectionInset = new UIEdgeInsets (50,50,50,50);
그러면 아래와 같이 섹션 주위의 간격이 지정됩니다.
서브클래싱 UICollectionViewFlowLayout
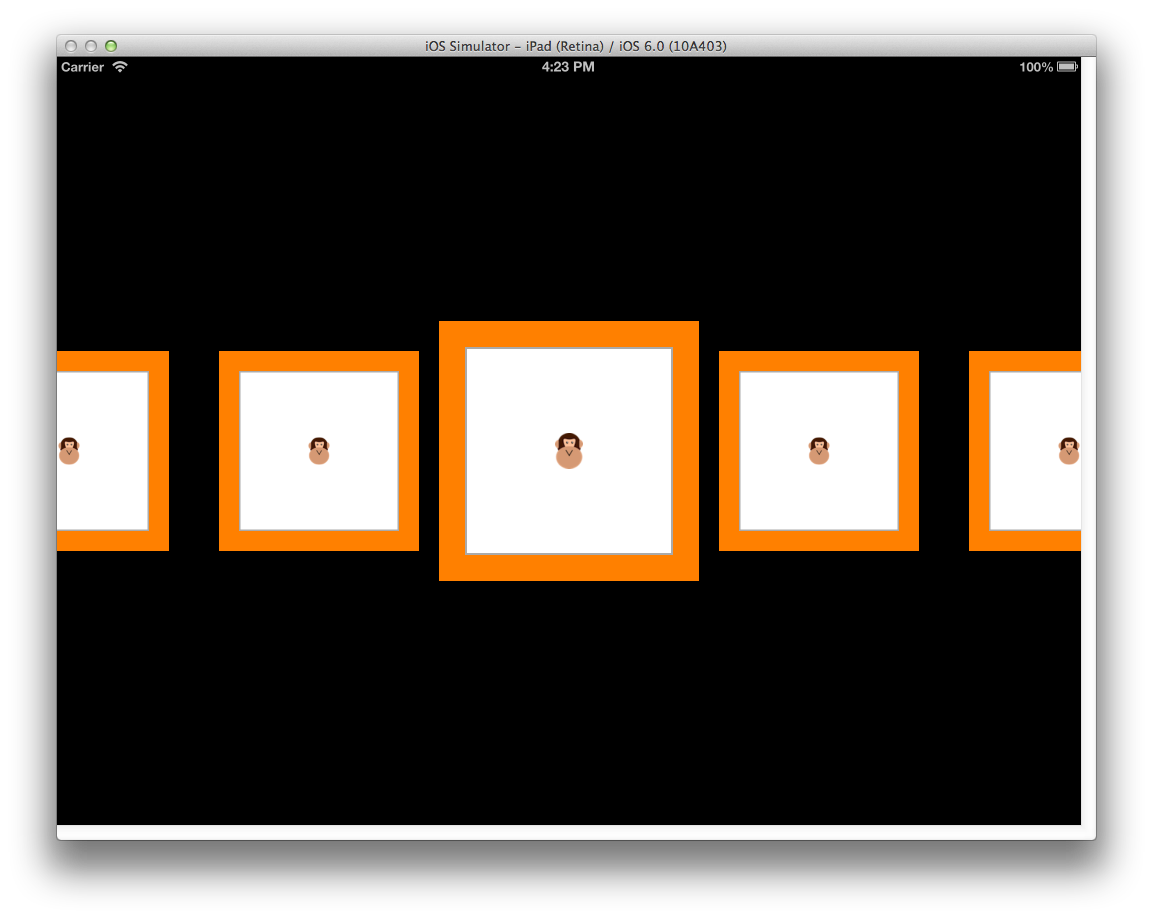
직접 사용하기 UICollectionViewFlowLayout 위한 버전에서는 서브클래스로 선을 따라 콘텐츠 레이아웃을 추가로 사용자 지정할 수도 있습니다. 예를 들어 아래와 같이 셀을 눈금으로 래핑하지 않고 가로 스크롤 효과가 있는 단일 행을 만드는 레이아웃을 만드는 데 사용할 수 있습니다.
서브클래싱을 UICollectionViewFlowLayout 통해 구현하려면 다음이 필요합니다.
- 레이아웃 자체 또는 생성자의 레이아웃에 있는 모든 항목에 적용되는 레이아웃 속성을 초기화합니다.
- 재정
ShouldInvalidateLayoutForBoundsChange의- 변경 내용의 범위가 변경될 때 셀의UICollectionView레이아웃이 다시 계산되도록 true를 반환합니다. 이 경우 가장 가운데 셀에 적용된 변환 코드가 스크롤 중에 적용되도록 하는 데 사용됩니다. - 스크롤이
TargetContentOffset중지될 때 가운데 셀이 가운데에 맞춰지도록 재정의UICollectionView합니다. - 의 배열을 반환하도록 재정
LayoutAttributesForElementsInRect의UICollectionViewLayoutAttributes각각UICollectionViewLayoutAttribute에는 해당 항목SizeZIndex과 같은Center속성을 포함하여 특정 항목을 레이아웃하는 방법에 대한 정보가 포함됩니다Transform3D.
다음 코드는 이러한 구현을 보여줍니다.
using System;
using CoreGraphics;
using Foundation;
using UIKit;
using CoreGraphics;
using CoreAnimation;

namespace SimpleCollectionView
{
  public class LineLayout : UICollectionViewFlowLayout
  {
    public const float ITEM_SIZE = 200.0f;
    public const int ACTIVE_DISTANCE = 200;
    public const float ZOOM_FACTOR = 0.3f;

    public LineLayout ()
    {
      ItemSize = new CGSize (ITEM_SIZE, ITEM_SIZE);
      ScrollDirection = UICollectionViewScrollDirection.Horizontal;
            SectionInset = new UIEdgeInsets (400,0,400,0);
      MinimumLineSpacing = 50.0f;
    }

    public override bool ShouldInvalidateLayoutForBoundsChange (CGRect newBounds)
    {
      return true;
    }

    public override UICollectionViewLayoutAttributes[] LayoutAttributesForElementsInRect (CGRect rect)
    {
      var array = base.LayoutAttributesForElementsInRect (rect);
            var visibleRect = new CGRect (CollectionView.ContentOffset, CollectionView.Bounds.Size);

      foreach (var attributes in array) {
        if (attributes.Frame.IntersectsWith (rect)) {
          float distance = (float)(visibleRect.GetMidX () - attributes.Center.X);
          float normalizedDistance = distance / ACTIVE_DISTANCE;
          if (Math.Abs (distance) < ACTIVE_DISTANCE) {
            float zoom = 1 + ZOOM_FACTOR * (1 - Math.Abs (normalizedDistance));
            attributes.Transform3D = CATransform3D.MakeScale (zoom, zoom, 1.0f);
            attributes.ZIndex = 1;
          }
        }
      }
      return array;
    }

    public override CGPoint TargetContentOffset (CGPoint proposedContentOffset, CGPoint scrollingVelocity)
    {
      float offSetAdjustment = float.MaxValue;
      float horizontalCenter = (float)(proposedContentOffset.X + (this.CollectionView.Bounds.Size.Width / 2.0));
      CGRect targetRect = new CGRect (proposedContentOffset.X, 0.0f, this.CollectionView.Bounds.Size.Width, this.CollectionView.Bounds.Size.Height);
      var array = base.LayoutAttributesForElementsInRect (targetRect);
      foreach (var layoutAttributes in array) {
        float itemHorizontalCenter = (float)layoutAttributes.Center.X;
        if (Math.Abs (itemHorizontalCenter - horizontalCenter) < Math.Abs (offSetAdjustment)) {
          offSetAdjustment = itemHorizontalCenter - horizontalCenter;
        }
      }
            return new CGPoint (proposedContentOffset.X + offSetAdjustment, proposedContentOffset.Y);
    }

  }
}
사용자 지정 레이아웃
사용 UICollectionViewFlowLayout외에도 레이아웃은 .에서 UICollectionViewLayout직접 상속하여 완전히 사용자 지정할 수 있습니다.
재정의할 주요 방법은 다음과 같습니다.
PrepareLayout– 레이아웃 프로세스 전체에서 사용되는 초기 기하학적 계산을 수행하는 데 사용됩니다.CollectionViewContentSize– 콘텐츠를 표시하는 데 사용되는 영역의 크기를 반환합니다.LayoutAttributesForElementsInRect– 앞에서 보여 준 UICollectionViewFlowLayout 예제와 마찬가지로 이 메서드는 각 항목을 레이아웃하는UICollectionView방법에 대한 정보를 제공하는 데 사용됩니다. 그러나 사용자 지정 레이아웃을UICollectionViewFlowLayout만들 때와 달리 선택한 항목의 위치를 지정할 수 있습니다.
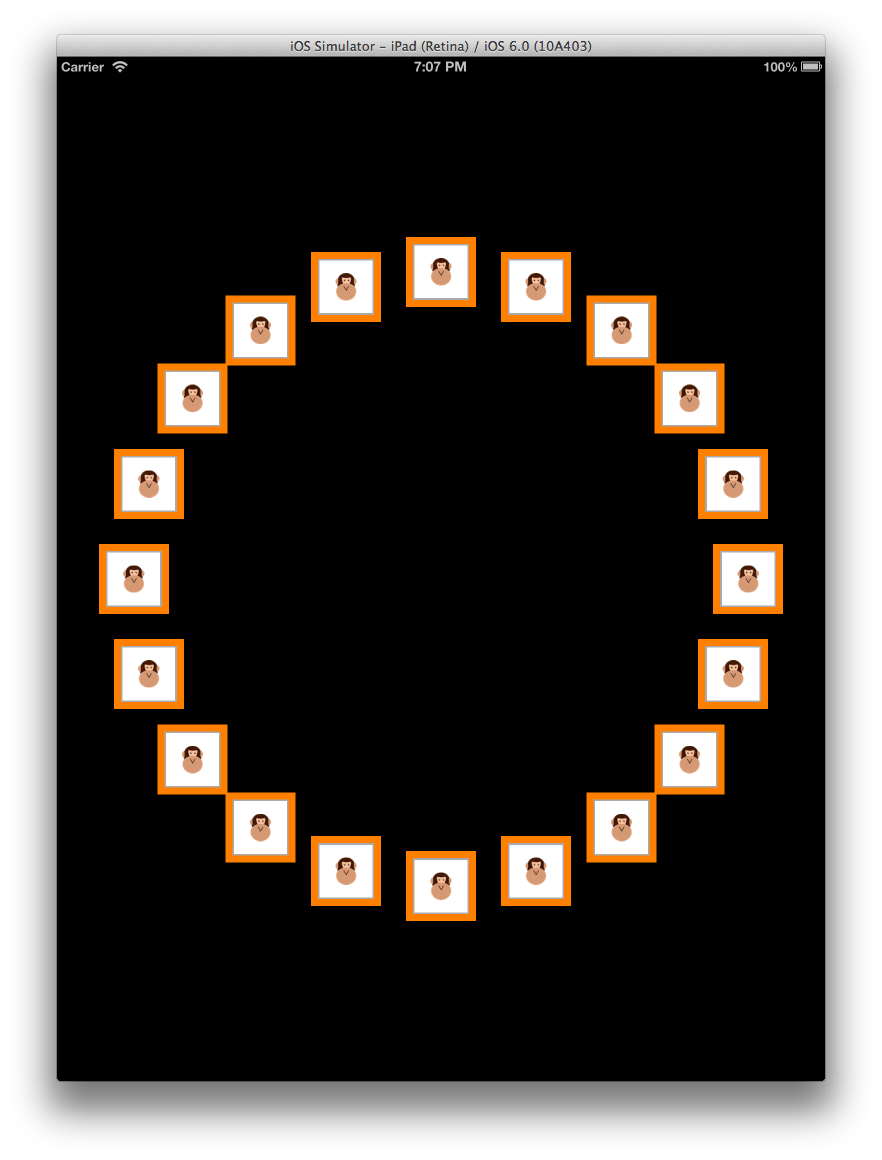
예를 들어 아래와 같이 동일한 콘텐츠를 원형 레이아웃으로 표시할 수 있습니다.
레이아웃의 강력한 장점은 그리드와 유사한 레이아웃에서 가로 스크롤 레이아웃으로 변경하고 이후에 이 원형 레이아웃으로 변경하려면 레이아웃 클래스만 변경해야 한다는 UICollectionView 것입니다. 대리자 또는 데이터 소스 코드에서 UICollectionView아무것도 변경되지 않습니다.
iOS 9의 변경 내용
이제 iOS 9에서 컬렉션 뷰(UICollectionView)는 새 기본 제스처 인식기와 몇 가지 새로운 지원 메서드를 추가하여 항목의 끌어오기 순서를 기본값으로 다시 정렬할 수 있습니다.
이러한 새 메서드를 사용하면 컬렉션 보기에서 순서를 변경할 끌기를 쉽게 구현할 수 있으며 다시 정렬 프로세스의 모든 단계에서 항목 모양을 사용자 지정할 수 있습니다.
이 문서에서는 Xamarin.iOS 애플리케이션에서 끌어서 다시 정렬을 구현하는 방법뿐만 아니라 iOS 9에서 컬렉션 뷰 컨트롤에 적용한 다른 변경 사항 중 일부를 살펴보겠습니다.
항목 순서 다시 지정
위에서 설명한 대로 iOS 9에서 컬렉션 보기의 가장 중요한 변경 사항 중 하나는 손쉬운 끌어서 다시 정렬 기능을 기본으로 추가한 것입니다.
iOS 9에서 컬렉션 뷰에 다시 정렬을 추가하는 가장 빠른 방법은 .를 UICollectionViewController사용하는 것입니다.
이제 컬렉션 뷰 컨트롤러에는 컬렉션의 InstallsStandardGestureForInteractiveMovement 항목 순서를 다시 매기기 위해 끌기를 지원하는 표준 제스처 인식기를 추가하는 속성이 있습니다.
기본값은 true끌어서 다시 정렬을 지원하도록 클래스의 UICollectionViewDataSource 메서드만 구현 MoveItem 하면 됩니다. 예시:
public override void MoveItem (UICollectionView collectionView, NSIndexPath sourceIndexPath, NSIndexPath destinationIndexPath)
{
  // Reorder our list of items
  ...
}
단순 순서 다시 정렬 예제
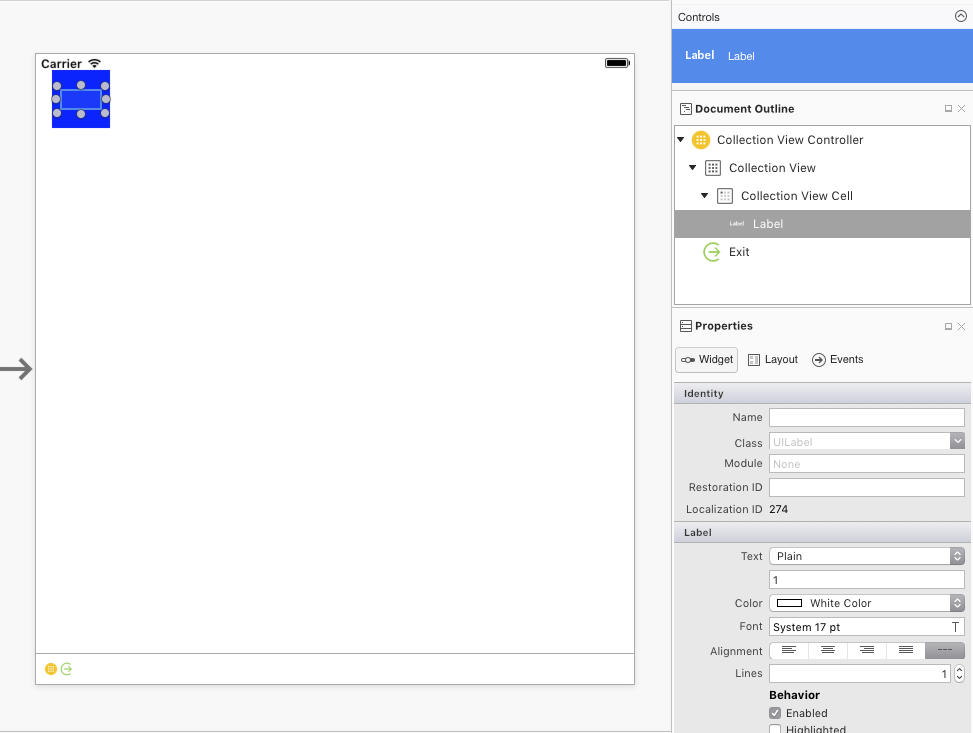
빠른 예제로 새 Xamarin.iOS 프로젝트를 시작하고 Main.storyboard 파일을 편집합니다. UICollectionViewController 디자인 화면으로 끌어다 놓습니다.
컬렉션 보기를 선택합니다(문서 개요에서 이 작업을 수행하는 것이 가장 쉬울 수 있음). 속성 패드의 레이아웃 탭에서 아래 스크린샷과 같이 다음 크기를 설정합니다.
- 셀 크기: 너비 – 60 | 높이 – 60
- 헤더 크기: 너비 – 0 | 높이 – 0
- 바닥글 크기: 너비 – 0 | 높이 – 0
- 최소 간격: 셀의 경우 – 8 | 선의 경우 - 8
- 섹션 인셋: 위쪽 - 16 | 아래쪽 – 16 | 왼쪽 – 16 | 오른쪽 – 16
다음으로, 기본 셀을 편집합니다.
- 배경색을 파란색으로 변경
- 셀의 제목 역할을 하는 레이블 추가
- 다시 사용 식별자를 셀로 설정
셀의 크기가 변경될 때 레이블을 셀 가운데에 두는 제약 조건을 추가합니다.
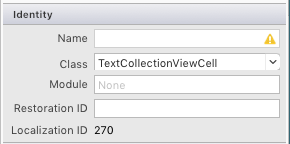
CollectionViewCell의 Property Pad에서 클래스를 다음으로 TextCollectionViewCell설정합니다.
컬렉션 재사용 가능 보기를 다음으로 Cell설정합니다.
마지막으로 레이블을 선택하고 이름을 다음과 같이 지정합니다 TextLabel.
클래스를 TextCollectionViewCell 편집하고 다음 속성을 추가합니다.
using System;
using Foundation;
using UIKit;

namespace CollectionView
{
  public partial class TextCollectionViewCell : UICollectionViewCell
  {
    #region Computed Properties
    public string Title {
      get { return TextLabel.Text; }
      set { TextLabel.Text = value; }
    }
    #endregion

    #region Constructors
    public TextCollectionViewCell (IntPtr handle) : base (handle)
    {
    }
    #endregion
  }
}
Text 여기서 레이블의 속성은 셀의 제목으로 노출되므로 코드에서 설정할 수 있습니다.
프로젝트에 새 C# 클래스를 추가하고 호출합니다 WaterfallCollectionSource. 파일을 편집하고 다음과 같이 표시합니다.
using System;
using Foundation;
using UIKit;
using System.Collections.Generic;

namespace CollectionView
{
  public class WaterfallCollectionSource : UICollectionViewDataSource
  {
    #region Computed Properties
    public WaterfallCollectionView CollectionView { get; set;}
    public List<int> Numbers { get; set; } = new List<int> ();
    #endregion

    #region Constructors
    public WaterfallCollectionSource (WaterfallCollectionView collectionView)
    {
      // Initialize
      CollectionView = collectionView;

      // Init numbers collection
      for (int n = 0; n < 100; ++n) {
        Numbers.Add (n);
      }
    }
    #endregion

    #region Override Methods
    public override nint NumberOfSections (UICollectionView collectionView) {
      // We only have one section
      return 1;
    }

    public override nint GetItemsCount (UICollectionView collectionView, nint section) {
      // Return the number of items
      return Numbers.Count;
    }

    public override UICollectionViewCell GetCell (UICollectionView collectionView, NSIndexPath indexPath)
    {
      // Get a reusable cell and set {~~it's~>its~~} title from the item
      var cell = collectionView.DequeueReusableCell ("Cell", indexPath) as TextCollectionViewCell;
      cell.Title = Numbers [(int)indexPath.Item].ToString();

      return cell;
    }

    public override bool CanMoveItem (UICollectionView collectionView, NSIndexPath indexPath) {
      // We can always move items
      return true;
    }

    public override void MoveItem (UICollectionView collectionView, NSIndexPath sourceIndexPath, NSIndexPath destinationIndexPath)
    {
      // Reorder our list of items
      var item = Numbers [(int)sourceIndexPath.Item];
      Numbers.RemoveAt ((int)sourceIndexPath.Item);
      Numbers.Insert ((int)destinationIndexPath.Item, item);
    }
    #endregion
  }
}
이 클래스는 컬렉션 뷰의 데이터 원본이 되며 컬렉션의 각 셀에 대한 정보를 제공합니다.
컬렉션의 MoveItem 항목을 끌어서 다시 정렬할 수 있도록 메서드가 구현됩니다.
프로젝트에 다른 새 C# 클래스를 추가하고 호출합니다 WaterfallCollectionDelegate. 이 파일을 편집하고 다음과 같이 표시합니다.
using System;
using Foundation;
using UIKit;
using System.Collections.Generic;

namespace CollectionView
{
  public class WaterfallCollectionDelegate : UICollectionViewDelegate
  {
    #region Computed Properties
    public WaterfallCollectionView CollectionView { get; set;}
    #endregion

    #region Constructors
    public WaterfallCollectionDelegate (WaterfallCollectionView collectionView)
    {

      // Initialize
      CollectionView = collectionView;

    }
    #endregion

    #region Overrides Methods
    public override bool ShouldHighlightItem (UICollectionView collectionView, NSIndexPath indexPath) {
      // Always allow for highlighting
      return true;
    }

    public override void ItemHighlighted (UICollectionView collectionView, NSIndexPath indexPath)
    {
      // Get cell and change to green background
      var cell = collectionView.CellForItem(indexPath);
      cell.ContentView.BackgroundColor = UIColor.FromRGB(183,208,57);
    }

    public override void ItemUnhighlighted (UICollectionView collectionView, NSIndexPath indexPath)
    {
      // Get cell and return to blue background
      var cell = collectionView.CellForItem(indexPath);
      cell.ContentView.BackgroundColor = UIColor.FromRGB(164,205,255);
    }
    #endregion
  }
}
컬렉션 뷰의 대리자 역할을 합니다. 사용자가 컬렉션 보기에서 셀과 상호 작용할 때 셀을 강조 표시하도록 메서드가 재정의되었습니다.
마지막 C# 클래스를 프로젝트에 추가하고 호출합니다 WaterfallCollectionView. 이 파일을 편집하고 다음과 같이 표시합니다.
using System;
using UIKit;
using System.Collections.Generic;
using Foundation;

namespace CollectionView
{
  [Register("WaterfallCollectionView")]
  public class WaterfallCollectionView : UICollectionView
  {

    #region Constructors
    public WaterfallCollectionView (IntPtr handle) : base (handle)
    {
    }
    #endregion

    #region Override Methods
    public override void AwakeFromNib ()
    {
      base.AwakeFromNib ();

      // Initialize
      DataSource = new WaterfallCollectionSource(this);
      Delegate = new WaterfallCollectionDelegate(this);

    }
    #endregion
  }
}
DataSource Delegate 위에서 만든 컬렉션 뷰는 스토리보드(또는 .xib 파일)에서 생성될 때 설정됩니다.
Main.storyboard 파일을 다시 편집하고 컬렉션 보기를 선택하고 속성으로 전환합니다. 위에서 정의한 사용자 지정 WaterfallCollectionView 클래스로 클래스를 설정합니다.
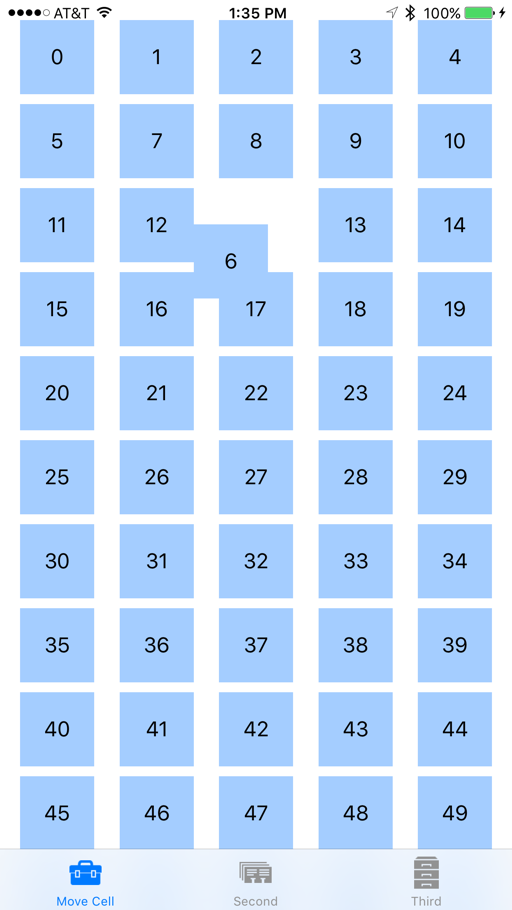
UI에 변경한 내용을 저장하고 앱을 실행합니다. 사용자가 목록에서 항목을 선택하고 새 위치로 끌면 다른 항목이 항목의 길에서 벗어날 때 자동으로 애니메이션 효과를 줍니다. 사용자가 새 위치에 항목을 삭제하면 해당 위치에 유지됩니다. 예시:
사용자 지정 제스처 인식기 사용
일반 UIViewController제스처를 UICollectionViewController 사용할 수 없고 사용해야 하는 경우 또는 끌어서 놓기 제스처를 더 자세히 제어하려는 경우 사용자 지정 제스처 인식기를 만들어 보기가 로드될 때 컬렉션 보기에 추가할 수 있습니다. 예시:
public override void ViewDidLoad ()
{
  base.ViewDidLoad ();

  // Create a custom gesture recognizer
  var longPressGesture = new UILongPressGestureRecognizer ((gesture) => {

    // Take action based on state
    switch(gesture.State) {
    case UIGestureRecognizerState.Began:
      var selectedIndexPath = CollectionView.IndexPathForItemAtPoint(gesture.LocationInView(View));
      if (selectedIndexPath !=null) {
        CollectionView.BeginInteractiveMovementForItem(selectedIndexPath);
      }
      break;
    case UIGestureRecognizerState.Changed:
      CollectionView.UpdateInteractiveMovementTargetPosition(gesture.LocationInView(View));
      break;
    case UIGestureRecognizerState.Ended:
      CollectionView.EndInteractiveMovement();
      break;
    default:
      CollectionView.CancelInteractiveMovement();
      break;
    }

  });

  // Add the custom recognizer to the collection view
  CollectionView.AddGestureRecognizer(longPressGesture);
}
여기서는 컬렉션 뷰에 추가된 몇 가지 새 메서드를 사용하여 끌기 작업을 구현하고 제어합니다.
BeginInteractiveMovementForItem- 이동 작업의 시작을 표시합니다.UpdateInteractiveMovementTargetPosition- 항목의 위치가 업데이트되면 전송됩니다.EndInteractiveMovement- 항목 이동의 끝을 표시합니다.CancelInteractiveMovement- 사용자가 이동 작업을 취소하는 것을 표시합니다.
애플리케이션이 실행되면 끌기 작업은 컬렉션 뷰와 함께 제공되는 기본 끌기 제스처 인식기처럼 작동합니다.
사용자 지정 레이아웃 및 순서 변경
iOS 9에서는 컬렉션 보기에서 끌어서 다시 정렬 및 사용자 지정 레이아웃을 사용하는 몇 가지 새로운 메서드가 추가되었습니다. 이 기능을 살펴보려면 컬렉션에 사용자 지정 레이아웃을 추가해 보겠습니다.
먼저 프로젝트에 호출 WaterfallCollectionLayout 된 새 C# 클래스를 추가합니다. 편집하고 다음과 같이 표시합니다.
using System;
using Foundation;
using UIKit;
using System.Collections.Generic;
using CoreGraphics;

namespace CollectionView
{
  [Register("WaterfallCollectionLayout")]
  public class WaterfallCollectionLayout : UICollectionViewLayout
  {
    #region Private Variables
    private int columnCount = 2;
    private nfloat minimumColumnSpacing = 10;
    private nfloat minimumInterItemSpacing = 10;
    private nfloat headerHeight = 0.0f;
    private nfloat footerHeight = 0.0f;
    private UIEdgeInsets sectionInset = new UIEdgeInsets(0, 0, 0, 0);
    private WaterfallCollectionRenderDirection itemRenderDirection = WaterfallCollectionRenderDirection.ShortestFirst;
    private Dictionary<nint,UICollectionViewLayoutAttributes> headersAttributes = new Dictionary<nint, UICollectionViewLayoutAttributes>();
    private Dictionary<nint,UICollectionViewLayoutAttributes> footersAttributes = new Dictionary<nint, UICollectionViewLayoutAttributes>();
    private List<CGRect> unionRects = new List<CGRect>();
    private List<nfloat> columnHeights = new List<nfloat>();
    private List<UICollectionViewLayoutAttributes> allItemAttributes = new List<UICollectionViewLayoutAttributes>();
    private List<List<UICollectionViewLayoutAttributes>> sectionItemAttributes = new List<List<UICollectionViewLayoutAttributes>>();
    private nfloat unionSize = 20;
    #endregion

    #region Computed Properties
    [Export("ColumnCount")]
    public int ColumnCount {
      get { return columnCount; }
      set {
        WillChangeValue ("ColumnCount");
        columnCount = value;
        DidChangeValue ("ColumnCount");

        InvalidateLayout ();
      }
    }

    [Export("MinimumColumnSpacing")]
    public nfloat MinimumColumnSpacing {
      get { return minimumColumnSpacing; }
      set {
        WillChangeValue ("MinimumColumnSpacing");
        minimumColumnSpacing = value;
        DidChangeValue ("MinimumColumnSpacing");

        InvalidateLayout ();
      }
    }

    [Export("MinimumInterItemSpacing")]
    public nfloat MinimumInterItemSpacing {
      get { return minimumInterItemSpacing; }
      set {
        WillChangeValue ("MinimumInterItemSpacing");
        minimumInterItemSpacing = value;
        DidChangeValue ("MinimumInterItemSpacing");

        InvalidateLayout ();
      }
    }

    [Export("HeaderHeight")]
    public nfloat HeaderHeight {
      get { return headerHeight; }
      set {
        WillChangeValue ("HeaderHeight");
        headerHeight = value;
        DidChangeValue ("HeaderHeight");

        InvalidateLayout ();
      }
    }

    [Export("FooterHeight")]
    public nfloat FooterHeight {
      get { return footerHeight; }
      set {
        WillChangeValue ("FooterHeight");
        footerHeight = value;
        DidChangeValue ("FooterHeight");

        InvalidateLayout ();
      }
    }

    [Export("SectionInset")]
    public UIEdgeInsets SectionInset {
      get { return sectionInset; }
      set {
        WillChangeValue ("SectionInset");
        sectionInset = value;
        DidChangeValue ("SectionInset");

        InvalidateLayout ();
      }
    }

    [Export("ItemRenderDirection")]
    public WaterfallCollectionRenderDirection ItemRenderDirection {
      get { return itemRenderDirection; }
      set {
        WillChangeValue ("ItemRenderDirection");
        itemRenderDirection = value;
        DidChangeValue ("ItemRenderDirection");

        InvalidateLayout ();
      }
    }
    #endregion

    #region Constructors
    public WaterfallCollectionLayout ()
    {
    }

    public WaterfallCollectionLayout(NSCoder coder) : base(coder) {

    }
    #endregion

    #region Public Methods
    public nfloat ItemWidthInSectionAtIndex(int section) {

      var width = CollectionView.Bounds.Width - SectionInset.Left - SectionInset.Right;
      return (nfloat)Math.Floor ((width - ((ColumnCount - 1) * MinimumColumnSpacing)) / ColumnCount);
    }
    #endregion

    #region Override Methods
    public override void PrepareLayout ()
    {
      base.PrepareLayout ();

      // Get the number of sections
      var numberofSections = CollectionView.NumberOfSections();
      if (numberofSections == 0)
        return;

      // Reset collections
      headersAttributes.Clear ();
      footersAttributes.Clear ();
      unionRects.Clear ();
      columnHeights.Clear ();
      allItemAttributes.Clear ();
      sectionItemAttributes.Clear ();

      // Initialize column heights
      for (int n = 0; n < ColumnCount; n++) {
        columnHeights.Add ((nfloat)0);
      }

      // Process all sections
      nfloat top = 0.0f;
      var attributes = new UICollectionViewLayoutAttributes ();
      var columnIndex = 0;
      for (nint section = 0; section < numberofSections; ++section) {
        // Calculate section specific metrics
        var minimumInterItemSpacing = (MinimumInterItemSpacingForSection == null) ? MinimumColumnSpacing :
          MinimumInterItemSpacingForSection (CollectionView, this, section);

        // Calculate widths
        var width = CollectionView.Bounds.Width - SectionInset.Left - SectionInset.Right;
        var itemWidth = (nfloat)Math.Floor ((width - ((ColumnCount - 1) * MinimumColumnSpacing)) / ColumnCount);

        // Calculate section header
        var heightHeader = (HeightForHeader == null) ? HeaderHeight :
          HeightForHeader (CollectionView, this, section);

        if (heightHeader > 0) {
          attributes = UICollectionViewLayoutAttributes.CreateForSupplementaryView (UICollectionElementKindSection.Header, NSIndexPath.FromRowSection (0, section));
          attributes.Frame = new CGRect (0, top, CollectionView.Bounds.Width, heightHeader);
          headersAttributes.Add (section, attributes);
          allItemAttributes.Add (attributes);

          top = attributes.Frame.GetMaxY ();
        }

        top += SectionInset.Top;
        for (int n = 0; n < ColumnCount; n++) {
          columnHeights [n] = top;
        }

        // Calculate Section Items
        var itemCount = CollectionView.NumberOfItemsInSection(section);
        List<UICollectionViewLayoutAttributes> itemAttributes = new List<UICollectionViewLayoutAttributes> ();

        for (nint n = 0; n < itemCount; n++) {
          var indexPath = NSIndexPath.FromRowSection (n, section);
          columnIndex = NextColumnIndexForItem (n);
          var xOffset = SectionInset.Left + (itemWidth + MinimumColumnSpacing) * (nfloat)columnIndex;
          var yOffset = columnHeights [columnIndex];
          var itemSize = (SizeForItem == null) ? new CGSize (0, 0) : SizeForItem (CollectionView, this, indexPath);
          nfloat itemHeight = 0.0f;

          if (itemSize.Height > 0.0f && itemSize.Width > 0.0f) {
            itemHeight = (nfloat)Math.Floor (itemSize.Height * itemWidth / itemSize.Width);
          }

          attributes = UICollectionViewLayoutAttributes.CreateForCell (indexPath);
          attributes.Frame = new CGRect (xOffset, yOffset, itemWidth, itemHeight);
          itemAttributes.Add (attributes);
          allItemAttributes.Add (attributes);
          columnHeights [columnIndex] = attributes.Frame.GetMaxY () + MinimumInterItemSpacing;
        }
        sectionItemAttributes.Add (itemAttributes);

        // Calculate Section Footer
        nfloat footerHeight = 0.0f;
        columnIndex = LongestColumnIndex();
        top = columnHeights [columnIndex] - MinimumInterItemSpacing + SectionInset.Bottom;
        footerHeight = (HeightForFooter == null) ? FooterHeight : HeightForFooter(CollectionView, this, section);

        if (footerHeight > 0) {
          attributes = UICollectionViewLayoutAttributes.CreateForSupplementaryView (UICollectionElementKindSection.Footer, NSIndexPath.FromRowSection (0, section));
          attributes.Frame = new CGRect (0, top, CollectionView.Bounds.Width, footerHeight);
          footersAttributes.Add (section, attributes);
          allItemAttributes.Add (attributes);
          top = attributes.Frame.GetMaxY ();
        }

        for (int n = 0; n < ColumnCount; n++) {
          columnHeights [n] = top;
        }
      }

      var i =0;
      var attrs = allItemAttributes.Count;
      while(i < attrs) {
        var rect1 = allItemAttributes [i].Frame;
        i = (int)Math.Min (i + unionSize, attrs) - 1;
        var rect2 = allItemAttributes [i].Frame;
        unionRects.Add (CGRect.Union (rect1, rect2));
        i++;
      }

    }

    public override CGSize CollectionViewContentSize {
      get {
        if (CollectionView.NumberOfSections () == 0) {
          return new CGSize (0, 0);
        }

        var contentSize = CollectionView.Bounds.Size;
        contentSize.Height = columnHeights [0];
        return contentSize;
      }
    }

    public override UICollectionViewLayoutAttributes LayoutAttributesForItem (NSIndexPath indexPath)
    {
      if (indexPath.Section >= sectionItemAttributes.Count) {
        return null;
      }

      if (indexPath.Item >= sectionItemAttributes [indexPath.Section].Count) {
        return null;
      }

      var list = sectionItemAttributes [indexPath.Section];
      return list [(int)indexPath.Item];
    }

    public override UICollectionViewLayoutAttributes LayoutAttributesForSupplementaryView (NSString kind, NSIndexPath indexPath)
    {
      var attributes = new UICollectionViewLayoutAttributes ();

      switch (kind) {
      case "header":
        attributes = headersAttributes [indexPath.Section];
        break;
      case "footer":
        attributes = footersAttributes [indexPath.Section];
        break;
      }

      return attributes;
    }

    public override UICollectionViewLayoutAttributes[] LayoutAttributesForElementsInRect (CGRect rect)
    {
      var begin = 0;
      var end = unionRects.Count;
      List<UICollectionViewLayoutAttributes> attrs = new List<UICollectionViewLayoutAttributes> ();

      for (int i = 0; i < end; i++) {
        if (rect.IntersectsWith(unionRects[i])) {
          begin = i * (int)unionSize;
        }
      }

      for (int i = end - 1; i >= 0; i--) {
        if (rect.IntersectsWith (unionRects [i])) {
          end = (int)Math.Min ((i + 1) * (int)unionSize, allItemAttributes.Count);
          break;
        }
      }

      for (int i = begin; i < end; i++) {
        var attr = allItemAttributes [i];
        if (rect.IntersectsWith (attr.Frame)) {
          attrs.Add (attr);
        }
      }

      return attrs.ToArray();
    }

    public override bool ShouldInvalidateLayoutForBoundsChange (CGRect newBounds)
    {
      var oldBounds = CollectionView.Bounds;
      return (newBounds.Width != oldBounds.Width);
    }
    #endregion

    #region Private Methods
    private int ShortestColumnIndex() {
      var index = 0;
      var shortestHeight = nfloat.MaxValue;
      var n = 0;

      // Scan each column for the shortest height
      foreach (nfloat height in columnHeights) {
        if (height < shortestHeight) {
          shortestHeight = height;
          index = n;
        }
        ++n;
      }

      return index;
    }

    private int LongestColumnIndex() {
      var index = 0;
      var longestHeight = nfloat.MinValue;
      var n = 0;

      // Scan each column for the shortest height
      foreach (nfloat height in columnHeights) {
        if (height > longestHeight) {
          longestHeight = height;
          index = n;
        }
        ++n;
      }

      return index;
    }

    private int NextColumnIndexForItem(nint item) {
      var index = 0;

      switch (ItemRenderDirection) {
      case WaterfallCollectionRenderDirection.ShortestFirst:
        index = ShortestColumnIndex ();
        break;
      case WaterfallCollectionRenderDirection.LeftToRight:
        index = ColumnCount;
        break;
      case WaterfallCollectionRenderDirection.RightToLeft:
        index = (ColumnCount - 1) - ((int)item / ColumnCount);
        break;
      }

      return index;
    }
    #endregion

    #region Events
    public delegate CGSize WaterfallCollectionSizeDelegate(UICollectionView collectionView, WaterfallCollectionLayout layout, NSIndexPath indexPath);
    public delegate nfloat WaterfallCollectionFloatDelegate(UICollectionView collectionView, WaterfallCollectionLayout layout, nint section);
    public delegate UIEdgeInsets WaterfallCollectionEdgeInsetsDelegate(UICollectionView collectionView, WaterfallCollectionLayout layout, nint section);

    public event WaterfallCollectionSizeDelegate SizeForItem;
    public event WaterfallCollectionFloatDelegate HeightForHeader;
    public event WaterfallCollectionFloatDelegate HeightForFooter;
    public event WaterfallCollectionEdgeInsetsDelegate InsetForSection;
    public event WaterfallCollectionFloatDelegate MinimumInterItemSpacingForSection;
    #endregion
  }
}
이 클래스를 사용하여 컬렉션 뷰에 사용자 지정 두 열인 폭포 형식 레이아웃을 제공할 수 있습니다.
이 코드는 키-값 코딩(및 DidChangeValue 메서드를 통해WillChangeValue)을 사용하여 이 클래스의 계산 속성에 대한 데이터 바인딩을 제공합니다.
다음으로 편집하고 WaterfallCollectionSource 다음과 같은 변경 및 추가를 수행합니다.
private Random rnd = new Random();
...

public List<nfloat> Heights { get; set; } = new List<nfloat> ();
...

public WaterfallCollectionSource (WaterfallCollectionView collectionView)
{
  // Initialize
  CollectionView = collectionView;

  // Init numbers collection
  for (int n = 0; n < 100; ++n) {
    Numbers.Add (n);
    Heights.Add (rnd.Next (0, 100) + 40.0f);
  }
}
그러면 목록에 표시될 각 항목에 대해 임의의 높이가 생성됩니다.
다음으로, 클래스를 WaterfallCollectionView 편집하고 다음 도우미 속성을 추가합니다.
public WaterfallCollectionSource Source {
  get { return (WaterfallCollectionSource)DataSource; }
}
이렇게 하면 사용자 지정 레이아웃에서 데이터 원본(및 항목 높이)을 더 쉽게 가져올 수 있습니다.
마지막으로 뷰 컨트롤러를 편집하고 다음 코드를 추가합니다.
public override void AwakeFromNib ()
{
  base.AwakeFromNib ();

  var waterfallLayout = new WaterfallCollectionLayout ();

  // Wireup events
  waterfallLayout.SizeForItem += (collectionView, layout, indexPath) => {
    var collection = collectionView as WaterfallCollectionView;
    return new CGSize((View.Bounds.Width-40)/3,collection.Source.Heights[(int)indexPath.Item]);
  };

  // Attach the custom layout to the collection
  CollectionView.SetCollectionViewLayout(waterfallLayout, false);
}
사용자 지정 레이아웃의 인스턴스를 만들고, 각 항목의 크기를 제공하도록 이벤트를 설정하고, 컬렉션 보기에 새 레이아웃을 연결합니다.
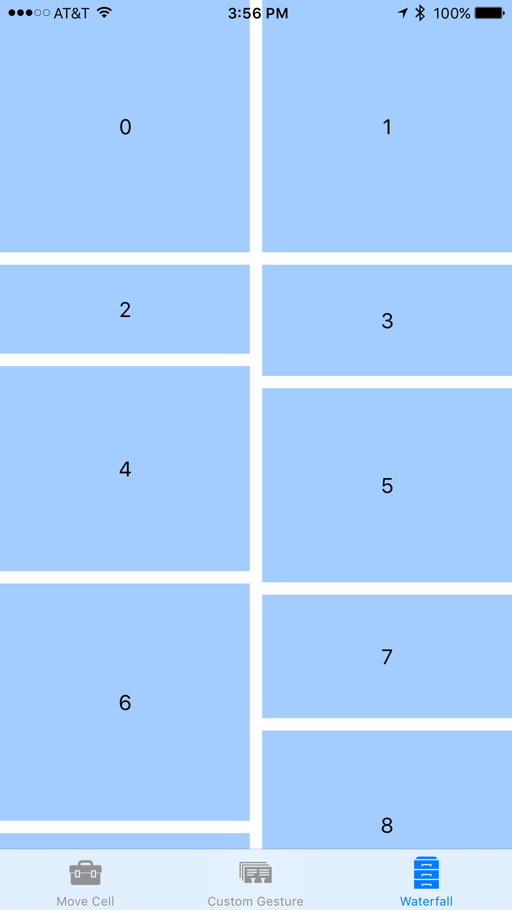
Xamarin.iOS 앱을 다시 실행하면 컬렉션 보기가 다음과 같이 표시됩니다.
이전과 같이 항목을 끌어서 다시 정렬할 수 있지만, 이제 항목이 삭제될 때 새 위치에 맞게 크기가 변경됩니다.
컬렉션 보기 변경 내용
다음 섹션에서는 iOS 9에서 컬렉션 보기의 각 클래스에 대한 변경 내용을 자세히 살펴보겠습니다.
UICollectionView
iOS 9에 대한 클래스에 UICollectionView 다음과 같은 변경 내용이 추가되었습니다.
BeginInteractiveMovementForItem– 끌기 작업의 시작을 표시합니다.CancelInteractiveMovement– 사용자가 끌기 작업을 취소했음을 컬렉션 보기에 알릴 수 있습니다.EndInteractiveMovement– 사용자가 끌기 작업을 완료했음을 컬렉션 보기에 알릴 수 있습니다.GetIndexPathsForVisibleSupplementaryElements– 컬렉션 뷰 섹션에서 머리글 또는 바닥글의 값을 반환indexPath합니다.GetSupplementaryView– 지정된 머리글 또는 바닥글을 반환합니다.GetVisibleSupplementaryViews– 표시되는 모든 머리글 및 바닥글 목록을 반환합니다.UpdateInteractiveMovementTargetPosition– 사용자가 끌기 작업 중에 항목을 이동했거나 이동 중임을 컬렉션 보기에 알립니다.
UICollectionViewController
iOS 9에서 클래스에 UICollectionViewController 다음과 같은 변경 내용이 추가되었습니다.
InstallsStandardGestureForInteractiveMovement– 끌어서 다시 정렬을 자동으로 지원하는 새 제스처 인식기가 사용되는 경우trueCanMoveItem– 지정된 항목을 끌어서 다시 정렬할 수 있는지 컬렉션 뷰에 알립니다.GetTargetContentOffset– 지정된 컬렉션 뷰 항목의 오프셋을 가져오는 데 사용됩니다.GetTargetIndexPathForMove– 끌기 작업에 대해 지정된 항목의 값을 가져옵니다indexPath.MoveItem– 목록에서 지정된 항목의 순서를 이동합니다.
UICollectionViewDataSource
iOS 9에서 클래스에 UICollectionViewDataSource 다음과 같은 변경 내용이 추가되었습니다.
CanMoveItem– 지정된 항목을 끌어서 다시 정렬할 수 있는지 컬렉션 뷰에 알립니다.MoveItem– 목록에서 지정된 항목의 순서를 이동합니다.
UICollectionViewDelegate
iOS 9에서 클래스에 UICollectionViewDelegate 다음과 같은 변경 내용이 추가되었습니다.
GetTargetContentOffset– 지정된 컬렉션 뷰 항목의 오프셋을 가져오는 데 사용됩니다.GetTargetIndexPathForMove– 끌기 작업에 대해 지정된 항목의 값을 가져옵니다indexPath.
UICollectionViewFlowLayout
iOS 9에서 클래스에 UICollectionViewFlowLayout 다음과 같은 변경 내용이 추가되었습니다.
SectionFootersPinToVisibleBounds– 구역 바닥글을 표시되는 컬렉션 뷰 범위에 고정합니다.SectionHeadersPinToVisibleBounds– 섹션 헤더를 표시되는 컬렉션 뷰 경계에 고정합니다.
UICollectionViewLayout
iOS 9에서 클래스에 UICollectionViewLayout 다음과 같은 변경 내용이 추가되었습니다.
GetInvalidationContextForEndingInteractiveMovementOfItems– 끌기 작업이 끝날 때 사용자가 끌기를 완료하거나 취소할 때 무효화 컨텍스트를 반환합니다.GetInvalidationContextForInteractivelyMovingItems– 끌기 작업이 시작될 때 무효화 컨텍스트를 반환합니다.GetLayoutAttributesForInteractivelyMovingItem– 항목을 끌 때 지정된 항목의 레이아웃 특성을 가져옵니다.GetTargetIndexPathForInteractivelyMovingItem– 항목을 끌 때 지정된 지점에 있는 항목의 값을 반환indexPath합니다.
UICollectionViewLayoutAttributes
iOS 9에서 클래스에 UICollectionViewLayoutAttributes 다음과 같은 변경 내용이 추가되었습니다.
CollisionBoundingPath– 끌기 작업 중 두 항목의 충돌 경로를 반환합니다.CollisionBoundsType– 끌기 작업 중에 발생한 충돌 유형(aUIDynamicItemCollisionBoundsType)을 반환합니다.
UICollectionViewLayoutInvalidationContext
iOS 9에서 클래스에 UICollectionViewLayoutInvalidationContext 다음과 같은 변경 내용이 추가되었습니다.
InteractiveMovementTarget– 끌기 작업의 대상 항목을 반환합니다.PreviousIndexPathsForInteractivelyMovingItems– 끌기에indexPaths관련된 다른 항목의 순서를 다시 지정하는 작업을 반환합니다.TargetIndexPathsForInteractivelyMovingItems– 끌어서 다시 정렬 작업의 결과로 다시 정렬될 항목의 값을 반환indexPaths합니다.
UICollectionViewSource
iOS 9에서 클래스에 UICollectionViewSource 다음과 같은 변경 내용이 추가되었습니다.
CanMoveItem– 지정된 항목을 끌어서 다시 정렬할 수 있는지 컬렉션 뷰에 알립니다.GetTargetContentOffset– 끌어서 다시 정렬 작업을 통해 이동할 항목의 오프셋을 반환합니다.GetTargetIndexPathForMove– 끌어서 다시 정렬 작업 중에 이동할 항목의 값을 반환indexPath합니다.MoveItem– 목록에서 지정된 항목의 순서를 이동합니다.
요약
이 문서에서는 iOS 9의 컬렉션 뷰에 대한 변경 내용을 설명하고 Xamarin.iOS에서 이를 구현하는 방법을 설명했습니다. 컬렉션 뷰에서 간단한 끌어서 다시 정렬 작업을 구현하는 방법을 설명했습니다. 끌어서 다시 정렬할 때 사용자 지정 제스처 인식기 사용 및 끌어서 다시 정렬이 사용자 지정 컬렉션 뷰 레이아웃에 미치는 영향
