Nata
Norint pasiekti šį puslapį, reikalingas leidimas. Galite pabandyti prisijungti arba pakeisti katalogus.
Norint pasiekti šį puslapį, reikalingas leidimas. Galite pabandyti pakeisti katalogus.
User Data Functions enable you to create reusable Python functions that can be invoked across Microsoft Fabric and from external applications. By centralizing your business logic in functions, you can maintain consistency, reduce code duplication, and streamline data transformation workflows throughout your organization.
With User Data Functions, you can:
- Centralize business logic - Write functions once and invoke them from Pipelines, Notebooks, Activator rules, and Power BI
- Integrate seamlessly - Call functions via REST endpoints from any application or service
- Accelerate development - Use pre-built sample functions or create custom functions with the Python programming model
- Maintain consistency - Ensure data transformations and business rules are applied uniformly across all workloads
This quickstart shows you how to create your first User Data Functions item, add functions from the sample library, write custom functions, and run them in the Fabric portal. By the end, you have a working function that demonstrates category standardization for product data.
What you accomplish
In this quickstart, you complete the following tasks:
- Create a User Data Functions item in your workspace
- Add and configure required Python libraries (like pandas)
- Insert a function from the sample library
- Write a custom function with proper syntax and decorators
- Test and publish your functions
- Run functions in the portal and view results
Prerequisites
- A Microsoft Fabric capacity in one of the supported regions. If you don't have a Fabric capacity, start a free Fabric trial.
- A Fabric workspace assigned to that capacity
Create a new user data functions item
In your workspace, select + New item.
Search for and select the User data functions tile.
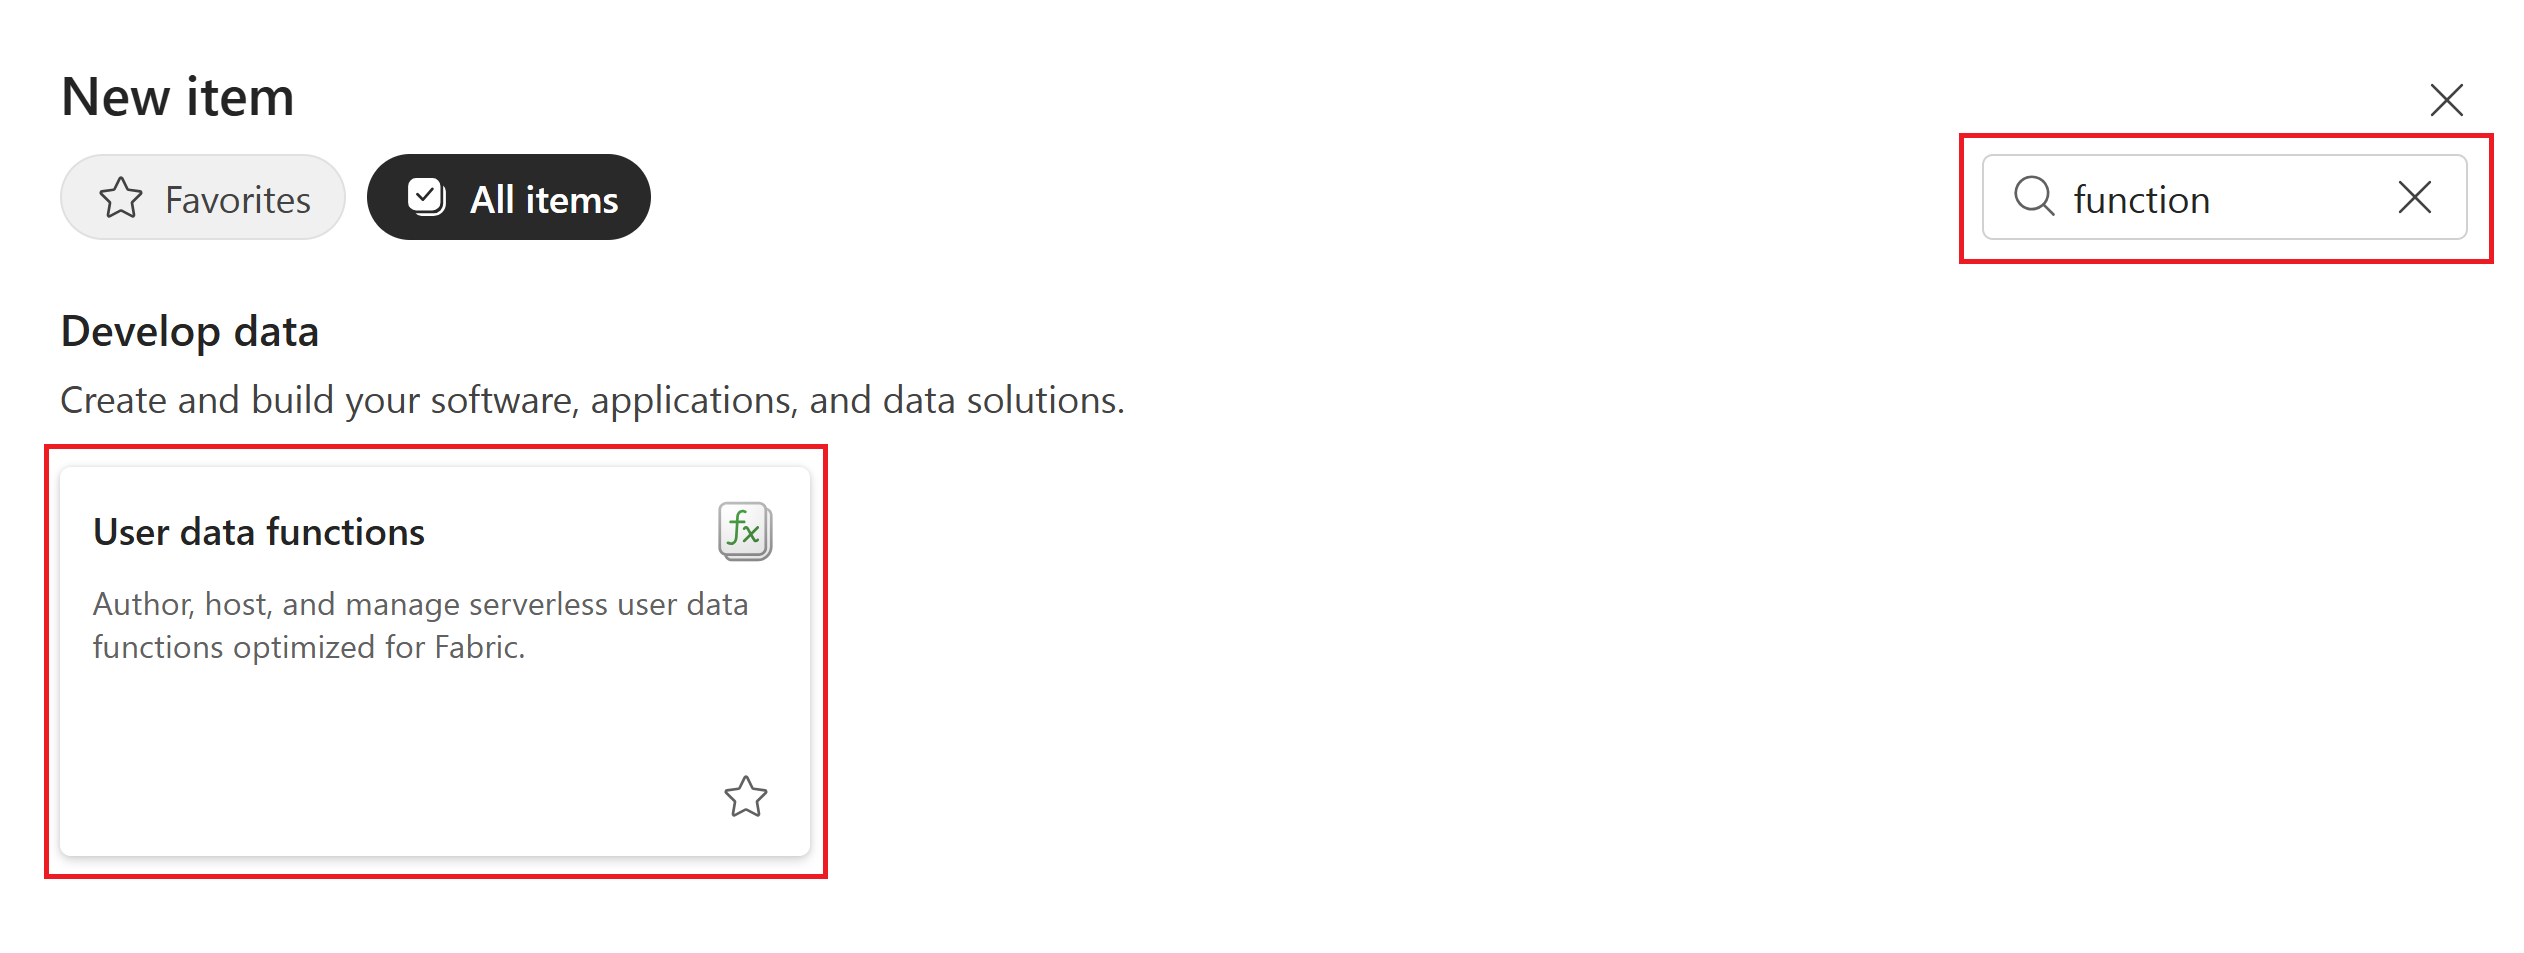
Enter a Name for the user data functions item and select Create.
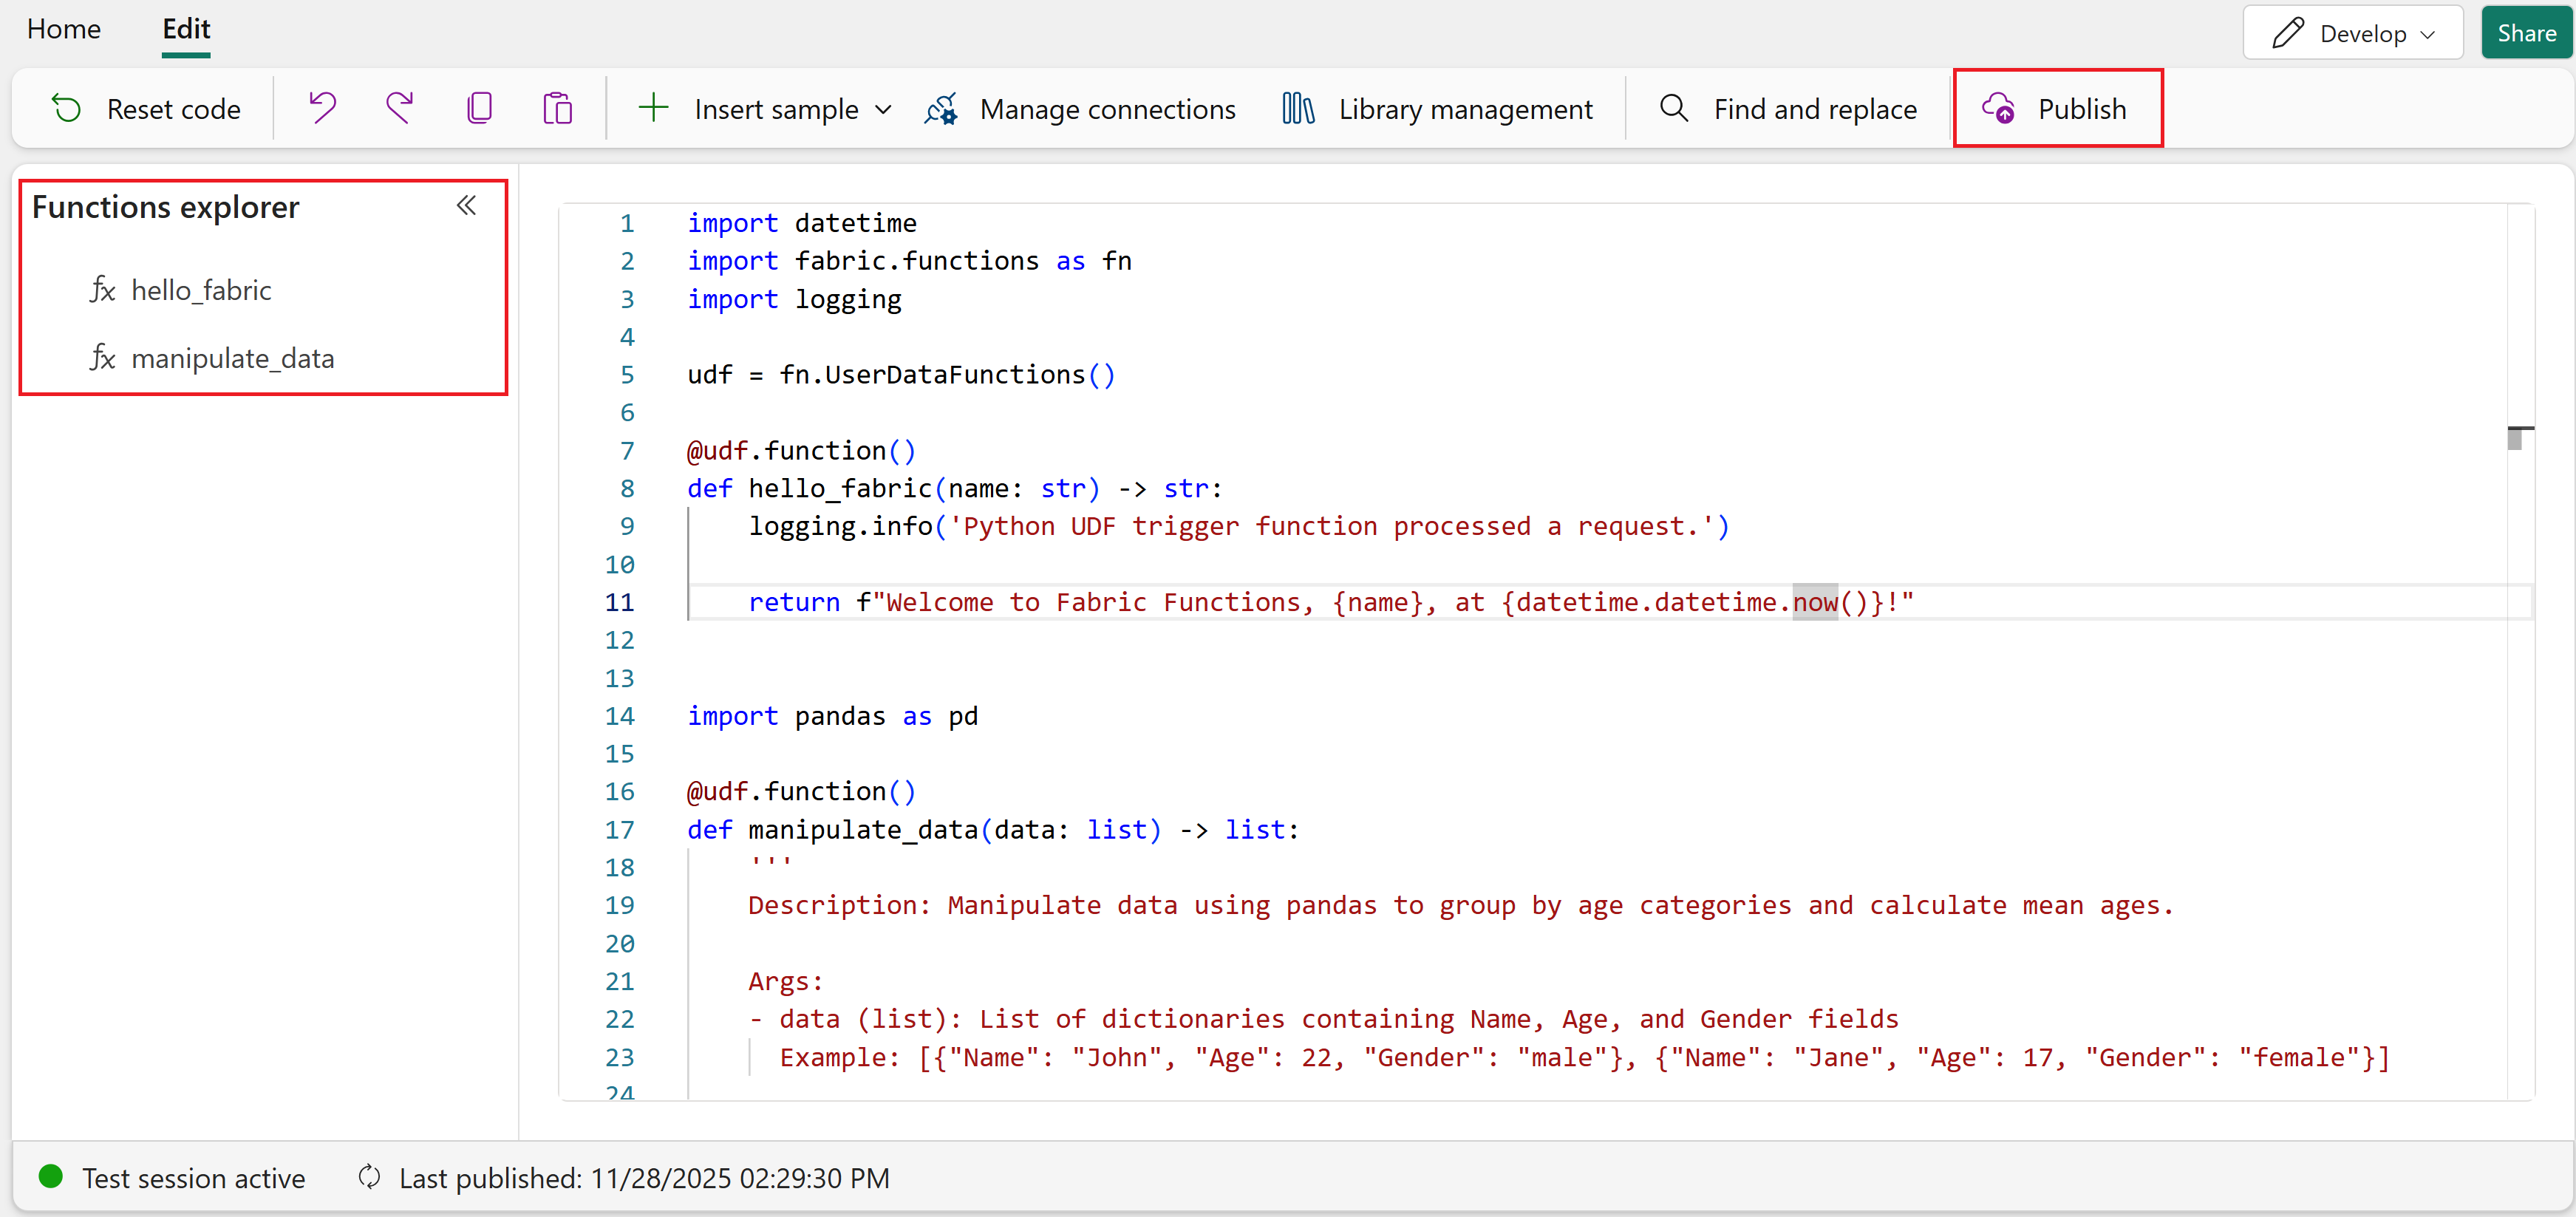
Select the New function file to create a new sample function. The
hello_fabricPython function is published and loaded in the code editor.The Functions explorer shows all the functions that are published and ready to be invoked. Since the
hello_fabricfunction is published, you can run it from the list of functions in the Functions explorer.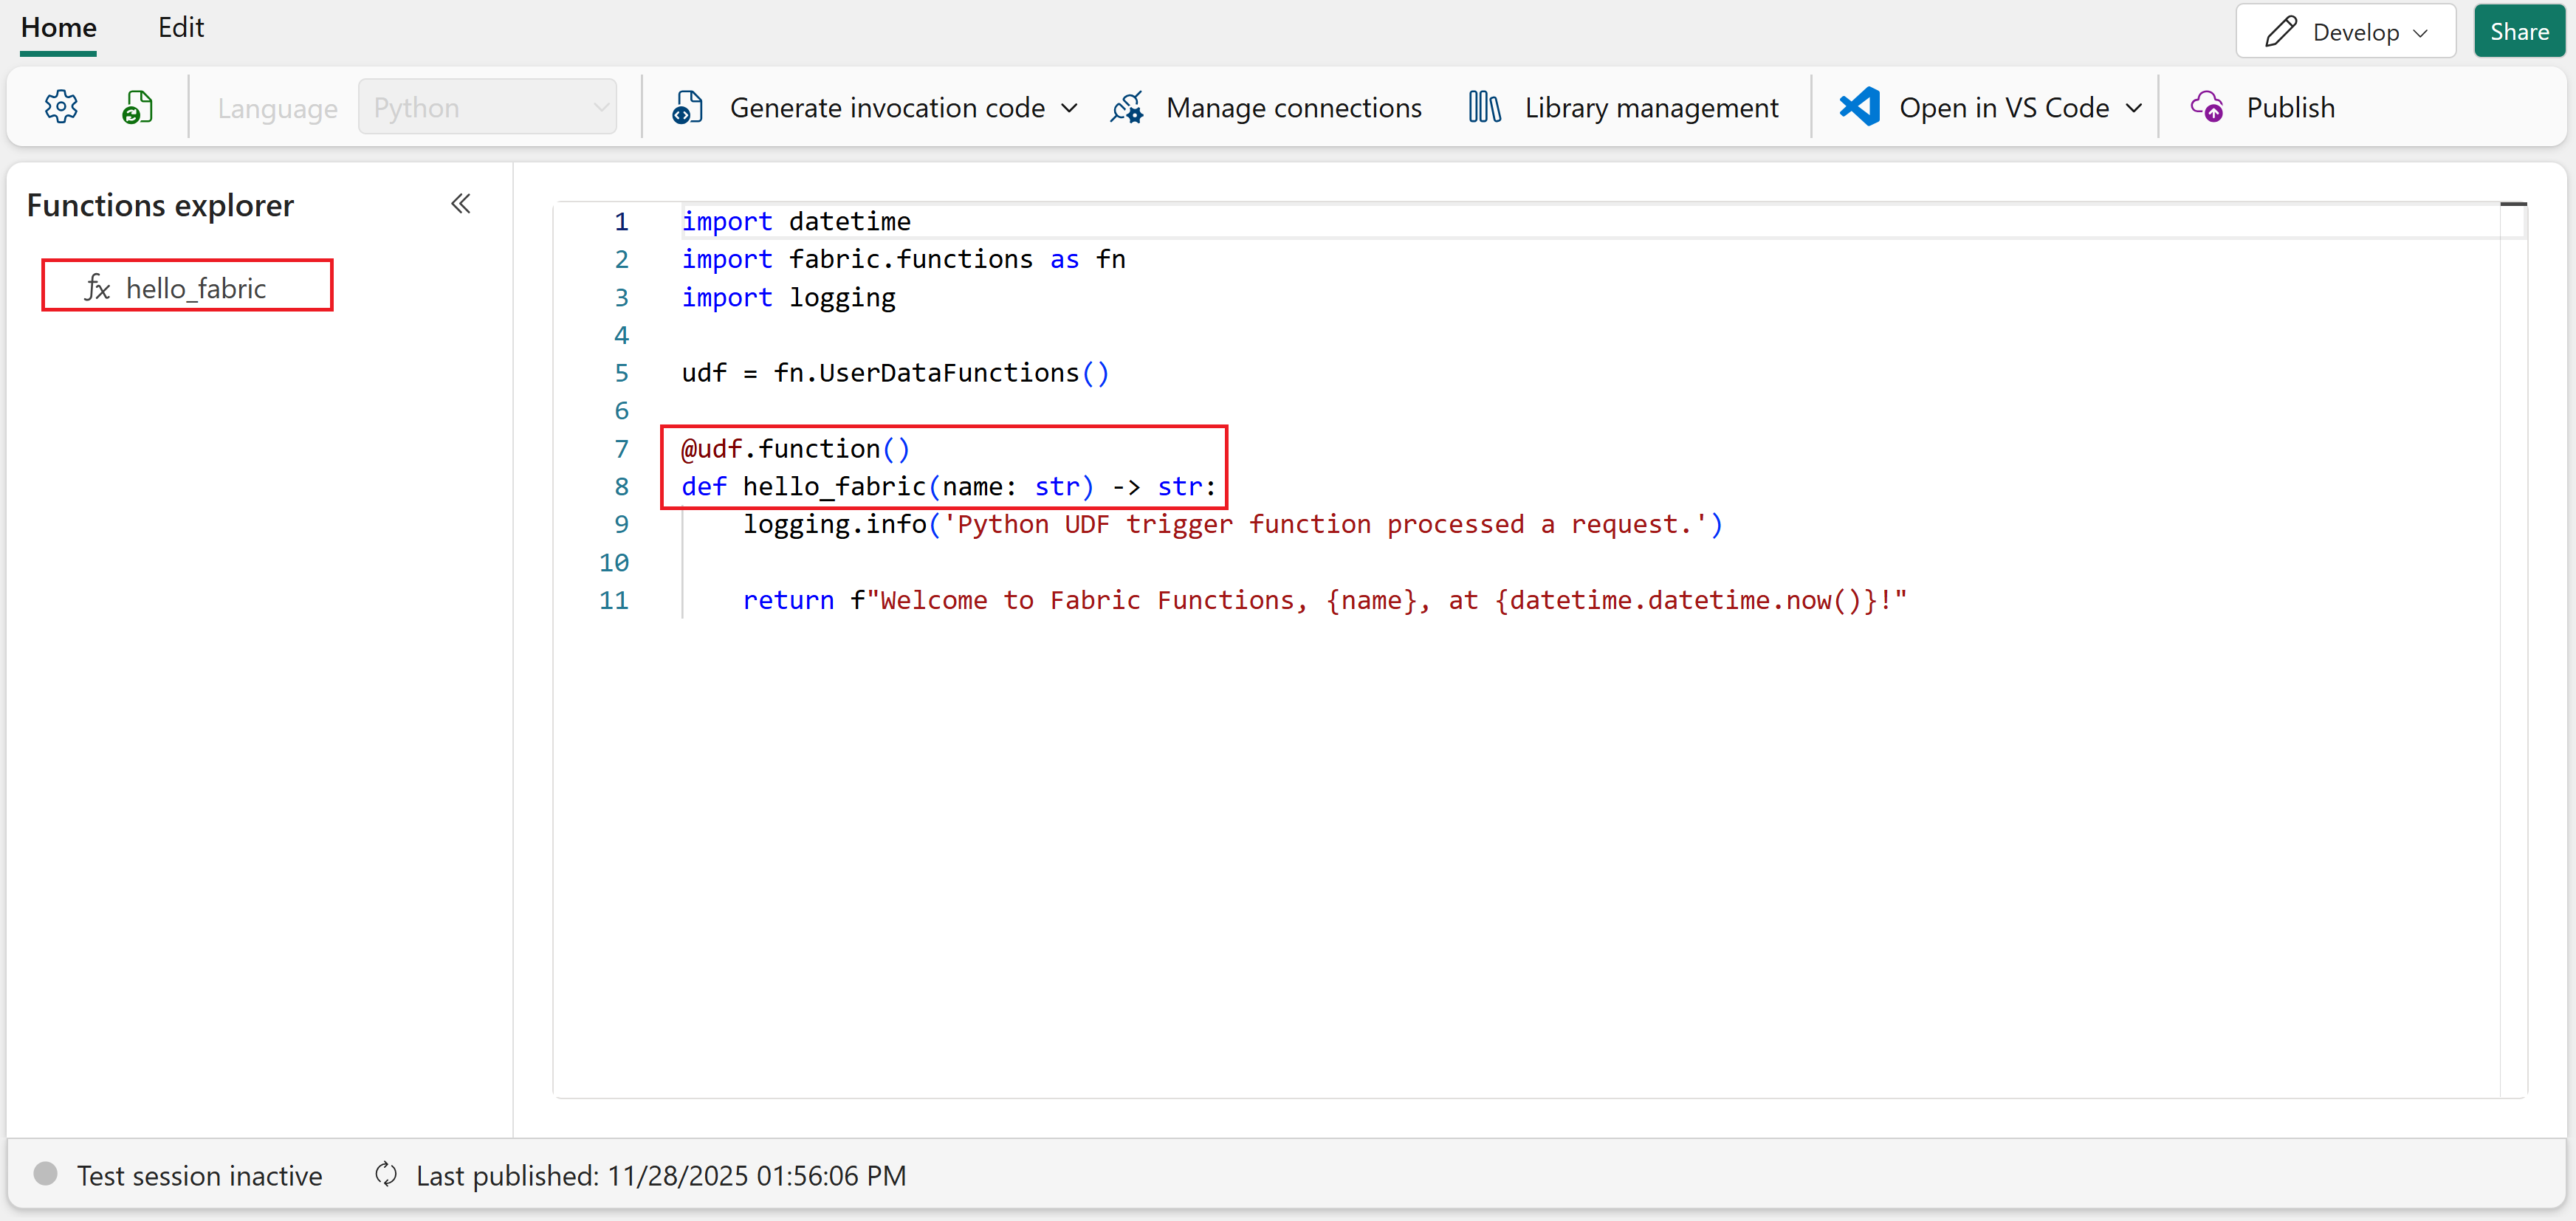


Add a new function from sample
This example shows how to add a new function from the Insert sample menu. In this case, we add a function called Manipulate data with pandas library that uses the pandas library as a requirement.
Add required libraries
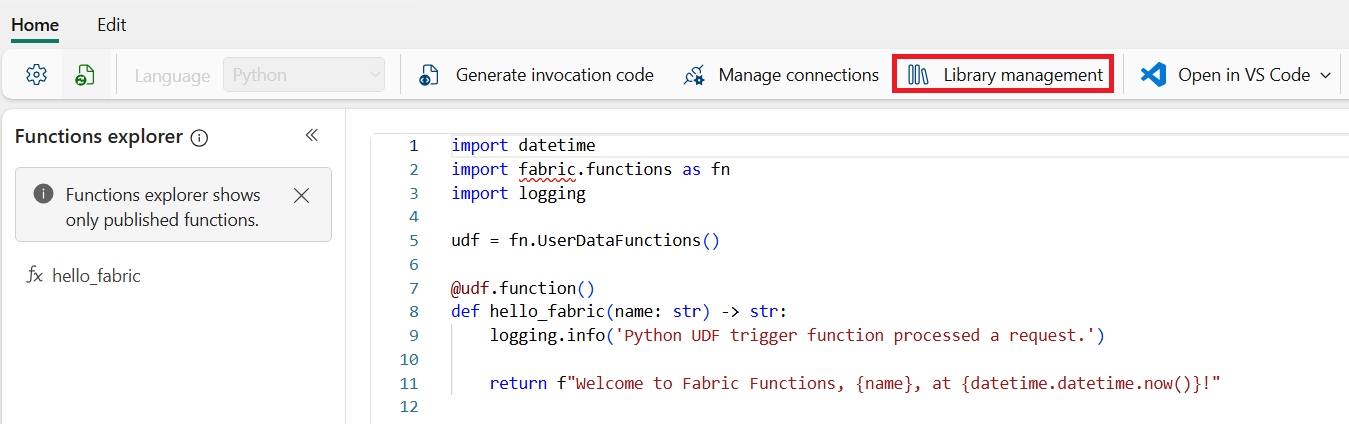
Make sure you are in Develop mode.

Select Library management to add the libraries that your function requires.
Select +Add from PyPI to add a new library from the public PyPI repository.
Search for and select the pandas library and select the version. Once the library is added, it's automatically saved in your User Data Functions item.

Optionally, you can update the version of the
fabric_user_data_functionslibrary to the latest available version. Select the pencil icon next to the library to update it.Note
The
fabric_user_data_functionslibrary is included by default and can't be removed. This library is required for the functionality of User data functions. You need to update the version of this library for any future releases of this SDK.Close the Library management pane to return to the User Data Functions home page.


Insert the sample function
Select the Edit tab to open more editing options in the ribbon menu.
Select Insert sample > Data Manipulation > Manipulate data with pandas library. This action adds a new function that uses the
pandaslibrary to manipulate data.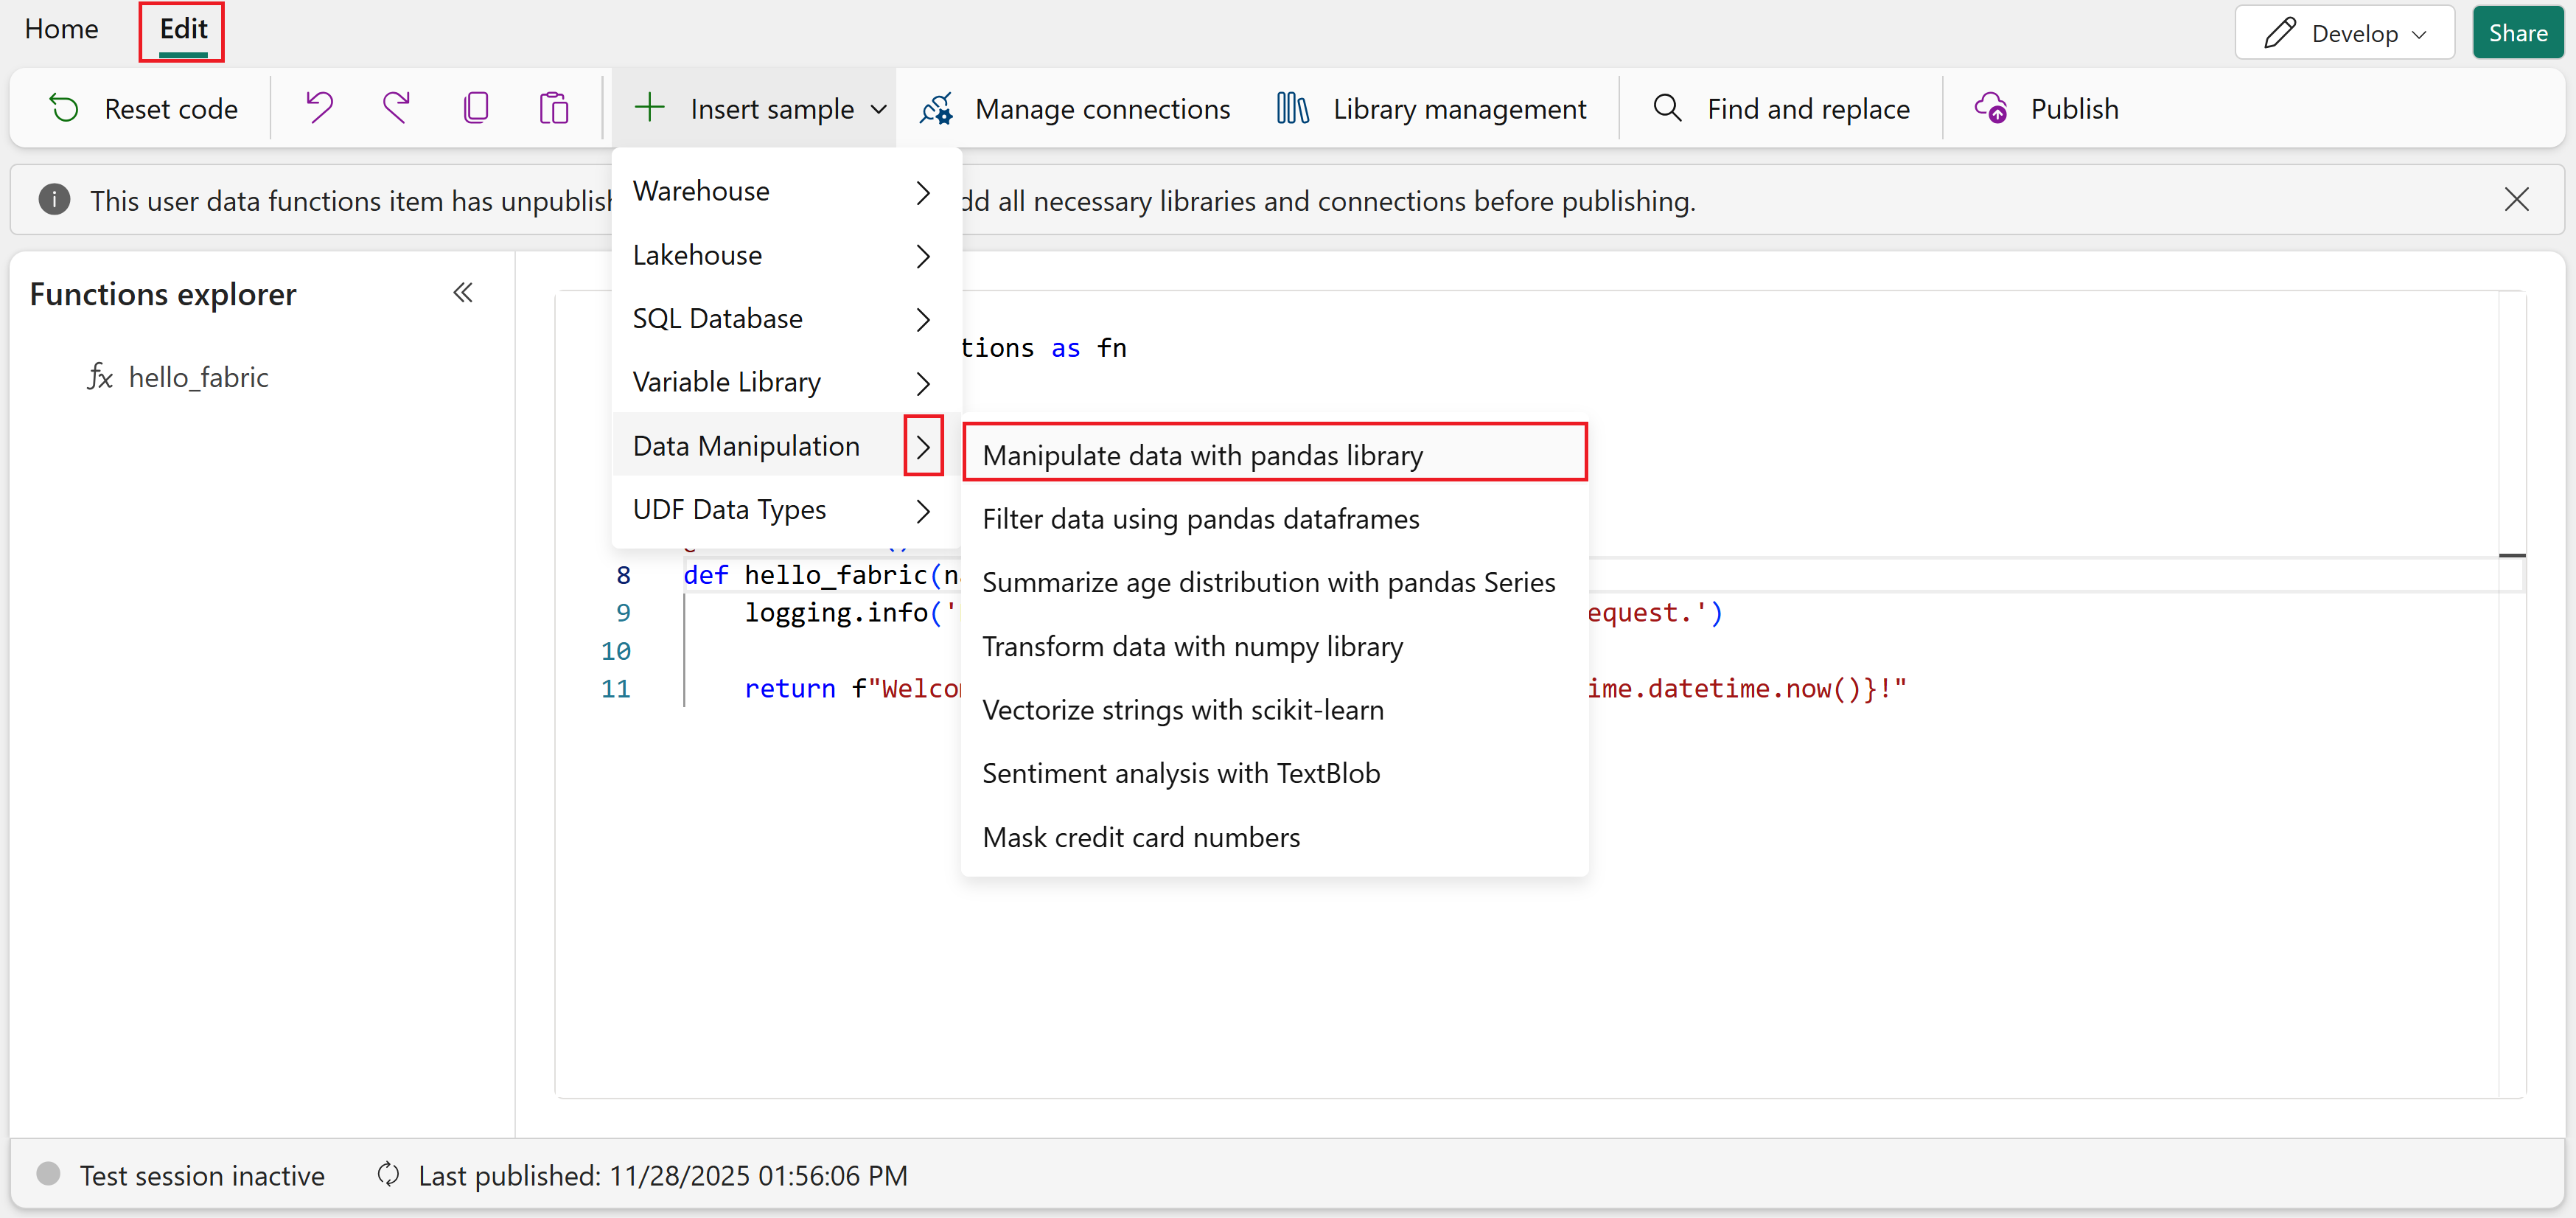
After the sample is inserted into the editor, you'll see the new function appear in the Functions explorer with a circle icon next to it. This icon indicates that the function changed since it was last published, meaning there are updates that need to be published.


Write a custom function
Now that you added a function from the sample library, you can write your own custom function directly in the code editor. This section shows you the syntax and structure required for creating functions from scratch.
Every runnable function requires the @udf.function() decorator before the function definition. This decorator marks your Python function as executable within the User Data Functions framework. The basic syntax is:
@udf.function()
def your_function_name(parameter: type) -> return_type:
    # Your function logic here
    return result
Important
Parameter names must use camelCase (for example, productName instead of product_name) and all parameters are required. For complete syntax requirements and limitations, see Syntax requirements and limitations.
Here's a complete example that standardizes product categories from raw sales data:
# This function standardizes inconsistent product category names from different data sources

@udf.function()
def standardize_category(productName: str, rawCategory: str) -> dict:
    # Define category mappings for common variations
    category_mapping = {
        "electronics": ["electronic", "electronics", "tech", "devices"],
        "clothing": ["clothes", "clothing", "apparel", "fashion"],
        "home_goods": ["home", "household", "home goods", "furniture"],
        "food": ["food", "grocery", "groceries", "snacks"],
        "books": ["book", "books", "reading", "literature"]
    }

    # Normalize the input
    raw_lower = rawCategory.lower().strip()

    # Find the standardized category
    standardized = "other"
    for standard_name, variations in category_mapping.items():
        if raw_lower in variations:
            standardized = standard_name
            break

    return {
        "product_name": productName,
        "original_category": rawCategory,
        "standardized_category": standardized,
        "needs_review": standardized == "other"
    }
You can add this function to your code editor alongside the existing functions. The function appears in the Functions explorer with a circle icon, indicating it needs to be published.
Programming model key concepts
Your User Data Functions use the User Data Functions Python Programming model to create, run, debug, and modify individual functions. The programming model is provided by the fabric-user-data-functions package, which is publicly available on PyPI and pre-installed in your user data functions items.
When you create your first function, the code file includes the required import statements:
import datetime
import fabric.functions as fn
import logging

udf = fn.UserDataFunctions()
Key points about the programming model:
- The
fabric-user-data-functionspackage provides thefabric.functionsmodule, which you import asfnin your code. - The
fn.UserDataFunctions()call creates the execution context required for defining and running functions within a User Data Functions item. - Other libraries like
loggingenable you to write custom logs for debugging and monitoring.
Note
The import fabric.functions as fn statement and the udf = fn.UserDataFunctions() line are required for your functions to work properly. Your functions will not work if these lines are missing.
Test and publish your functions
Now that you created multiple functions (the sample manipulate_data function and your custom standardize_category function), you can test and publish them together.
While in Develop mode, you can test each function using the Test capability before publishing. Testing allows you to validate your code changes without making them available for external invocation.
When you're ready to make your functions available, select Publish to save your changes and update all your functions. Publishing might take a few minutes.
After publishing completes, all functions are refreshed in the Functions explorer list and the circle icons are removed. Your functions are now ready to be:
- Run from the portal in Run only mode
- Invoked from another Fabric item, such as a pipeline, notebook, or Activator rule
- Called from an external application via the REST endpoint
Run your functions
With all your functions created, tested, and published, you can now switch to Run only mode to execute them and see the results.
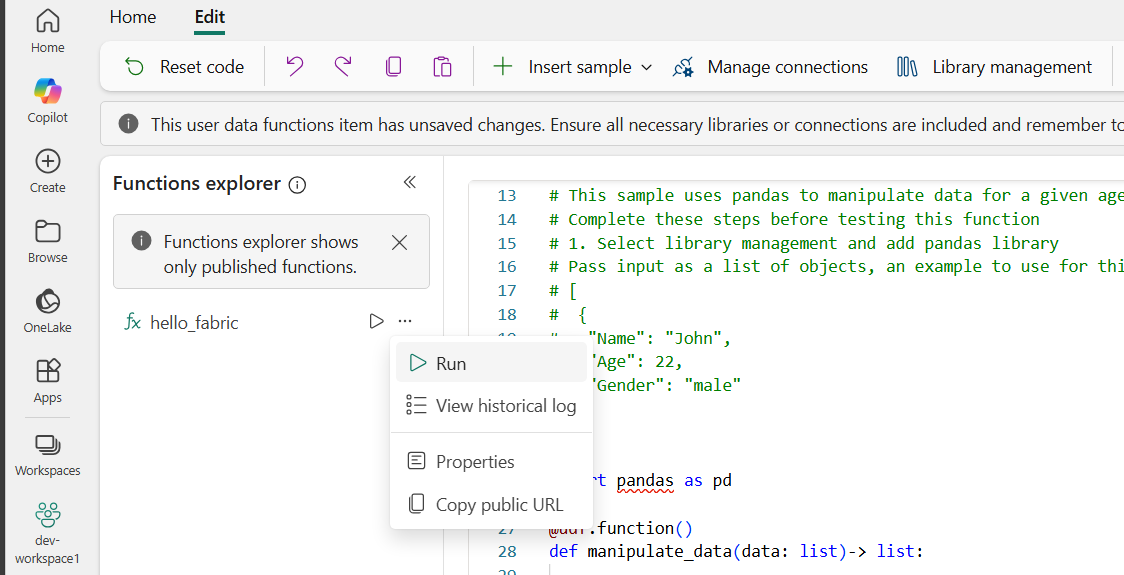
Select Run only mode from the mode selector in the top-right corner of the portal.
Select the Run icon that shows up when you hover over a function in the Functions explorer list.


Run the sample function
In the Functions explorer, hover over the
manipulate_datafunction.Select the Run button that appears when you hover over the function.
A run pane opens on the right side of the screen.
In the run pane, you see the parameter name data with type
list. Enter the following JSON value in the text box:[ { "Name": "John", "Age": 22, "Gender": "male" } ]Select the Run button in the run pane (located next to where you entered the JSON data) to execute the function.
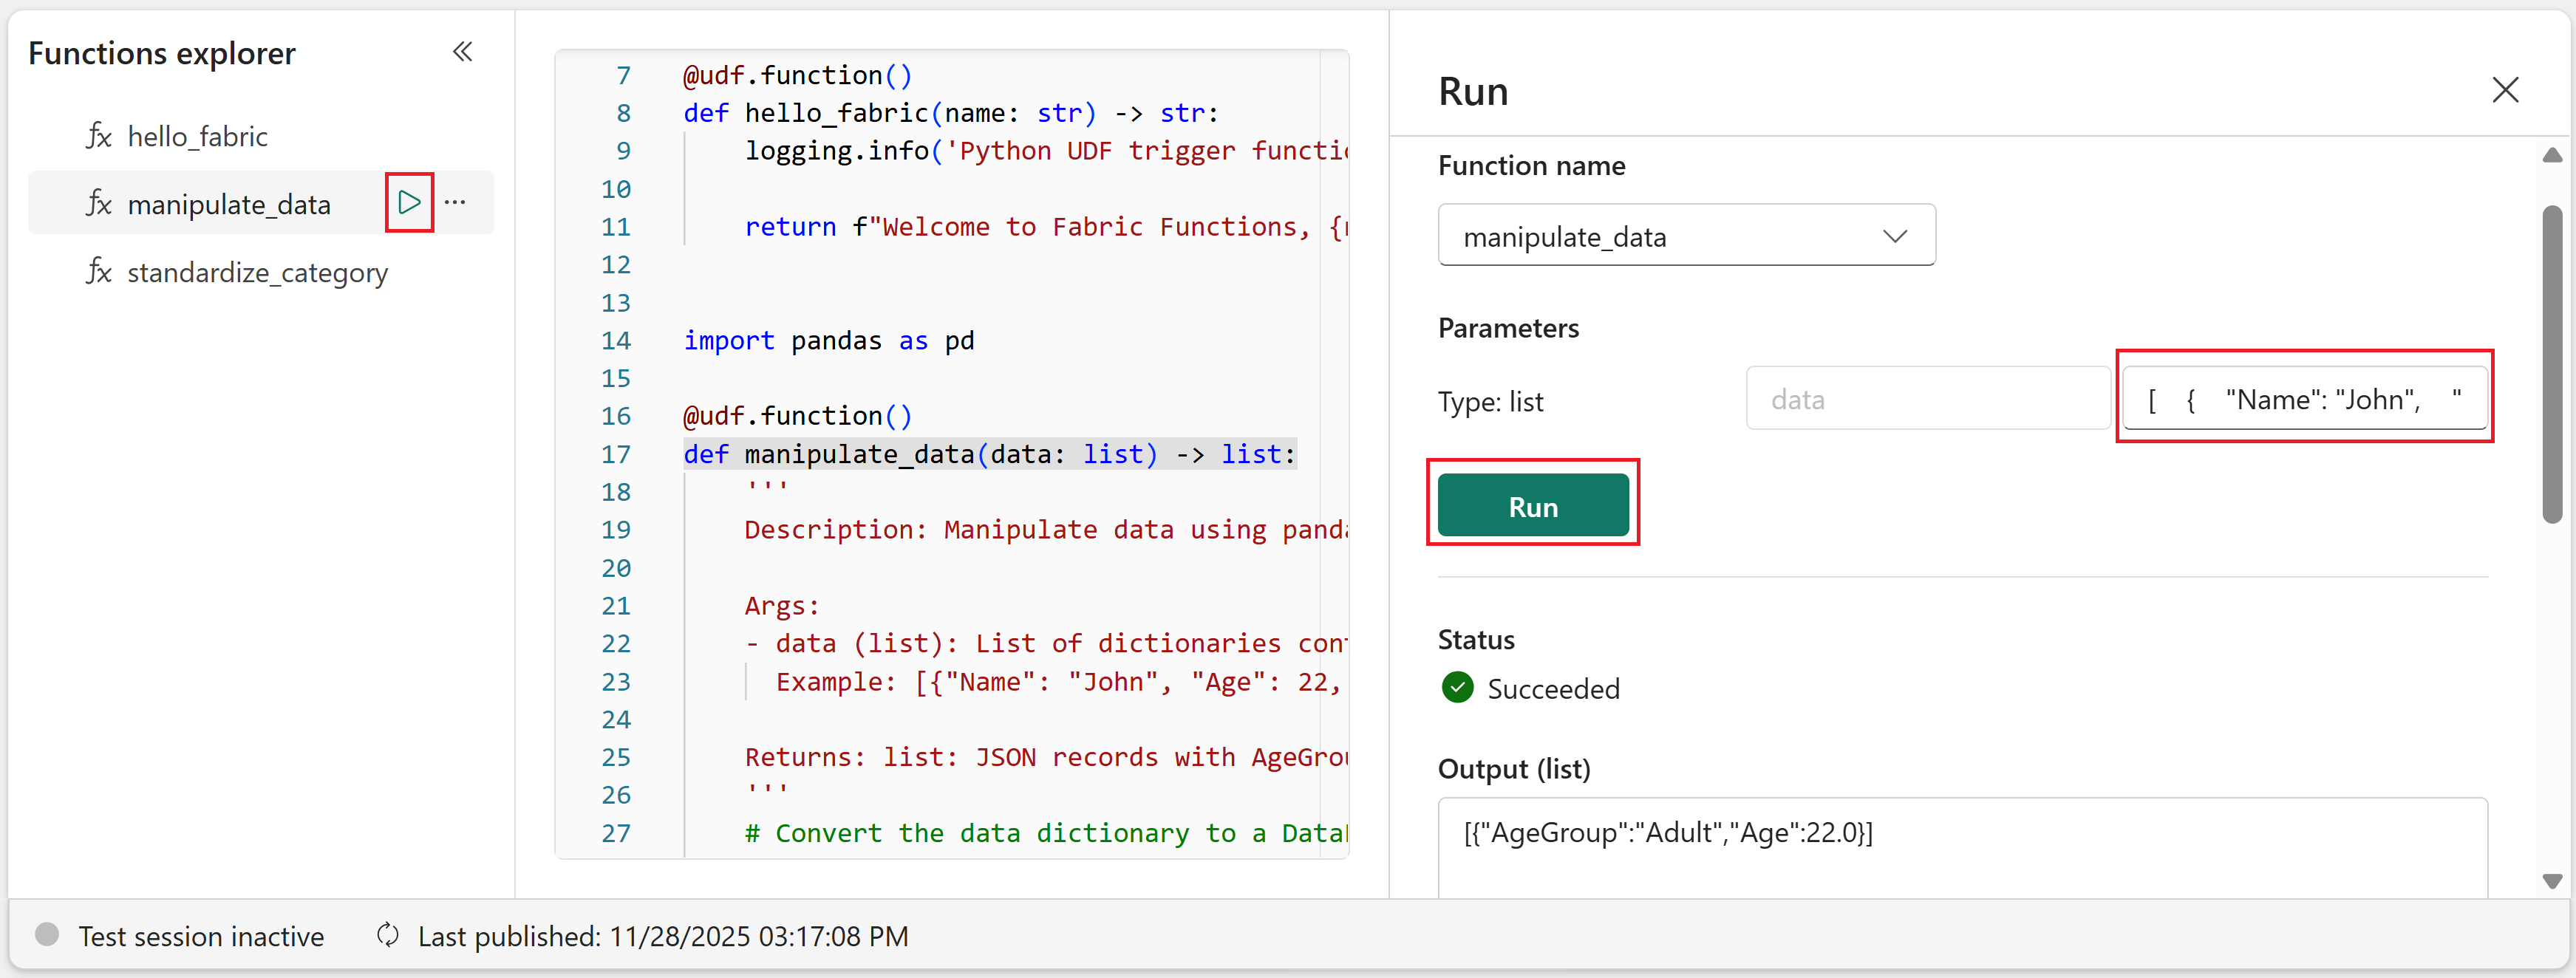
View the results and logs under Output (list) in the run pane. The output shows the manipulated data as a pandas DataFrame in JSON format.

Run the custom function
Now try running your custom standardize_category function.
In the Functions explorer, hover over the
standardize_categoryfunction.Select the Run button that appears when you hover over the function.
A run pane opens on the right side of the screen.
Provide test parameters:
- productName:
Laptop Computer - rawCategory:
tech
- productName:
Select Run and observe the output, which should show the standardized category as "electronics" and include the metadata about the categorization.
Manage functions
After creating and running your functions, you can rename or delete them as needed. All management operations require you to be in Develop mode.
Rename a function
In Develop mode, select into the code editor and update the name of the function. For example, rename
hello_fabrictohello_fabric1:@udf.function() def hello_fabric1(name: str) -> str: logging.info('Python UDF trigger function processed a request.') return f"Welcome to Fabric Functions, {name}, at {datetime.datetime.now()}!"After changing the name, select Publish to save these changes.
Once the changes are published, you see the new name for the function in the Functions explorer.
Delete a function
To delete a function, select the function code in the code editor and remove the entire code section. Publish the changes to delete it entirely from the user data functions item.
For example, to delete the hello_fabric function, remove the following code block:
@udf.function()
def hello_fabric(name: str) -> str:
    logging.info('Python UDF trigger function processed a request.')

    return f"Welcome to Fabric Functions, {name}, at {datetime.datetime.now()}!"
After the code is removed, you can select Publish to save your changes. Once the publish completes, you see an updated list of available functions in the Functions explorer.
Troubleshooting
If you encounter issues while working with User Data Functions:
- Function won't publish - Check for syntax errors in your code. Ensure all required imports (
fabric.functions) and theudf = fn.UserDataFunctions()line are present. - Parameter naming errors - Remember that parameter names must use camelCase (no underscores). Review the syntax requirements and limitations.
- Library import errors - Verify that all required libraries are added via Library Management and that the version is compatible with Python 3.11.
- Function not appearing in Functions explorer - Make sure you published your changes after adding or modifying functions.
For more help, see User Data Functions service limits and considerations.
Related content
Now that you created your first User Data Functions item, explore these resources to expand your skills:
- Create a Fabric User data functions item in Visual Studio Code - Learn to develop functions locally with full IDE support
- Learn about the User data functions programming model - Dive deeper into the Python SDK and advanced features
- Invoke User Data Functions from a Python application - Call your functions from external applications via REST APIs
- Manage libraries for User Data Functions - Learn advanced library management techniques