Nota
O acesso a esta página requer autorização. Pode tentar iniciar sessão ou alterar os diretórios.
O acesso a esta página requer autorização. Pode tentar alterar os diretórios.
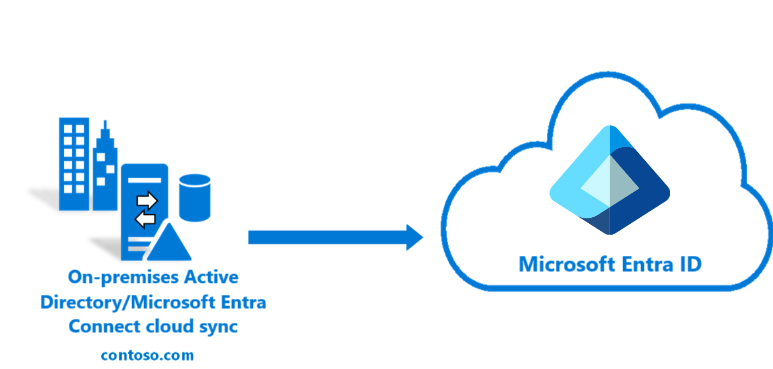
Este tutorial orienta você na criação de um ambiente básico do Ative Directory.
Você pode usar o ambiente criado no tutorial para testar vários aspetos de cenários de identidade híbrida. Este é um pré-requisito para alguns dos tutoriais. Se você tiver um ambiente existente do Ative Directory, poderá usá-lo como um substituto. Esta informação é fornecida para os indivíduos que estão a começar do zero.
Pré-requisitos
A seguir estão os pré-requisitos necessários para concluir este tutorial:
- Um computador com o Hyper-V instalado. Sugere-se fazer isso em um computador Windows 10 ou Windows Server 2022 .
- Um adaptador de rede externo para permitir que a máquina virtual se comunique com a Internet.
- Uma subscrição do Azure
- Uma cópia do Windows Server 2022
- Microsoft .NET framework 4.7.1
Nota
Este tutorial usa scripts do PowerShell para que você possa criar o ambiente do tutorial no menor tempo possível. Cada um dos scripts usa variáveis que são declaradas no início dos scripts. Você pode e deve alterar as variáveis para refletir seu ambiente.
Os scripts usados criam um ambiente geral do Ative Directory antes de instalar o agente de provisionamento de nuvem do Microsoft Entra Connect. Eles são relevantes para todos os tutoriais.
Cópias dos scripts do PowerShell usados neste tutorial estão disponíveis no GitHub aqui.
Criar uma máquina virtual
A primeira coisa que você precisa fazer é criar uma máquina virtual. Essa máquina virtual é usada como nosso servidor Ative Directory local. Esta etapa é essencial para colocar o ambiente de identidade híbrida em funcionamento. Efetue o seguinte procedimento:
- Abra o ISE do PowerShell como Administrador.
- Execute o seguinte script.
#Declare variables
$VMName = 'DC1'
$Switch = 'External'
$InstallMedia = 'D:\ISO\en_windows_server_2016_updated_feb_2018_x64_dvd_11636692.iso'
$Path = 'D:\VM'
$VHDPath = 'D:\VM\DC1\DC1.vhdx'
$VHDSize = '64424509440'

#Create New Virtual Machine
New-VM -Name $VMName -MemoryStartupBytes 16GB -BootDevice VHD -Path $Path -NewVHDPath $VHDPath -NewVHDSizeBytes $VHDSize -Generation 2 -Switch $Switch

#Set the memory to be non-dynamic
Set-VMMemory $VMName -DynamicMemoryEnabled $false

#Add DVD Drive to Virtual Machine
Add-VMDvdDrive -VMName $VMName -ControllerNumber 0 -ControllerLocation 1 -Path $InstallMedia

#Mount Installation Media
$DVDDrive = Get-VMDvdDrive -VMName $VMName

#Configure Virtual Machine to Boot from DVD
Set-VMFirmware -VMName $VMName -FirstBootDevice $DVDDrive
Conclua a implantação do sistema operacional
Para concluir a criação da máquina virtual, você precisa concluir a instalação do sistema operacional.
- Hyper-V Manager, selecione duas vezes na máquina virtual
- Selecione no botão Iniciar.
- Você será solicitado a 'Pressione qualquer tecla para inicializar a partir de CD ou DVD'. Vá em frente e faça-o.
- No ecrã de arranque do Windows Server, selecione o seu idioma e selecione Seguinte.
- Selecione Instalar agora.
- Introduza a sua chave de licença e selecione Seguinte.
- Marque **Aceito os termos de licença e selecione Avançar.
- Selecione Personalizado: Instalar Somente Windows (Avançado)
- Selecione Próximo
- Quando a instalação estiver concluída, reinicie a máquina virtual, entre e execute atualizações do Windows para garantir que a VM seja a mais up-todata. Instale as atualizações mais recentes.
Instalar pré-requisitos do Ative Directory
Agora que você tem uma máquina virtual ativada, precisa fazer algumas coisas antes de instalar o Ative Directory. Ou seja, você precisa renomear a máquina virtual, definir um endereço IP estático e informações de DNS e instalar as ferramentas de Administração de Servidor Remoto. Efetue o seguinte procedimento:
- Abra o ISE do PowerShell como Administrador.
- Execute o seguinte script.
#Declare variables
$ipaddress = "10.0.1.117"
$ipprefix = "24"
$ipgw = "10.0.1.1"
$ipdns = "10.0.1.117"
$ipdns2 = "8.8.8.8"
$ipif = (Get-NetAdapter).ifIndex
$featureLogPath = "c:\poshlog\featurelog.txt"
$newname = "DC1"
$addsTools = "RSAT-AD-Tools"

#Set static IP address
New-NetIPAddress -IPAddress $ipaddress -PrefixLength $ipprefix -InterfaceIndex $ipif -DefaultGateway $ipgw

# Set the DNS servers
Set-DnsClientServerAddress -InterfaceIndex $ipif -ServerAddresses ($ipdns, $ipdns2)

#Rename the computer
Rename-Computer -NewName $newname -force

#Install features
New-Item $featureLogPath -ItemType file -Force
Add-WindowsFeature $addsTools
Get-WindowsFeature | Where installed >>$featureLogPath

#Restart the computer
Restart-Computer
Criar um ambiente do Windows Server AD
Agora que você criou e renomeou a VM criada e ela tem um endereço IP estático, você pode instalar e configurar os Serviços de Domínio Ative Directory. Efetue o seguinte procedimento:
- Abra o ISE do PowerShell como Administrador.
- Execute o seguinte script.
#Declare variables
$DatabasePath = "c:\windows\NTDS"
$DomainMode = "WinThreshold"
$DomainName = "contoso.com"
$DomainNetBIOSName = "CONTOSO"
$ForestMode = "WinThreshold"
$LogPath = "c:\windows\NTDS"
$SysVolPath = "c:\windows\SYSVOL"
$featureLogPath = "c:\poshlog\featurelog.txt"
$Password = "Pass1w0rd"
$SecureString = ConvertTo-SecureString $Password -AsPlainText -Force

#Install AD DS, DNS and GPMC
start-job -Name addFeature -ScriptBlock {
Add-WindowsFeature -Name "ad-domain-services" -IncludeAllSubFeature -IncludeManagementTools
Add-WindowsFeature -Name "dns" -IncludeAllSubFeature -IncludeManagementTools
Add-WindowsFeature -Name "gpmc" -IncludeAllSubFeature -IncludeManagementTools }
Wait-Job -Name addFeature
Get-WindowsFeature | Where installed >>$featureLogPath

#Create New AD Forest
Install-ADDSForest -CreateDnsDelegation:$false -DatabasePath $DatabasePath -DomainMode $DomainMode -DomainName $DomainName -SafeModeAdministratorPassword $SecureString -DomainNetbiosName $DomainNetBIOSName -ForestMode $ForestMode -InstallDns:$true -LogPath $LogPath -NoRebootOnCompletion:$false -SysvolPath $SysVolPath -Force:$true
Criar um usuário do Windows Server AD
Agora que você tem nosso ambiente do Ative Directory, precisa criar uma conta de teste. Essa conta é criada em nosso ambiente AD local e, em seguida, sincronizada com a ID do Microsoft Entra. Efetue o seguinte procedimento:
- Abra o ISE do PowerShell como Administrador.
- Execute o seguinte script.
# Filename:  4_CreateUser.ps1
# Description: Creates a user in Active Directory. This is part of
#       the Azure AD Connect password hash sync tutorial.
#
# DISCLAIMER:
# Copyright (c) Microsoft Corporation. All rights reserved. This
# script is made available to you without any express, implied or
# statutory warranty, not even the implied warranty of
# merchantability or fitness for a particular purpose, or the
# warranty of title or non-infringement. The entire risk of the
# use or the results from the use of this script remains with you.
#
#
#
#
#Declare variables
$Givenname = "Allie"
$Surname = "McCray"
$Displayname = "Allie McCray"
$Name = "amccray"
$Password = "Pass1w0rd"
$Identity = "CN=ammccray,CN=Users,DC=contoso,DC=com"
$SecureString = ConvertTo-SecureString $Password -AsPlainText -Force


#Create the user
New-ADUser -Name $Name -GivenName $Givenname -Surname $Surname -DisplayName $Displayname -AccountPassword $SecureString

#Set the password to never expire
Set-ADUser -Identity $Identity -PasswordNeverExpires $true -ChangePasswordAtLogon $false -Enabled $true
Criar um tenant do Microsoft Entra
Agora precisa criar um tenant do Microsoft Entra para que possa sincronizar os utilizadores com a nuvem. Para criar um novo inquilino do Microsoft Entra, proceda da seguinte forma.
- Entre no centro de administração do Microsoft Entra e entre com uma conta que tenha sua assinatura do Microsoft Entra.
- Selecione Visão geral.
- Selecione Gerenciar locatários.
- Selecione Criar.
- Forneça um nome para a organização juntamente com o nome de domínio inicial. Depois, selecione Criar. Isso cria seu diretório.
- Quando isso estiver concluído, selecione o link aqui para gerir o diretório.
Criar um administrador de identidade híbrida no Microsoft Entra ID
Agora que você tem um locatário do Microsoft Entra, cria uma conta de Administrador de Identidade Híbrida. Para criar a conta de Administrador de Identidade Híbrida, faça o seguinte.
- Em Gerir, selecione Utilizadores.
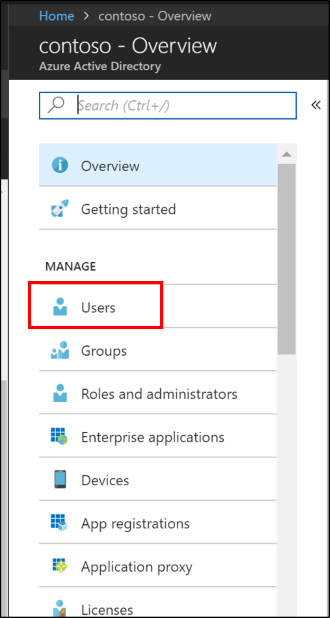
- Selecione Todos os usuários e, em seguida, selecione + Novo usuário.
- Forneça um nome e um nome de usuário para esse usuário. Este é o seu Administrador de Identidade Híbrida para o locatário. Altere a função Directory para Hybrid Identity Administrator. Você também pode mostrar a senha temporária. Quando terminar, selecione Criar.
- Quando isso for concluído, abra um novo navegador da Web e entre no myapps.microsoft.com usando a nova conta de Administrador de Identidade Híbrida e a senha temporária.
- Altere a senha do Administrador de Identidade Híbrida para algo que você possa lembrar.
Opcional: Outro servidor e floresta
A seguir está uma seção opcional que fornece etapas para criar outro servidor e/ou floresta. Isso pode ser usado em alguns dos tutoriais mais avançados, como o Pilot para Microsoft Entra Connect para sincronização na cloud.
Se você só precisa de outro servidor, você pode parar após a etapa de - Criar a máquina virtual e associar o servidor ao domínio existente que você criou anteriormente.
Criar uma máquina virtual
- Abra o ISE do PowerShell como Administrador.
- Execute o seguinte script.
# Filename:  1_CreateVM_CP.ps1
# Description: Creates a VM to be used in the tutorial.
#
# DISCLAIMER:
# Copyright (c) Microsoft Corporation. All rights reserved. #This script is made available to you without any express, implied or statutory warranty, not even the implied warranty of merchantability or fitness for a particular purpose, or the warranty of title or non-infringement. The entire risk of the use or the results from the use of this script remains with you.
#
#
#
#
#Declare variables
$VMName = 'CP1'
$Switch = 'External'
$InstallMedia = 'D:\ISO\en_windows_server_2016_updated_feb_2018_x64_dvd_11636692.iso'
$Path = 'D:\VM'
$VHDPath = 'D:\VM\CP1\CP1.vhdx'
$VHDSize = '64424509440'

#Create New Virtual Machine
New-VM -Name $VMName -MemoryStartupBytes 16GB -BootDevice VHD -Path $Path -NewVHDPath $VHDPath -NewVHDSizeBytes $VHDSize -Generation 2 -Switch $Switch

#Set the memory to be non-dynamic
Set-VMMemory $VMName -DynamicMemoryEnabled $false

#Add DVD Drive to Virtual Machine
Add-VMDvdDrive -VMName $VMName -ControllerNumber 0 -ControllerLocation 1 -Path $InstallMedia

#Mount Installation Media
$DVDDrive = Get-VMDvdDrive -VMName $VMName

#Configure Virtual Machine to Boot from DVD
Set-VMFirmware -VMName $VMName -FirstBootDevice $DVDDrive
Conclua a implantação do sistema operacional
Para concluir a criação da máquina virtual, você precisa concluir a instalação do sistema operacional.
- Hyper-V Manager, selecione duas vezes na máquina virtual
- Selecione no botão Iniciar.
- Você será solicitado a 'Pressione qualquer tecla para inicializar a partir de CD ou DVD'. Vá em frente e faça-o.
- No ecrã de arranque do Windows Server, selecione o seu idioma e selecione Seguinte.
- Selecione Instalar agora.
- Introduza a sua chave de licença e selecione Seguinte.
- Marque **Aceito os termos de licença e selecione Avançar.
- Selecione Personalizado: Instalar Somente Windows (Avançado)
- Selecione Próximo
- Quando a instalação estiver concluída, reinicie a máquina virtual, entre e execute atualizações do Windows para garantir que a VM seja a mais up-todata. Instale as atualizações mais recentes.
Instalar pré-requisitos do Ative Directory
Agora que você tem uma máquina virtual ativada, precisa fazer algumas coisas antes de instalar o Ative Directory. Ou seja, você precisa renomear a máquina virtual, definir um endereço IP estático e informações de DNS e instalar as ferramentas de Administração de Servidor Remoto. Efetue o seguinte procedimento:
- Abra o ISE do PowerShell como Administrador.
- Execute o seguinte script.
# Filename:  2_ADPrep_CP.ps1
# Description: Prepares your environment for Active Directory. This is part of
#       the Azure AD Connect password hash sync tutorial.
#
# DISCLAIMER:
# Copyright (c) Microsoft Corporation. All rights reserved. This
# script is made available to you without any express, implied or
# statutory warranty, not even the implied warranty of
# merchantability or fitness for a particular purpose, or the
# warranty of title or non-infringement. The entire risk of the
# use or the results from the use of this script remains with you.
#
#
#
#
#Declare variables
$ipaddress = "10.0.1.118"
$ipprefix = "24"
$ipgw = "10.0.1.1"
$ipdns = "10.0.1.118"
$ipdns2 = "8.8.8.8"
$ipif = (Get-NetAdapter).ifIndex
$featureLogPath = "c:\poshlog\featurelog.txt"
$newname = "CP1"
$addsTools = "RSAT-AD-Tools"

#Set static IP address
New-NetIPAddress -IPAddress $ipaddress -PrefixLength $ipprefix -InterfaceIndex $ipif -DefaultGateway $ipgw

#Set the DNS servers
Set-DnsClientServerAddress -InterfaceIndex $ipif -ServerAddresses ($ipdns, $ipdns2)

#Rename the computer
Rename-Computer -NewName $newname -force

#Install features
New-Item $featureLogPath -ItemType file -Force
Add-WindowsFeature $addsTools
Get-WindowsFeature | Where installed >>$featureLogPath

#Restart the computer
Restart-Computer
Criar um ambiente do Windows Server AD
Agora que você criou e renomeou a VM e ela tem um endereço IP estático, está pronto para instalar e configurar os Serviços de Domínio Ative Directory. Efetue o seguinte procedimento:
- Abra o ISE do PowerShell como Administrador.
- Execute o seguinte script.
# Filename:  3_InstallAD_CP.ps1
# Description: Creates an on-premises AD environment. This is part of
#       the Azure AD Connect password hash sync tutorial.
#
# DISCLAIMER:
# Copyright (c) Microsoft Corporation. All rights reserved. This
# script is made available to you without any express, implied or
# statutory warranty, not even the implied warranty of
# merchantability or fitness for a particular purpose, or the
# warranty of title or non-infringement. The entire risk of the
# use or the results from the use of this script remains with you.
#
#
#
#
#Declare variables
$DatabasePath = "c:\windows\NTDS"
$DomainMode = "WinThreshold"
$DomainName = "fabrikam.com"
$DomaninNetBIOSName = "FABRIKAM"
$ForestMode = "WinThreshold"
$LogPath = "c:\windows\NTDS"
$SysVolPath = "c:\windows\SYSVOL"
$featureLogPath = "c:\poshlog\featurelog.txt"
$Password = "Pass1w0rd"
$SecureString = ConvertTo-SecureString $Password -AsPlainText -Force

#Install AD DS, DNS and GPMC
start-job -Name addFeature -ScriptBlock {
Add-WindowsFeature -Name "ad-domain-services" -IncludeAllSubFeature -IncludeManagementTools
Add-WindowsFeature -Name "dns" -IncludeAllSubFeature -IncludeManagementTools
Add-WindowsFeature -Name "gpmc" -IncludeAllSubFeature -IncludeManagementTools }
Wait-Job -Name addFeature
Get-WindowsFeature | Where installed >>$featureLogPath

#Create New AD Forest
Install-ADDSForest -CreateDnsDelegation:$false -DatabasePath $DatabasePath -DomainMode $DomainMode -DomainName $DomainName -SafeModeAdministratorPassword $SecureString -DomainNetbiosName $DomainNetBIOSName -ForestMode $ForestMode -InstallDns:$true -LogPath $LogPath -NoRebootOnCompletion:$false -SysvolPath $SysVolPath -Force:$true
Criar um usuário do Windows Server AD
Agora que você tem nosso ambiente do Ative Directory, precisa de uma conta de teste. Essa conta é criada em nosso ambiente AD local e, em seguida, sincronizada com a ID do Microsoft Entra. Efetue o seguinte procedimento:
- Abra o ISE do PowerShell como Administrador.
- Execute o seguinte script.
# Filename:  4_CreateUser_CP.ps1
# Description: Creates a user in Active Directory. This is part of
#       the Azure AD Connect password hash sync tutorial.
#
# DISCLAIMER:
# Copyright (c) Microsoft Corporation. All rights reserved. This
# script is made available to you without any express, implied or
# statutory warranty, not even the implied warranty of
# merchantability or fitness for a particular purpose, or the
# warranty of title or non-infringement. The entire risk of the
# use or the results from the use of this script remains with you.
#
#
#
#
#Declare variables
$Givenname = "Anna"
$Surname = "Ringdal"
$Displayname = "Anna Ringdal"
$Name = "aringdal"
$Password = "Pass1w0rd"
$Identity = "CN=aringdal,CN=Users,DC=fabrikam,DC=com"
$SecureString = ConvertTo-SecureString $Password -AsPlainText -Force


#Create the user
New-ADUser -Name $Name -GivenName $Givenname -Surname $Surname -DisplayName $Displayname -AccountPassword $SecureString

#Set the password to never expire
Set-ADUser -Identity $Identity -PasswordNeverExpires $true -ChangePasswordAtLogon $false -Enabled $true
Conclusão
Agora você tem um ambiente que pode ser usado para tutoriais existentes e para testar outros recursos que a sincronização na nuvem oferece.