กิจกรรม
17 มี.ค. 21 - 21 มี.ค. 10
แอปอัจฉริยะ เข้าร่วมชุด meetup เพื่อสร้างโซลูชัน AI ที่ปรับขนาดได้ตามกรณีการใช้งานจริงกับนักพัฒนาและผู้เชี่ยวชาญร่วมกัน
ลงทะเบียนตอนนี้เบราว์เซอร์นี้ไม่ได้รับการสนับสนุนอีกต่อไป
อัปเกรดเป็น Microsoft Edge เพื่อใช้ประโยชน์จากคุณลักษณะล่าสุด เช่น การอัปเดตความปลอดภัยและการสนับสนุนด้านเทคนิค
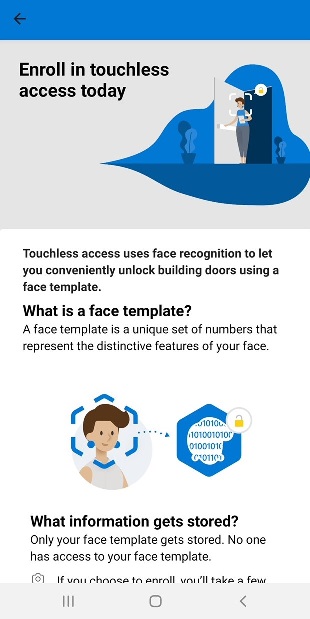
In this tutorial, you'll get started with a sample Face enrollment application. The app demonstrates best practices for obtaining meaningful consent to add users into a face recognition service and acquire high-quality face data. An integrated system could use an app like this to provide touchless access control, identification, attendance tracking, or personalization kiosk, based on their face data.
When users launch the app, it shows a detailed consent screen. If the user gives consent, the app prompts them for a username and password and then captures a high-quality face image using the device's camera.
The sample app is written using JavaScript and the React Native framework. It can be deployed on Android and iOS devices.
ข้อสำคัญ
Security considerations
Clone the git repository for the sample app.
To set up your development environment, follow the React Native documentation . Select React Native CLI Quickstart. Select your development OS and Android as the target OS. Complete the sections Installing dependencies and Android development environment.
Download your preferred text editor such as Visual Studio Code.
Retrieve your FaceAPI endpoint and key in the Azure portal under the Overview tab of your resource. Don't check in your Face API key to your remote repository.
คำเตือน
For local development and testing only, you can enter the API key and endpoint as environment variables. For final deployment, store the API key in a secure location and never in the code or environment variables. See the Azure AI services authentication guide for other ways to authenticate the service.
Run the app using either the Android Virtual Device emulator from Android Studio, or your own Android device. To test your app on a physical device, follow the relevant React Native documentation .
Now that you've set up the sample app, you can tailor it to your own needs.
For example, you might want to add situation-specific information on your consent page:
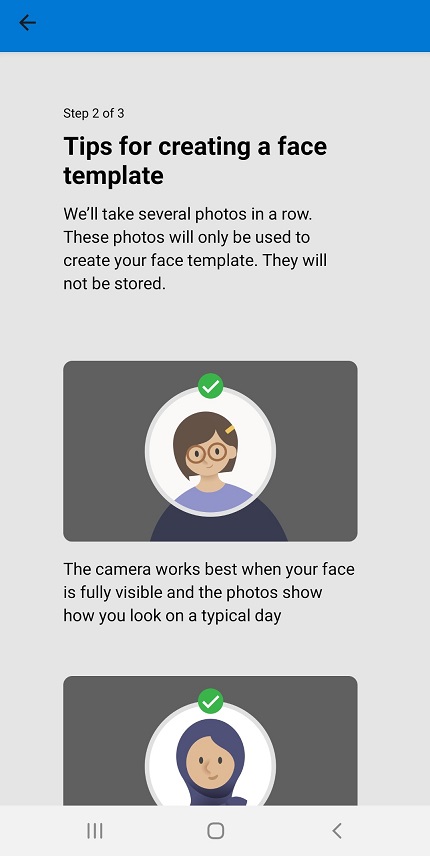
Add more instructions to improve verification accuracy.
Many face recognition issues are caused by low-quality reference images. Some factors that can degrade model performance are:
The service provides image quality checks to help you make the choice of whether the image is of sufficient quality based on the above factors to add the customer or attempt face recognition. This app demonstrates how to access frames from the device's camera, detect quality, show user interface messages to the user to help them capture a higher quality image, select the highest-quality frames, and add the detected face into the Face API service.
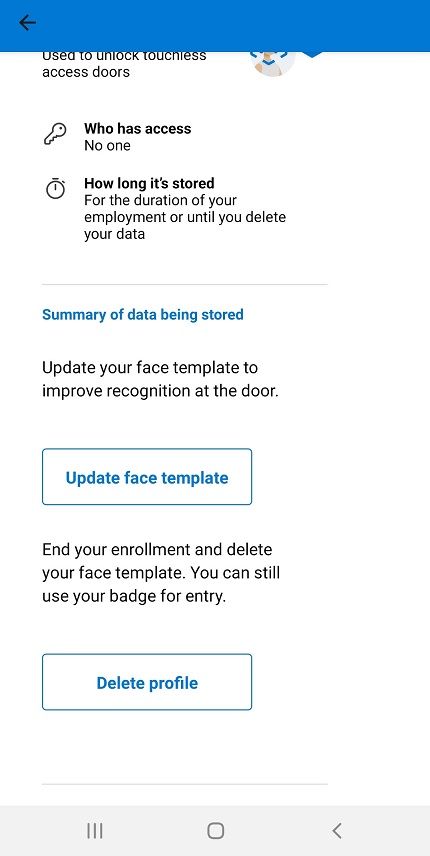
The sample app offers functionality for deleting the user's information and the option to readd. You can enable or disable these operations based on your business requirement.
To extend the app's functionality to cover the full experience, read the overview for other features to implement and best practices.
Configure your database to map each person with their ID
You need to use a database to store the face image along with user metadata. The social security number or other unique person identifier can be used as a key to look up their face ID.
For secure methods of passing your subscription key and endpoint to Face service, see the Azure AI services Security guide.
First, make sure that your app is ready for production deployment: remove any keys or secrets from the app code and make sure you have followed the security best practices.
When you're ready to release your app for production, you'll generate a release-ready APK file, which is the package file format for Android apps. This APK file must be signed with a private key. With this release build, you can begin distributing the app to your devices directly.
Follow the Prepare for release documentation to learn how to generate a private key, sign your application, and generate a release APK.
Once you've created a signed APK, see the Publish your app documentation to learn more about how to release your app.
In this guide, you learned how to set up your development environment and get started with the sample app. If you're new to React Native, you can read their getting started docs to learn more background information. It also may be helpful to familiarize yourself with Face API. Read the other sections on adding users before you begin development.
กิจกรรม
17 มี.ค. 21 - 21 มี.ค. 10
แอปอัจฉริยะ เข้าร่วมชุด meetup เพื่อสร้างโซลูชัน AI ที่ปรับขนาดได้ตามกรณีการใช้งานจริงกับนักพัฒนาและผู้เชี่ยวชาญร่วมกัน
ลงทะเบียนตอนนี้การฝึกอบรม
โมดูล
ค้นพบว่า ID ภายนอกของ Microsoft Entra สามารถมอบประสบการณ์การลงชื่อเข้าใช้ที่ปลอดภัยและราบรื่นสําหรับผู้บริโภคและลูกค้าทางธุรกิจของคุณได้อย่างไร สํารวจการสร้างผู้เช่า การลงทะเบียนแอป การกําหนดค่าโฟลว์ และความปลอดภัยของบัญชี
ใบรับรอง
ได้รับการรับรองจาก Microsoft: Azure Developer Associate - Certifications
สร้างโซลูชันแบบครบวงจรใน Microsoft Azure เพื่อสร้าง Azure Functions ดําเนินการและจัดการเว็บแอป พัฒนาโซลูชันโดยใช้ที่เก็บข้อมูล Azure และอื่น ๆ
เอกสาร
Detect liveness in faces - Azure AI services
In this Tutorial, you learn how to Detect liveness in faces, using both server-side code and a client-side mobile application.
Quickstart: Use the Face service - Azure AI services
The Face API offers client libraries that make it easy to detect, find similar, identify, verify, and more.
Call the Detect API - Face - Azure AI services
This guide demonstrates how to use face detection to extract attributes like age, emotion, or head pose from a given image.