Hello @Shantanand M Umachagi
With the modernized ASR appliance, the passphrase generation approach has been changed. Let me explain in simple steps to perform the push install of mobility agent on multiple machines with the modernized appliance.
For the VMware to Azure scenario:
Step: 1
You will set up VMware vCenter account and its creds as well as the VM creds for both windows and linux at the appliance web UI as shown in the below screenshot
Prepare an account for automatic discovery: https://learn.microsoft.com/en-us/azure/site-recovery/vmware-azure-set-up-replication-tutorial-modernized#prepare-an-account-for-automatic-discovery
Doc reference: https://learn.microsoft.com/en-us/azure/site-recovery/deploy-vmware-azure-replication-appliance-modernized?source=recommendations
Note: For Linux OS, ensure to provide the root credentials. For Windows OS, a user account with admin privileges should be added. These credentials will be used to push Mobility Service on to the source machine during enable replication operation.
Step:2
After an Azure Site Recovery replication appliance is added to a vault, you can get started with protecting the machines.
Set up disaster recovery to Azure for on-premises VMware VMs(Multiple)- Modernized
After you select the list of VMs, select Next to proceed to source settings. Here, select the replication appliance and VM credentials. These credentials will be used to push and register mobility agent on the machine by Azure Site Recovery replication appliance to complete enabling Azure Site Recovery. Ensure accurate credentials are chosen.
Appliance takes care of pushing and registering the agent on the selected VMs. You need not worry about the passphrase for registration in case of push installation for VMware VMs.
That's it. Replication will be enabled for your machines.
For Manual installation of mobility agent in case of Physical servers or VMware VMs. The passphrase approach is changed with configuration file method.
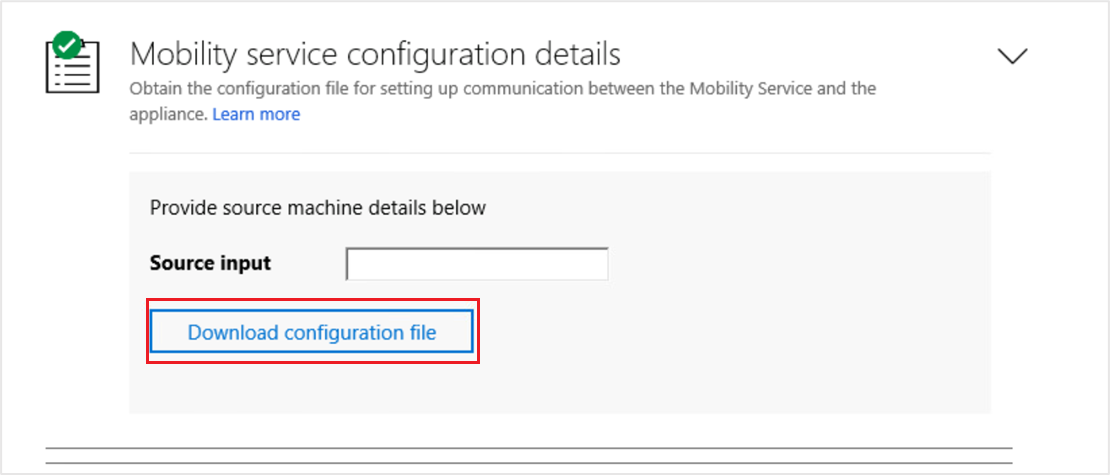
Here is how Generate Mobility Service configuration file:
Use the following steps to generate mobility service configuration file:
- Navigate to the appliance with which you want to register your source machine. Open the Microsoft Azure Appliance Configuration Manager and navigate to the section Mobility service configuration details.
- Paste the Machine Details string that you copied from Mobility Service and paste it in the input field here.
- Click Download configuration file.

This downloads the Mobility Service configuration file. Copy the downloaded file to a local folder in your source machine. You can place it in the same folder as the Mobility Service installer.
You will use this configuration file while installing the mobility agent manually to register to the appliance as described in step5 https://learn.microsoft.com/en-us/azure/site-recovery/vmware-physical-mobility-service-overview#install-the-mobility-service-using-ui-modernized
Please accept as answer and upvote if the above information is helpful for the benefit of the community.
