Using Azure Container Registry on Cross Subscription
In this article we we going to discuss one very common scenario of using an existing azure container registry across multiple subscription in Azure Account.
If you are new to azure container registry & azure web apps for containers , please refer my post here on step by step tutorial on how to setup web app for containers using azure container registry.
The Idea here to use the existing azure container is as follows :
- Create Azure Container registry in one subscription.
- Test if this is working fine by creating web app for container using this registry in same subscription.
- If the test us Successful , then use this registry details as a private registry.
- On Another Subscription , create a web app for containers
, but in Configure Container / docker
Container option , select the option for private registry and enter the details from point 3 with little correction (Image name should be in format <loginserverOfRegistory> / <Imagename> : <Image tag> ) which I will show you.
So based on details of my previous post here and image shown below , here are registry details for point number 3 above:
Login Server : azureregistrycontainer.azurecr.io
Username : azureregistrycontainer
Password : Blurred Password
Server URL : https://azureregistrycontainer.azurecr.io 
Image name : samples1/php
Tag : latest 
Now , while creating web app on another subscription , please provide the details as mentioned :

Or modify the similar details on Existing Web app for container in Docker Container Option: 
Please note , clicking on "Save” button here will take you back to Azure Container Registry setting, but that's just default UI functionality , ignore that.

Now go ahead and try to browse your web app , it should be running fine same as that container image web app on original subscription.
Possible things to check if this doesn't work :
1. Check the resource explorer option for this web app and check config details , it should have entry as shown below :

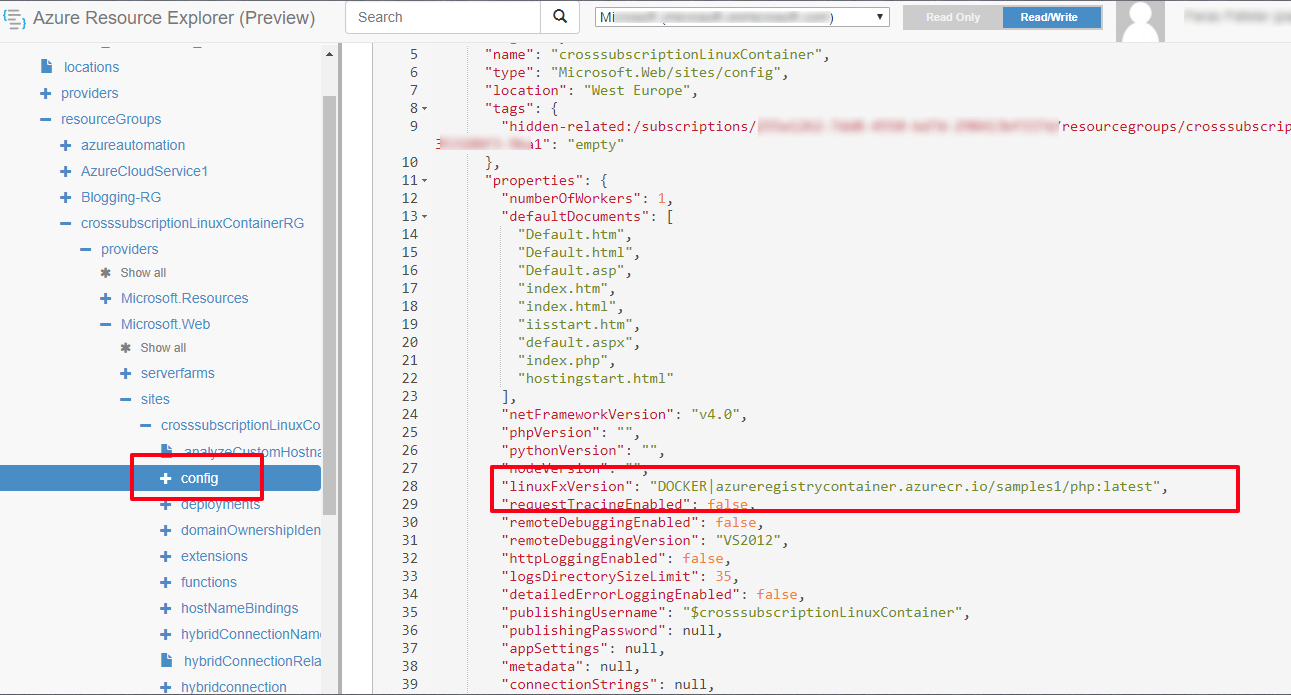
2. Verify that registry details and credentials as per step 3 are correct.
- Anonymous
January 03, 2018
nice