Training
Learning path
Use advance techniques in canvas apps to perform custom updates and optimization - Training
Use advance techniques in canvas apps to perform custom updates and optimization
This browser is no longer supported.
Upgrade to Microsoft Edge to take advantage of the latest features, security updates, and technical support.
In this article, you learn how to address rendering issues due to scaling limitations of the Windows Forms Designer on HDPI monitors by running Visual Studio as a DPI-unaware process. HDPI stands for high dots per inch, with each dot representing a physical device pixel.
Higher pixel density creates sharper images, and display scaling sizes elements properly. Without proper scaling, user interface (UI) elements and text are too tiny to use effectively and can overlap. To help remedy this issue, Windows automatically scales the UI percentile to match the DPI setting. For example, a DPI setting of 100% represents 96 DPI and 125% is 120 DPI. Monitors used to ship with 96 pixels per inch, which Windows used as the baseline for 100% bitmap drawing. However, as display technology advanced, monitors now ship with panels of 300 DPI or higher.
When an application declares itself to be DPI-aware, it's a statement specifying that the app behaves well at higher DPI settings, and so Windows can apply autoscaling. Conversely, DPI-unaware applications render at a fixed DPI value of 96 pixels per inch, or 100%, and so autoscaling isn't applied.
Note
In Visual Studio 2022 version 17.8 or later, you can avoid the issues described in this article. Visual Studio 2022 version 17.8 provides support for DPI-unaware tabs within a DPI-aware application. See Visual Studio DPI improvements. This lets you design Windows Forms for DPI-unaware contexts, without requiring you to run Visual Studio in DPI-unaware mode. To use this setting in a Windows Forms project, set the property ForceDesignerDPIUnaware to true in your project file:
<PropertyGroup>
  ...
  <ForceDesignerDPIUnaware>true</ForceDesignerDPIUnaware>
</PropertyGroup>
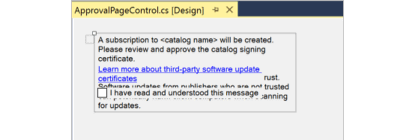
By default, Visual Studio is a dots per inch (DPI)-aware application, which means the display scales automatically. However, Windows Forms Designer is a DPI-unaware app, so it appears as a bitmap at 96 DPI. Without autoscaling support, issues and overlapping arises when opening forms on HDPI monitors, like in this image:
When you open a form in Windows Forms Designer on an HDPI monitor, Visual Studio displays an info bar that displays the monitor's current scaling percentage (for example, 150%/144 DPI), an option to restart Visual Studio at 100% scaling to match Windows Forms Designer, and further information. Restarting at 100% scaling makes VS DPI-unaware, allowing for proper rendering without overlap.

Tip
The recommended solution to resolve these UI issues is to restart Visual Studio as a DPI-unaware process, which means that it restarts at 100% scaling (96 DPI).
To switch to DPI-unaware:
It's important to restart Visual Studio to return it to its default as a DPI-aware process when you're finished working in the Windows Forms Designer.
To return to DPI-aware:
When Visual Studio runs as DPI-unaware, the designer layout issues are resolved, however fonts might appear blurry and issues can appear in other designers such as the XAML Designer. Visual Studio displays a different informational message when DPI-unaware that says "Visual Studio is running as a DPI-unaware process. WPF and XAML designers might not display correctly."
Note
Note
To avoid using Visual Studio to toggle display scaling, adjust scaling in Windows settings. For instance, in Windows 11, you can set scaling to 100% (96 DPI).
To do so, type display settings in the task bar search box, and then select Change display settings. In the Settings window, set Change the size of text, apps, and other items to 100%. Be aware that 100% scaling (96 DPI) can make the user interface too small for practical use.
To manage your display settings by using command-line tools rather than the UI (user interface) tools, use DevEnv.exe. The devenv.exe command takes /noscale as a command-line parameter to run in 100% scaling mode. Here's how to use it:
devenv /noScale.In addition to the aforementioned options, you can also try the following options:
Select the option to Optimize rendering for screens with different pixel densities (requires restart)
Disable scaling notifications in Visual Studio, for example, if you aren't working in a designer. Here's how to disable notifications:
If the DPI-awareness transition doesn't work in Visual Studio, ensure the dpiAwareness value is NOT present in the HKEY_LOCAL_MACHINE\SOFTWARE\Microsoft\Windows NT\CurrentVersion\Image File Execution Options\devenv.exe subkey in Registry Editor. Delete the value if it is present.
Training
Learning path
Use advance techniques in canvas apps to perform custom updates and optimization - Training
Use advance techniques in canvas apps to perform custom updates and optimization
Documentation
Scaling on your main display is set to X% - Visual Studio (Windows)
Learn about the scaling percentage settings message you see with Windows Forms Designer on HDPI monitors, and what to do next.
Addressing DPI Issues2 - Visual Studio (Windows)
Learn about the issues involved in programming for high-resolution screens, such as scaling up content, layout issues, and using DPI-scaling APIs.
Automatic Scaling - Windows Forms .NET Framework
Learn about how automatic scaling enables a form and its controls, designed on one machine, to be displayed appropriately on another machine.