Developing Business Central Extensions (part 2) - Repository/Environment
If you haven't read part 1, you should do so before continuing here. Part 1 contains all the prerequisites you need in order to continue with this post.
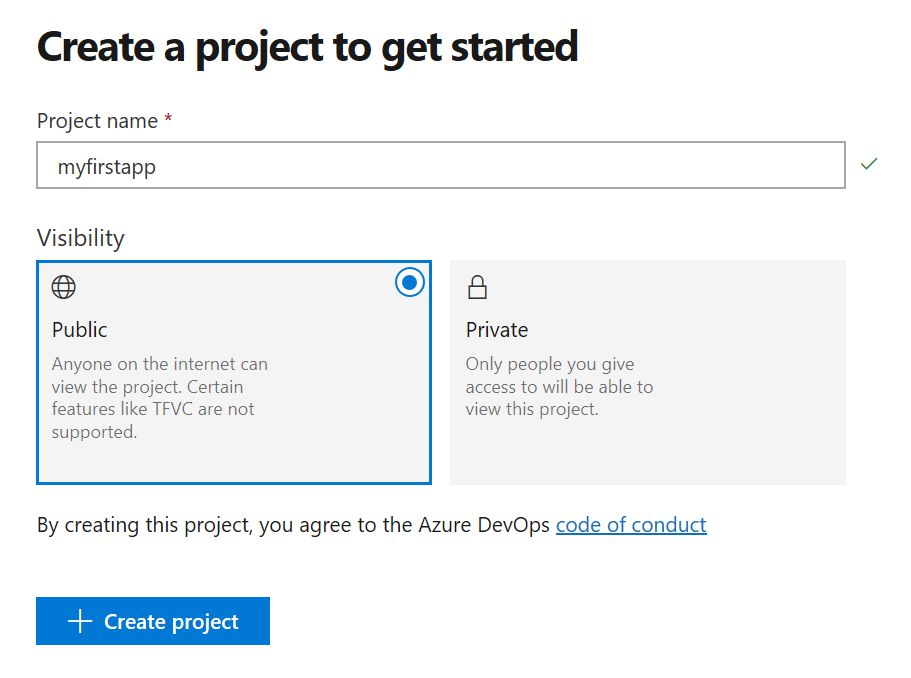
Create your organization and your first project
Navigate to https://devops.azure.com and login to your DevOps account. Create your organization, which is the location in which you will create your projects. In your organization, create your first project:
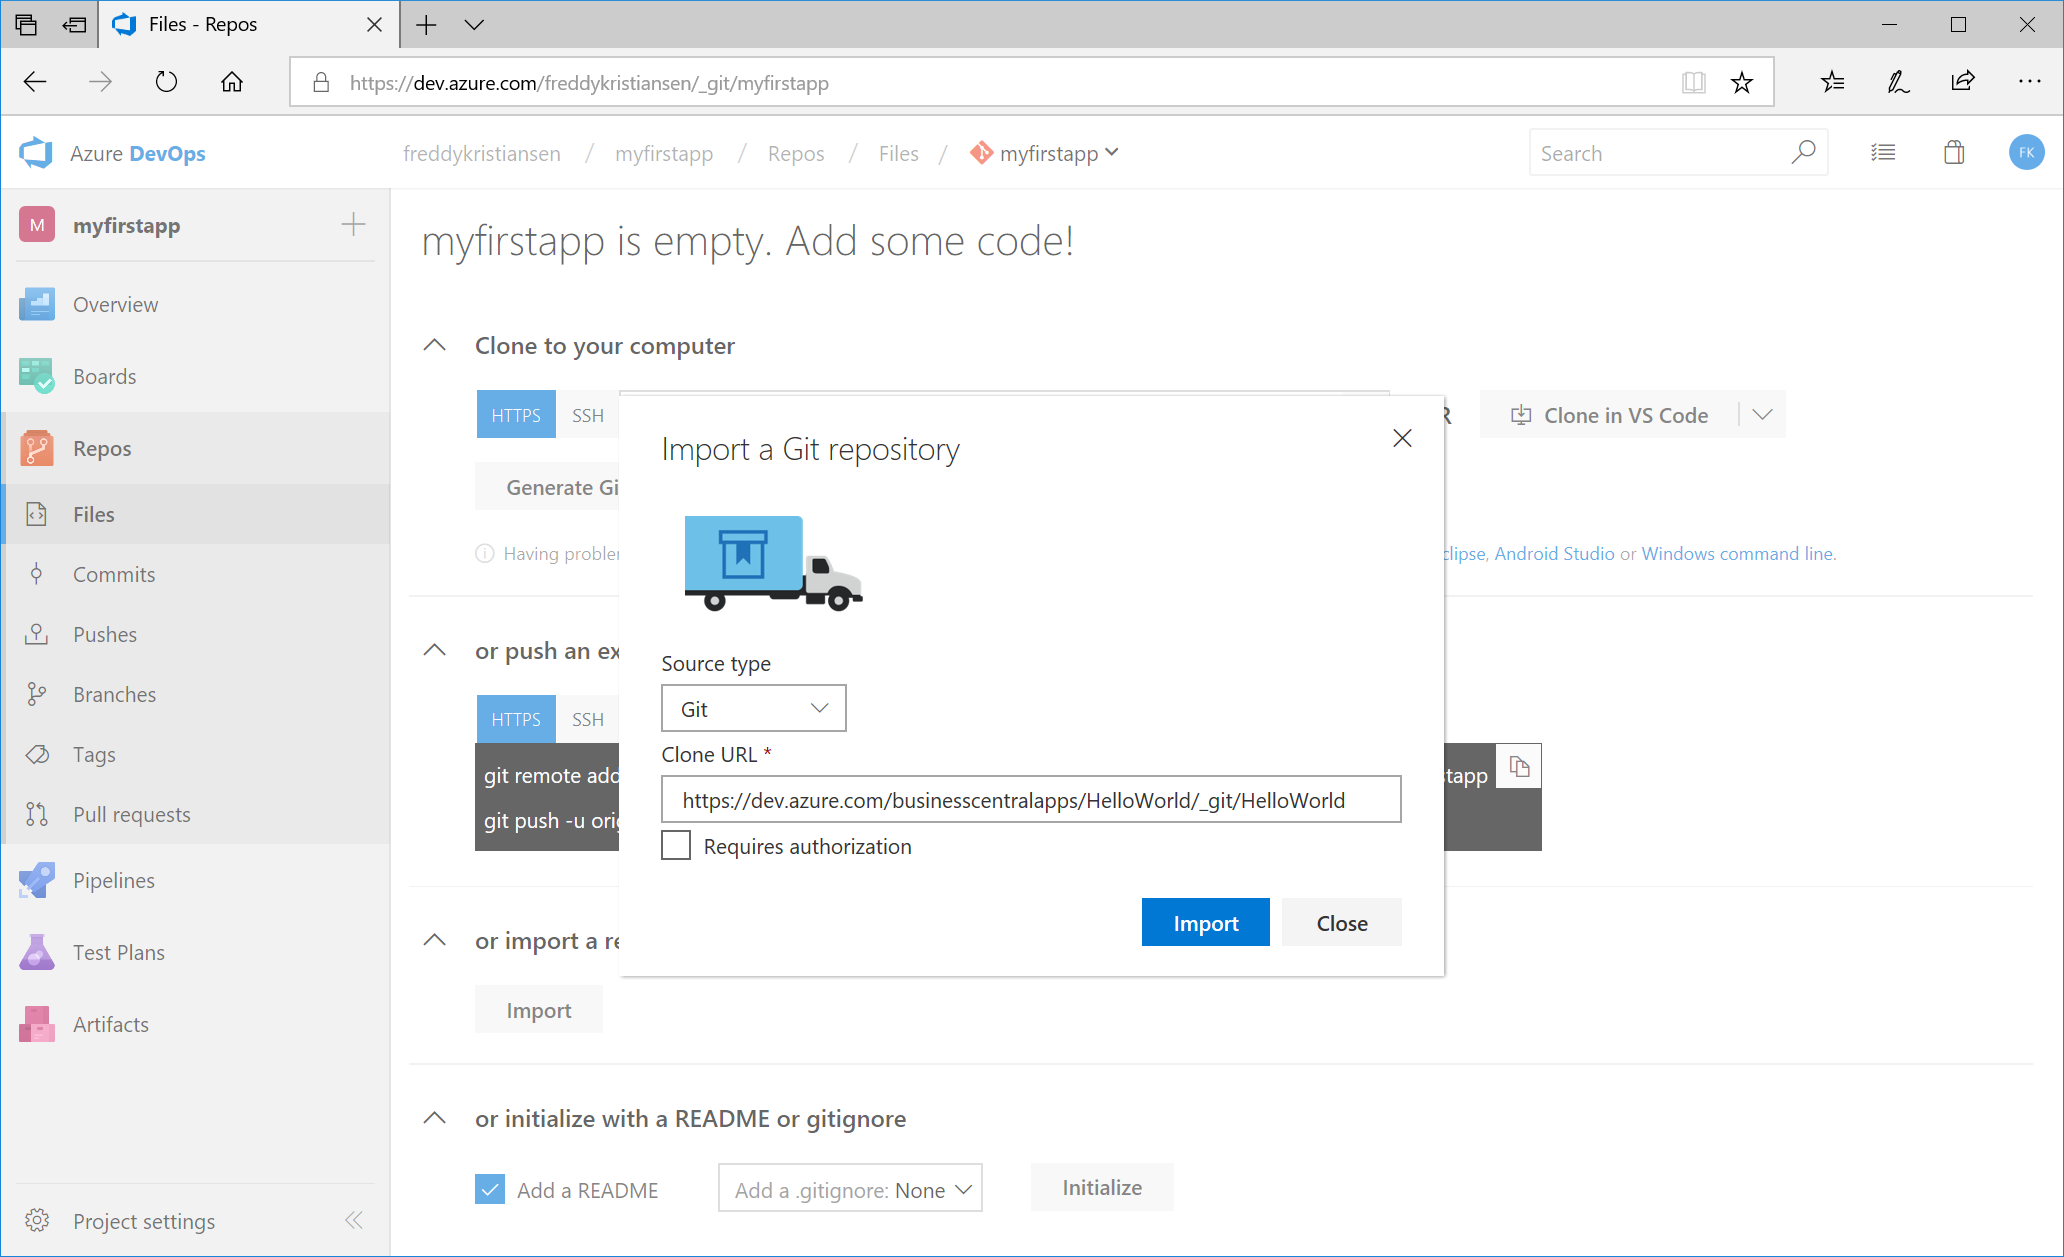
In the project navigate to the Repos -> Files area, click Import and enter https://dev.azure.com/businesscentralapps/HelloWorld/_git/HelloWorld in the Clone URL field.
Inspect the content of the repository

- app is the Hello World App folder
- test is the Test App folder
- scripts contains a set of scripts for build, test and CI/CD
- settings.json defines the settings for your project and users
- Local-Sandbox.ps1 is a script, which will create a local Sandbox environment (based on Docker)
- AzureVM-Sandbox.ps1 is a script, which will create an AzureVM with a Sandbox environment (based on Docker and ARM templates)
- Local-Build.ps1 is a script, which will perform a full build and test run locally
- Initialize.ps1 is an initialization script used from the other scripts in this folder.
- CI.yml is the CI pipeline sample
Note: The template will constantly be improved and the content of the template repository might vary.
If you want to add multiple apps to the project, the idea is to create folders for each app in the root folder.
After the import, Click the Clone button in the upper right Corner and select Clone in VS Code.
Accept the app change, select a location for the repository and sign in to your Azure DevOps account if asked to do so.
Note: If authentication fails with a NullReferenceException, it is likely because you need to install a new version of the Credential Manager as explained in Part 1.
Modify Settings.json
Open Repository and open settings.json:
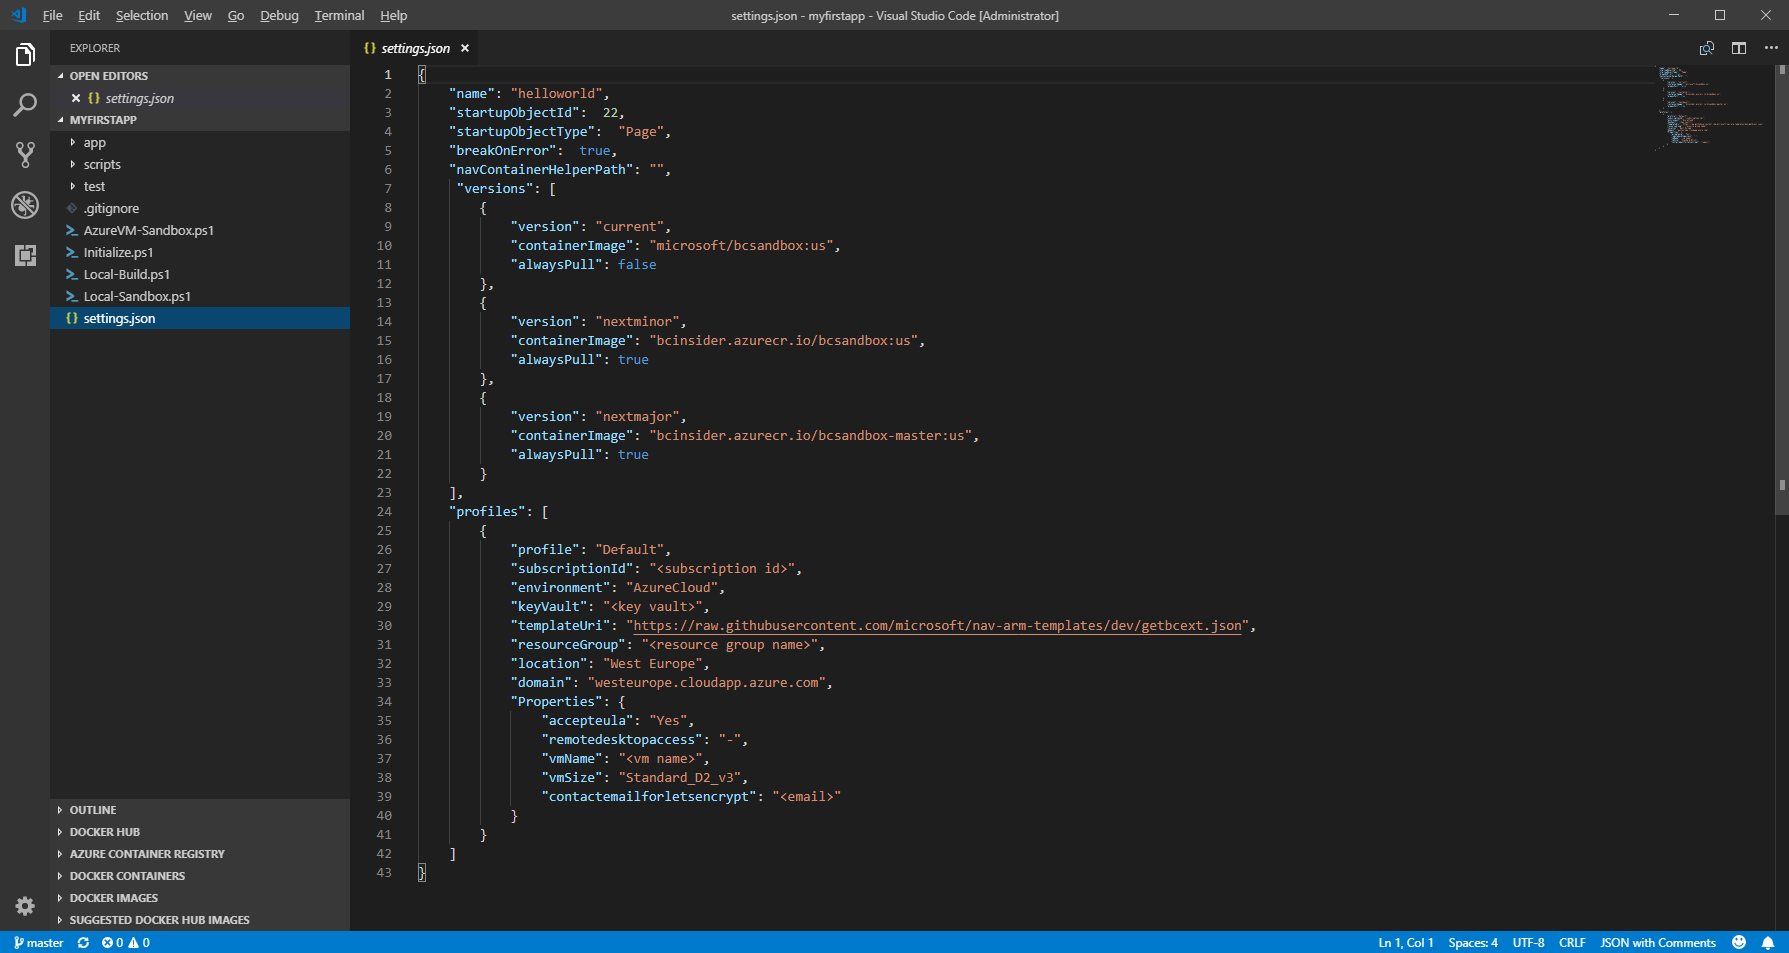
- name is the name of the project.
- startupObjectId, startupObjectType and breakOnError are values, which will be inserted in launch.json if present.
- navContainerHelperPath is a local path to NavContainerHelper. If not set, NavContainerHelper will be installed from the PowerShell Gallery.
- versions describes the three different versions of Business Central you will be building against.
- profiles describes the Azure connection and resource naming, location, sizing etc. for a specific profile. Every user will typically have their own profile and the build process will also have a profile of its own.
Please modify the default profile to match the subscription Id and the Key Vault Name from part 1 of this blog post series. If you are going to create Azure VMs for your Business Central Sandbox environment, you also need to set the Resource Group Name, the Location and the Properties you want to set in the ARM template deployment. The properties section can contain all properties known by the ARM template (described by the template parameter).
Modify App app.json
Expand the app folder, open app.json, mark <app id> , press Ctrl+Shift+P and select Insert GUID (from the Insert GUID extension we installed in VS Code in Part 1).
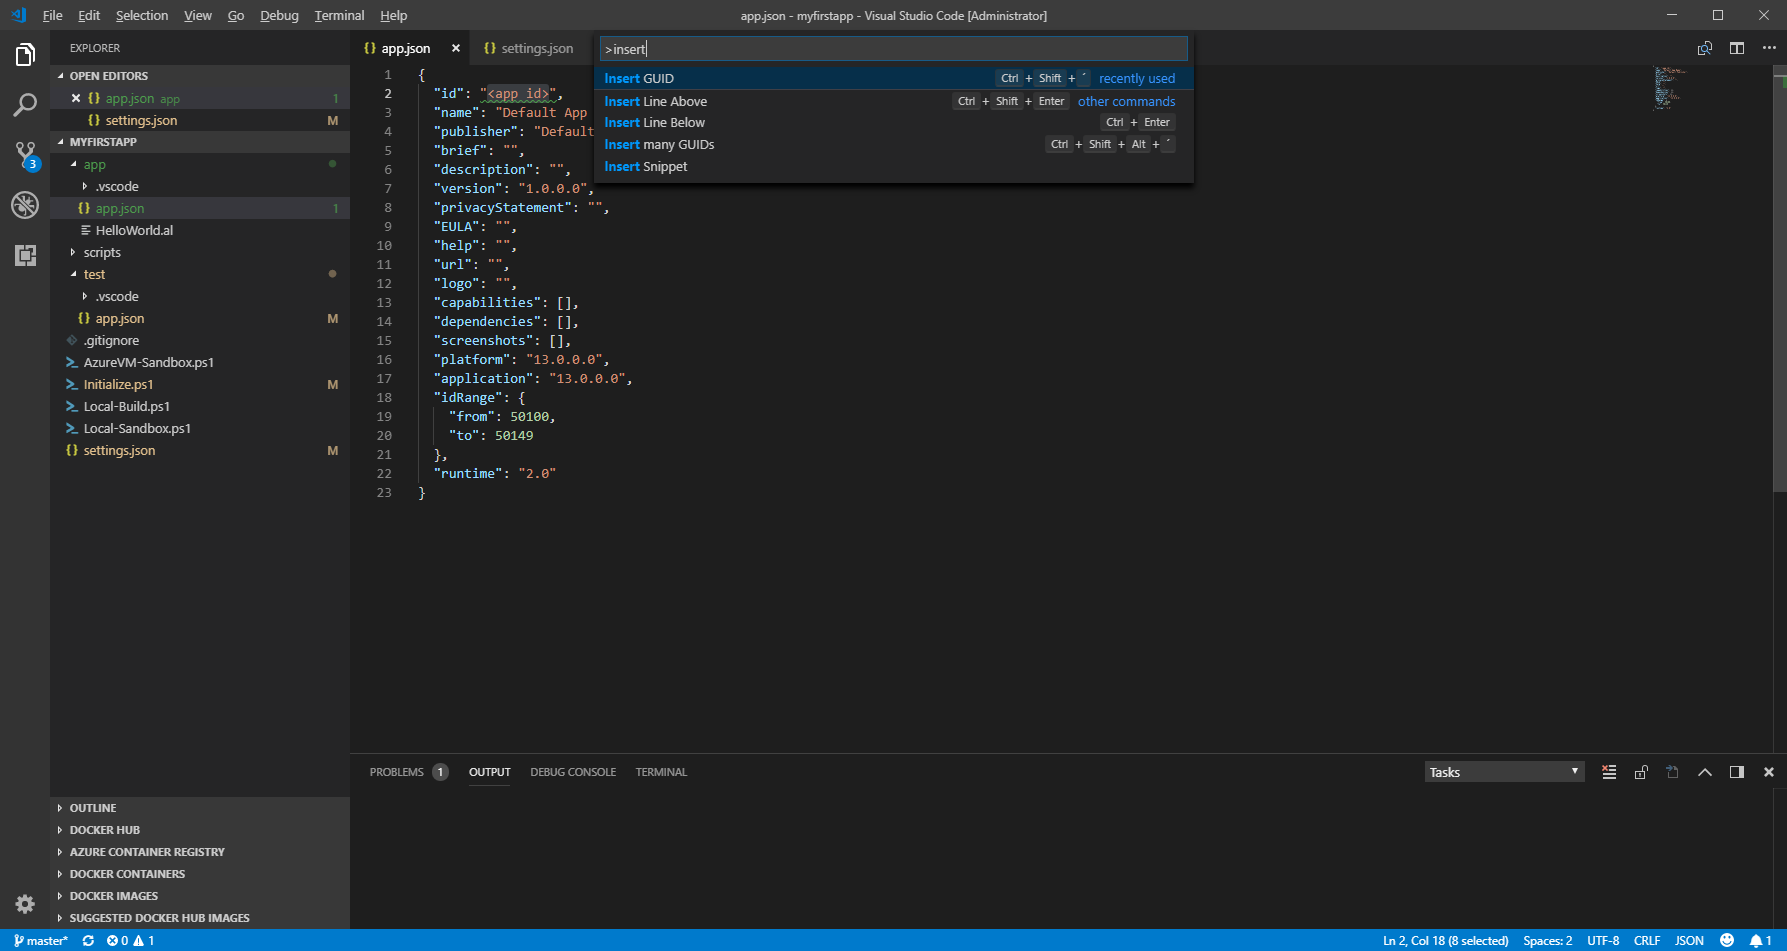
Copy the GUID to the clipboard, you need it for the dependency in the Test App. Close app.json.
Modify Test app.json
Expand the test folder, open app.json, replace <app id> under dependencies with the App Id GUID from the App app.json.
Replace the <test app id> with a new GUID. Close app.json.
Check in your changes
In this blog post we are primarily working on local builds and local development. For that it is not necessary to checkin your changes.
But, in the next blog post we will be looking at setting up hosted builds and our configuration needs to be in the depot for that.
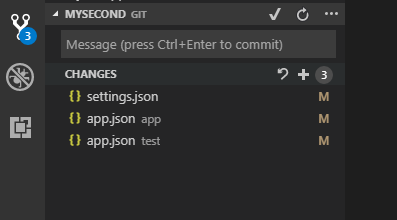
Click the Source Control icon and press + on the changes line to stage all your changes.
Now enter your commit message and press Ctrl+Enter 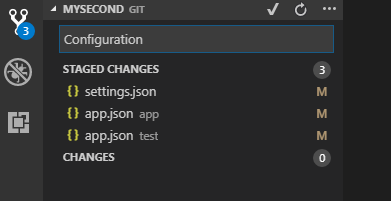
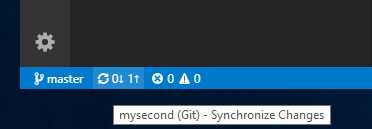
In the bottom left side, press the synchronize symbol to push your changes to the depot.
Create your Sandbox environment
In Part 1, we installed the PowerShell extension in VS Code.
In the repository you will find two scripts for setting up sandbox environments:
- Local-Sandbox.ps1 is a script, which will create a local Sandbox environment (based on Docker)
- AzureVM-Sandbox.ps1 is a script, which will create an AzureVM with a Sandbox environment (based on Docker and ARM templates)
Open Local-Sandbox.ps1 and press F5.
Select the current version, login to your azure subscription if asked to do so and wait for the script to complete.

After completion of the script, you should see

Note: That all app folders in the root folder automatically gets a Local Sandbox server created pointing to the local sandbox environment.
Note: In order to create an AzureVM Sandbox environment, you need to correctly configure settings.json as described above (Resource Group Name, VM Name and Contact email for Lets Encrypt)
Note also: The Resource Group holding the Azure VM should not be used for other resources. Creating an AzureVM-Sandbox will remove the Resource Group if it already exists.
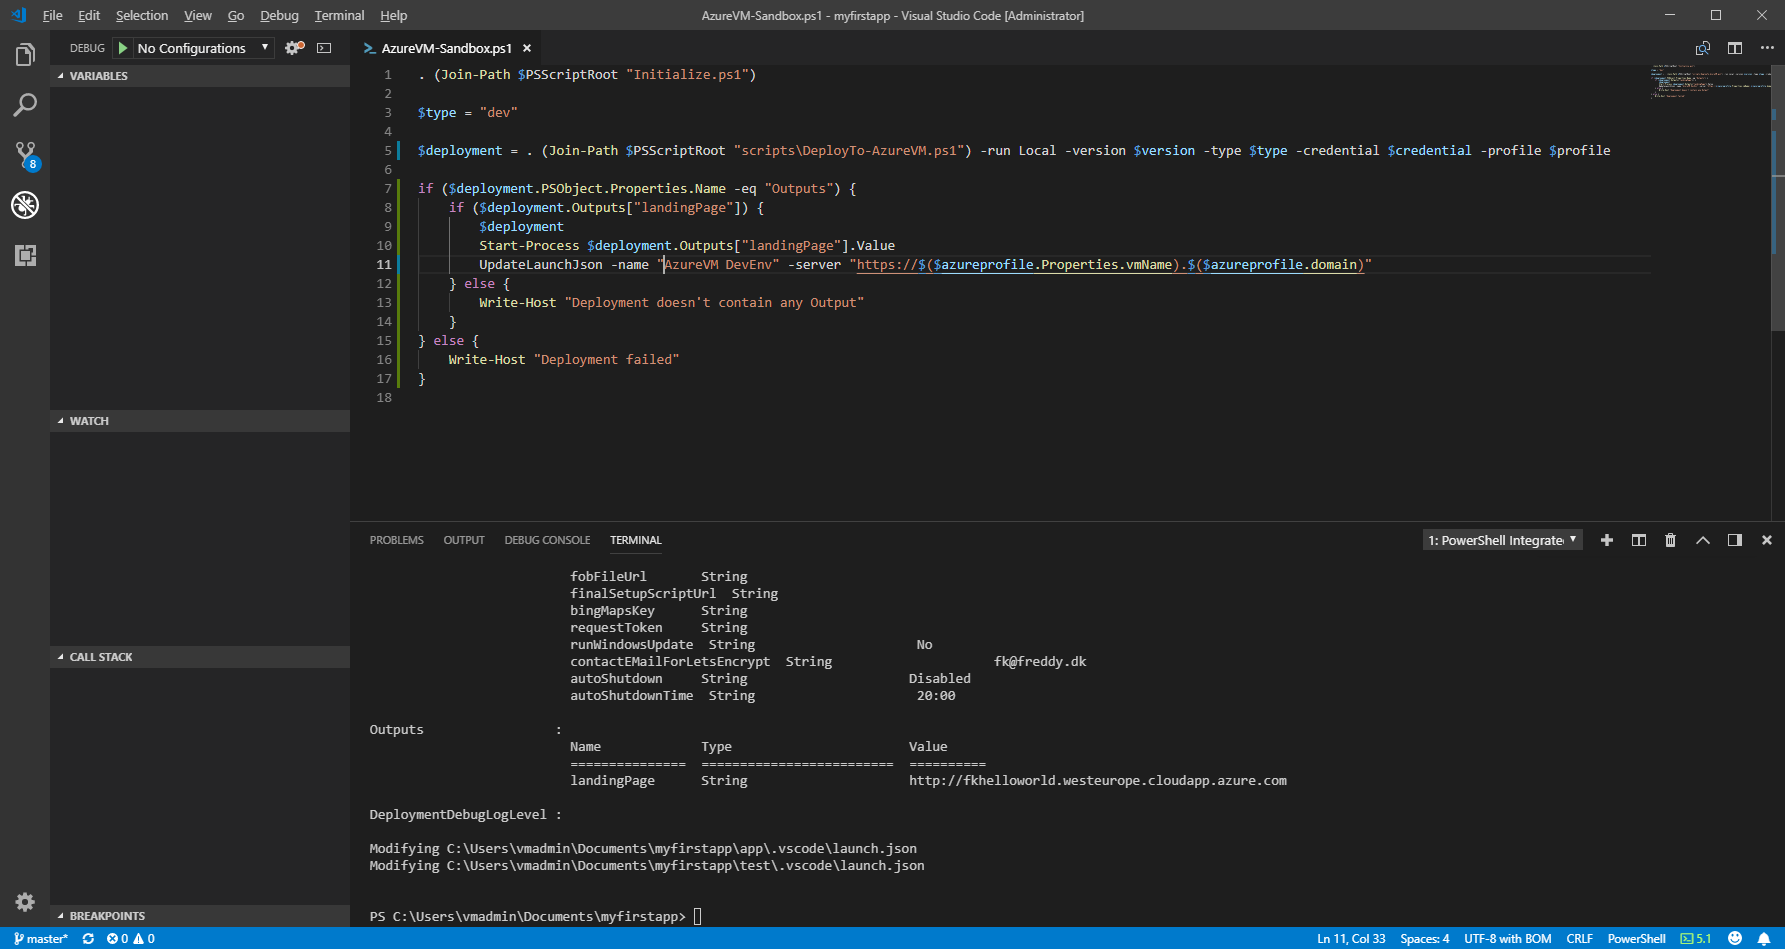
Open AzureVM-Sandbox.ps1 and press F5.
Note
Select the current version, login to your azure subscription if asked to do so and wait for the script to complete. This will likely take 10-15 minutes and after that you should see:
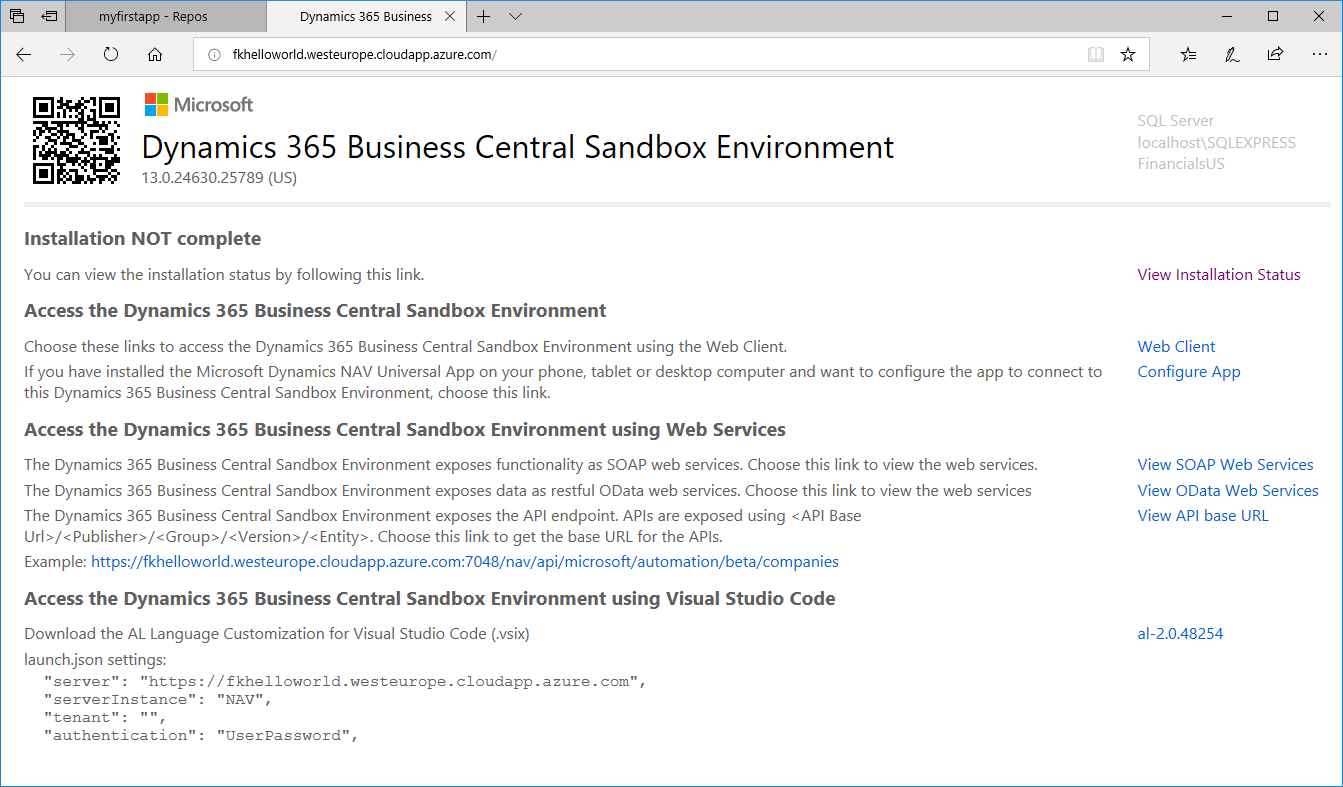
Note: The deployment is still running inside the Azure VM. The landing page should open automatically and you should see:

This content of this page will change to the landing page when the installation is complete:
Note: That all app folders in the root folder automatically gets a AzureVM Sandbox server created pointing to the AzureVM sandbox environment.
Build your app
In VS Code, close the folder.
Select File -> Add folder to workspace select the app folder in the repository and add this to the workspace.
Do the same with the test folder and save the Workspace in the Root folder.
Open your app project in the workspace (not under myfirstapp), click HelloWorld.al 
Click the Download Symbols, select appropriate server if you have created both environments (Local Sandbox if running Local, AzureVM Sandbox if running Azure VM). Enter the credentials you stored in the keyvault and you should see:

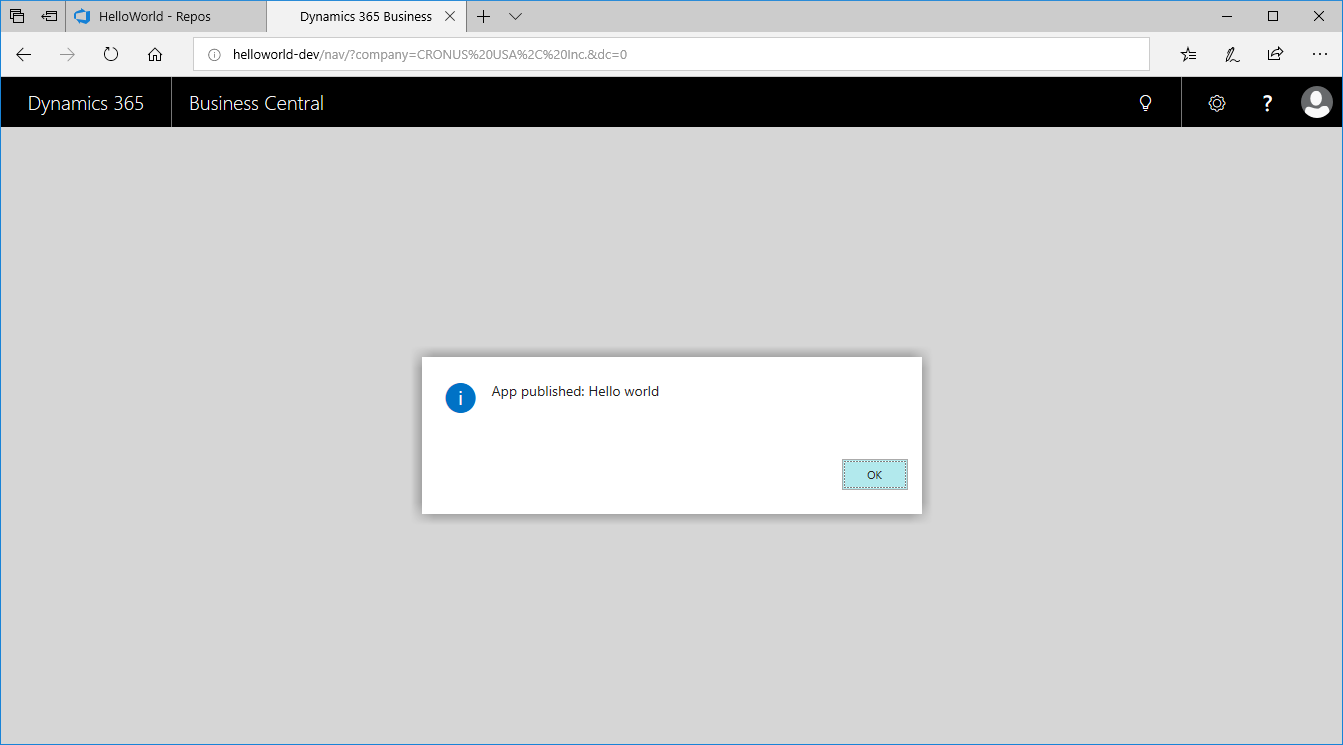
Press F5 and you should see:
What's next
Now we are done setting up our repository, we have build the app and successfully tested it.
In the next Blog Post we will setup build agents and create build pipelines to build the app in Azure DevOps.
Enjoy
Freddy Kristiansen
Technical Evangelist
- Anonymous
November 17, 2018
The comment has been removed- Anonymous
November 17, 2018
Actually, the template URI is optional and it defaults to the value in the screenshot, but I will edit the blog post and mention this.
- Anonymous
- Anonymous
November 17, 2018
The comment has been removed- Anonymous
November 17, 2018
The comment has been removed
- Anonymous
- Anonymous
November 17, 2018
Freddy, I kept on searching for the cause and found it although I cannot explain why. If I leave out the option '-useBestContainerOS ` when creating the local sandbox, it works okay.- Anonymous
November 17, 2018
Yeah, if you leave out the useBest, the container doesn't have to download pre-requisites.I will investigate whether there is a better way of doing this - thanks for reporting this.- Anonymous
November 18, 2018
The comment has been removed
- Anonymous
- Anonymous
- Anonymous
December 04, 2018
The comment has been removed- Anonymous
December 04, 2018
That is correct - I will add that information to the blog post.I hope you didn't have a lot of other stuff in that resource group?- Anonymous
December 06, 2018
Luckily, I grated special resource group to follow your blogs. Trust is not blind ? You know the old joke. Developers never made backup, but they cry ?I would recommend to add resourceGroupRemovalPolicy to setting.json with following values: force, ask, mergeForce – like it works nowAsk – give the warring to the terminal. With possibility to cancel, continue (same as force), to give new value for resource group. It should be default value because otherwise developers will cry ?Merge – Create new resource group, if same resource group already exist, then add new resources inside existing resource group without deleting anything. It is the user responsibility to maintain that resource group overwhelming with portalLast one support ideas to Create multiple VM -in same RG. Think about running VM -s for bcsandbox:W1 and bcsandbox:us side by side to test or demo drive. Also I would recommend to create additional branch based on master for https://dev.azure.com/businesscentralapps/HelloWorld/_git/HelloWorld. Called Community Feedback, I hope name telling more why that. We can easily comment your code or will give feedback via some MD files. I feel the commenting blogs is not good way to handle that.- Anonymous
December 06, 2018
Good ideas, thanks
- Anonymous
- Anonymous
- Anonymous
- Anonymous
January 16, 2019
Hi Freddy,How can I create pull requests for your Azure DevOps repository?- Anonymous
January 23, 2019
Will check up on that and get back.
- Anonymous
- Anonymous
January 29, 2019
Good to know: you need to update to Windows version 1809, otherwise some errors will occur: first an error about ProcessIsolation. Windows 1803 only supports hyperv. I changed this to hyperv in the CreateContainer.ps1 but got another error about Select INTO (SQL) scripts. So finally I updated to 1809 and all problems went away.- Anonymous
January 29, 2019
By the way, great post and looking forward for more! - Anonymous
January 29, 2019
NavContainerHelper should automatically determine process vs. hyperv isolation, but maybe I didn't change this in CreateContainer.Will check.Thanks for the feedback.
- Anonymous
- Anonymous
February 10, 2019
Hi Freddy, following your great blogs and giving this one a try. I've moved to 1809 to get over those issues, but things now seem to be failing when trying to 'create admin as SQL User and add to sysadmin'. I'm in VS Code running as admin (although same result in PS ISE).If I simply run the "New-NavContainer -accept_eula -containerName "helloworld-dev" -auth NavUserPassword -imageName "microsoft/bcsandbox:us-ltsc2019" I can reproduce the error.Initialization of container helloworld-dev failedAt C:\Program Files\WindowsPowerShell\Modules\navcontainerhelper\0.5.0.2\ContainerHandling\Wait-NavContainerReady.ps1:45 char:17+ ... throw "Initialization of container $containerName failed" ...+ ~~~~~~~~~~~~~~~~~~~~~~~~~~~~~~~~~~~~~~~~~~~~~~~~~~~~~~~~~ + CategoryInfo : OperationStopped: (Initialization ...orld-dev failed:String) [], RuntimeException + FullyQualifiedErrorId : Initialization of container helloworld-dev failedAny ideas?ThanksRyan- Anonymous
February 27, 2019
Sorry, didn't see the info before now - did you resolve the issue? else please file an issue at http://www.github.com/microsoft/navcontainerhelper/issues, thanks
- Anonymous