Add and remove files in Git
After initializing your local Git repository, you can start working on your AL extension. Every file you create needs to be added to your repository. To do that, you need to execute some commands. Let's look at different commands to add to or remove from your repository and commit your changes in the Git directory.
Add files
To add an untracked or modified file (or multiple files) to Git, you can use the add command. This command adds your modified files from the working directory to the staging area. With the add command, you specify the filename of the file to add. An asterisk can be used to indicate all files.
git add <filename>

git add *
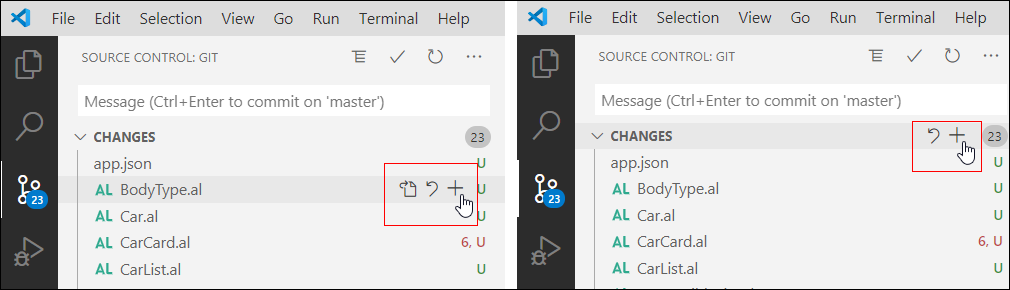
Within Visual Studio Code, you can add file by clicking the + sign next to a filename in the source control window (Ctrl+Shift+G). This action puts your file in the staging area. To add all the changed files, you can click the + sign in the changes section.
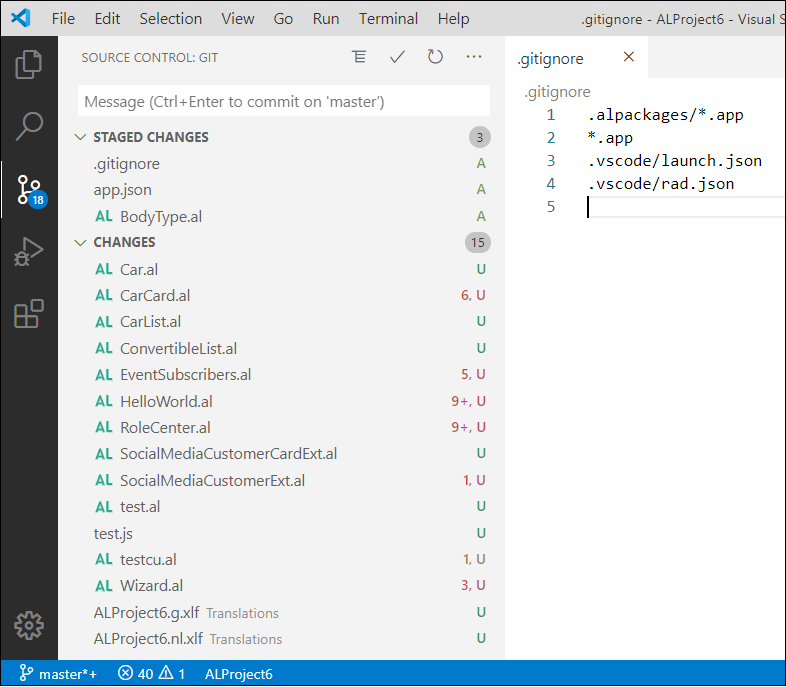
The result of adding files to the staging area is visible in the staged changes section within Visual Studio Code. In the next screenshot, the app.json, BodyType.al, and .gitignore file are staged. They're also assigned the status code A, indicating that they are added.
Remove a staged file
If you added a file to the stage area, but it shouldn't be included, you can unstage that file. To unstage a file, you need to use the reset command.
git reset HEAD <filename>
This command puts the file back into the working directory and remove it from the staging area. If you reset recently added files, your file becomes untracked again.
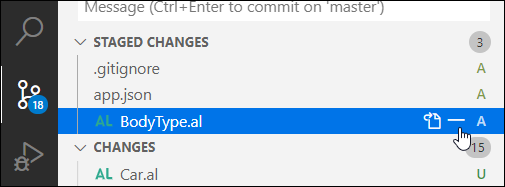
Within Visual Studio Code, you can use the - sign to unstage or reset.
Commit your staged files to the Git directory
Once your files are in the staging area, you can use the commit command to store them in the Git directory. Each commit takes all the files from the staging area, add them to the Git directory and include your username and email within the commit.
git commit
A commit always needs a commit message. If you use the previous command, the default editor opens and allows you to enter a commit message. You can also use the -m option.
git commit -m "Your message comes here"
Within Visual Studio Code, you have a GUI to enter your commit message. There are two locations where you can enter that message. You can enter it in the Source Control Management (SCM) pane just above the staged changes section.
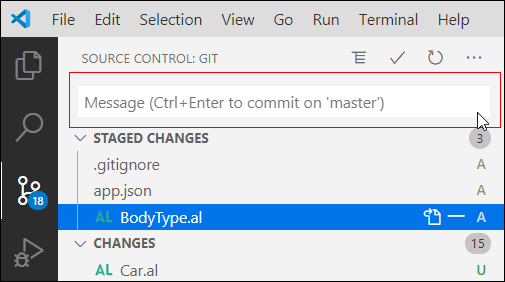
If you don't provide a message when you click the commit button, Visual Studio Code also asks you to enter a message.

The actual commit is done by using the check icon or the commit commands from the Git commands list. You can open the commands list by clicking the three dots.
The Commit Staged changes is only committing files in the staging area. The check icon is a shortcut for the Commit Staged command. Normally every commit creates a new commit entry in Git. Every commit generates a unique commit string that uniquely identifies that commit.
For example:
521747298a3790fde1710f3aa2d03b55020575aa
If you select the Amend option, your changes is added to the last commit, instead of creating a new commit, which is useful if you forgot some files.
git commit --amend
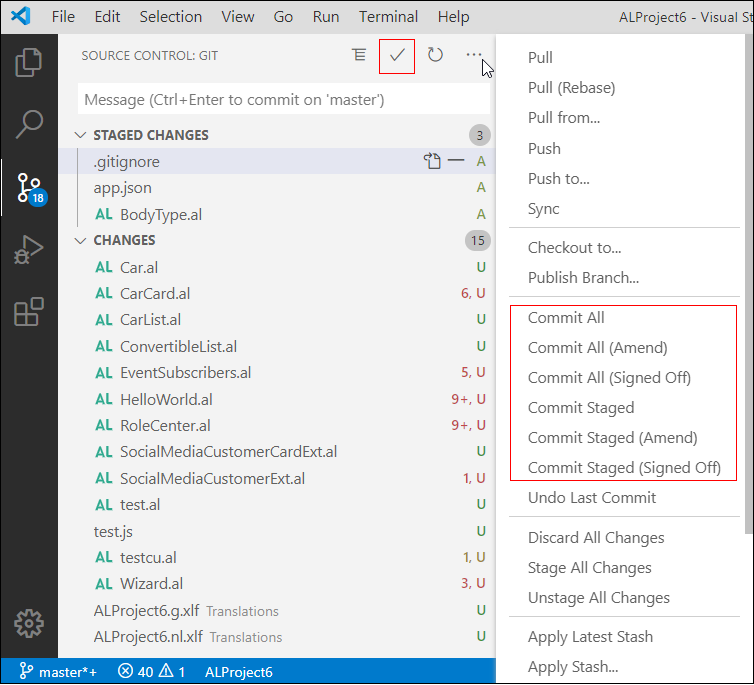
If the staging area contains no files and you select Commit, Visual Studio Code displays a message that no files are staged. It also asks whether you want to commit the files in your working directory. It then bypasses the staging area. You can also use the -a option on the commit command.
git commit -a -m "Your message comes here"
After you create a commit, select the branch name, such as main. Visual Studio Code displays an option to create a new branch. It also displays the commit ID that the branch uses.

We recommended you often add your changed files to the staging area, and if they're ready and stable, you can commit them into your Git directory. Don't wait until the end of the day, instead commit your modifications as often as possible.
Remove a file from the repository
If you delete a file from your working directory using Windows Explorer or within Visual Studio Code, your file is still part of the Git repository. Use the rm command to indicate the Git repository that you want to delete the file from your project. This action is stored in your staging area, together with files you modified or added. When you perform a commit, your file removal is completed in the Git repository.
git rm <filename>
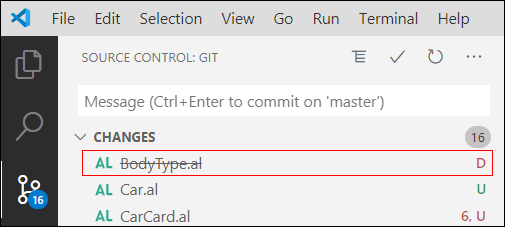
A delete is automatically detected in the working directory and made visible in Visual Studio Code. This file gets a status code of D, indicating that this file is deleted from disk. Stage this change to execute the rm command and commit to completely remove it from the Git Directory.
Maybe you don't want to delete your file from disk, but you do want to remove it from Git. You can use the rm --cached to do that.
git rm --cached <filename>
This action removes your file from the staging area and execute a remove in the Git repository, but your file is still on your disk. The file becomes untracked again.
Undo your changes
If you made some modifications to a file and you would like to get the previous version back, you can use the checkout command. Checkout gets the committed version from the Git directory and puts this version in your working directory.
git checkout <filename>