Exercise - Create a new choice or modify an existing choice
Create a new custom choice
You might want to make a new custom choice to use across many entities in Microsoft Dataverse. You can create a choice in two ways: by creating a choice when you define a new field within a table, or by creating a choice using the choice functionality within the Power Apps portal.
To create a new custom choice using the choice functionality in the Power Apps Portal, follow these steps:
Sign into Power Apps maker portal. If using the virtual environment, skip to step 2.
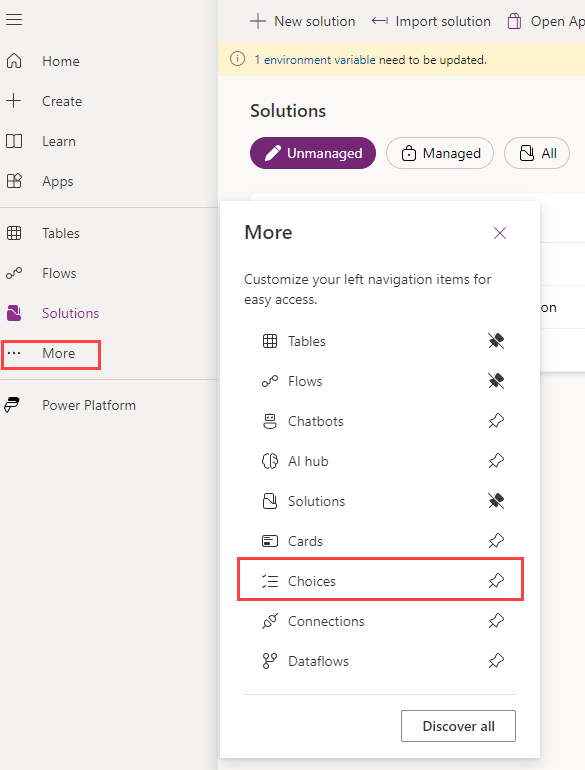
On the left pane, select ... More and select Choices.
Select New choice on the menu at the top of the list.
Enter a PC Type for the Display name.
Add the following items to the choice by entering the label and then selecting + New choice:
Laptop
Desktop
Tablet
Server

Note
You can assign a unique numeric value by adjusting the value field beside the choice entry.
Select the Save button.


The choice PC Type is now available to use with any column in any table within the environment. To use the new choice, follow the next steps.
Tip
It might take a few minutes for the new choice to appear in the list of available choices.
Create a new custom table
If you haven't created the custom table PC Manufacturers earlier in this learning path, complete the following steps.
Select Tables on the left-hand side of the Power Apps maker portal.
Select New table in the menu at the top of the list of tables and then select Set advanced properties.
Enter the following for Display name: PC Manufacturers
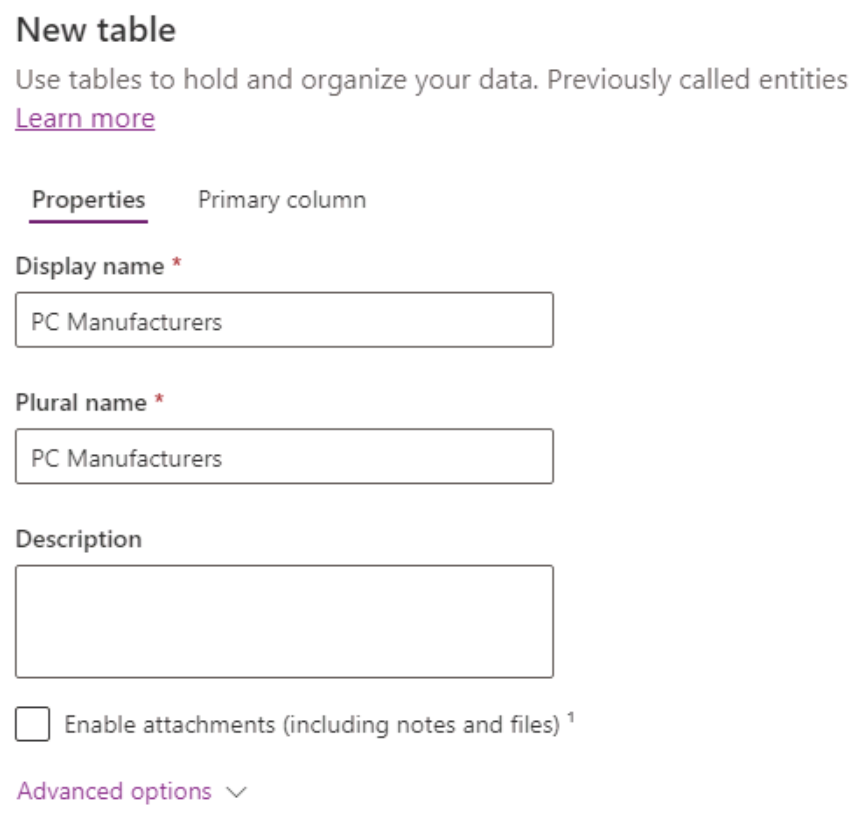
Select Save.

Add the choice to the custom table
Select Tables on the left-hand side of the Power Apps maker portal.
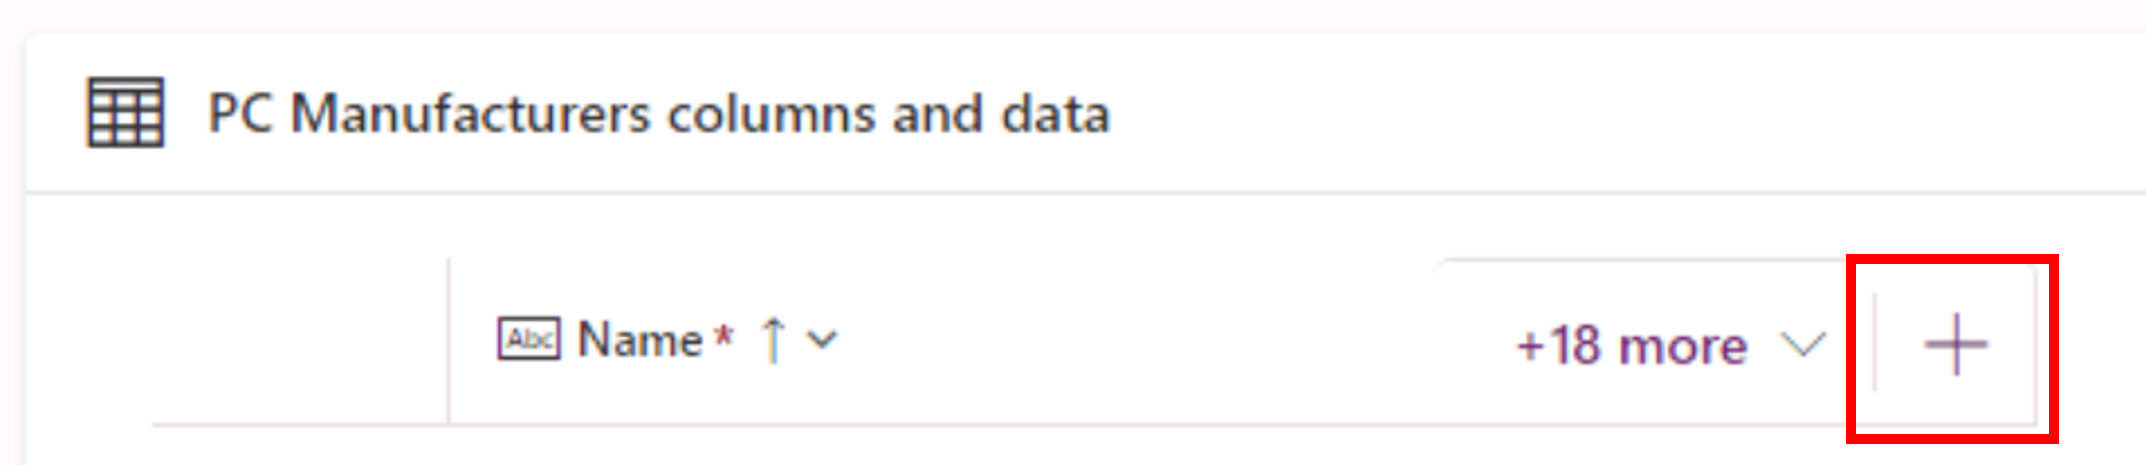
Select the new custom table PC Manufacturers in the list of tables. This opens the list of columns in the table.
Select the New column button on the menu below the columns and data section.
Enter Type of PC as the name of the new column.
Select Choice for the data type and select Choice again.
Scroll down to the Sync this choice with option and select PC Type from the list of choices.
Select the Save button.

You can also define a choice as you add a new column, without creating a choice in the portal. The choice that you add while defining a column can also be used with any column of type Choice in any table within the environment.
Define a choice when adding new columns
If you would rather define a choice as you add new columns to a table, follow these steps:
Select Tables on the left-hand side of the Power Apps maker portal.
Select the new custom table PC Manufacturers in the list of tables.
Select Columns under Schema. This opens the list of columns in the table.
Select the + New column button on the menu above the list of columns.
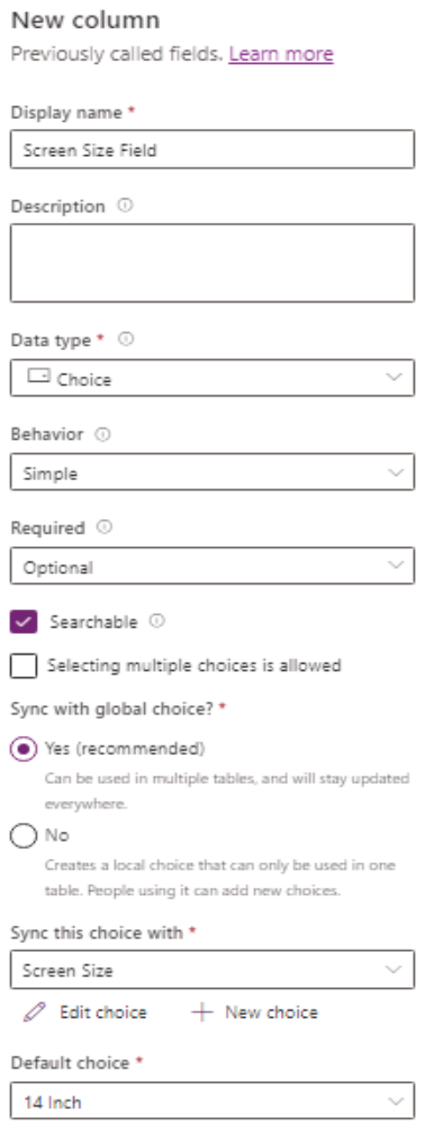
Enter Screen Size in the Display name field.
Select Choice in the Data type field and select Choice again.
Locate the Sync this choice with field and select + New choice.
Enter Screen Size in the Display name field.
Enter 14 Inch, 17 Inch, 21 Inch, and None in the items.

Select the Save button
Select Screen Size for Sync this choice with field
Select 14 inch in the Default choice field.
Select the Save table button.
Select the Save button.


If you need to modify an existing choice, follow these steps:
Sign into Power Apps maker portal.
On the left pane, select ... More and select Choices.
Select the Choice that you want to modify.
Add a new entry by selecting the Add new choice button.
You can delete an item by selecting the trashcan.
You can add additional properties by selecting the settings icon next to the entry.
Select the Save button to save changes.