Note
Access to this page requires authorization. You can try signing in or changing directories.
Access to this page requires authorization. You can try changing directories.
The linting process highlights language syntax and style problems in your Python source code. You can run a linter on your code to identify and correct subtle programming mistakes or unconventional coding practices that can lead to errors. Linting can detect the use of an uninitialized or undefined variable, calls to undefined functions, missing parentheses, and subtle issues like attempts to redefine built-in types or functions. Linting is distinct from formatting because it analyzes how your code runs and detects errors whereas formatting only restructures how your code appears.
Two common options for linting include pylint and mypy. These tools are widely used to check for errors in Python code and encourage good Python coding patterns. Both tools are integrated into Visual Studio for Python projects.
Prerequisites
- Visual Studio. To install the product, follow the steps in Install Visual Studio.
- Access to a Python project to run linting tools on existing code.
Run a linter
The linting tools in Visual Studio are available in Solution Explorer.
The following steps show how to use a linter to check your code.
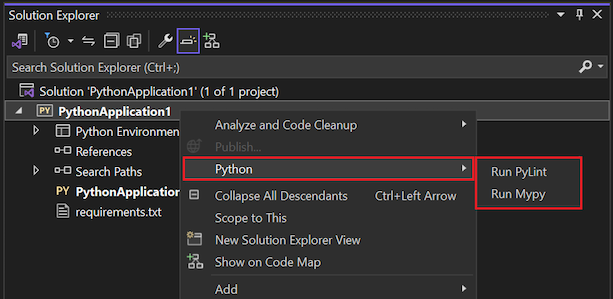
In Visual Studio, right-click a Python project in Solution Explorer and select Python, then choose Run PyLint or Run Mypy:
The command prompts you to install the linter you choose into your active environment if it's not already present.
After the linter runs on your code, you can review any lint warnings and errors in the Error List window:
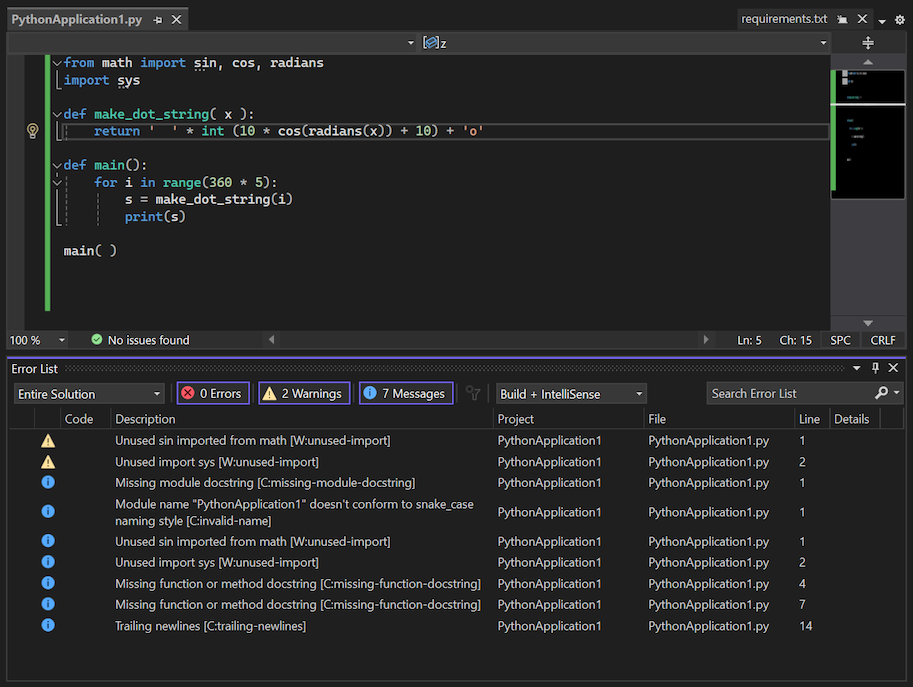
Double-click an error or warning to go to the location in the source code where the issue is generated.


Set command-line options
Both pylint and mypy offer command-line options to configure linting settings for your project.
This section shows an example that uses the pylint command-line options to control pyLint behavior through a .pylintrc configuration file. This file can be placed in the root of a Python project in Visual Studio or another folder, depending on how widely you want to apply the settings.
The following steps suppress "missing docstring" warnings (as shown in the previous image) by using a .pylintrc file in the Python project.
On the command line, browse to the project root folder that has the
.pyprojfile, and run the following command to generate a commented configuration file:pylint --generate-rcfile > .pylintrcIn Solution Explorer, right-click the project and select Add > Existing Item.
In the dialog, browse to the folder that has the new
.pylintrcfile. Select the.pylintrcfile, and then select Add.In Solution Explorer, open the
.pylintrcfile for editing.There are several settings you can configure in the file. This example shows how to disable a warning.
Locate the
[MESSAGES CONTROL]section, and then locate thedisablesetting within that section.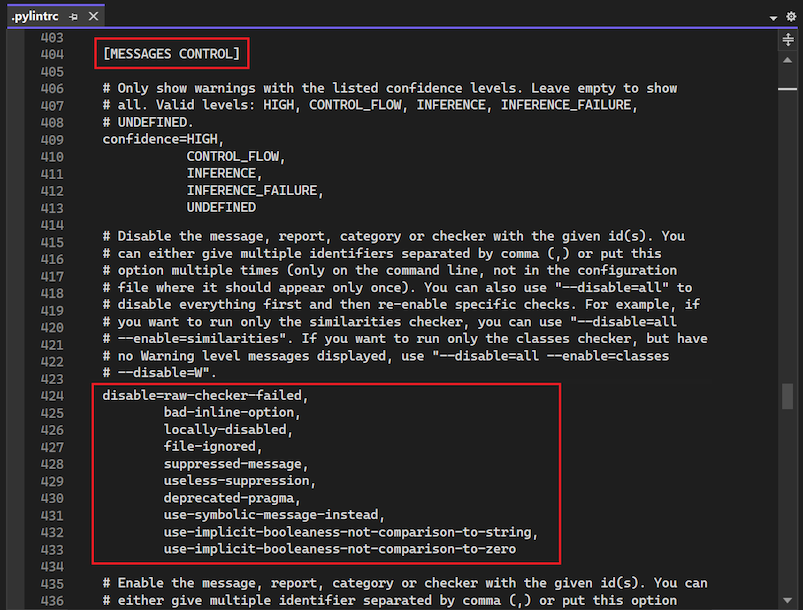
The
disablesetting consists of a long string of specific messages to which you can append whichever warnings you want.Append the string
,missing-docstring(including the comma prefix) to thedisablesetting value: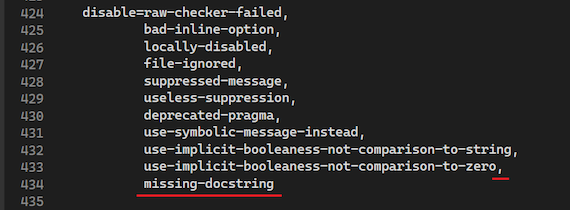
Save the
.pylintrcfile.Run pylint again. Notice that the "missing docstring" warnings are now suppressed.


Use pylintrc file from network share
You can use a .pylintrc file from a network share.
Create an environment variable named
PYLINTRC.Assign the variable the value of the filename on the network share by using a Universal Naming Convention (UNC) path or a mapped drive letter. For example,
PYLINTRC=\\myshare\python\.pylintrc.