학습
모듈
Azure Remote Rendering을 사용하여 3D 모델 렌더링 - Training
Azure Remote Rendering을 사용하여 Unity 프로젝트에서 3D 모델을 렌더링합니다. 모델을 HoloLens 2에 배포하거나 MRTK를 통해 혼합 현실의 기능을 사용할 수 있습니다.
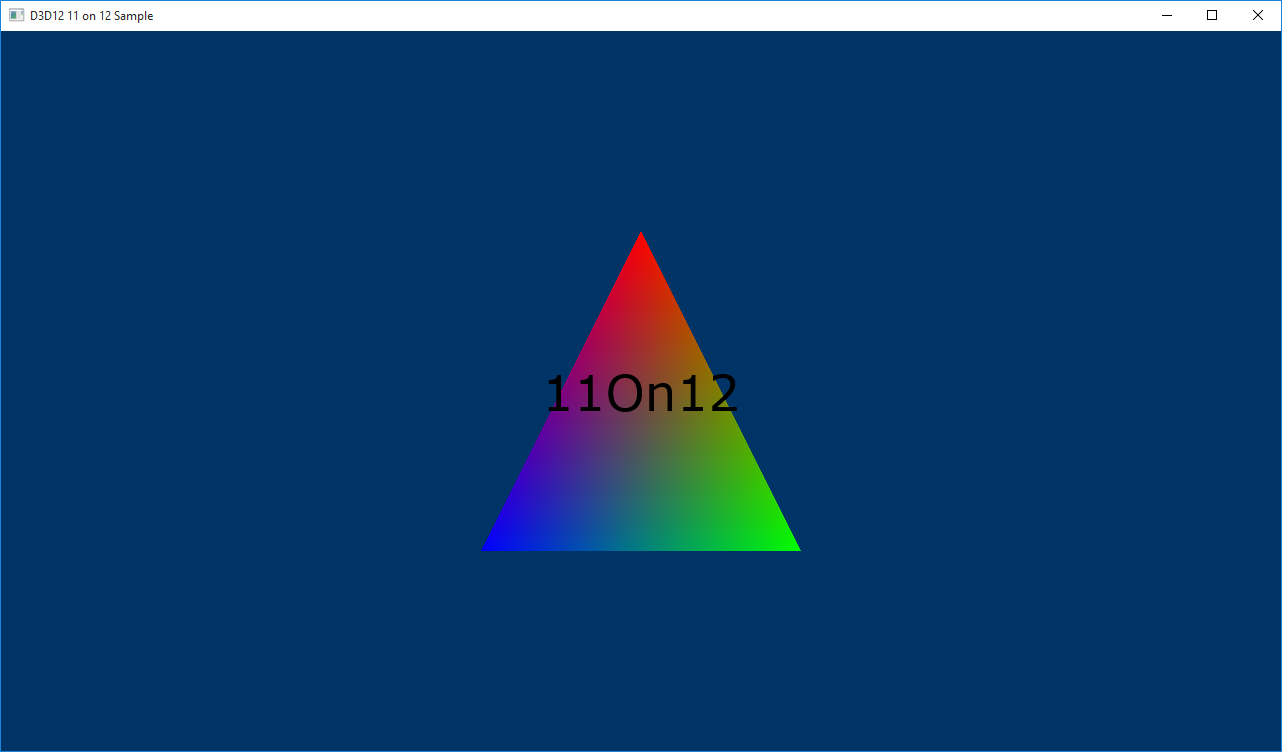
D3D1211on12 샘플에서는 11 기반 디바이스와 12 기반 디바이스 간에 리소스를 공유하여 D3D12 콘텐츠를 통해 D2D 콘텐츠를 렌더링하는 방법을 보여 줍니다.
첫 번째 단계는 ID3D12Device를 만든 후에 ID3D11On12Device를 만드는 것입니다. 이때 API D3D11On12CreateDevice를 통해 ID3D12Device에 래핑되는 ID3D11Device를 만듭니다. 이 API는 다른 매개 변수 중에서 ID3D12CommandQueue를 사용하므로 11On12 디바이스는 해당 명령을 제출할 수 있습니다. ID3D11Device가 만들어지면 여기에서 ID3D11On12Device 인터페이스를 쿼리할 수 있습니다. 이것은 D2D 설정에 사용할 기본 디바이스 개체입니다.
LoadPipeline 메서드에서 디바이스를 설정합니다.
 // Create an 11 device wrapped around the 12 device and share
    // 12's command queue.
    ComPtr<ID3D11Device> d3d11Device;
    ThrowIfFailed(D3D11On12CreateDevice(
        m_d3d12Device.Get(),
        d3d11DeviceFlags,
        nullptr,
        0,
        reinterpret_cast<IUnknown**>(m_commandQueue.GetAddressOf()),
        1,
        0,
        &d3d11Device,
        &m_d3d11DeviceContext,
        nullptr
        ));

    // Query the 11On12 device from the 11 device.
    ThrowIfFailed(d3d11Device.As(&m_d3d11On12Device));
| 호출 흐름 | 매개 변수 |
|---|---|
| ID3D11Device | |
| D3D11On12CreateDevice |
이제 11On12 디바이스가 있으므로 이 디바이스를 사용하여 D3D11을 사용할 때처럼 D2D 팩터리 및 디바이스를 만듭니다.
LoadAssets 메서드에 추가합니다.
 // Create D2D/DWrite components.
    {
        D2D1_DEVICE_CONTEXT_OPTIONS deviceOptions = D2D1_DEVICE_CONTEXT_OPTIONS_NONE;
        ThrowIfFailed(D2D1CreateFactory(D2D1_FACTORY_TYPE_SINGLE_THREADED, __uuidof(ID2D1Factory3), &d2dFactoryOptions, &m_d2dFactory));
        ComPtr<IDXGIDevice> dxgiDevice;
        ThrowIfFailed(m_d3d11On12Device.As(&dxgiDevice));
        ThrowIfFailed(m_d2dFactory->CreateDevice(dxgiDevice.Get(), &m_d2dDevice));
        ThrowIfFailed(m_d2dDevice->CreateDeviceContext(deviceOptions, &m_d2dDeviceContext));
        ThrowIfFailed(DWriteCreateFactory(DWRITE_FACTORY_TYPE_SHARED, __uuidof(IDWriteFactory), &m_dWriteFactory));
    }
| 호출 흐름 | 매개 변수 |
|---|---|
| D2D1_DEVICE_CONTEXT_OPTIONS | |
| D2D1CreateFactory | D2D1_FACTORY_TYPE |
| IDXGIDevice | |
| ID2D1Factory3::CreateDevice | |
| ID2D1Device::CreateDeviceContext | |
| DWriteCreateFactory | DWRITE_FACTORY_TYPE |
D3D12는 스왑 체인을 소유하므로, 11On12 디바이스(D2D 콘텐츠)를 사용하여 백 버퍼로 렌더링하려면 ID3D12Resource 형식의 백 버퍼에서 ID3D11Resource 형식의 래핑된 리소스를 만들어야 합니다. 이렇게 하면 11On12 디바이스에 사용할 수 있도록 ID3D12Resource가 D3D11 기반 인터페이스에 연결됩니다. 래핑된 리소스를 준비한 후에는 마찬가지로 LoadAssets 메서드에서 D2D가 렌더링될 렌더링 대상 화면을 만들 수 있습니다.
// Initialize *hwnd* with the handle of the window displaying the rendered content.
HWND hwnd;

// Query the window's dpi settings, which will be used to create
// D2D's render targets.
float dpi = GetDpiForWindow(hwnd);
D2D1_BITMAP_PROPERTIES1 bitmapProperties = D2D1::BitmapProperties1(
    D2D1_BITMAP_OPTIONS_TARGET | D2D1_BITMAP_OPTIONS_CANNOT_DRAW,
    D2D1::PixelFormat(DXGI_FORMAT_UNKNOWN, D2D1_ALPHA_MODE_PREMULTIPLIED),
    dpi,
    dpi);

// Create frame resources.
{
    CD3DX12_CPU_DESCRIPTOR_HANDLE rtvHandle(m_rtvHeap->GetCPUDescriptorHandleForHeapStart());

    // Create a RTV, D2D render target, and a command allocator for each frame.
    for (UINT n = 0; n < FrameCount; n++)
    {
        ThrowIfFailed(m_swapChain->GetBuffer(n, IID_PPV_ARGS(&m_renderTargets[n])));
        m_d3d12Device->CreateRenderTargetView(m_renderTargets[n].Get(), nullptr, rtvHandle);

        // Create a wrapped 11On12 resource of this back buffer. Since we are
        // rendering all D3D12 content first and then all D2D content, we specify
        // the In resource state as RENDER_TARGET - because D3D12 will have last
        // used it in this state - and the Out resource state as PRESENT. When
        // ReleaseWrappedResources() is called on the 11On12 device, the resource
        // will be transitioned to the PRESENT state.
        D3D11_RESOURCE_FLAGS d3d11Flags = { D3D11_BIND_RENDER_TARGET };
        ThrowIfFailed(m_d3d11On12Device->CreateWrappedResource(
            m_renderTargets[n].Get(),
            &d3d11Flags,
            D3D12_RESOURCE_STATE_RENDER_TARGET,
            D3D12_RESOURCE_STATE_PRESENT,
            IID_PPV_ARGS(&m_wrappedBackBuffers[n])
            ));

        // Create a render target for D2D to draw directly to this back buffer.
        ComPtr<IDXGISurface> surface;
        ThrowIfFailed(m_wrappedBackBuffers[n].As(&surface));
        ThrowIfFailed(m_d2dDeviceContext->CreateBitmapFromDxgiSurface(
            surface.Get(),
            &bitmapProperties,
            &m_d2dRenderTargets[n]
            ));

        rtvHandle.Offset(1, m_rtvDescriptorSize);

        ThrowIfFailed(m_d3d12Device->CreateCommandAllocator(
            D3D12_COMMAND_LIST_TYPE_DIRECT,
            IID_PPV_ARGS(&m_commandAllocators[n])));
    }
}
| 호출 흐름 | 매개 변수 |
|---|---|
| GetDpiForWindow | 창 핸들 |
| D2D1_BITMAP_PROPERTIES1 |
[D2D1_BITMAP_OPTIONS] (/windows/desktop/api/d2d1_1/ne-d2d1_1-d2d1_bitmap_options) [PixelFormat] (/windows/desktop/api/d2d1helper/nf-d2d1helper-pixelformat) [DXGI_FORMAT] (/windows/desktop/api/dxgiformat/ne-dxgiformat-dxgi_format) [D2D1_ALPHA_MODE] (/windows/desktop/api/dcommon/ne-dcommon-d2d1_alpha_mode) |
| CD3DX12_CPU_DESCRIPTOR_HANDLE | GetCPUDescriptorHandleForHeapStart |
| IDXGISwapChain::GetBuffer | |
| CreateRenderTargetView | |
| D3D11_RESOURCE_FLAGS | D3D11_BIND_FLAG |
| CreateWrappedResource | D3D12_RESOURCE_STATES |
| IDXGISurface | |
| ID2D1DeviceContext::CreateBitmapFromDxgiSurface | |
| CreateCommandAllocator | D3D12_COMMAND_LIST_TYPE |
이제 3D 콘텐츠를 렌더링할 ID3D12Device, 즉 ID3D11On12Device를 통해 12 디바이스와 공유되는 ID2D1Device(2D 콘텐츠 렌더링에 사용할 수 있음)가 있으며 둘 다 동일한 스왑 체인으로 렌더링하도록 구성됩니다. 이 샘플은 게임이 해당 UI를 렌더링하는 것과 비슷한 방식으로, 간단히 D2D 디바이스를 사용하여 3D 장면 위로 텍스트를 렌더링합니다. 이를 위해 아직 LoadAssets 메서드에서 몇 가지 기본적인 D2D 개체를 만들어야 합니다.
 // Create D2D/DWrite objects for rendering text.
    {
        ThrowIfFailed(m_d2dDeviceContext->CreateSolidColorBrush(D2D1::ColorF(D2D1::ColorF::Black), &m_textBrush));
        ThrowIfFailed(m_dWriteFactory->CreateTextFormat(
            L"Verdana",
            NULL,
            DWRITE_FONT_WEIGHT_NORMAL,
            DWRITE_FONT_STYLE_NORMAL,
            DWRITE_FONT_STRETCH_NORMAL,
            50,
            L"en-us",
            &m_textFormat
            ));
        ThrowIfFailed(m_textFormat->SetTextAlignment(DWRITE_TEXT_ALIGNMENT_CENTER));
        ThrowIfFailed(m_textFormat->SetParagraphAlignment(DWRITE_PARAGRAPH_ALIGNMENT_CENTER));
    }
이제 샘플의 초기화를 완료했으므로 기본 렌더링 루프를 계속 진행할 수 있습니다.
// Render the scene.
void D3D1211on12::OnRender()
{
    // Record all the commands we need to render the scene into the command list.
    PopulateCommandList();

    // Execute the command list.
    ID3D12CommandList* ppCommandLists[] = { m_commandList.Get() };
    m_commandQueue->ExecuteCommandLists(_countof(ppCommandLists), ppCommandLists);

    RenderUI();

    // Present the frame.
    ThrowIfFailed(m_swapChain->Present(0, 0));

    MoveToNextFrame();
}
렌더링 루프에서 유일한 새 항목은 D2D를 사용하여 UI를 렌더링할 RenderUI 호출 뿐입니다. 먼저 모든 D3D12 명령 목록을 실행하여 3D 장면을 렌더링한 다음, 그 위에 UI를 렌더링합니다. RenderUI를 자세히 살펴보기 전에 PopulateCommandLists 변경 내용을 확인해야 합니다. 다른 샘플에서는 명령 목록을 닫기 전에 일반적으로 리소스 장벽을 적용하여 렌더링 대상 상태에서 현재 상태로 백 버퍼를 전환합니다. 그러나 이 샘플에서는 D2D를 사용하여 백 버퍼로 계속 렌더링해야 하므로 해당 리소스 장벽을 제거합니다. 백 버퍼의 래핑된 리소스를 만들 때 렌더링 대상 상태를 "IN" 상태로 지정하고 현재 상태를 "OUT" 상태로 지정했습니다.
RenderUI는 D2D 사용과 관련해서 매우 간단합니다. 렌더링 목표를 설정하고 텍스트를 렌더링합니다. 그러나 11On12 디바이스에서 래핑된 리소스를 사용하기 전에(예: 백 버퍼는 렌더링 대상) 11On12 디바이스에서 AcquireWrappedResources API를 호출해야 합니다. 렌더링한 후 11On12 디바이스에서 ReleaseWrappedResources API를 호출합니다. ReleaseWrappedResources를 호출하여 지정된 리소스를 생성 시에 지정한 "OUT" 상태로 전환하는 리소스 장벽을 백그라운드에서 적용합니다. 이 예제에서는 이것이 현재 상태입니다. 마지막으로, 11On12 디바이스에서 수행된 모든 명령을 공유 ID3D12CommandQueue로 제출하기 위해 ID3D11DeviceContext에서 Flush를 호출해야 합니다.
// Render text over D3D12 using D2D via the 11On12 device.
void D3D1211on12::RenderUI()
{
    D2D1_SIZE_F rtSize = m_d2dRenderTargets[m_frameIndex]->GetSize();
    D2D1_RECT_F textRect = D2D1::RectF(0, 0, rtSize.width, rtSize.height);
    static const WCHAR text[] = L"11On12";

    // Acquire our wrapped render target resource for the current back buffer.
    m_d3d11On12Device->AcquireWrappedResources(m_wrappedBackBuffers[m_frameIndex].GetAddressOf(), 1);

    // Render text directly to the back buffer.
    m_d2dDeviceContext->SetTarget(m_d2dRenderTargets[m_frameIndex].Get());
    m_d2dDeviceContext->BeginDraw();
    m_d2dDeviceContext->SetTransform(D2D1::Matrix3x2F::Identity());
    m_d2dDeviceContext->DrawTextW(
        text,
        _countof(text) - 1,
        m_textFormat.Get(),
        &textRect,
        m_textBrush.Get()
        );
    ThrowIfFailed(m_d2dDeviceContext->EndDraw());

    // Release our wrapped render target resource. Releasing
    // transitions the back buffer resource to the state specified
    // as the OutState when the wrapped resource was created.
    m_d3d11On12Device->ReleaseWrappedResources(m_wrappedBackBuffers[m_frameIndex].GetAddressOf(), 1);

    // Flush to submit the 11 command list to the shared command queue.
    m_d3d11DeviceContext->Flush();
}
학습
모듈
Azure Remote Rendering을 사용하여 3D 모델 렌더링 - Training
Azure Remote Rendering을 사용하여 Unity 프로젝트에서 3D 모델을 렌더링합니다. 모델을 HoloLens 2에 배포하거나 MRTK를 통해 혼합 현실의 기능을 사용할 수 있습니다.