Migrate to Microsoft Sentinel with the SIEM migration experience
Article
Applies to:
Microsoft Sentinel in the Azure portal
Migrate your SIEM to Microsoft Sentinel for all your security monitoring use cases. Automated assistance from the SIEM Migration experience simplifies your migration.
These features are currently included in the SIEM Migration experience:
Splunk
The experience focuses on migrating Splunk security monitoring to Microsoft Sentinel and mapping out-of-the-box (OOTB) analytics rules wherever possible.
The experience supports migration of Splunk detections to Microsoft Sentinel analytics rules, including mapping Splunk data sources and lookups.
Prerequisites
You need the following from the source SIEM:
Splunk
The migration experience is compatible with both Splunk Enterprise and Splunk Cloud editions.
A Splunk admin role is required to export all Splunk alerts. For more information, see Splunk role-based user access.
Export the historical data from Splunk to the relevant tables in the Log Analytics workspace. For more information, see Export historical data from Splunk.
You need the following on the target, Microsoft Sentinel:
The SIEM migration experience deploys analytics rules. This capability requires the Microsoft Sentinel Contributor role. For more information, see Permissions in Microsoft Sentinel.
Ingest security data previously used in your source SIEM into Microsoft Sentinel. Before an analytics rule is translated and enabled, the rule's data source must be present in the Log Analytics workspace. Install and enable out-of-the-box (OOTB) data connectors in Content hub to match your security monitoring estate from your source SIEM. If no data connector exists, create a custom ingestion pipeline.
Create Microsoft Sentinel watchlists from your Splunk lookups so the fields used are mapped for the translated analytics rules.
Translate Splunk detection rules
At the core of Splunk detection rules, is the Search Processing Language (SPL). The SIEM migration experience systematically translates SPL to Kusto query language (KQL) for each Splunk rule. Carefully review translations and make adjustments to ensure migrated rules function as intended in your Microsoft Sentinel workspace. For more information on the concepts important in translating detection rules, see migrate Splunk detection rules.
Current capabilities:
Map Splunk detections to OOTB Microsoft Sentinel analytics rules.
Translate simple queries with a single data source.
Schema Mapping (Preview) creates logical links for the translated rules by mapping Splunk data sources to Microsoft Sentinel tables, and Splunk lookups to watchlists.
Translated query review provides error feedback with edit capability to save time in the detection rule translation process.
Translation State indicating how completely SPL syntax is translated to KQL at the grammatical level.
Support for Splunk macros translation using inline replacement macro definition within SPL queries.
Splunk Common Information Model (CIM) to Microsoft Sentinel's Advanced Security Information Model (ASIM) translation support.
Downloadable pre-migration and post-migration summary.
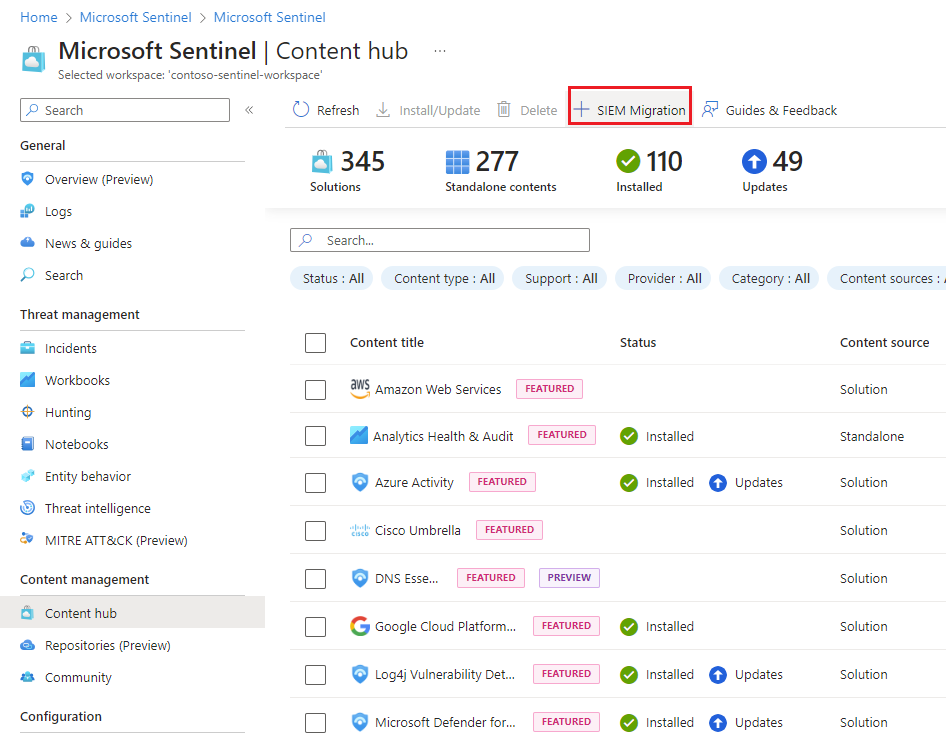
Start the SIEM migration experience
Find the SIEM migration experience in Microsoft Sentinel from the Azure portal or the Defender portal, under Content management > Content hub.
Select SIEM Migration.
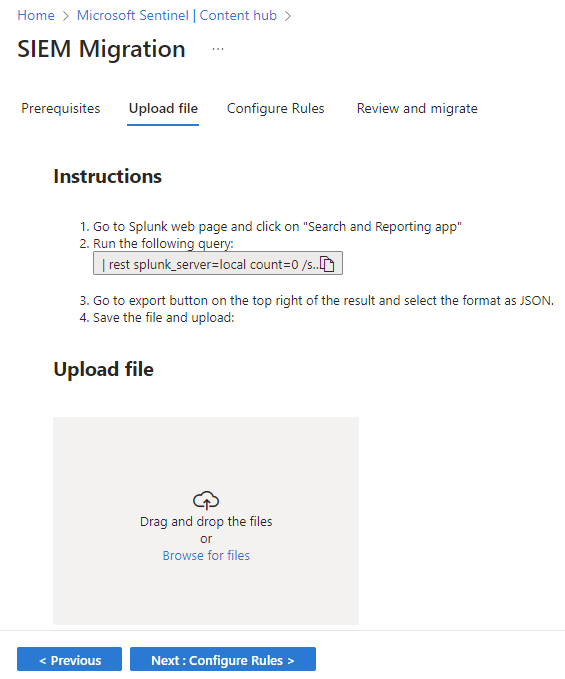
Upload Splunk detections
From Splunk Web, select Search and Reporting in the Apps panel.
Select the export button and choose JSON as the format.
Save the file.
Upload the exported Splunk JSON file.
Note
The Splunk export must be a valid JSON file and the upload size is limited to 50 MB.
Schema mapping
Use Schema mapping to precisely define how the data types and fields in the analytics rule logic are mapped based on the extracted sources from the SPL queries to the Microsoft Sentinel tables.
Data sources
Known sources such as Splunk CIM schemas and data models are automatically mapped to ASIM schemas when applicable. Other sources used in the Splunk detection must be manually mapped to Microsoft Sentinel or Log Analytics tables. Mapping schemas are hierarchical so Splunk sources map 1:1 with Microsoft Sentinel tables and the fields within those sources.
Once the schema mapping is complete, any manual updates are reflected in the Mapping Status as "Manually mapped". The changes are taken into account in the next step when the rules are translated. The mapping is saved per workspace, so you don't have to repeat it.
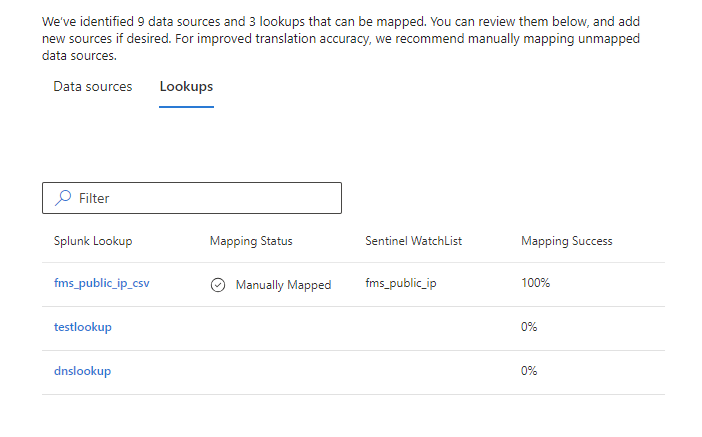
Lookups
Splunk lookups compare to Microsoft Sentinel watchlists, which are lists of curated field-value combinations to correlate with the events in your Microsoft Sentinel environment. Since Splunk lookups are defined and available outside the boundaries of SPL queries, the equivalent Microsoft Sentinel watchlist must be created as a prerequisite. Schema mapping then takes lookups automatically identified from the uploaded Splunk queries and maps them to Sentinel Watchlists.
SPL queries reference lookups with the lookup, inputlookup, and outputlookup keywords. The outputlookup operation writes data to a lookup and isn't supported in translation. The SIEM migration translation engine uses the _GetWatchlist() KQL function to map to the correct Sentinel watchlist along with other KQL functions to complete the rule logic.
When a Splunk lookup doesn't have a corresponding watchlist mapped, the translation engine keeps the same name for both the watchlist and its fields as the Splunk lookup and fields.
Configure rules
Select Configure Rules.
Review the analysis of the Splunk export.
Name is the original Splunk detection rule name.
Translation Type indicates if a Sentinel OOTB analytics rule matches the Splunk detection logic.
Translation State gives feedback about how completely the syntax of a Splunk detection was translated to KQL. The translation state doesn't test the rule or verify the data source.
Fully Translated - Queries in this rule were fully translated to KQL but the rule logic and data source weren't validated.
Partially Translated - Queries in this rule weren't fully translated to KQL.
Not Translated - Indicates an error in translation.
Manually Translated - This status is set when any rule is edited and saved.
Highlight a rule to resolve translation and select Edit. When you're satisfied with the results, select Save Changes.
Switch on the Deploy toggle for analytics rules you want to deploy.
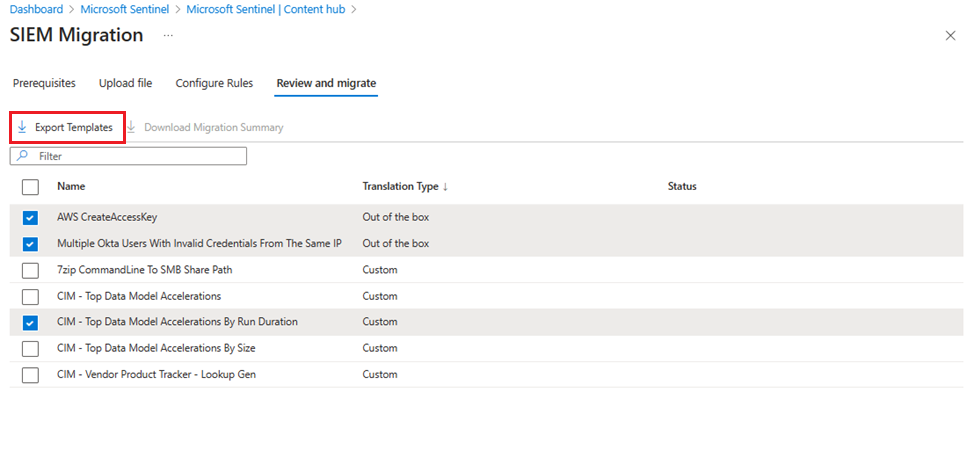
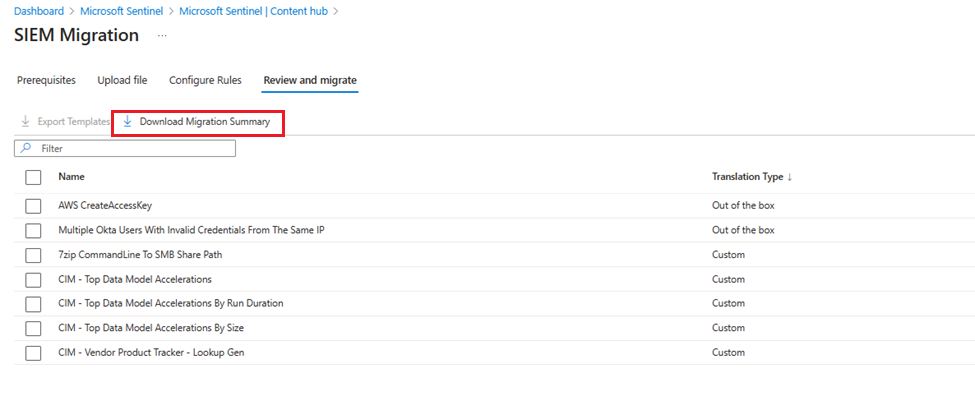
When the review is complete, select Review and migrate.
Deploy the Analytics rules
Select Deploy.
Translation Type
Resource deployed
Out of the box
The corresponding solutions from Content hub that contain the matched analytics rule templates are installed. The matched rules are deployed as active analytics rules in the disabled state.
Rules are deployed as active analytics rules in the disabled state.
(Optional) Select Export Templates to download all the translated rules as ARM templates for use in your CI/CD or custom deployment processes.
Before exiting the SIEM Migration experience, select Download Migration Summary to keep a summary of the Analytics deployment.
Validate and enable rules
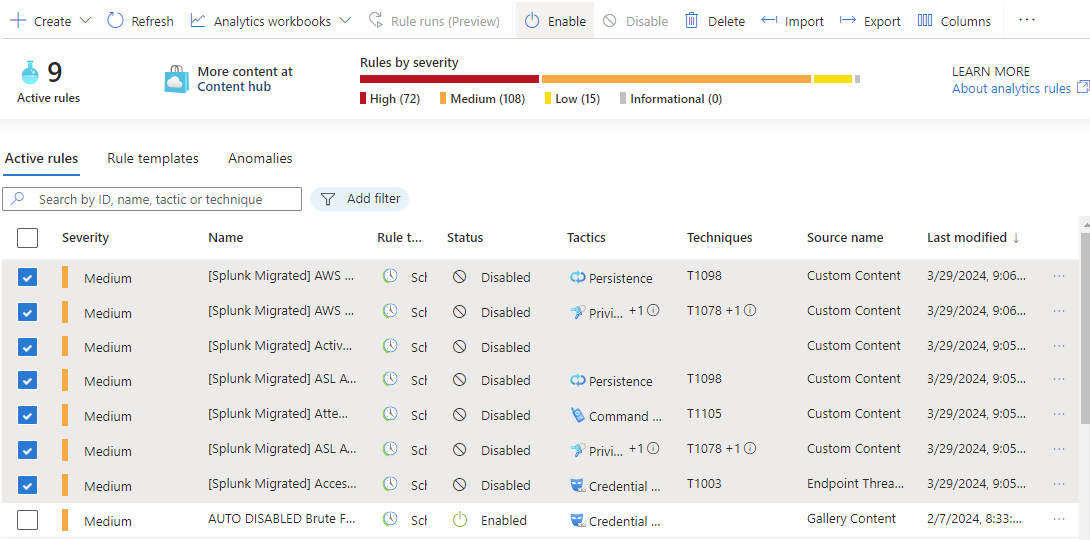
View the properties of deployed rules from Microsoft Sentinel Analytics.
All migrated rules are deployed with the Prefix [Splunk Migrated].
All migrated rules are set to disabled.
The following properties are retained from the Splunk export wherever possible: Severity queryFrequency queryPeriod triggerOperator triggerThreshold suppressionDuration
Enable rules after you review and verify them.
Related content
In this article, you learned how to use the SIEM migration experience.
For more information on the SIEM migration experience, see the following articles: