Note
Access to this page requires authorization. You can try signing in or changing directories.
Access to this page requires authorization. You can try changing directories.
APPLIES TO:
 Azure CLI ml extension v2 (current)
 Python SDK azure-ai-ml v2 (current)
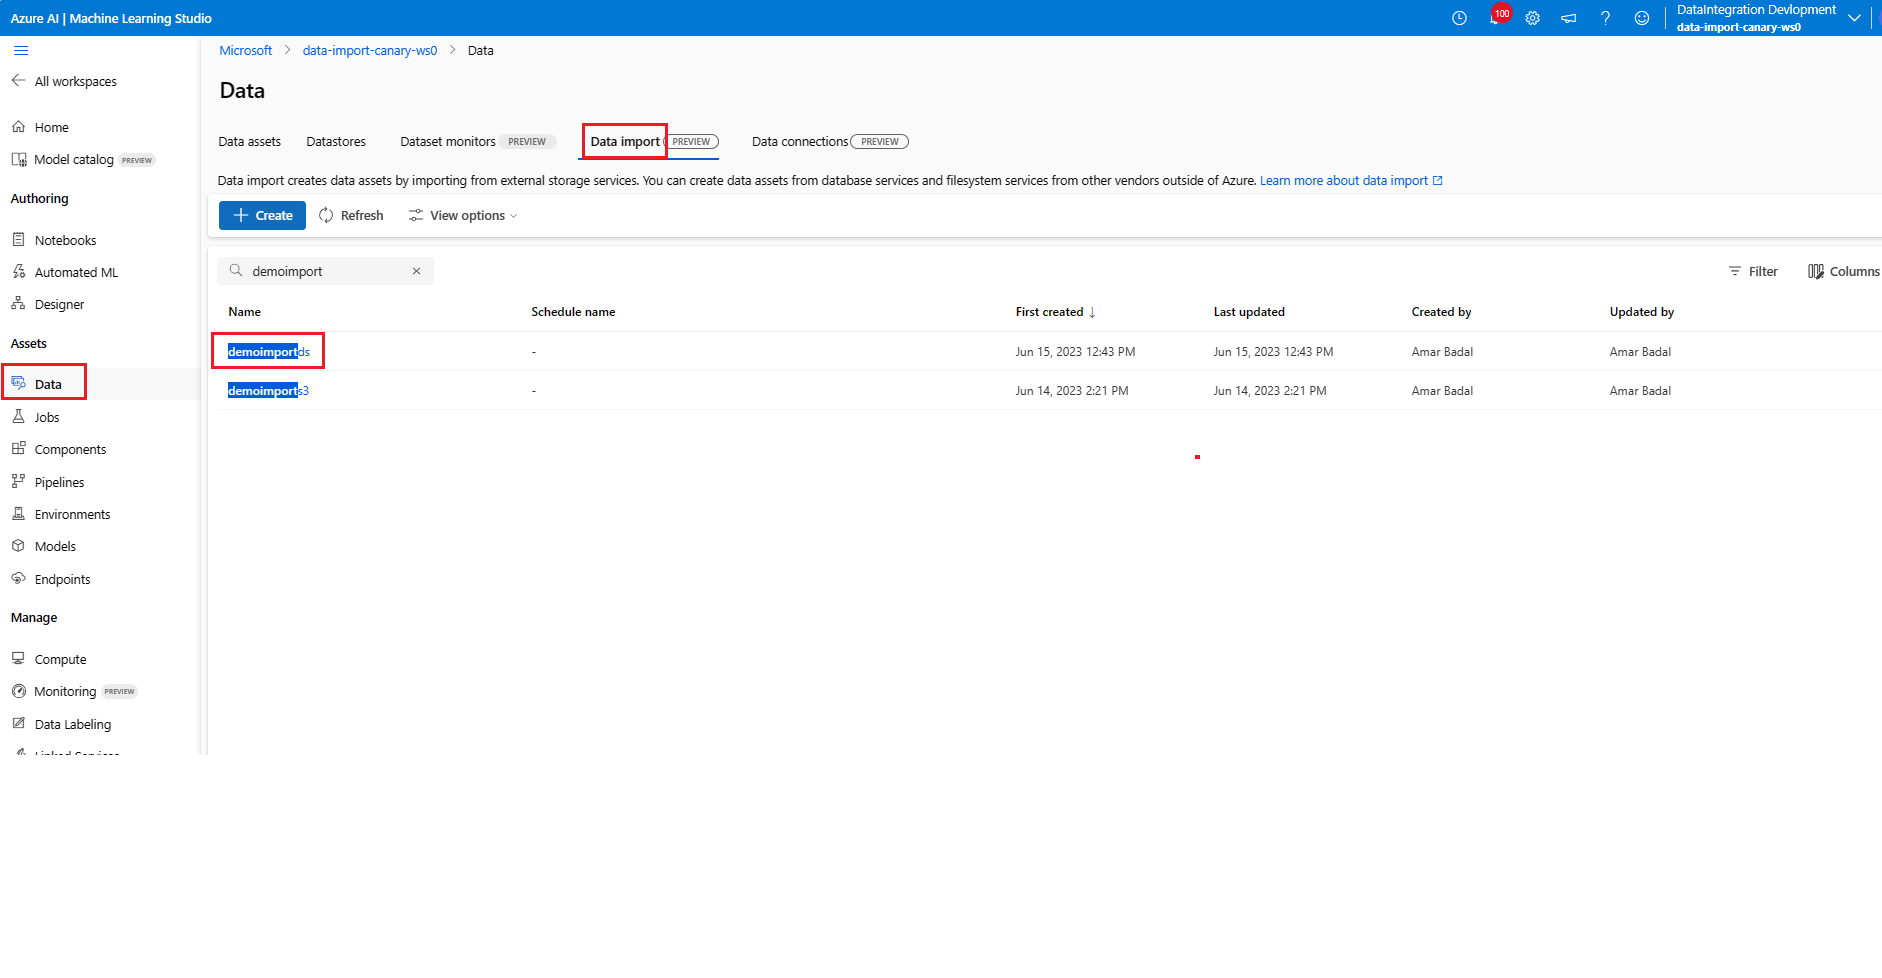
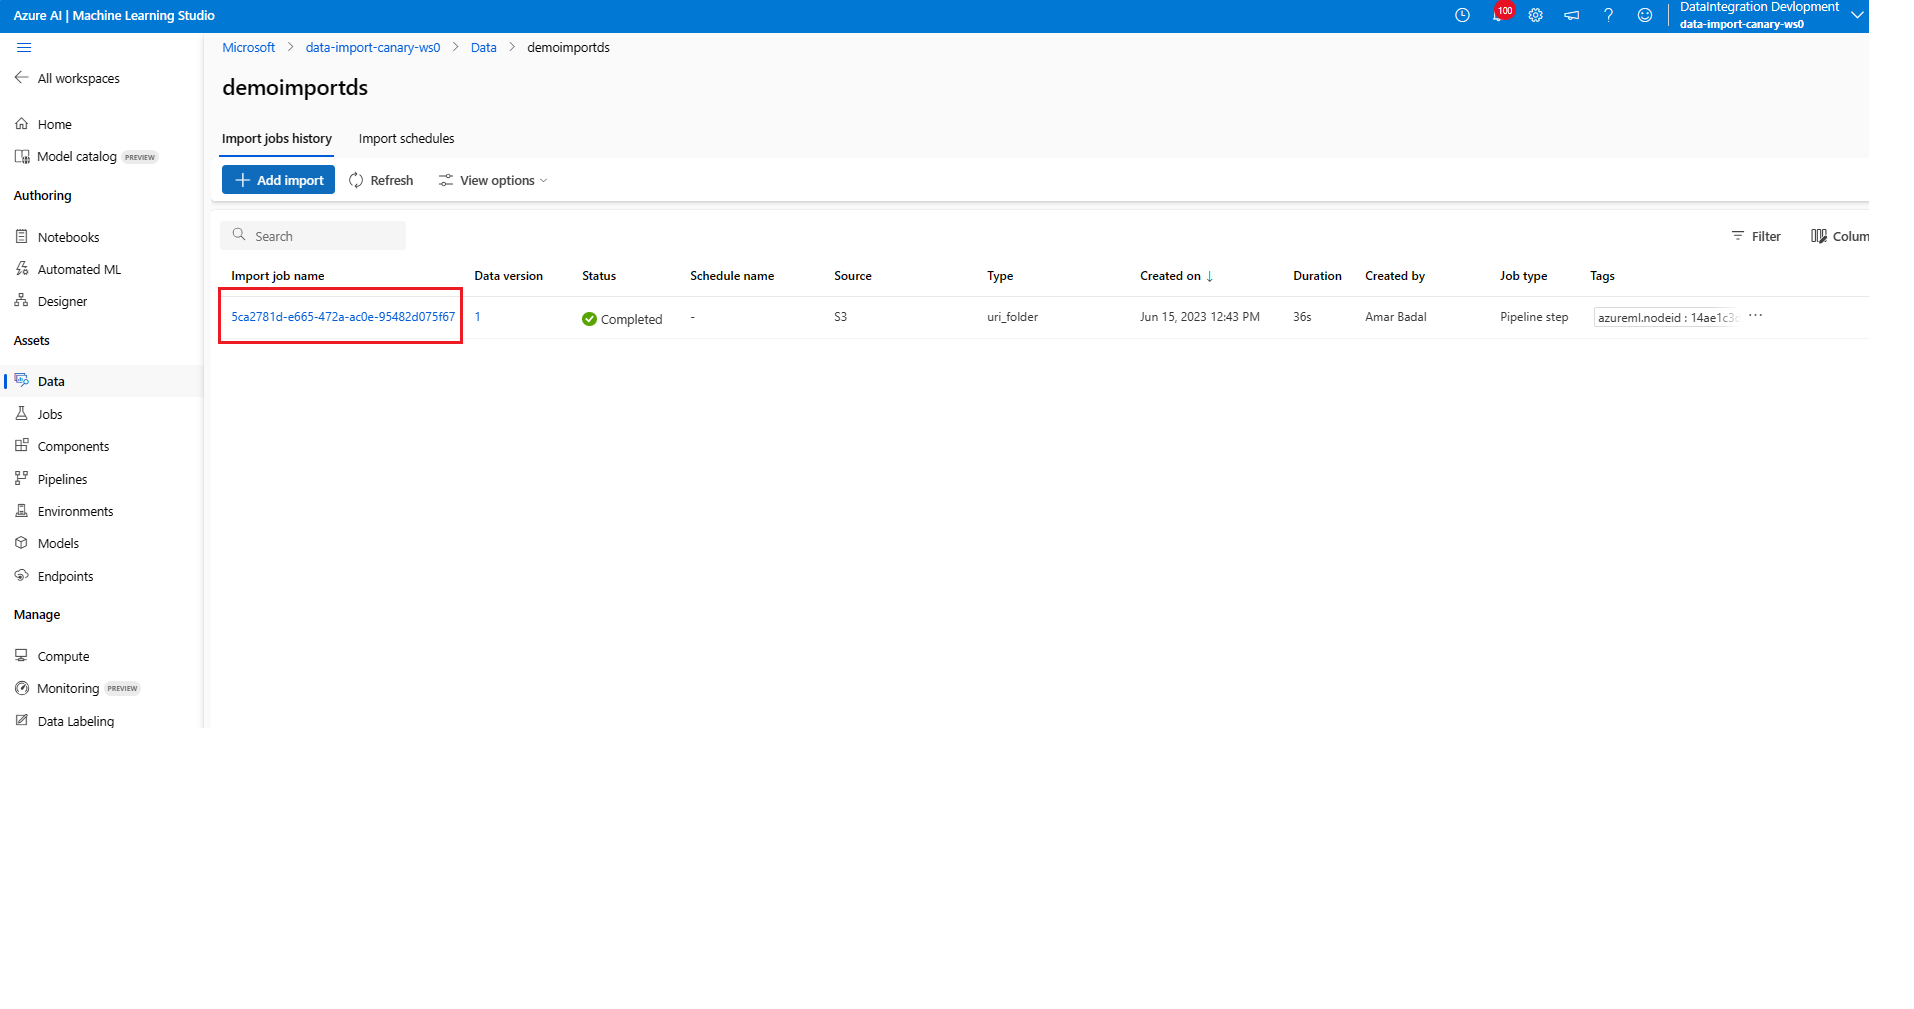
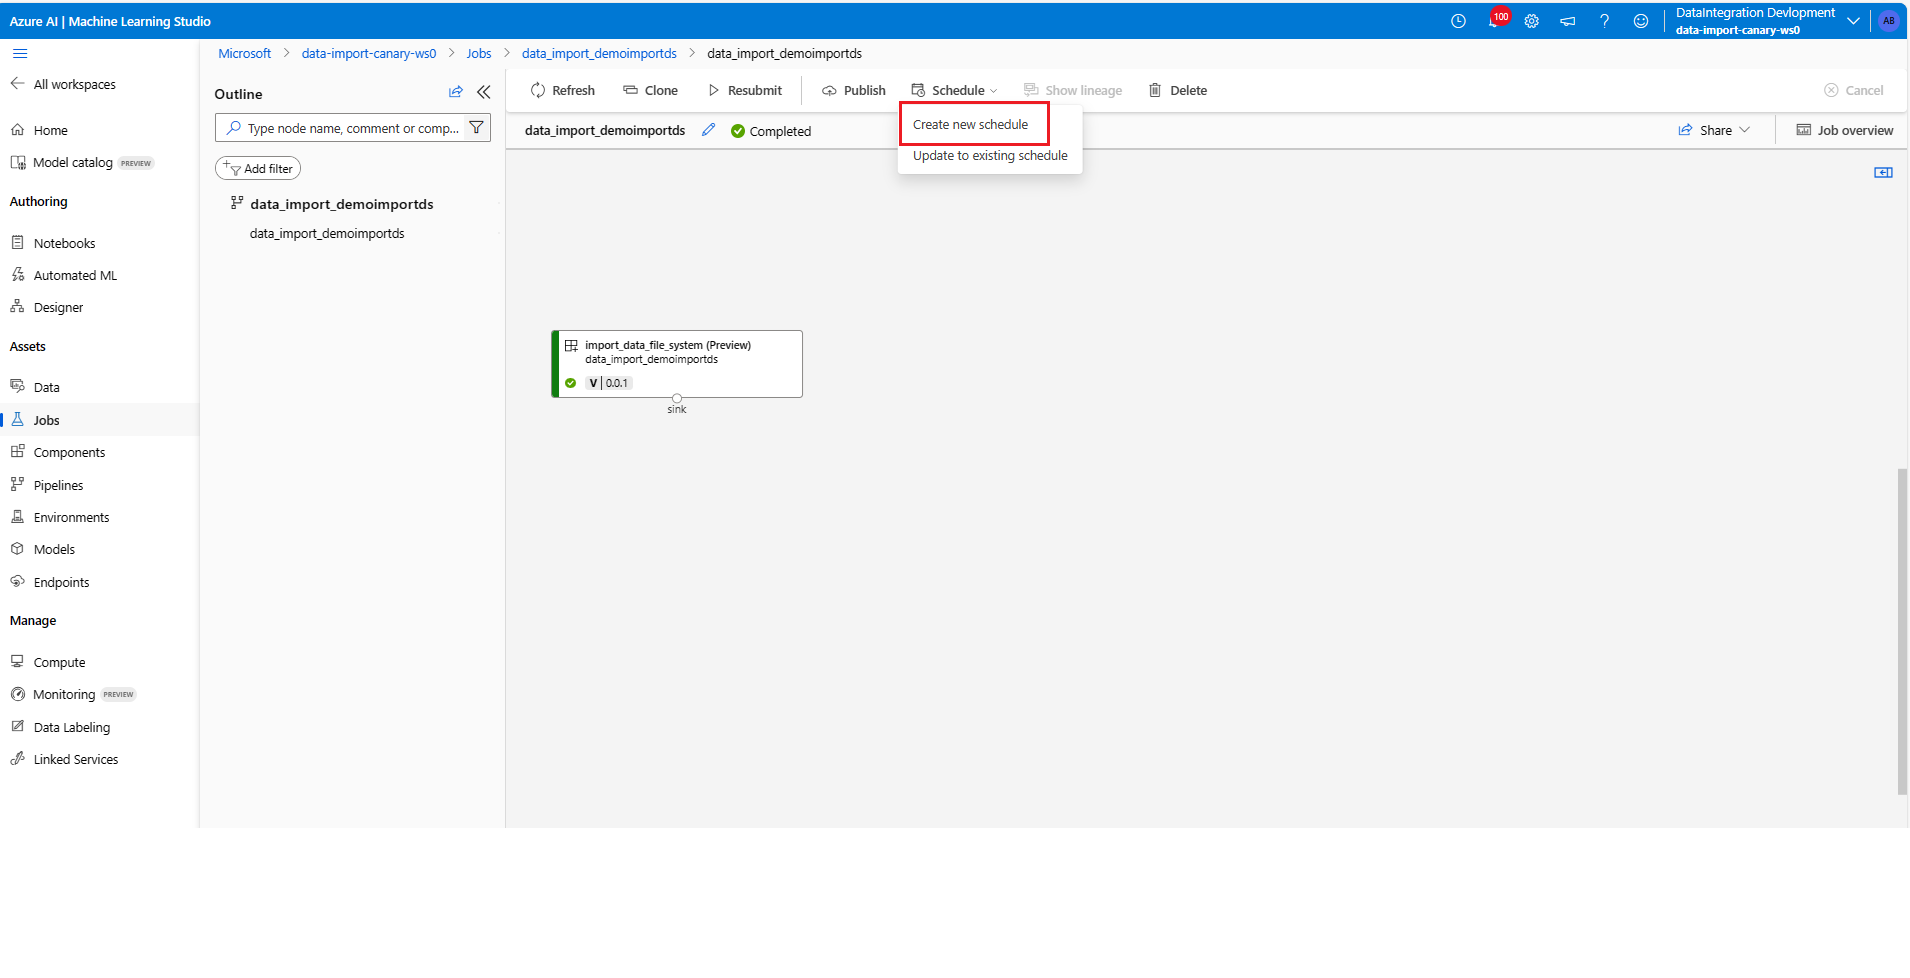
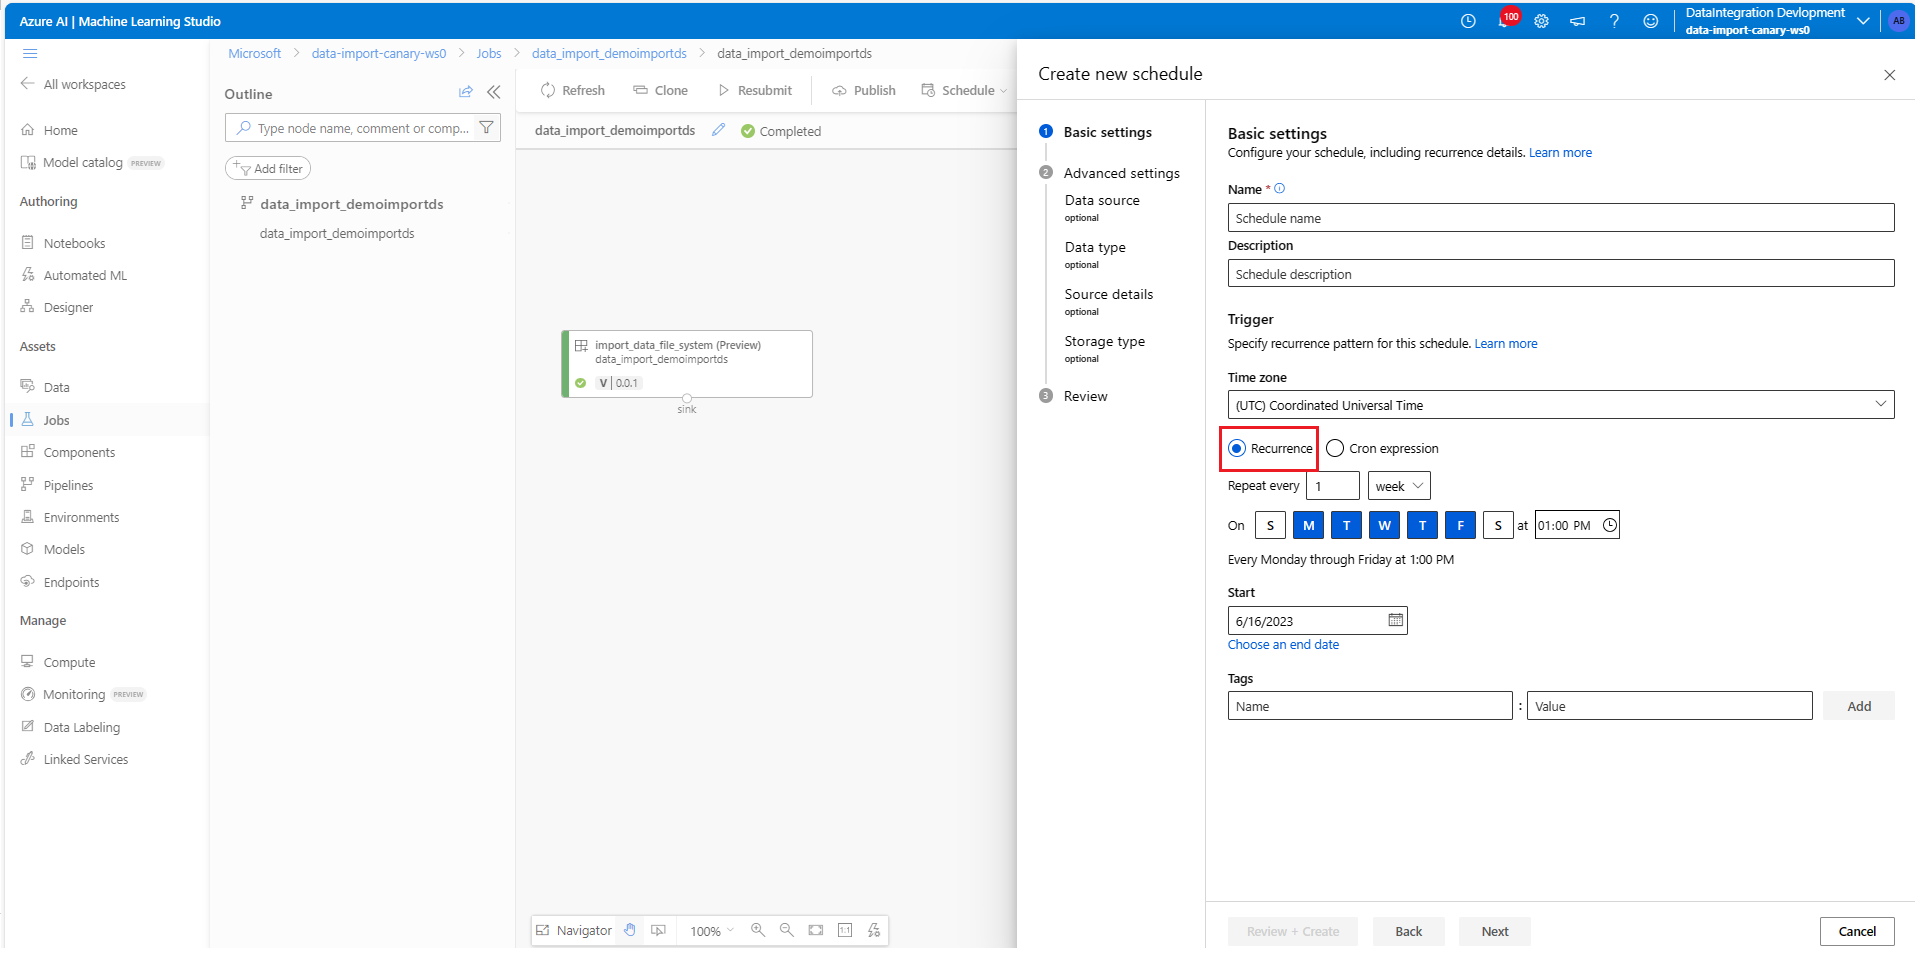
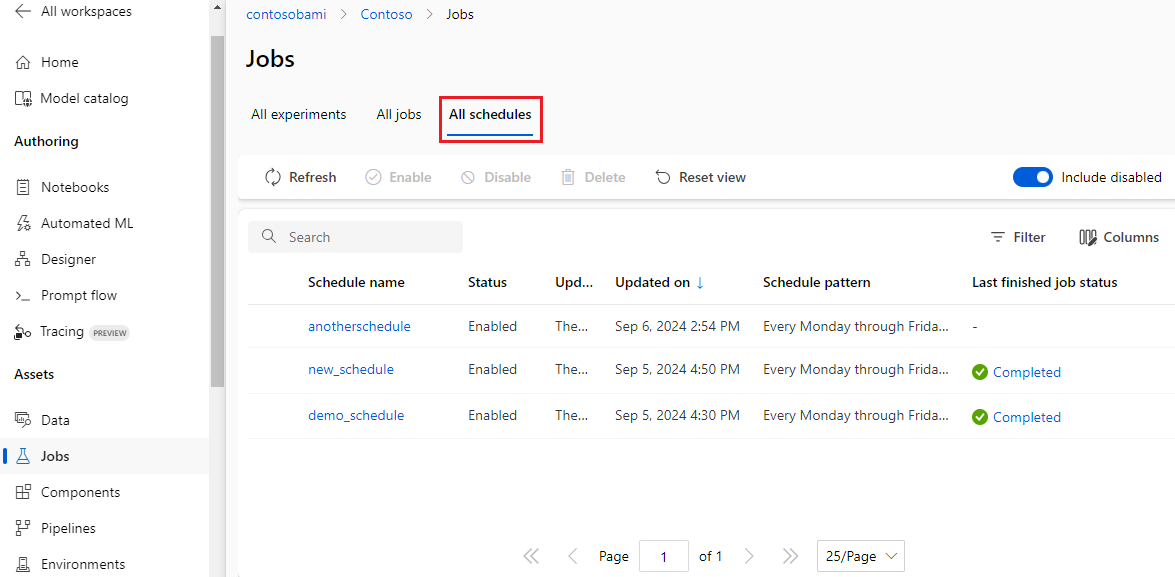
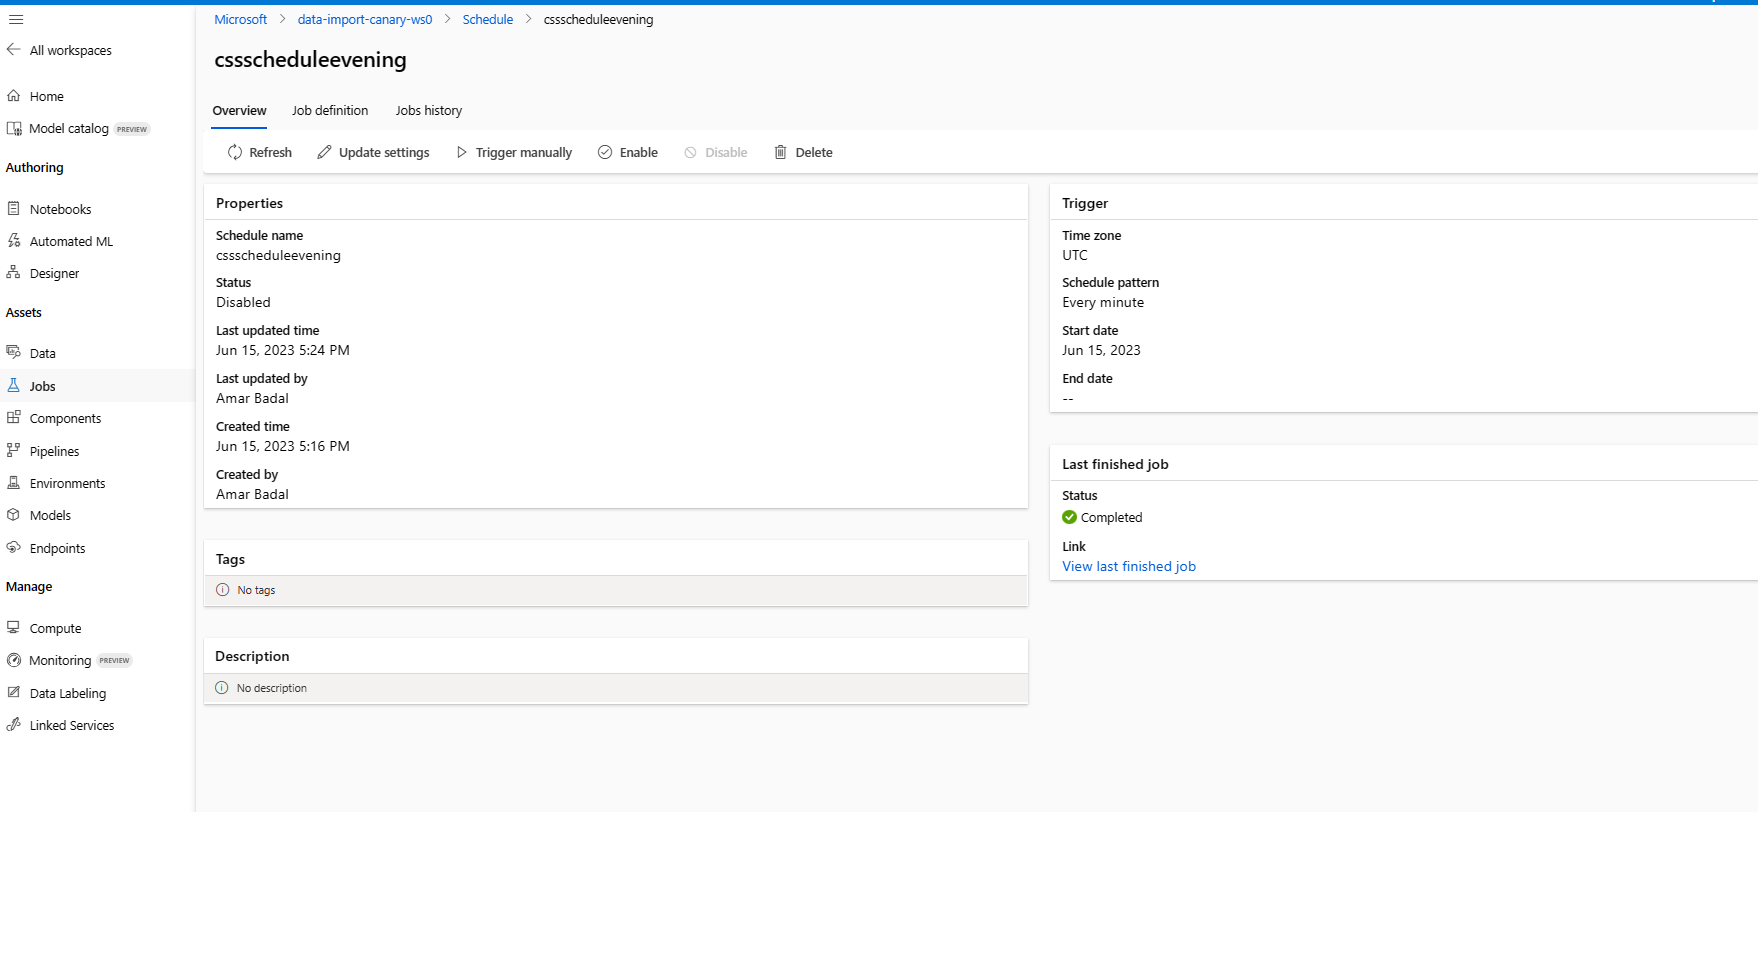
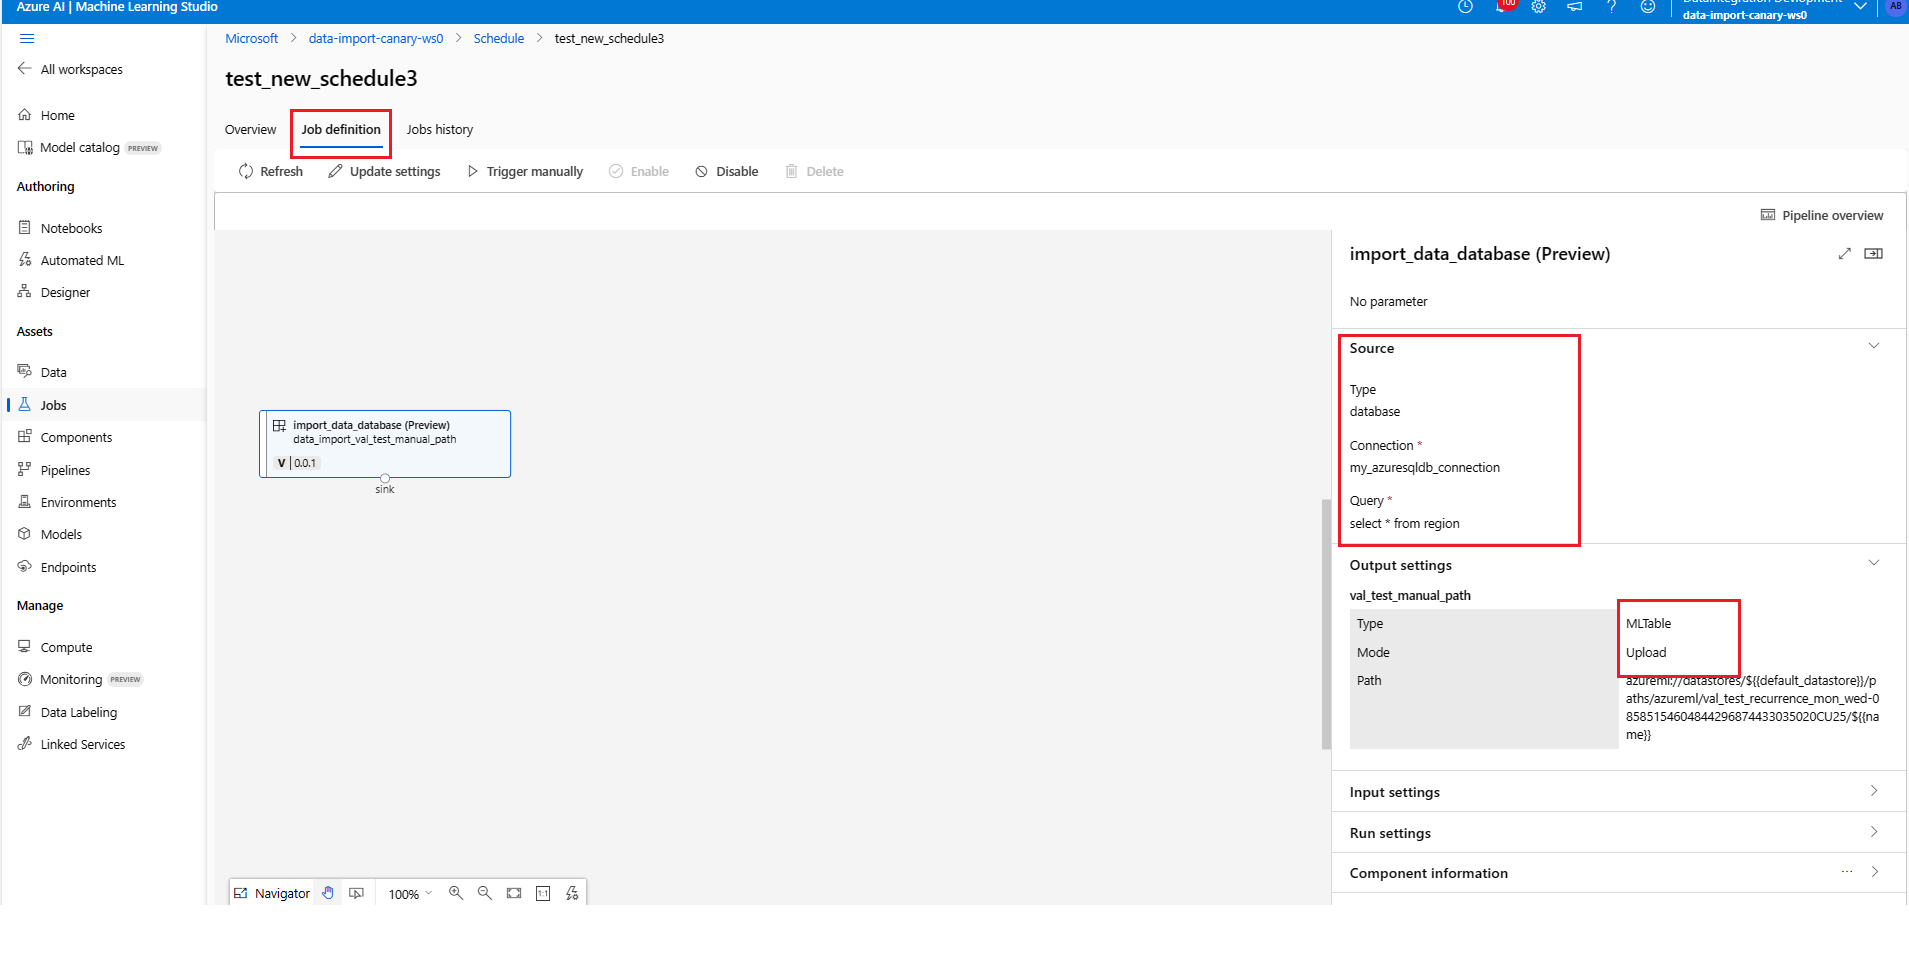
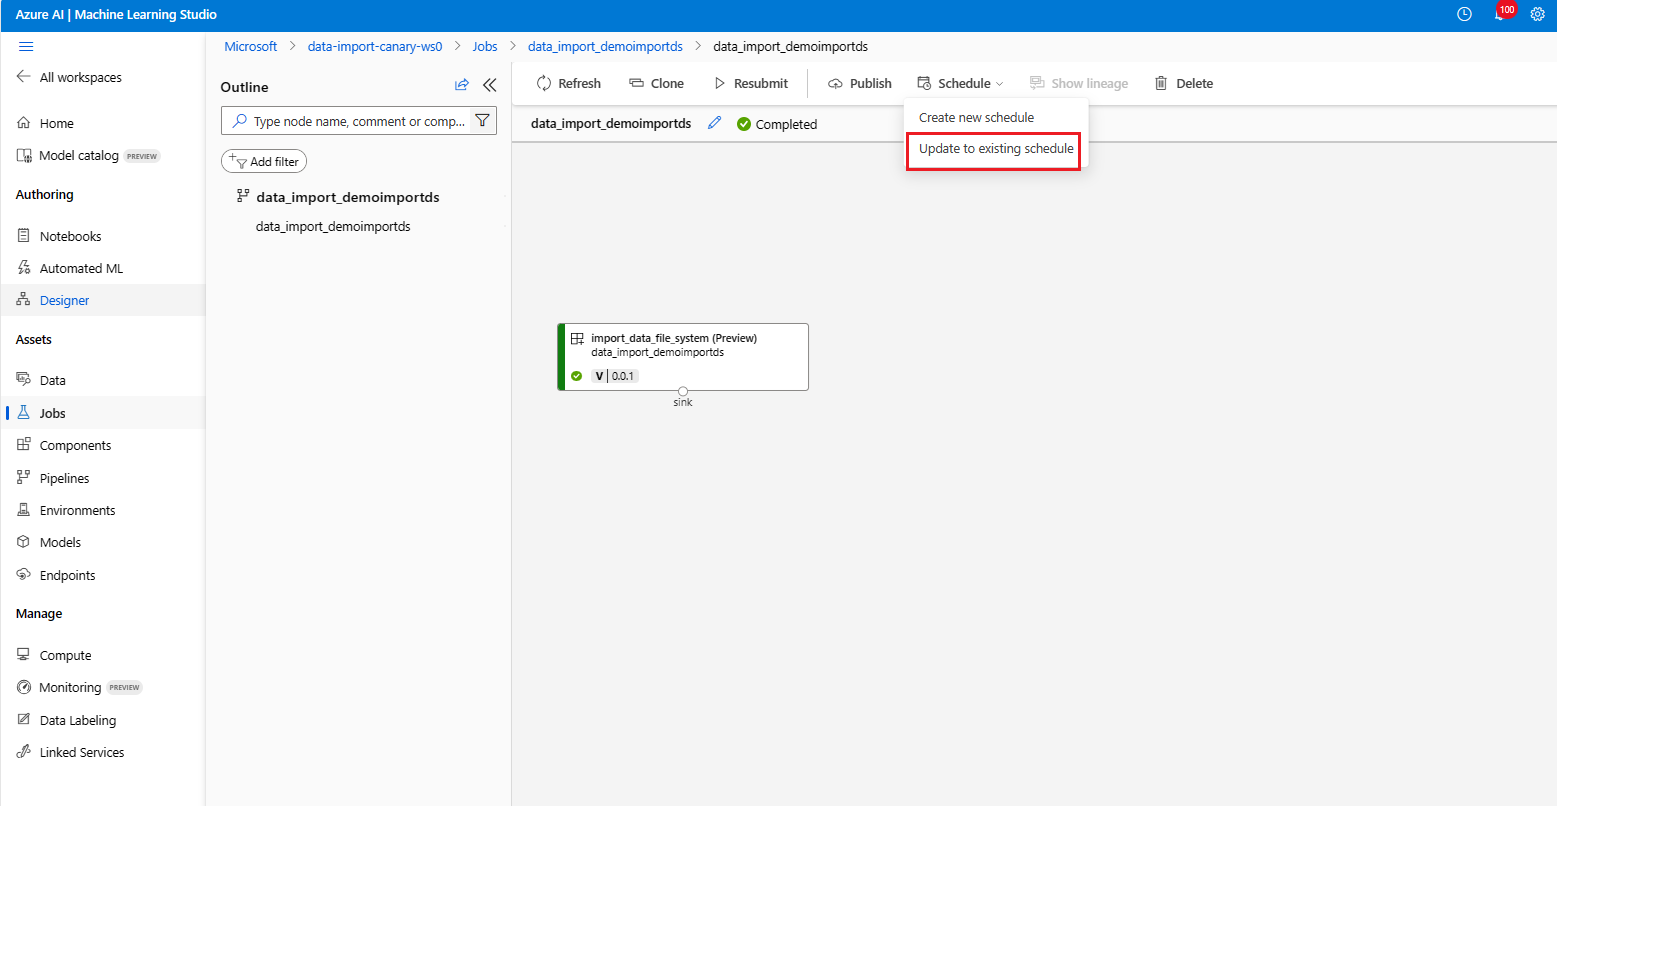
In this article, you'll learn how to programmatically schedule data imports, using the schedule UI to do it. You can create a schedule based on elapsed time. Time-based schedules can handle routine tasks - for example, regular data imports to keep them up-to-date. After learning how to create schedules, you'll learn how to retrieve, update and deactivate them via CLI, SDK, and studio UI resources.
Prerequisites
- You need an Azure subscription to use Azure Machine Learning. If you don't have an Azure subscription, create a free account before you begin. Try the free or paid version of Azure Machine Learning today.
Install the Azure CLI and the
mlextension. Follow the installation steps in Install, set up, and use the CLI (v2).Create an Azure Machine Learning workspace if you don't have one. For workspace creation, see Install, set up, and use the CLI (v2).
Schedule data import
To import data on a recurring basis, you must create a schedule. A Schedule associates a data import action with a trigger. The trigger can either be cron, which uses a cron expression to describe the delay between runs, or a recurrence, which specifies the frequency to trigger a job. In each case, you must first build an import data definition. An existing data import, or a data import that is defined inline, works for this. For more information, visit Create a data import in CLI, SDK and UI.
Create a schedule
Create a time-based schedule with recurrence pattern
APPLIES TO:  Azure CLI ml extension v2 (current)
YAML: Schedule for data import with recurrence pattern
$schema: https://azuremlschemas.azureedge.net/latest/schedule.schema.json
name: simple_recurrence_import_schedule
display_name: Simple recurrence import schedule
description: a simple hourly recurrence import schedule

trigger:
  type: recurrence
  frequency: day #can be minute, hour, day, week, month
  interval: 1 #every day
  schedule:
    hours: [4,5,10,11,12]
    minutes: [0,30]
  start_time: "2022-07-10T10:00:00" # optional - default will be schedule creation time
  time_zone: "Pacific Standard Time" # optional - default will be UTC

import_data: ./my-snowflake-import-data.yaml
YAML: Schedule for data import definition inline with recurrence pattern on managed datastore
$schema: https://azuremlschemas.azureedge.net/latest/schedule.schema.json
name: inline_recurrence_import_schedule
display_name: Inline recurrence import schedule
description: an inline hourly recurrence import schedule

trigger:
  type: recurrence
  frequency: day #can be minute, hour, day, week, month
  interval: 1 #every day
  schedule:
    hours: [4,5,10,11,12]
    minutes: [0,30]
  start_time: "2022-07-10T10:00:00" # optional - default will be schedule creation time
  time_zone: "Pacific Standard Time" # optional - default will be UTC

import_data:
  type: mltable
  name: my_snowflake_ds
  path: azureml://datastores/workspacemanagedstore
  source:
    type: database
    query: select * from TPCH_SF1.REGION
    connection: azureml:my_snowflake_connection
A trigger contains these properties:
- (Required)
typespecifies the schedule type, eitherrecurrenceorcron. The following section has more information.
Next, run this command in the CLI:
> az ml schedule create -f <file-name>.yml
Note
These properties apply to CLI and SDK:
(Required)
frequencyspecifies the unit of time that describes how often the schedule fires. Can have valuesminutehourdayweekmonth
(Required)
intervalspecifies how often the schedule fires based on the frequency, which is the number of time units to wait until the schedule fires again.(Optional)
scheduledefines the recurrence pattern, containinghours,minutes, andweekdays.- When
frequencyequalsday, a pattern can specifyhoursandminutes. - When
frequencyequalsweekandmonth, a pattern can specifyhours,minutesandweekdays. hoursshould be an integer or a list, ranging between 0 and 23.minutesshould be an integer or a list, ranging between 0 and 59.weekdaysa string or list ranging frommondaytosunday.- If
scheduleis omitted, the job(s) triggers fire according to the logic ofstart_time,frequencyandinterval.
- When
(Optional)
start_timedescribes the start date and time, with a timezone. Ifstart_timeis omitted, start_time equals the job creation time. For a start time in the past, the first job runs at the next calculated run time.(Optional)
end_timedescribes the end date and time with a timezone. Ifend_timeis omitted, the schedule continues to trigger jobs until the schedule is manually disabled.(Optional)
time_zonespecifies the time zone of the recurrence. If omitted, the default timezone is UTC. For more information about timezone values, visit appendix for timezone values.
Create a time-based schedule with cron expression
YAML: Schedule for a data import with cron expression
APPLIES TO:  Azure CLI ml extension v2 (current)
YAML: Schedule for data import with cron expression (preview)
$schema: https://azuremlschemas.azureedge.net/latest/schedule.schema.json
name: simple_cron_import_schedule
display_name: Simple cron import schedule
description: a simple hourly cron import schedule

trigger:
  type: cron
  expression: "0 * * * *"
  start_time: "2022-07-10T10:00:00" # optional - default will be schedule creation time
  time_zone: "Pacific Standard Time" # optional - default will be UTC

import_data: ./my-snowflake-import-data.yaml
YAML: Schedule for data import definition inline with cron expression (preview)
$schema: https://azuremlschemas.azureedge.net/latest/schedule.schema.json
name: inline_cron_import_schedule
display_name: Inline cron import schedule
description: an inline hourly cron import schedule

trigger:
  type: cron
  expression: "0 * * * *"
  start_time: "2022-07-10T10:00:00" # optional - default will be schedule creation time
  time_zone: "Pacific Standard Time" # optional - default will be UTC

import_data:
  type: mltable
  name: my_snowflake_ds
  path: azureml://datastores/workspaceblobstore/paths/snowflake/${{name}}
  source:
    type: database
    query: select * from TPCH_SF1.REGION
    connection: azureml:my_snowflake_connection
The trigger section defines the schedule details and contains these properties:
- (Required)
typespecifies thecronschedule type.
> az ml schedule create -f <file-name>.yml
The list continues here:
(Required)
expressionuses a standard crontab expression to express a recurring schedule. A single expression is composed of five space-delimited fields:MINUTES HOURS DAYS MONTHS DAYS-OF-WEEKA single wildcard (
*), which covers all values for the field. A*, in days, means all days of a month (which varies with month and year).The
expression: "15 16 * * 1"in the sample above means the 16:15PM on every Monday.This table lists the valid values for each field:
Field Range Comment MINUTES0-59 - HOURS0-23 - DAYS- Not supported. The value is ignored and treated as *.MONTHS- Not supported. The value is ignored and treated as *.DAYS-OF-WEEK0-6 Zero (0) means Sunday. Names of days also accepted. For more information about crontab expressions, visit the Crontab Expression wiki resource on GitHub.
Important
DAYSandMONTHare not supported. If you pass one of these values, it will be ignored and treated as*.(Optional)
start_timespecifies the start date and time with the timezone of the schedule. For example,start_time: "2022-05-10T10:15:00-04:00"means the schedule starts from 10:15:00AM on 2022-05-10 in the UTC-4 timezone. Ifstart_timeis omitted, thestart_timeequals the schedule creation time. For a start time in the past, the first job runs at the next calculated run time.(Optional)
end_timedescribes the end date, and time with a timezone. Ifend_timeis omitted, the schedule continues to trigger jobs until the schedule is manually disabled.(Optional)
time_zonespecifies the time zone of the expression. Iftime_zoneis omitted, the timezone is UTC by default. For more information about timezone values, visit appendix for timezone values.
Limitations:
- Currently, Azure Machine Learning v2 scheduling doesn't support event-based triggers.
- Use the Azure Machine Learning SDK/CLI v2 to specify a complex recurrence pattern that contains multiple trigger timestamps. The UI only displays the complex pattern and doesn't support editing.
- If you set the recurrence as the 31st day of every month, the schedule won't trigger jobs in months with less than 31 days.
List schedules in a workspace
APPLIES TO:  Azure CLI ml extension v2 (current)
az ml schedule list
Check schedule detail
APPLIES TO:  Azure CLI ml extension v2 (current)
az ml schedule show -n simple_cron_data_import_schedule
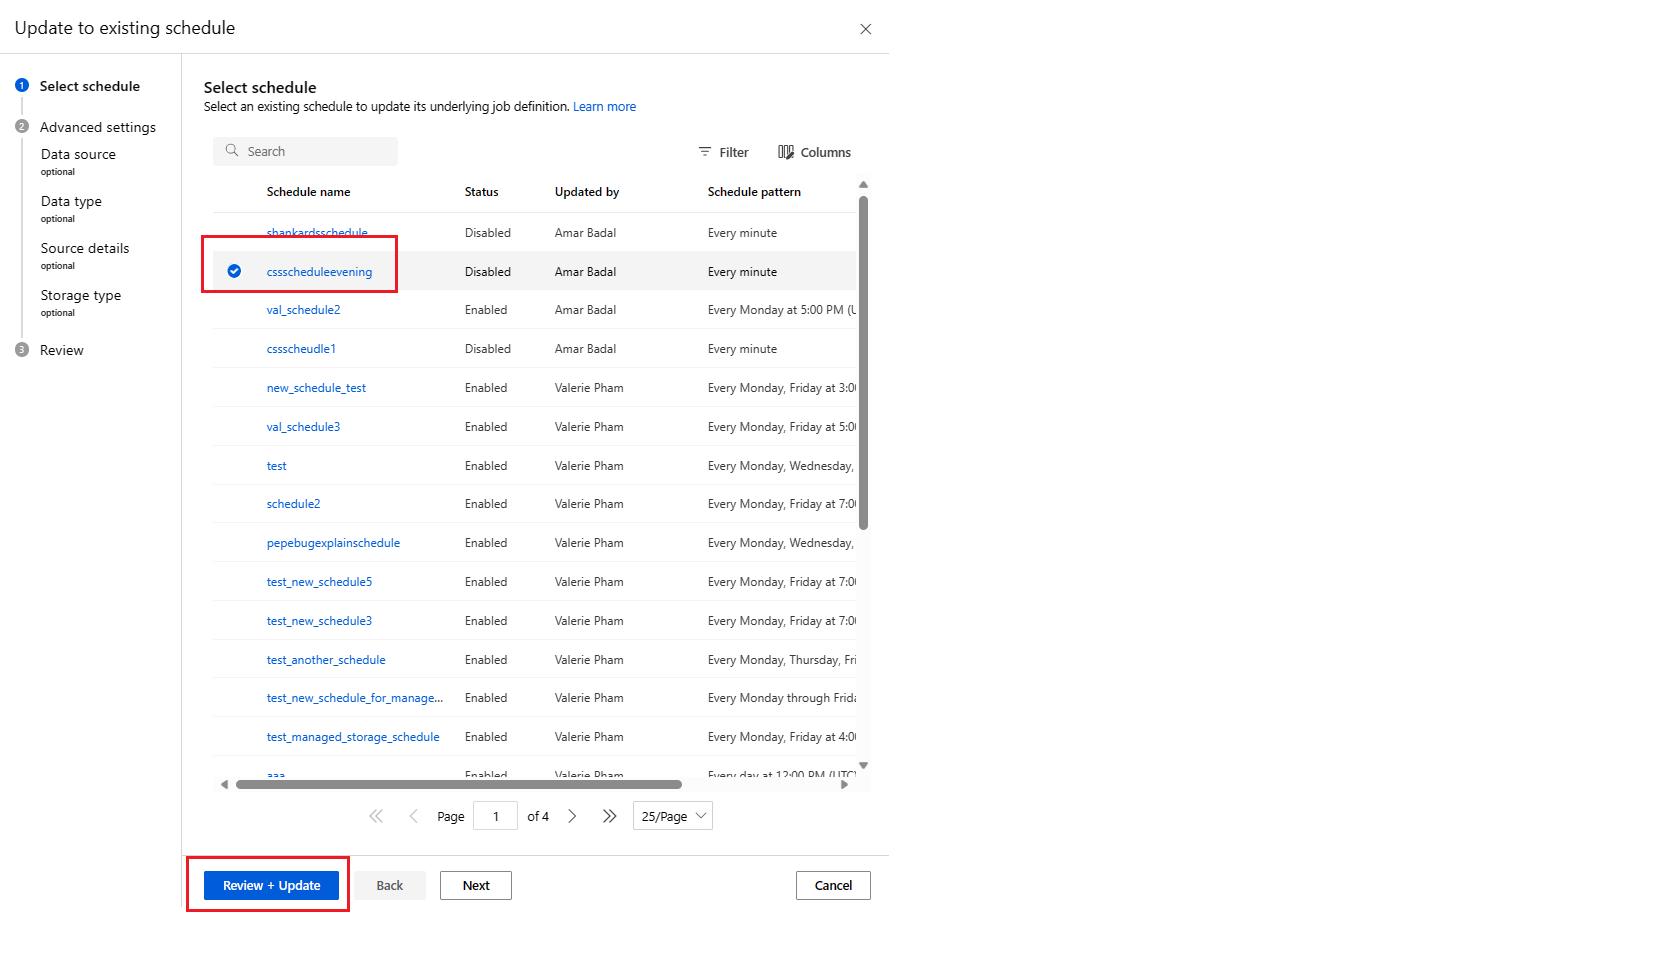
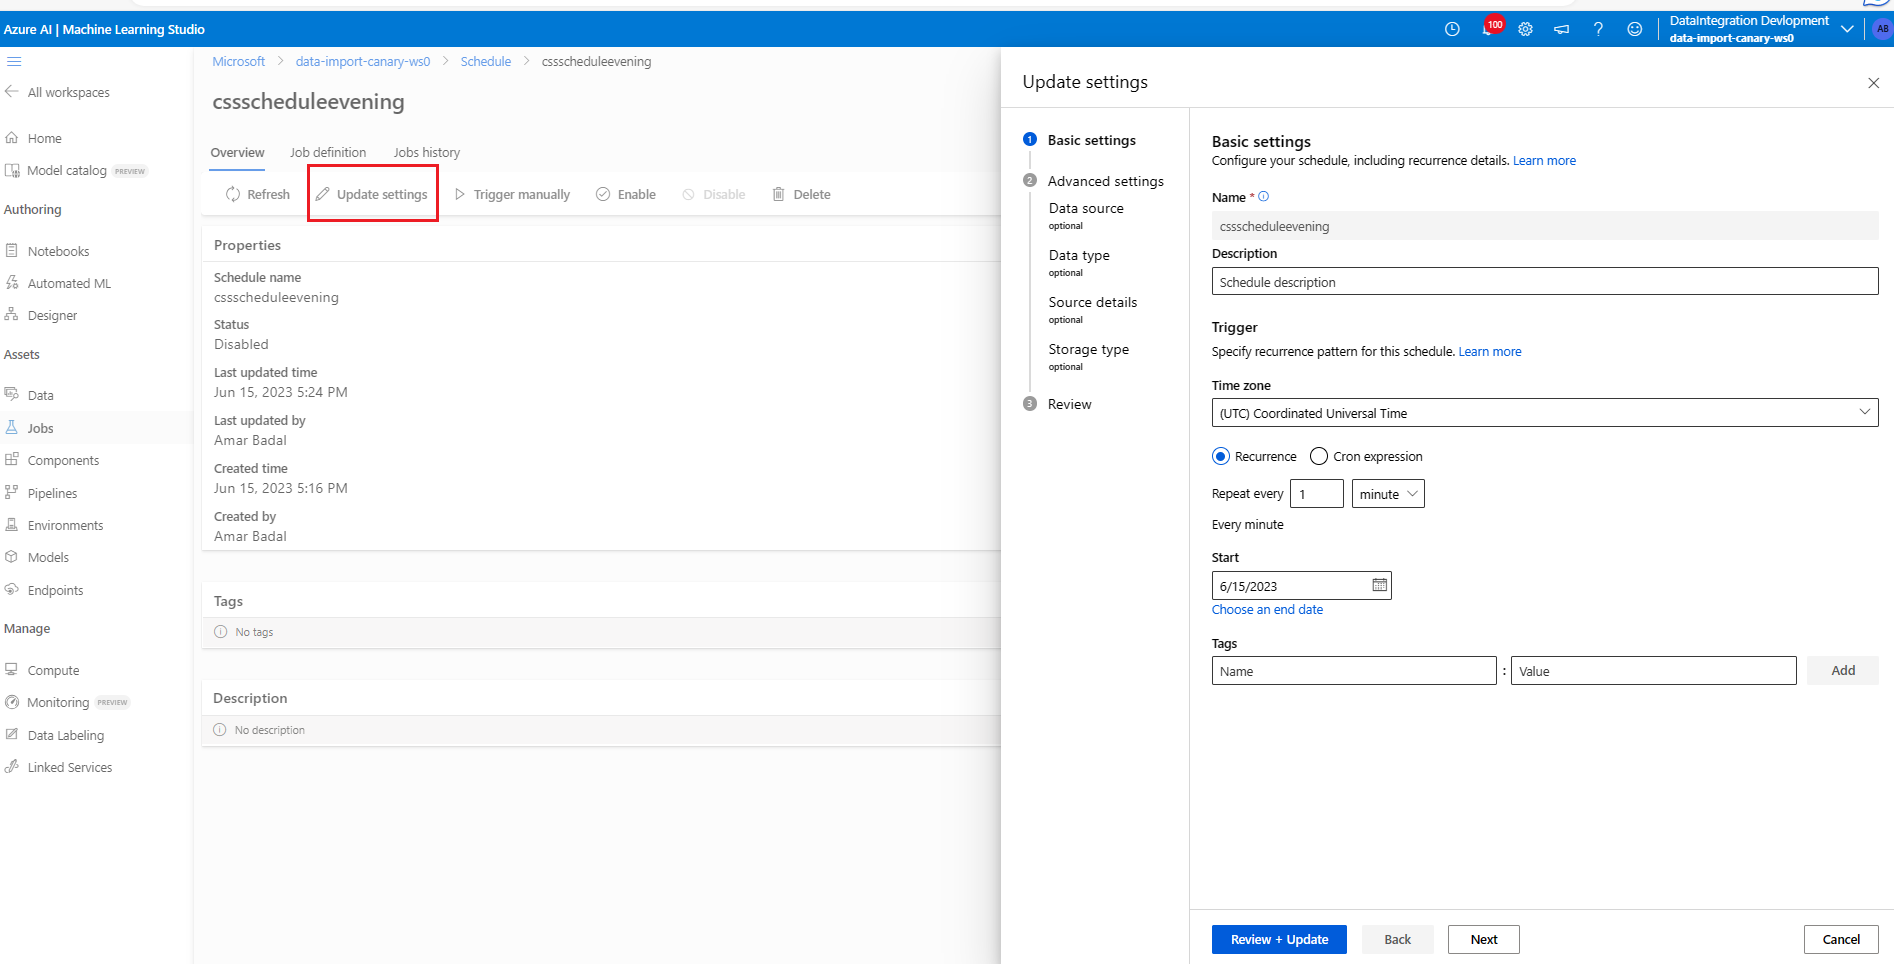
Update a schedule
APPLIES TO:  Azure CLI ml extension v2 (current)
az ml schedule update -n simple_cron_data_import_schedule --set description="new description" --no-wait
Note
To update more than just tags/description, we recommend use of az ml schedule create --file update_schedule.yml
Disable a schedule
APPLIES TO:  Azure CLI ml extension v2 (current)
az ml schedule disable -n simple_cron_data_import_schedule --no-wait
Enable a schedule
APPLIES TO:  Azure CLI ml extension v2 (current)
az ml schedule enable -n simple_cron_data_import_schedule --no-wait
Delete a schedule
Important
A schedule must be disabled before deletion. Deletion is a permanent, unrecoverable action. After a schedule is deleted, you can never access or recover it.
APPLIES TO:  Azure CLI ml extension v2 (current)
az ml schedule delete -n simple_cron_data_import_schedule
RBAC (Role-based-access-control) support
Schedules are generally used for production. To prevent problems, workspace admins may want to restrict schedule creation and management permissions within a workspace.
There are currently three action rules related to schedules, and you can configure them in the Azure portal. For more information, visit how to manage access to an Azure Machine Learning workspace..
| Action | Description | Rule |
|---|---|---|
| Read | Get and list schedules in Machine Learning workspace | Microsoft.MachineLearningServices/workspaces/schedules/read |
| Write | Create, update, disable and enable schedules in Machine Learning workspace | Microsoft.MachineLearningServices/workspaces/schedules/write |
| Delete | Delete a schedule in Machine Learning workspace | Microsoft.MachineLearningServices/workspaces/schedules/delete |
Next steps
- Learn more about the CLI (v2) data import schedule YAML schema.
- Learn how to manage imported data assets.
