Note
Access to this page requires authorization. You can try signing in or changing directories.
Access to this page requires authorization. You can try changing directories.
Get started with Azure Load Balancer by using the Azure portal to create an internal load balancer for a backend pool with two virtual machines. Other resources include Azure Bastion, NAT Gateway, a virtual network, and the required subnets.

Note
In this example you'll create a NAT gateway to provide outbound Internet access. The outbound rules tab in the configuration is bypassed and isn't needed with the NAT gateway. For more information on Azure NAT gateway, see What is Azure Virtual Network NAT? For more information about outbound connections in Azure, see Source Network Address Translation (SNAT) for outbound connections
Prerequisites
- An Azure account with an active subscription. Create an account for free.
Sign in to Azure
Sign in to the Azure portal.
Create NAT gateway
In this section, you create a NAT gateway for outbound internet access for resources in the virtual network. For other options for outbound rules, check out Network Address Translation (SNAT) for outbound connections
Sign in to the Azure portal.
In the search box at the top of the portal, enter NAT gateway. Select NAT gateways in the search results.
Select + Create.
In the Basics tab of Create network address translation (NAT) gateway enter or select the following information:
Setting Value Project details Subscription Select your subscription. Resource group Select Create new.
Enter load-balancer-rg in Name.
Select OK.Instance details NAT gateway name Enter lb-nat-gateway. Region Select East US. Availability zone Select No zone. Idle timeout (minutes) Enter 15. 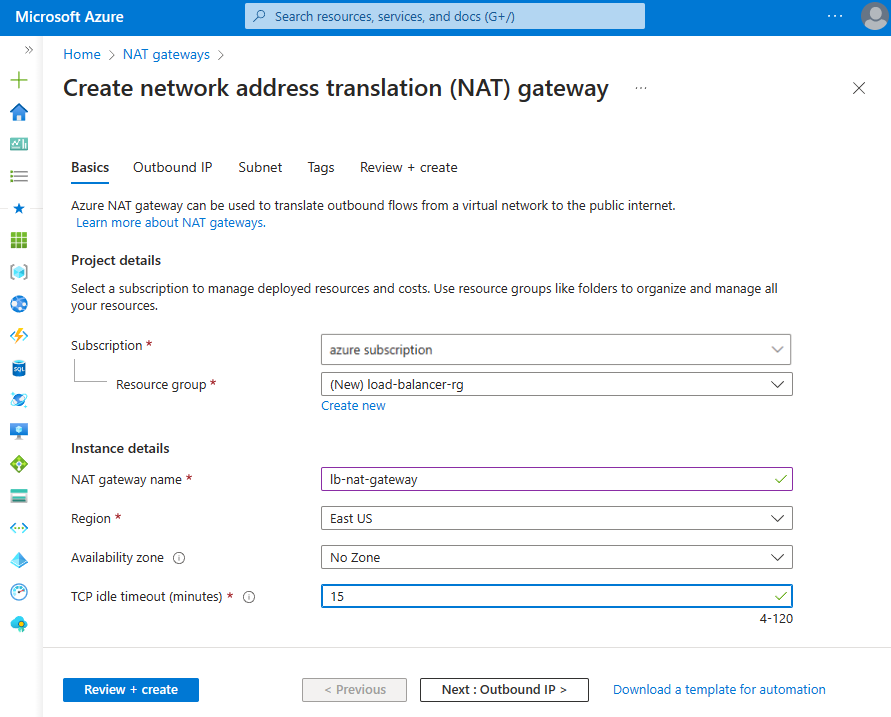
Select the Outbound IP tab or select the Next: Outbound IP button at the bottom of the page.
Select Create a new public IP address under Public IP addresses.
Enter nat-gw-public-ip in Name in Add a public IP address.
Select OK.
Select the blue Review + create button at the bottom of the page, or select the Review + create tab.
Select Create.
Create a virtual network and bastion host
In this section, you create a virtual network with a resource subnet, an Azure Bastion subnet, and an Azure Bastion host.
Important
Hourly pricing starts from the moment that Bastion is deployed, regardless of outbound data usage. For more information, see Pricing and SKUs. If you're deploying Bastion as part of a tutorial or test, we recommend that you delete this resource after you finish using it.
In the portal, search for and select Virtual networks.
On the Virtual networks page, select + Create.
On the Basics tab of Create virtual network, enter or select the following information:
Setting Value Project details Subscription Select your subscription. Resource group Select load-balancer-rg from the dropdown or Create new if it doesn't exist.
Enter load-balancer-rg in Name.
Select OK.Instance details Name Enter lb-vnet. Region Select (US) East US. 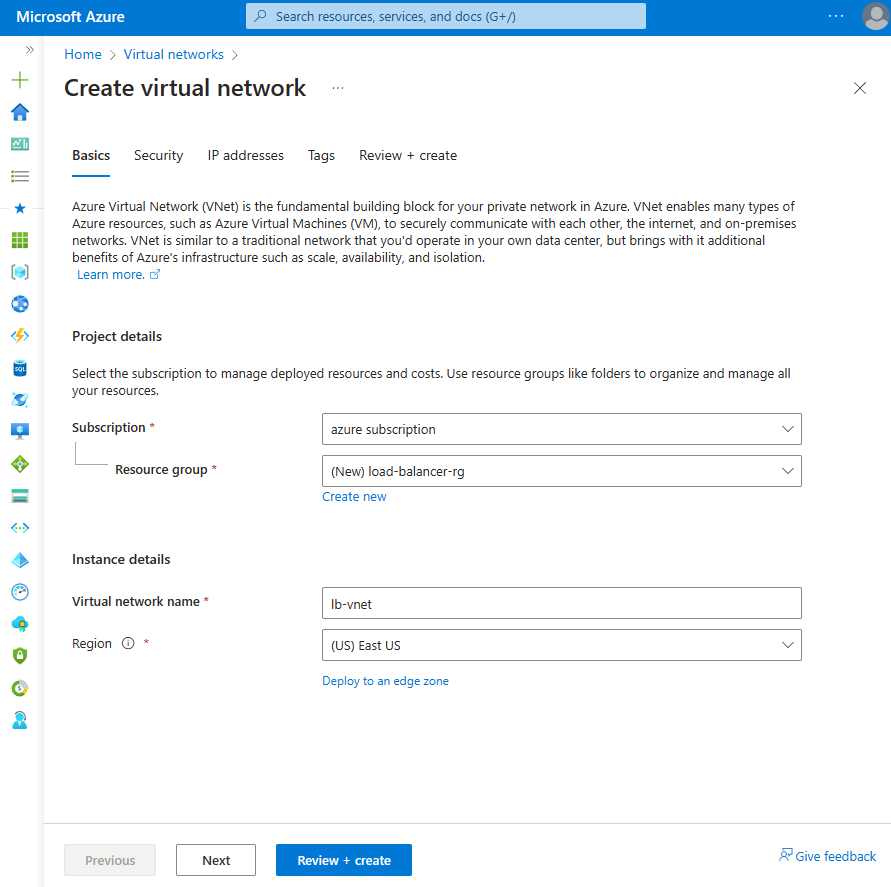
Select the Security tab or Next button at the bottom of the page.
Under Azure Bastion, enter or select the following information:
Setting Value Azure Bastion Enable Azure Bastion Select checkbox. Azure Bastion host name Enter lb-bastion. Azure Bastion public IP address Select Create new.
Enter lb-bastion-ip in Name.
Select OK.Select the IP addresses tab, or Next at the bottom of the page.
On Create virtual network page, enter or select the following information:
Setting Value Add IPv4 address space IPv4 address space Enter 10.0.0.0/16 (65,356 addresses). Subnets Select the default subnet link to edit. Edit subnet Subnet purpose Leave the default Default. Name Enter backend-subnet. Starting address Enter 10.0.0.0. Subnet size Enter /24(256 addresses). Security NAT Gateway Select lb-nat-gateway. 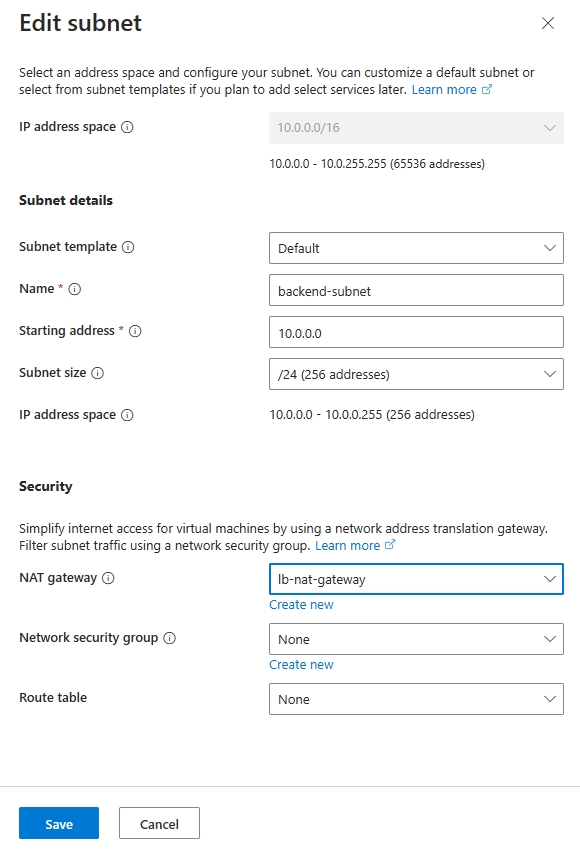
Select Save.
Select Review + create at the bottom of the screen, and when validation passes, select Create.
Create load balancer
In this section, you create a load balancer that load balances virtual machines.
During the creation of the load balancer, you configure:
- Frontend IP address
- Backend pool
- Inbound load-balancing rules
In the search box at the top of the portal, enter Load balancer. Select Load balancers in the search results.
In the Load balancer page, select Create.
In the Basics tab of the Create load balancer page, enter, or select the following information:
Setting Value Project details Subscription Select your subscription. Resource group Select load-balancer-rg. Instance details Name Enter load-balancer. Region Select East US. SKU Leave the default Standard. Type Select Internal. Tier Leave the default of Regional. 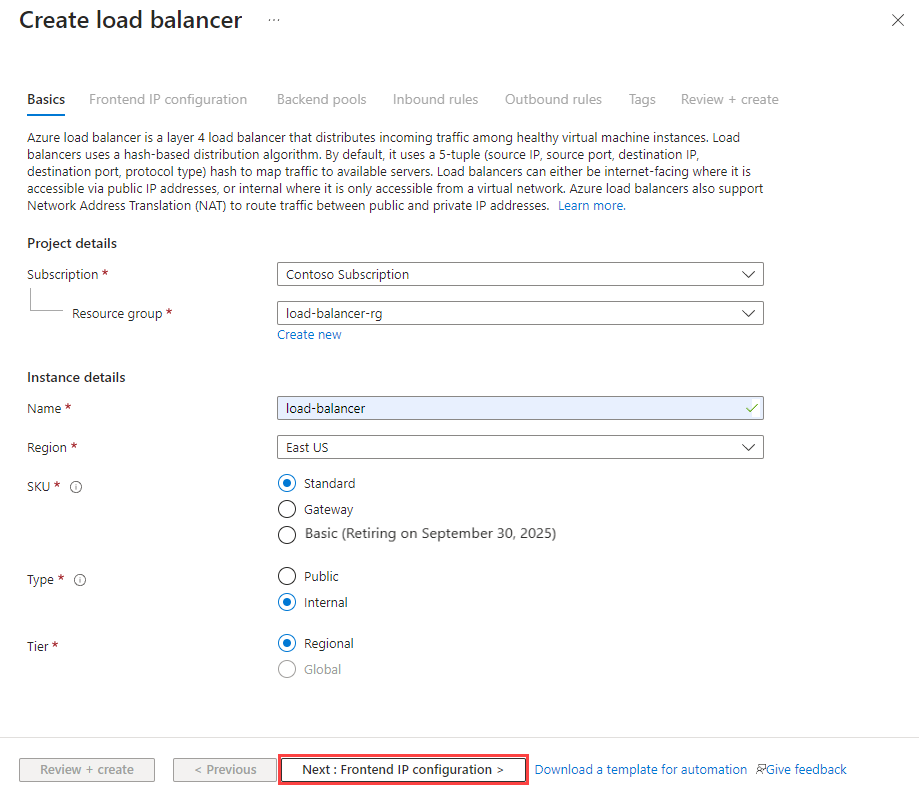
Select Next: Frontend IP configuration at the bottom of the page.
In Frontend IP configuration, select + Add a frontend IP configuration, then enter or select the following information:
Setting Value Name Enter lb-frontend. Private IP address version Select IPv4 or IPv6 depending on your requirements. Setting Value Name Enter lb-frontend. Virtual network Select lb-vnet. Subnet Select backend-subnet. Assignment Select Dynamic. Availability zone Select Zone-redundant. Select Add.
Select Next: Backend pools at the bottom of the page.
In the Backend pools tab, select + Add a backend pool.
Enter lb-backend-pool for Name in Add backend pool.
Select IP Address for Backend Pool Configuration.
Select Save.
Select the Next: Inbound rules button at the bottom of the page.
In Load balancing rule in the Inbound rules tab, select + Add a load balancing rule.
In Add load balancing rule, enter or select the following information:
Setting Value Name Enter lb-HTTP-rule. IP Version Select IPv4 or IPv6 depending on your requirements. Frontend IP address Select lb-frontend. Backend pool Select lb-backend-pool. Protocol Select TCP. Port Enter 80. Backend port Enter 80. Health probe Select Create new.
In Name, enter lb-health-probe.
Select TCP in Protocol.
Leave the rest of the defaults, and select Save.Session persistence Select None. Idle timeout (minutes) Enter or select 15. Enable TCP reset Select checkbox. Enable Floating IP Leave the default of unselected. Select Save.
Select the blue Review + create button at the bottom of the page.
Select Create.
Create virtual machines
In this section, you create two VMs (lb-vm1 and lb-VM2) in two different zones (Zone 1 and Zone 2).
These VMs are added to the backend pool of the load balancer that was created earlier.
In the search box at the top of the portal, enter Virtual machine. Select Virtual machines in the search results.
In Virtual machines, select + Create > Azure virtual machine.
In Create a virtual machine, enter or select the following values in the Basics tab:
Setting Value Project Details Subscription Select your Azure subscription Resource Group Select load-balancer-rg Instance details Virtual machine name Enter lb-VM1 Region Select ((US) East US) Availability Options Select Availability zones Availability zone Select Zone 1 Security type Select Standard. Image Select Windows Server 2022 Datacenter: Azure Edition - Gen2 Azure Spot instance Leave the default of unchecked. Size Choose VM size or take default setting Administrator account Username Enter a username Password Enter a password Confirm password Reenter password Inbound port rules Public inbound ports Select None Select the Networking tab, or select Next: Disks, then Next: Networking.
In the Networking tab, select or enter the following information:
Setting Value Network interface Virtual network Select lb-vnet Subnet Select backend-subnet Public IP Select None. NIC network security group Select Advanced Configure network security group Skip this setting until the rest of the settings are completed. Complete after Select a backend pool. Delete NIC when VM is deleted Leave the default of unselected. Accelerated networking Leave the default of selected. Load balancing Load balancing options Load-balancing options Select Azure load balancer Select a load balancer Select load-balancer Select a backend pool Select lb-backend-pool Configure network security group Select Create new.
In the Create network security group, enter lb-NSG in Name.
Under Inbound rules, select +Add an inbound rule.
In Service, select HTTP.
Under Priority, enter 100.
In Name, enter lb-NSG-Rule
Select Add
Select OKSelect Review + create.
Review the settings, and then select Create.
Follow the steps 1 through 7 to create another VM with the following values and all the other settings the same as lb-VM1:
Setting VM 2 Name lb-VM2 Availability zone Zone 2 Network security group Select the existing lb-NSG
Note
Azure provides a default outbound access IP for VMs that either aren't assigned a public IP address or are in the backend pool of an internal basic Azure load balancer. The default outbound access IP mechanism provides an outbound IP address that isn't configurable.
The default outbound access IP is disabled when one of the following events happens:
- A public IP address is assigned to the VM.
- The VM is placed in the backend pool of a standard load balancer, with or without outbound rules.
- An Azure NAT Gateway resource is assigned to the subnet of the VM.
VMs that you create by using virtual machine scale sets in flexible orchestration mode don't have default outbound access.
For more information about outbound connections in Azure, see Default outbound access in Azure and Use Source Network Address Translation (SNAT) for outbound connections.
Create test virtual machine
In this section, you create a VM named lb-TestVM. This VM is used to test the load balancer configuration.
In the search box at the top of the portal, enter Virtual machine. Select Virtual machines in the search results.
In Virtual machines, select + Create > Azure virtual machine.
In Create a virtual machine, enter or select the values in the Basics tab:
Setting Value Project Details Subscription Select your Azure subscription. Resource Group Select load-balancer-rg. Instance details Virtual machine name Enter lb-TestVM. Region Select (US) East US. Availability Options Select No infrastructure redundancy required. Security type Select Standard. Image Select Windows Server 2022 Datacenter - x64 Gen2. Azure Spot instance Leave the default of unselected. Size Choose VM size or take default setting. Administrator account Username Enter a username. Password Enter a password. Confirm password Reenter password. Inbound port rules Public inbound ports Select None. Select the Networking tab, or select Next: Disks, then Next: Networking.
In the Networking tab, select or enter:
Setting Value Network interface Virtual network lb-vnet. Subnet backend-subnet. Public IP Select None. NIC network security group Select Advanced. Configure network security group Select lb-NSG created in the previous step. Select Review + create.
Review the settings, and then select Create.
Install IIS
In the search box at the top of the portal, enter Virtual machine. Select Virtual machines in the search results.
Select lb-vm1.
In the Overview page, select Connect, then Bastion.
Enter the username and password entered during VM creation.
Select Connect.
On the server desktop, navigate to Windows Administrative Tools > Windows PowerShell > Windows PowerShell.
In the PowerShell Window, execute the following commands to:
- Install the IIS server.
- Remove the default iisstart.htm file.
- Add a new iisstart.htm file that displays the name of the VM.
# Install IIS server role
Install-WindowsFeature -name Web-Server -IncludeManagementTools

# Remove default htm file
Remove-Item  C:\inetpub\wwwroot\iisstart.htm

# Add a new htm file that displays server name
Add-Content -Path "C:\inetpub\wwwroot\iisstart.htm" -Value $("Hello World from " + $env:computername)
Close the Bastion session with lb-vm1.
Repeat steps 1 through 8 to install IIS and the updated iisstart.htm file on lb-VM2.
Test the load balancer
In this section, you test the load balancer by connecting to the lb-TestVM and verifying the webpage.
In the search box at the top of the portal, enter Load balancer. Select Load balancers in the search results.
Select load-balancer.
Make note or copy the address next to Private IP address in the Overview of load-balancer. If you can't see the Private IP address field, select See more in the information window.
In the search box at the top of the portal, enter Virtual machine. Select Virtual machines in the search results.
Select lb-TestVM.
In the Overview page, select Connect, then Bastion.
Enter the username and password entered during VM creation.
Open Microsoft Edge on lb-TestVM.
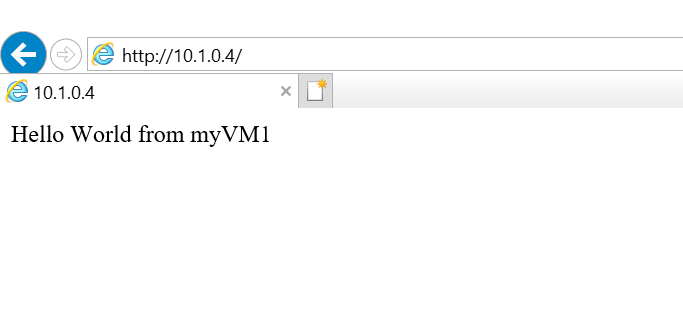
Enter the IP address from the previous step into the address bar of the browser. The custom page displaying one of the backend server names is displayed on the browser. In this example, it's 10.1.0.4.
To see the load balancer distribute traffic across both VMs, navigate to the VM shown in the browser message, and stop the VM.
Refresh the browser window. The page should still display the customized page. The load balancer is now only sending traffic to the remaining VM.
Clean up resources
When no longer needed, delete the resource group, load balancer, and all related resources. To do so, select the resource group load-balancer-rg that contains the resources and then select Delete.
Next steps
In this quickstart, you:
Created an internal Azure Load Balancer
Attached 2 VMs to the load balancer
Configured the load balancer traffic rule, health probe, and then tested the load balancer
To learn more about Azure Load Balancer, continue to: