Note
Access to this page requires authorization. You can try signing in or changing directories.
Access to this page requires authorization. You can try changing directories.
Generic greetings like "Dear customer" make customers less likely to engage with your emails. Personalize your outreach instead with dynamic text in your email templates.
Dynamic text replaces a placeholder entity with the value of the entity when you send the email. For example, your email template might contain "Dear {!User:First Name;}" but your customer sees "Dear Sal".
Insert dynamic text
You can insert dynamic text in existing email templates or templates that you create.
Note
Dynamic text in a hyperlink or an anchor tag isn't supported.
Select Email Template to edit an existing template or create a new email template.
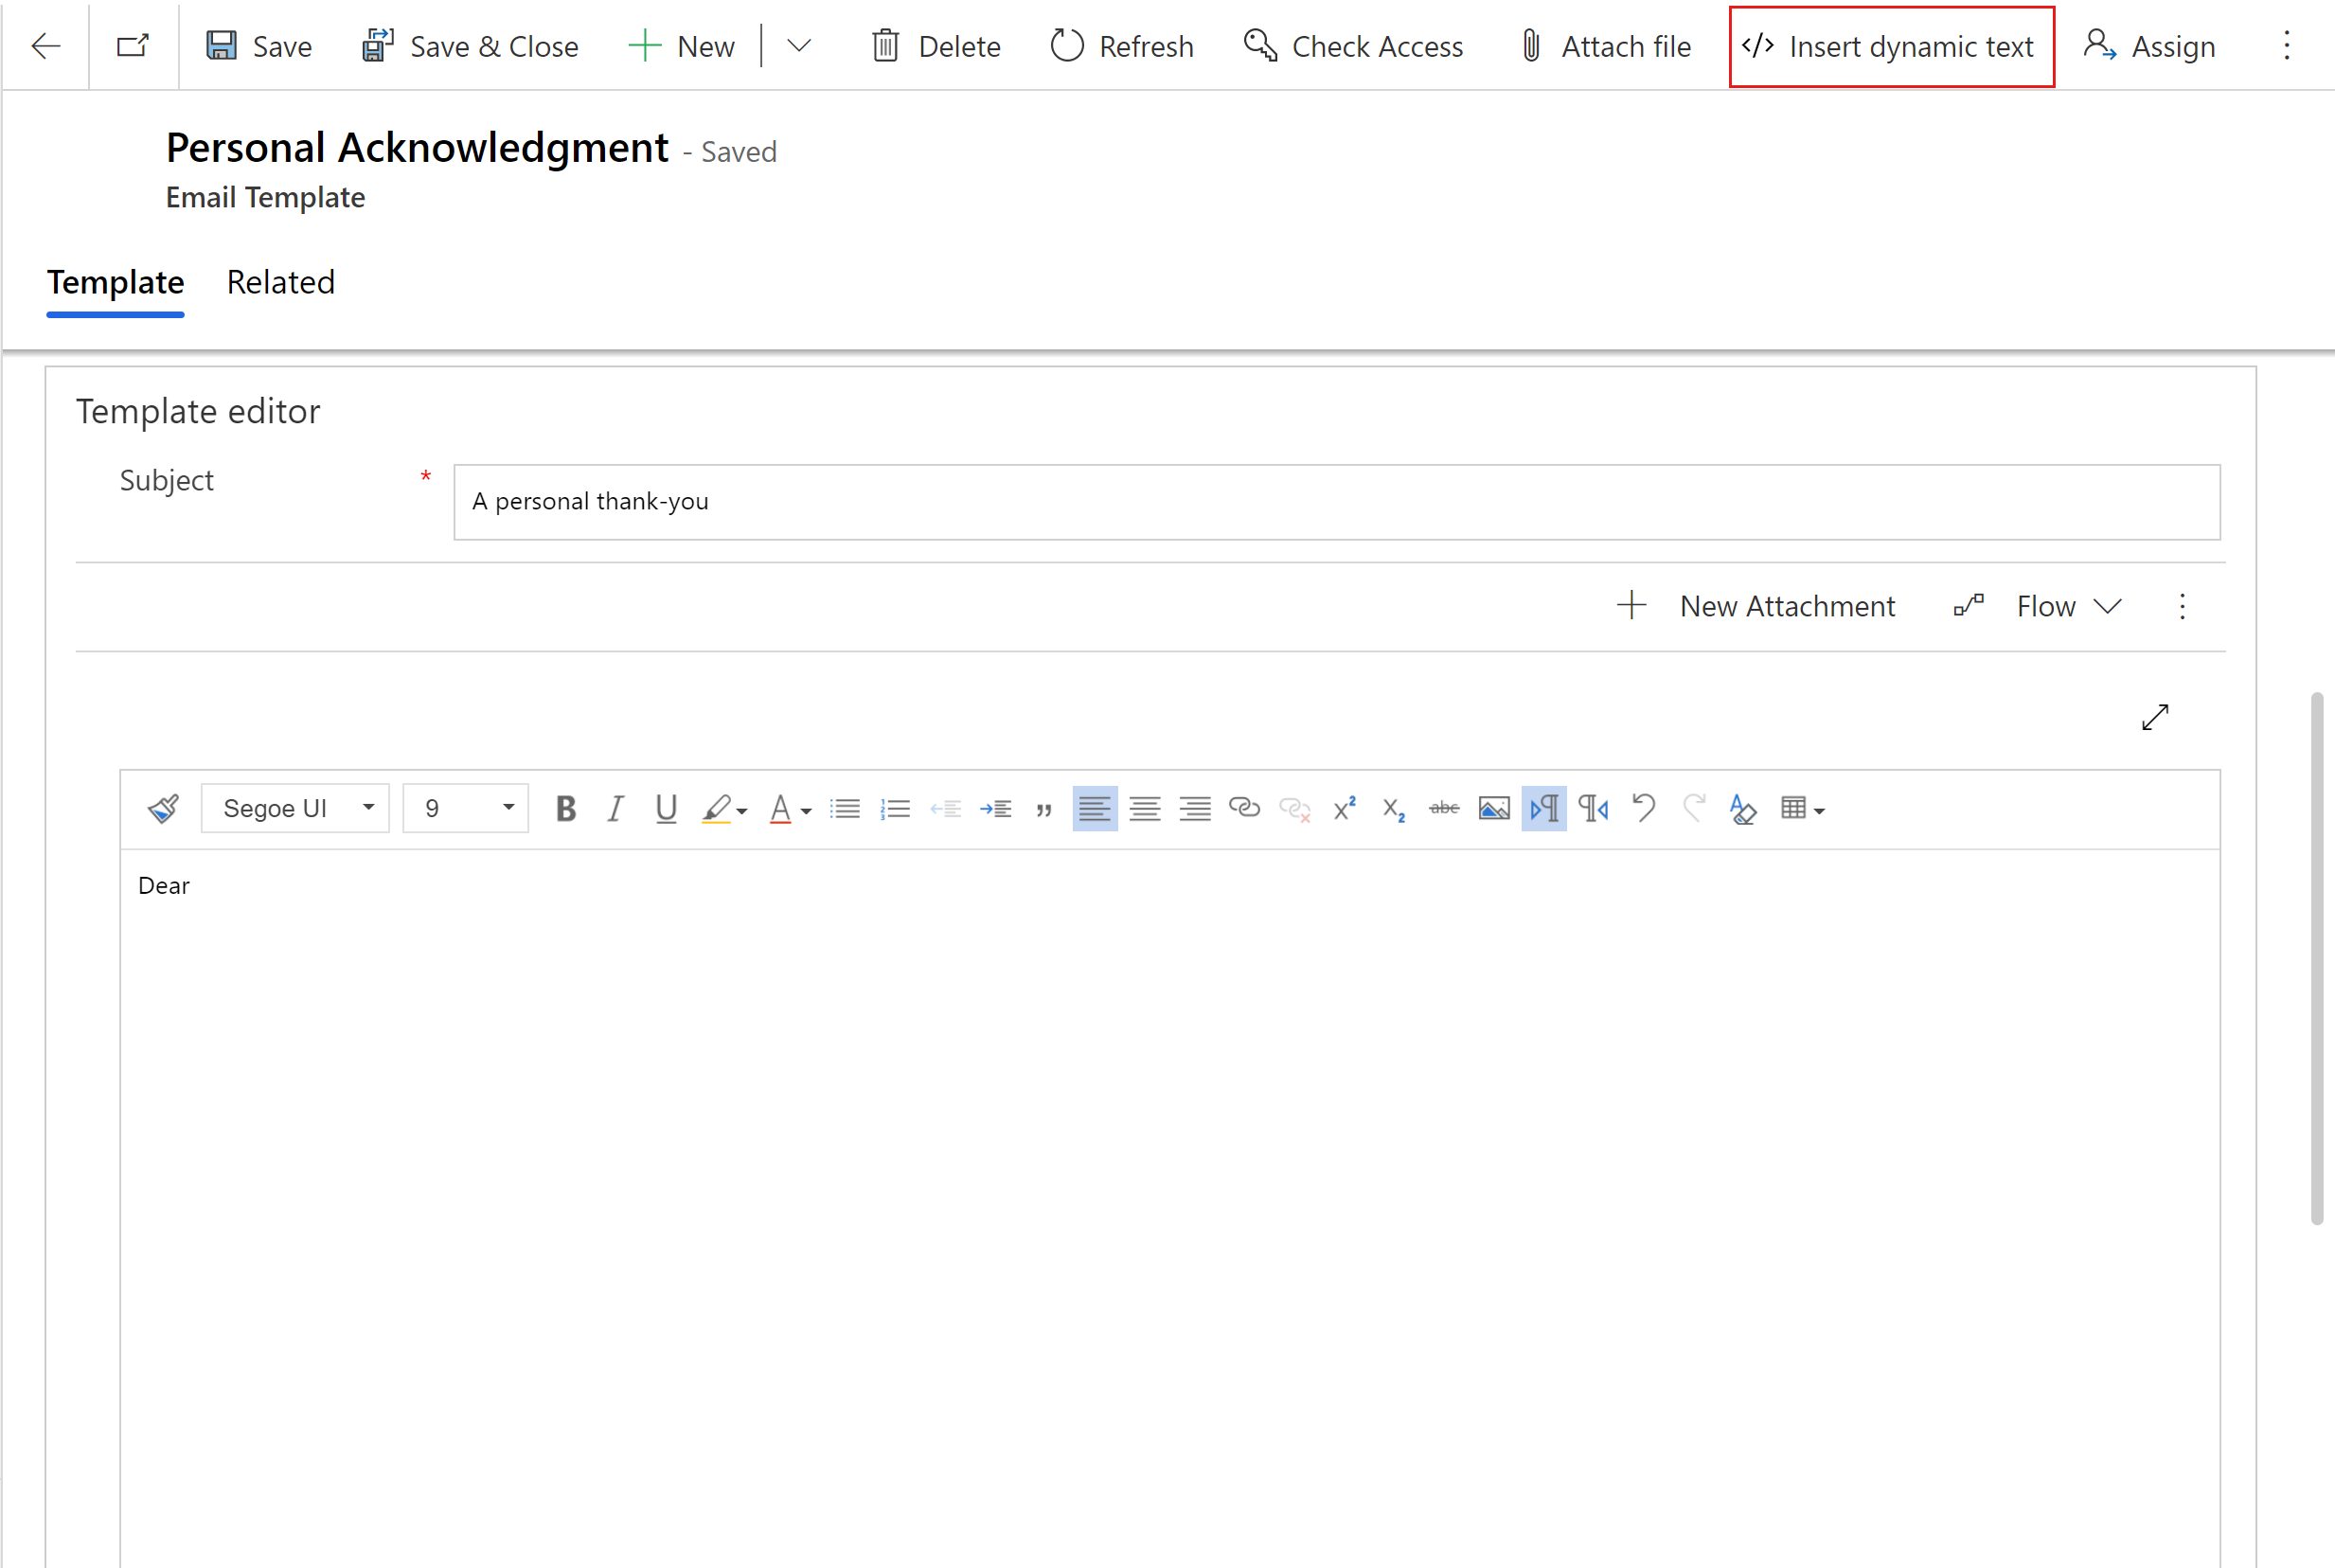
On the template editor, place your cursor where you want the personalized content to appear.
Select Insert dynamic text.

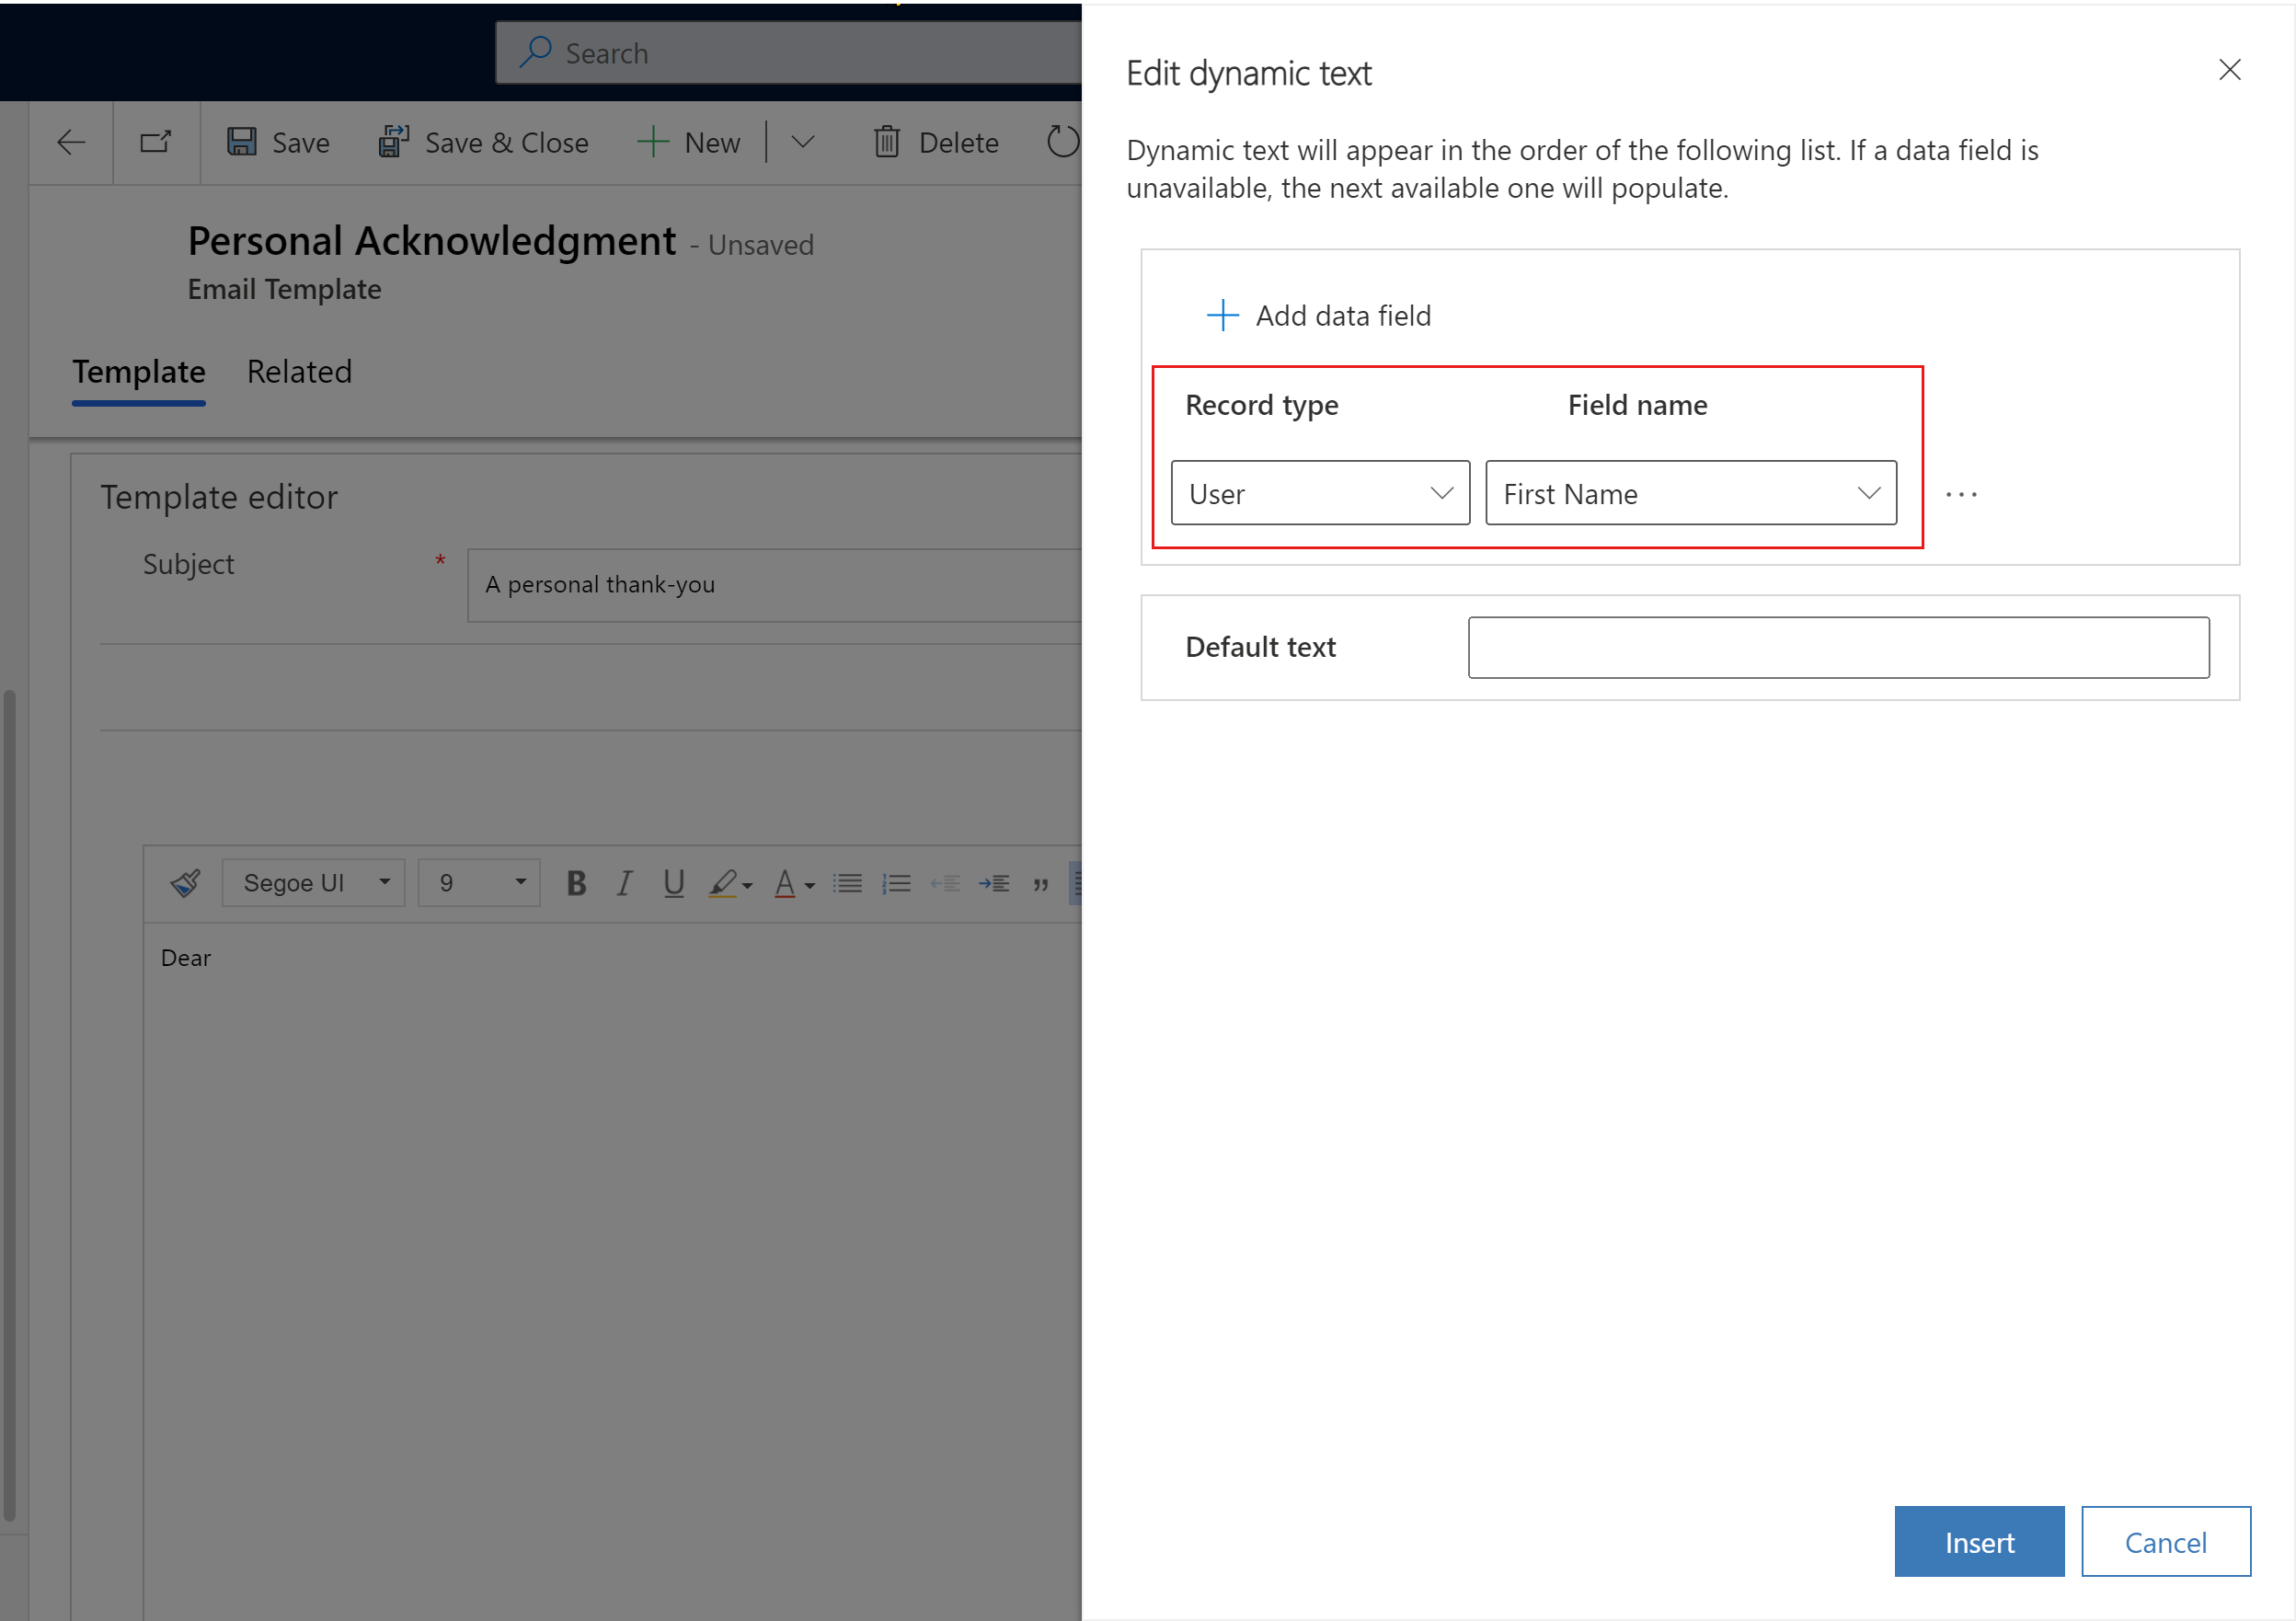
Select the Record type and Field name.
The category that you specified when you created the email template determines the record types you can choose. The record type you choose determines the fields you can select.

Insert custom fields
You can insert fields from custom entities by typing them directly in your email template.
Use the following syntax:
| Field Type | Syntax |
|---|---|
|
{!EntityLogicalName:FieldLogicalName;} |
|
{!EntityLogicalName:FieldLogicalName/@name;} |
| Date | {!EntityLogicalName:FieldLogicalName/@date;} |
| Time | {!EntityLogicalName:FieldLogicalName/@time;} |
For example, let's say you want to insert a custom field, Customer ID, linked to the record type User. Type the following placeholder in your template: {{!User:CustomerId;}}.
If you want to insert a custom field, ModifiedOn, linked to the record type User. Type the following placeholder in your template: {{!User:ModifiedOn/@date;}}.
See also
How to create an email template in model-driven apps
Enable the enhanced email template editor page