Note
Access to this page requires authorization. You can try signing in or changing directories.
Access to this page requires authorization. You can try changing directories.
The Azure Web PubSub service helps you build real-time messaging web applications using WebSockets and the publish-subscribe pattern easily. Azure Functions is a serverless platform that lets you run your code without managing any infrastructure. In this tutorial, you learn how to use Azure Web PubSub service and Azure Functions to build a serverless application with real-time messaging and the publish-subscribe pattern.
In this tutorial, you learn how to:
- Build a serverless real-time chat app
- Work with Web PubSub function trigger bindings and output bindings
- Deploy the function to Azure Function App
- Configure Azure Authentication
- Configure Web PubSub Event Handler to route events and messages to the application
Important
Raw connection strings appear in this article for demonstration purposes only.
A connection string includes the authorization information required for your application to access Azure Web PubSub service. The access key inside the connection string is similar to a root password for your service. In production environments, always protect your access keys. Use Azure Key Vault to manage and rotate your keys securely and secure your connection with WebPubSubServiceClient.
Avoid distributing access keys to other users, hard-coding them, or saving them anywhere in plain text that is accessible to others. Rotate your keys if you believe they may have been compromised.
Prerequisites
A code editor, such as Visual Studio Code
Node.js, version 18.x or above.
Note
For more information about the supported versions of Node.js, see Azure Functions runtime versions documentation.
Azure Functions Core Tools (v4 or higher preferred) to run Azure Function apps locally and deploy to Azure.
The Azure CLI to manage Azure resources.
If you don't have an Azure account, create a free account before you begin.
Sign in to Azure
Sign in to the Azure portal at https://portal.azure.com/ with your Azure account.
Create an Azure Web PubSub service instance
Your application will connect to a Web PubSub service instance in Azure.
Select the New button found on the upper left-hand corner of the Azure portal. In the New screen, type Web PubSub in the search box and press enter. (You could also search the Azure Web PubSub from the
Webcategory.)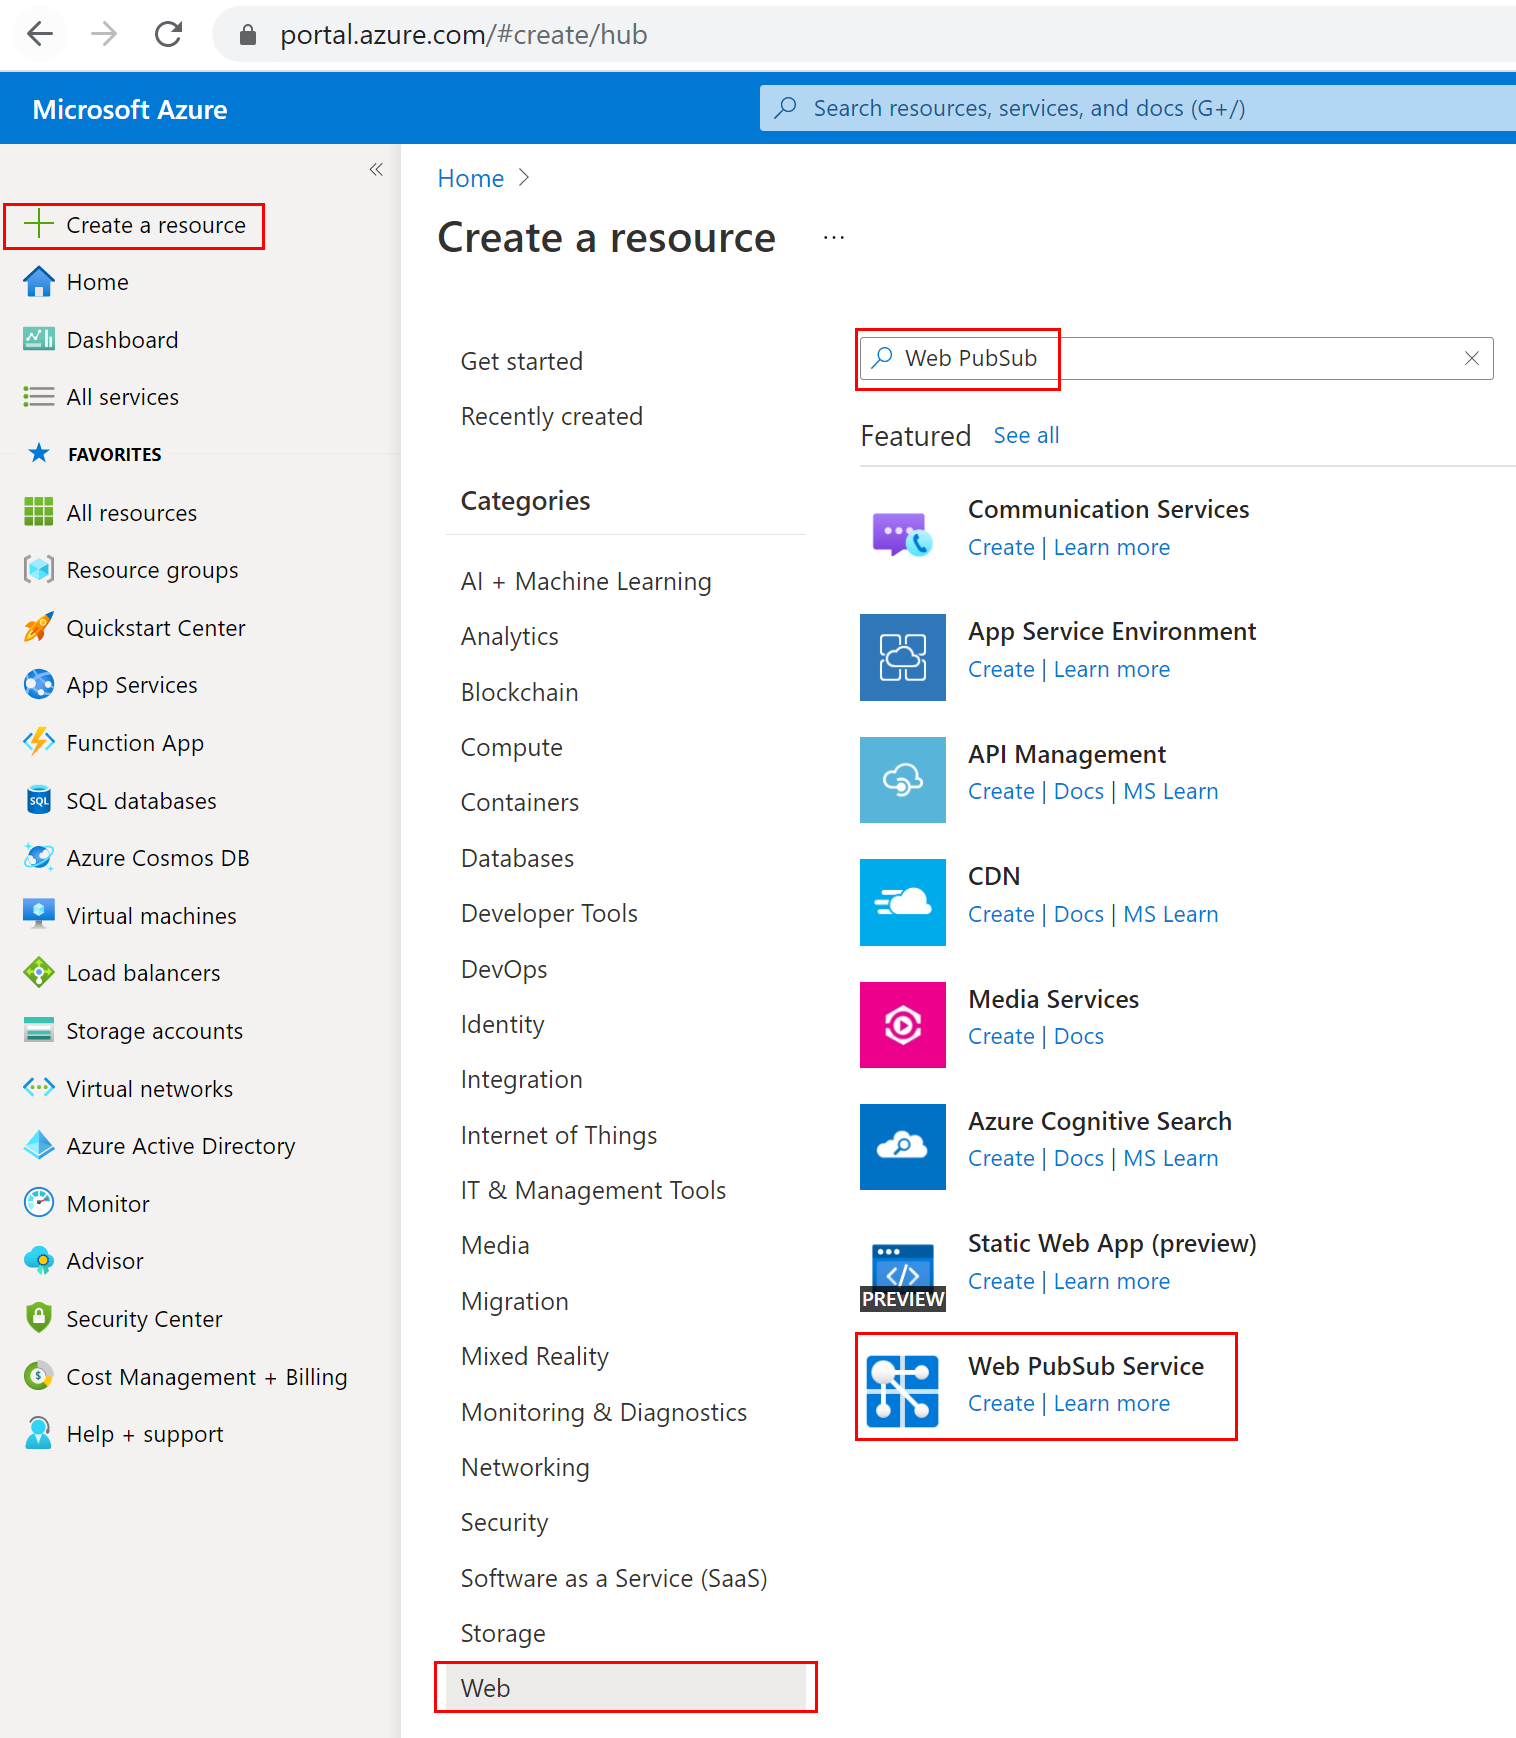
Select Web PubSub from the search results, then select Create.
Enter the following settings.
Setting Suggested value Description Resource name Globally unique name The globally unique Name that identifies your new Web PubSub service instance. Valid characters are a-z,A-Z,0-9, and-.Subscription Your subscription The Azure subscription under which this new Web PubSub service instance is created. Resource Group myResourceGroup Name for the new resource group in which to create your Web PubSub service instance. Location West US Choose a region near you. Pricing tier Free You can first try Azure Web PubSub service for free. Learn more details about Azure Web PubSub service pricing tiers Unit count - Unit count specifies how many connections your Web PubSub service instance can accept. Each unit supports 1,000 concurrent connections at most. It is only configurable in the Standard tier. 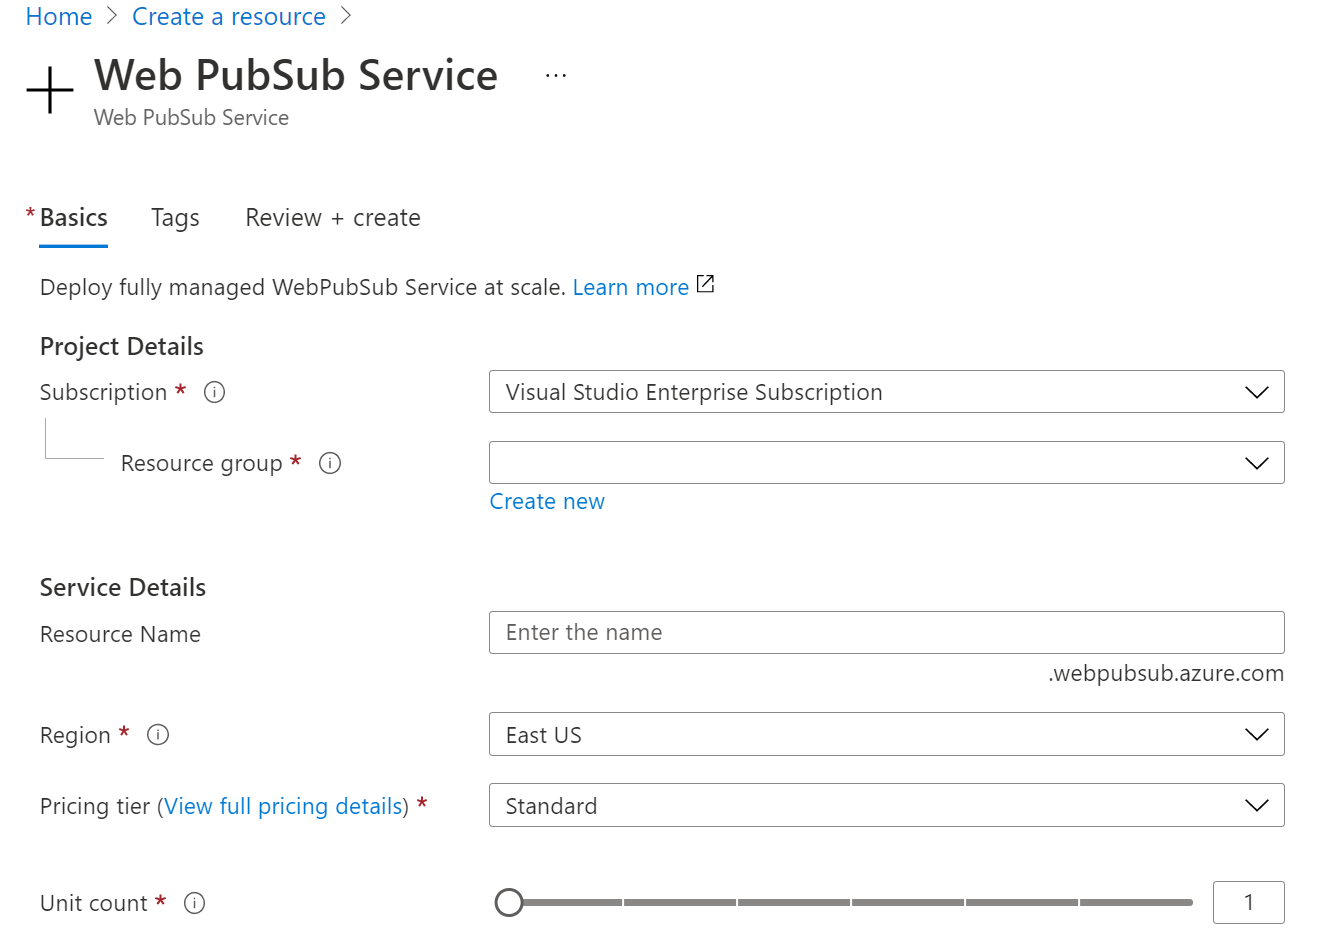
Select Create to start deploying the Web PubSub service instance.
Create the functions
Make sure you have Azure Functions Core Tools installed. And then create an empty directory for the project. Run command under this working directory.
func init --worker-runtime javascript --model V4Install
Microsoft.Azure.WebJobs.Extensions.WebPubSub.Confirm and update
host.json's extensionBundle to version 4.* or later to get Web PubSub support.{ "extensionBundle": { "id": "Microsoft.Azure.Functions.ExtensionBundle", "version": "[4.*, 5.0.0)" } }Create an
indexfunction to read and host a static web page for clients.func new -n index -t HttpTrigger- Update
src/functions/index.jsand copy following codes.const { app } = require('@azure/functions'); const { readFile } = require('fs/promises'); app.http('index', { methods: ['GET', 'POST'], authLevel: 'anonymous', handler: async (context) => { const content = await readFile('index.html', 'utf8', (err, data) => { if (err) { context.err(err) return } }); return { status: 200, headers: { 'Content-Type': 'text/html' }, body: content, }; } });
- Update
Create a
negotiatefunction to help clients get service connection url with access token.func new -n negotiate -t HttpTriggerNote
In this sample, we use Microsoft Entra ID user identity header
x-ms-client-principal-nameto retrieveuserId. And this won't work in a local function. You can make it empty or change to other ways to get or generateuserIdwhen playing in local. For example, let client type a user name and pass it in query like?user={$username}when callnegotiatefunction to get service connection url. And in thenegotiatefunction, setuserIdwith value{query.user}.- Update
src/functions/negotiateand copy following codes.const { app, input } = require('@azure/functions'); const connection = input.generic({ type: 'webPubSubConnection', name: 'connection', userId: '{headers.x-ms-client-principal-name}', hub: 'simplechat' }); app.http('negotiate', { methods: ['GET', 'POST'], authLevel: 'anonymous', extraInputs: [connection], handler: async (request, context) => { return { body: JSON.stringify(context.extraInputs.get('connection')) }; }, });
- Update
Create a
messagefunction to broadcast client messages through service.func new -n message -t HttpTrigger- Update
src/functions/message.jsand copy following codes.const { app, output, trigger } = require('@azure/functions'); const wpsMsg = output.generic({ type: 'webPubSub', name: 'actions', hub: 'simplechat', }); const wpsTrigger = trigger.generic({ type: 'webPubSubTrigger', name: 'request', hub: 'simplechat', eventName: 'message', eventType: 'user' }); app.generic('message', { trigger: wpsTrigger, extraOutputs: [wpsMsg], handler: async (request, context) => { context.extraOutputs.set(wpsMsg, [{ "actionName": "sendToAll", "data": `[${context.triggerMetadata.connectionContext.userId}] ${request.data}`, "dataType": request.dataType }]); return { data: "[SYSTEM] ack.", dataType: "text", }; } });
- Update
Add the client single page
index.htmlin the project root folder and copy content.<html> <body> <h1>Azure Web PubSub Serverless Chat App</h1> <div id="login"></div> <p></p> <input id="message" placeholder="Type to chat..." /> <div id="messages"></div> <script> (async function () { let authenticated = window.location.href.includes( "?authenticated=true" ); if (!authenticated) { // auth let login = document.querySelector("#login"); let link = document.createElement("a"); link.href = `${window.location.origin}/.auth/login/aad?post_login_redirect_url=/api/index?authenticated=true`; link.text = "login"; login.appendChild(link); } else { // negotiate let messages = document.querySelector("#messages"); let res = await fetch(`${window.location.origin}/api/negotiate`, { credentials: "include", }); let url = await res.json(); // connect let ws = new WebSocket(url.url); ws.onopen = () => console.log("connected"); ws.onmessage = (event) => { let m = document.createElement("p"); m.innerText = event.data; messages.appendChild(m); }; let message = document.querySelector("#message"); message.addEventListener("keypress", (e) => { if (e.charCode !== 13) return; ws.send(message.value); message.value = ""; }); } })(); </script> </body> </html>
Create and Deploy the Azure Function App
Before you can deploy your function code to Azure, you need to create three resources:
- A resource group, which is a logical container for related resources.
- A storage account, which is used to maintain state and other information about your functions.
- A function app, which provides the environment for executing your function code. A function app maps to your local function project and lets you group functions as a logical unit for easier management, deployment and sharing of resources.
Use the following commands to create these items.
If you haven't done so already, sign in to Azure:
az loginCreate a resource group or you can skip by reusing the one of Azure Web PubSub service:
az group create -n WebPubSubFunction -l <REGION>Create a general-purpose storage account in your resource group and region:
az storage account create -n <STORAGE_NAME> -l <REGION> -g WebPubSubFunctionCreate the function app in Azure:
az functionapp create --resource-group WebPubSubFunction --consumption-plan-location <REGION> --runtime node --runtime-version 18 --functions-version 4 --name <FUNCIONAPP_NAME> --storage-account <STORAGE_NAME>Note
Check Azure Functions runtime versions documentation to set
--runtime-versionparameter to supported value.Deploy the function project to Azure:
After you have successfully created your function app in Azure, you're now ready to deploy your local functions project by using the func azure functionapp publish command.
func azure functionapp publish <FUNCIONAPP_NAME>Configure the
WebPubSubConnectionStringfor the function app:Raw connection strings appear in this article for demonstration purposes only. In production environments, always protect your access keys. Use Azure Key Vault to manage and rotate your keys securely and secure your connection with
WebPubSubServiceClient.First, find your Web PubSub resource from Azure Portal and copy out the connection string under Keys. Then, navigate to Function App settings in Azure Portal -> Settings -> Environment variables. And add a new item under App settings, with name equals
WebPubSubConnectionStringand value is your Web PubSub resource connection string.
Configure the Web PubSub service Event Handler
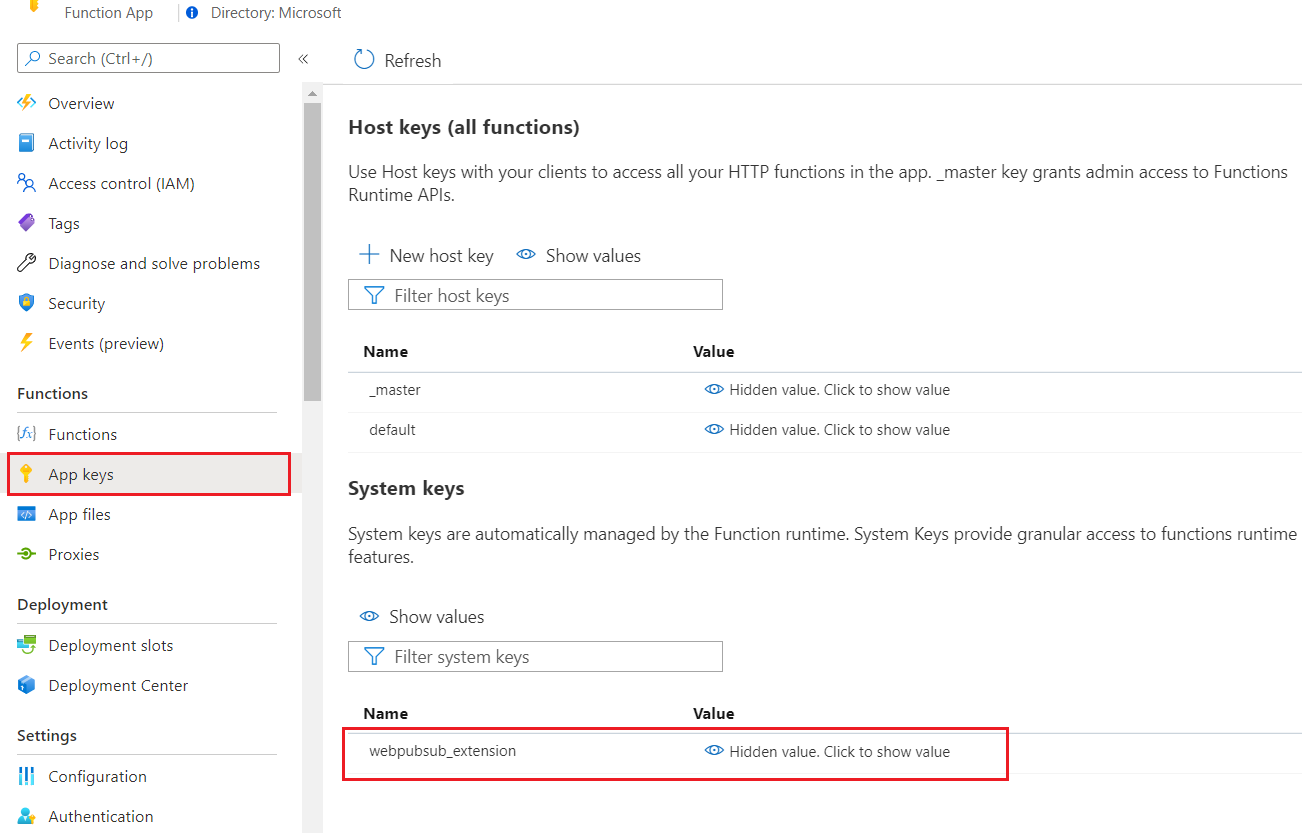
In this sample, we're using WebPubSubTrigger to listen to service upstream requests. So Web PubSub need to know the function's endpoint information in order to send target client requests. And Azure Function App requires a system key for security regarding extension-specific webhook methods. In the previous step after we deployed the Function App with message functions, we're able to get the system key.
Go to Azure portal -> Find your Function App resource -> App keys -> System keys -> webpubsub_extension. Copy out the value as <APP_KEY>.
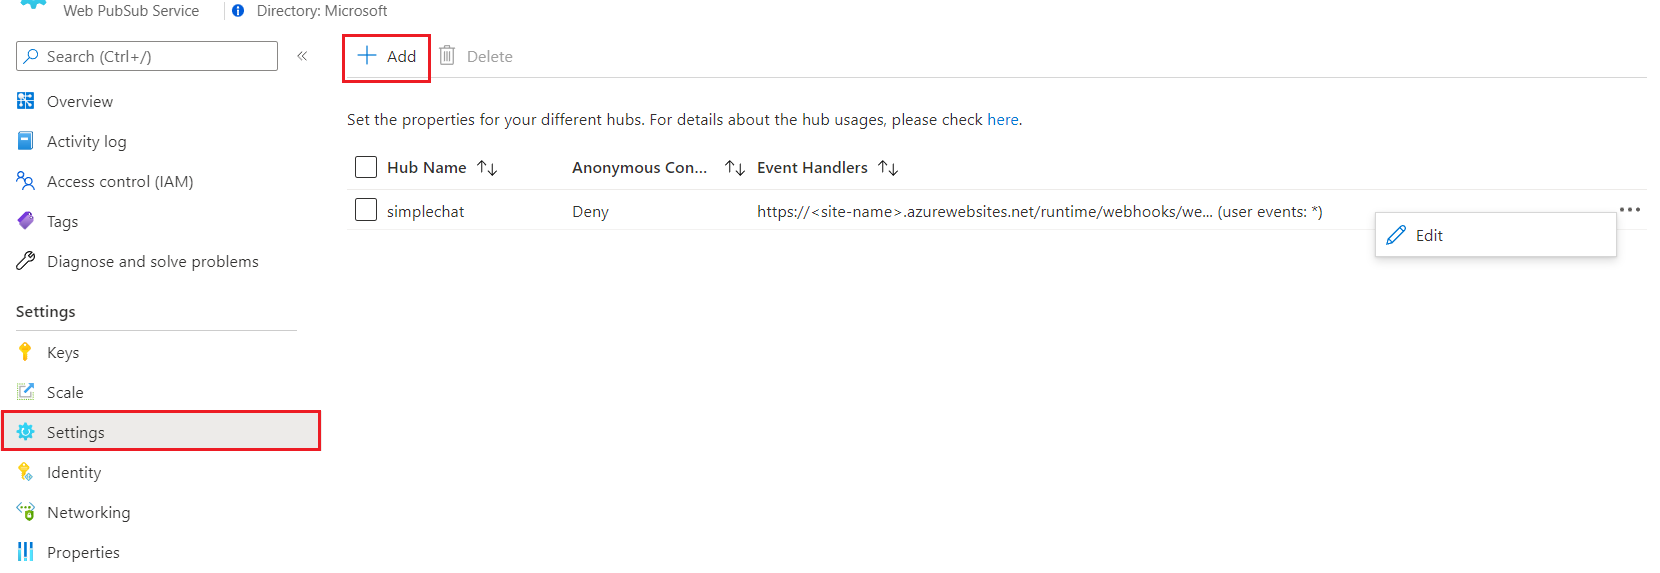
Set Event Handler in Azure Web PubSub service. Go to Azure portal -> Find your Web PubSub resource -> Settings. Add a new hub settings mapping to the one function in use. Replace the <FUNCTIONAPP_NAME> and <APP_KEY> to yours.
- Hub Name:
simplechat - URL Template: https://<FUNCTIONAPP_NAME>.azurewebsites.net/runtime/webhooks/webpubsub?code=<APP_KEY>
- User Event Pattern: *
- System Events: -(No need to configure in this sample)
Configure to enable client authentication
Go to Azure portal -> Find your Function App resource -> Authentication. Click Add identity provider. Set App Service authentication settings to Allow unauthenticated access, so your client index page can be visited by anonymous users before redirect to authenticate. Then Save.
Here we choose Microsoft as identify provider, which uses x-ms-client-principal-name as userId in the negotiate function. Besides, you can configure other identity providers following the links, and don't forget update the userId value in negotiate function accordingly.
Try the application
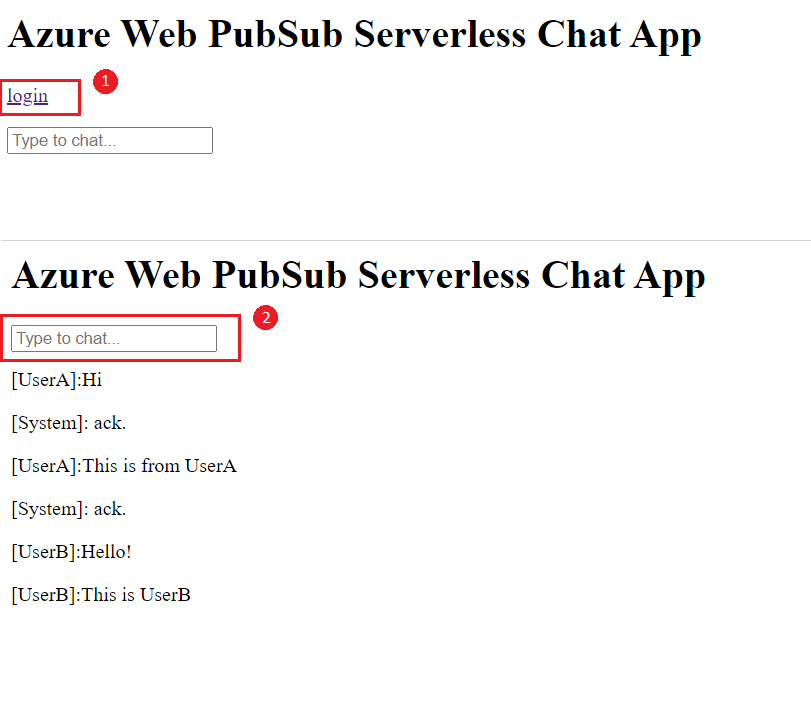
Now you're able to test your page from your function app: https://<FUNCTIONAPP_NAME>.azurewebsites.net/api/index. See snapshot.
- Click
loginto auth yourself. - Type message in the input box to chat.
In the message function, we broadcast caller's message to all clients and return caller with message [SYSTEM] ack. So we can know in sample chat snapshot, first four messages are from current client and last two messages are from another client.
Clean up resources
If you're not going to continue to use this app, delete all resources created by this doc with the following steps so you don't incur any charges:
In the Azure portal, select Resource groups on the far left, and then select the resource group you created. You may use the search box to find the resource group by its name instead.
In the window that opens, select the resource group, and then select Delete resource group.
In the new window, type the name of the resource group to delete, and then select Delete.
Next steps
In this quickstart, you learned how to run a serverless chat application. Now, you could start to build your own application.