Note
Access to this page requires authorization. You can try signing in or changing directories.
Access to this page requires authorization. You can try changing directories.
In this quickstart, learn how to create a NAT gateway by using the Azure CLI. The NAT Gateway service provides outbound connectivity for virtual machines in Azure.
If you don't have an Azure subscription, create an Azure free account before you begin.
Use the Bash environment in Azure Cloud Shell. For more information, see Get started with Azure Cloud Shell.
If you prefer to run CLI reference commands locally, install the Azure CLI. If you're running on Windows or macOS, consider running Azure CLI in a Docker container. For more information, see How to run the Azure CLI in a Docker container.
If you're using a local installation, sign in to the Azure CLI by using the az login command. To finish the authentication process, follow the steps displayed in your terminal. For other sign-in options, see Authenticate to Azure using Azure CLI.
When you're prompted, install the Azure CLI extension on first use. For more information about extensions, see Use and manage extensions with the Azure CLI.
Run az version to find the version and dependent libraries that are installed. To upgrade to the latest version, run az upgrade.
Create a resource group with az group create. An Azure resource group is a logical container into which Azure resources are deployed and managed.
az group create \
    --name test-rg \
    --location eastus2
In this section, create the NAT gateway and supporting resources.
To access the Internet, you need one or more public IP addresses for the NAT gateway. Use az network public-ip create to create a public IP address resource.
az network public-ip create \
    --resource-group test-rg \
    --name public-ip-nat \
    --sku Standard \
    --location eastus2 \
    --zone 1 2 3
Create an Azure NAT gateway with az network nat gateway create. The result of this command creates a gateway resource that uses the public IP address defined in the previous step. The idle timeout is set to 10 minutes.
az network nat gateway create \
    --resource-group test-rg \
    --name nat-gateway \
    --public-ip-addresses public-ip-nat \
    --idle-timeout 10 \
    --location eastus2
Create a virtual network with a subnet with az network vnet create. The IP address space for the virtual network is 10.0.0.0/16. The subnet within the virtual network is 10.0.0.0/24.
az network vnet create \
    --name vnet-1 \
    --resource-group test-rg \
    --address-prefix 10.0.0.0/16 \
    --subnet-name subnet-1 \
    --subnet-prefixes 10.0.0.0/24 \
    --location eastus2
Create an Azure Bastion host to access the virtual machine.
Use az network vnet subnet create to create an Azure Bastion subnet.
az network vnet subnet create \
    --name AzureBastionSubnet \
    --resource-group test-rg \
    --vnet-name vnet-1 \
    --address-prefix 10.0.1.0/26
Create a public IP address for the bastion host with az network public-ip create.
az network public-ip create \
    --resource-group test-rg \
    --name public-ip \
    --sku Standard \
    --location eastus2 \
    --zone 1 2 3
Use az network bastion create to create the bastion host.
Hourly pricing starts from the moment that Bastion is deployed, regardless of outbound data usage. For more information, see Pricing and SKUs. If you're deploying Bastion as part of a tutorial or test, we recommend that you delete this resource after you finish using it. For more information about Azure Bastion, see Azure Bastion.
az network bastion create \
    --name bastion \
    --public-ip-address public-ip \
    --resource-group test-rg \
    --vnet-name vnet-1 \
    --location eastus2
The bastion host can take several minutes to deploy. Wait for the bastion host to deploy before moving on to the next section.
Configure the source subnet in virtual network to use a specific NAT gateway resource with az network vnet subnet update. This command activates the NAT service on the specified subnet.
az network vnet subnet update \
    --name subnet-1 \
    --resource-group test-rg \
    --vnet-name vnet-1 \
    --nat-gateway nat-gateway
All outbound traffic to Internet destinations is now using the NAT gateway. It's not necessary to configure a UDR.
Create a virtual machine to test the NAT gateway to verify the public IP address of the outbound connection.
Create the virtual machine with az vm create.
az vm create \
    --resource-group test-rg \
    --name vm-1 \
    --image Ubuntu2204 \
    --public-ip-address "" \
    --vnet-name vnet-1 \
    --subnet subnet-1 \
    --admin-username azureuser \
    --authentication-type password
Wait for the virtual machine creation to complete before moving on to the next section.
In this section, you test the NAT gateway. You first discover the public IP of the NAT gateway. You then connect to the test virtual machine and verify the outbound connection through the NAT gateway.
Sign in to the Azure portal.
In the search box at the top of the portal, enter Public IP. Select Public IP addresses in the search results.
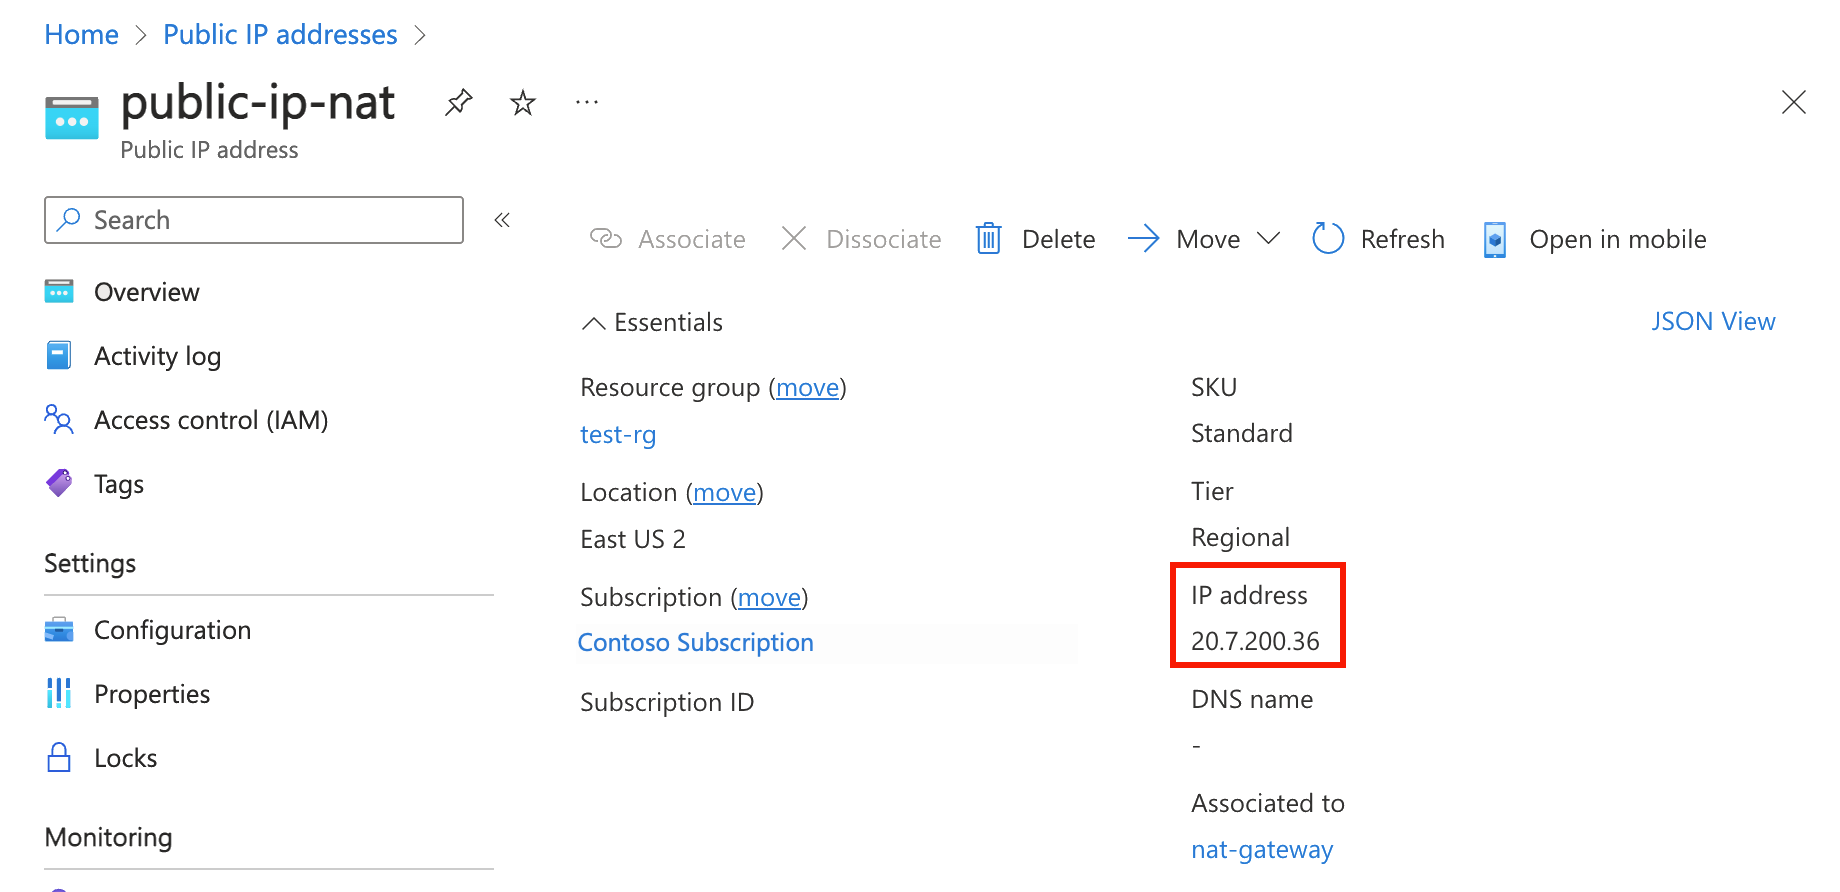
Select public-ip-nat.
Make note of the public IP address:

In the search box at the top of the portal, enter Virtual machine. Select Virtual machines in the search results.
Select vm-1.
On the Overview page, select Connect, then select the Bastion tab.
Select Use Bastion.
Enter the username and password entered during VM creation. Select Connect.
In the bash prompt, enter the following command:
curl ifconfig.meVerify the IP address returned by the command matches the public IP address of the NAT gateway.
azureuser@vm-1:~$ curl ifconfig.me
20.7.200.36
If you're not going to continue to use this application, delete the virtual network, virtual machine, and NAT gateway with the following CLI command:
  az group delete \
    --name test-rg
For more information on Azure NAT Gateway, see:

