Manage forecast periods
A forecast period is a time period for which you want to forecast sales. A forecast period defines the start date and end date of forecast period and the number of weeks in the period. You can create multiple forecast periods for a forecast. For example, you can create a forecast period for each quarter of the year.
Before adding and scheduling forecast periods, review the following information:
Each forecast configuration can have multiple forecast periods with different period types. For example, you can add a quarterly forecast for the first six months of the fiscal year and a monthly forecast for the remaining six months. For more such rules, see Forecast period rules
You can have different period types for the same period to track your team's forecast at multiple intervals. For example, towards the end of the quarter, you may want to track your team's forecast on a weekly basis, in addition to the monthly forecast. For example, you can have a monthly forecast for the month of September and a weekly forecast for the same month. However, you can't add duplicate periods with the same recurrence and period.
You can add forecast periods to archived forecasts and reactivate the forecast.
You can add forecast periods while you're defining the forecast configuration or after you've activated the forecast. If you add a new period after activating the forecast, you need to reactivate the forecast for the new period to take effect.
Open the Forecast configuration page in App Settings.
Open the forecast configuration record that you want to edit.
In the General step of the forecast configuration, scroll down to the Scheduling section,
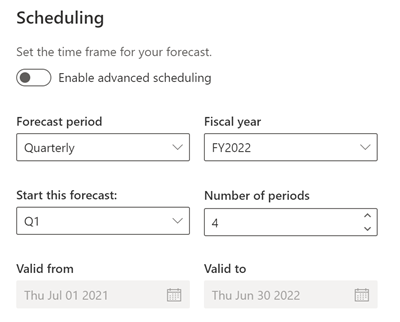
In the Scheduling format drop-down, select a calendar template that corresponds to the number and grouping of accounting periods in your organization's calendar. Learn more about the available scheduling formats. For example, select Gregorian if your organization uses the most-widely used Gregorian calender with 12 weeks per quarter.
Use the information in the following table to complete the remaining fields in this section:
Field Description Example scenario Start Date Select the date from when the forecast period starts. This date can be the date when your fiscal year starts. For Broadcast calender template, this value can't be changed as this value is already preset to the first Monday that contains January 1. If your organization's fiscal year starts on July 1, select July 1. You'll then be able to create forecasts for the period from July 1 to June 30 of the following year. If you want to track your team's forecast a few weeks ahead of the organization's fiscal year, set the start date to a few weeks before the fiscal year start date. Forecast period Select the frequency of the forecast. Specify whether you want a weekly, monthly, quarterly, or yearly forecast. The forecast period determines the granularity and recurrence of the forecast. Select Monthly to generate a forecast for every month. Period name prefix Select the fiscal year for the forecast. Select FY2023 if you're creating a forecast for the fiscal year 2023. Start this forecast Select the exact week, month, quarter, or year for the forecast period. If you've selected Monthly as the forecast period and want to start your forecast from July, select July as the start month. Number of periods Enter the number of forecast periods to generate. Forecast periods can only span up to one year. If you've selected monthly forecast and selected July as the start month, and number of periods as 6, then 6 forecast periods will be configured for the period from July to December. When you select Add period, a forecast for each month will be added to the table on the right side. Start this forecast on fiscal start date month Applicable only for monthly forecasts. When you turn this option on, the period name will be based on the start date of the period. Otherwise, it'll be based on the end date of the period. For a monthly period that's set to from July 15, 2023, the period name will be set as FY2023 July if this option is turned on. If it's turned off, the period name will be set as FY2023 August. Select Add period to add the forecast periods to the table on the right side.
Repeat step 4 through 6 to add more forecast periods.
By default, forecast periods are arranged in the order of the forecast start date in the Forecasts page. You can rearrange the forecast periods as per your organization's requirements.

In the General step of the forecast configuration, scroll down to the Scheduling section, and then drag and drop the forecast periods to rearrange them.
Save the changes.
Open the forecast page to ensure that the forecast periods are arranged as per your requirements.
The Status column in the Periods for this forecast table indicates the status of the forecast value calculation.
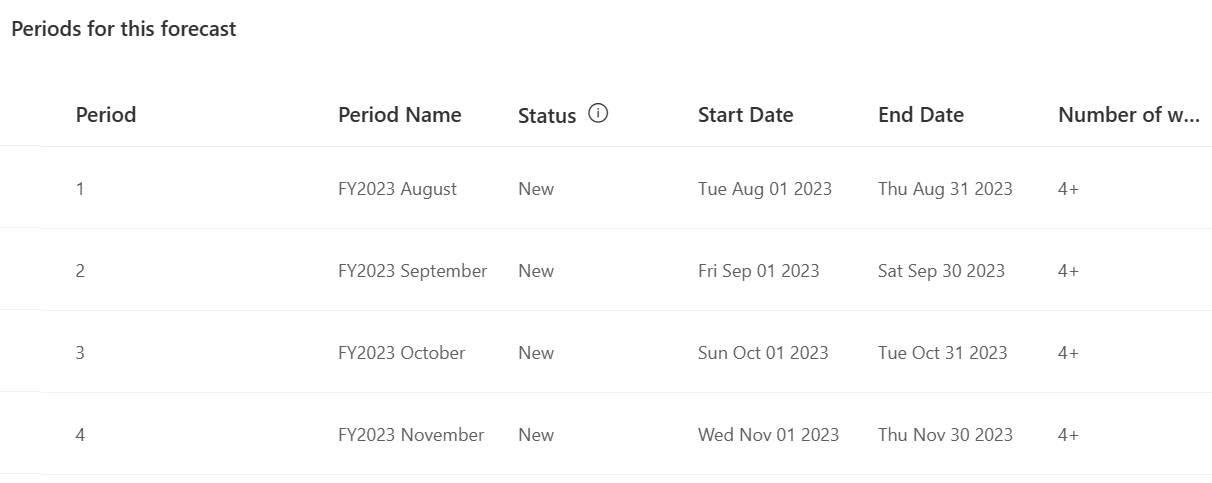
The status can be New, Queued, In progress, Completed, or Failed.
- Until you activate the forecast, the status is set as New.
- After you activate the forecast, it changes to Queued
- After the calculation starts, it changes to In progress.
- When the forecast value is calculated, it changes to Completed.
- If the forecast value calculation fails, the status changes to Failed.
After you activate the forecast, verify the status of the periods in the Periods for this forecast table before you view the forecast.